 Cassandra.org
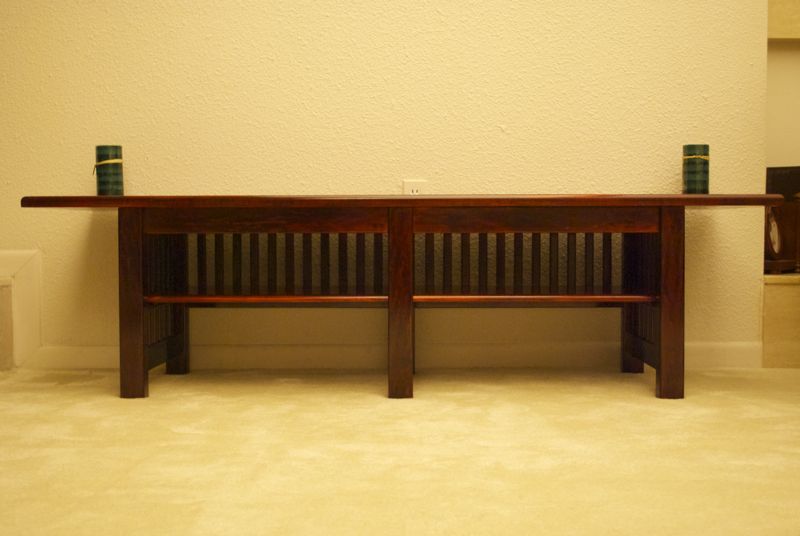
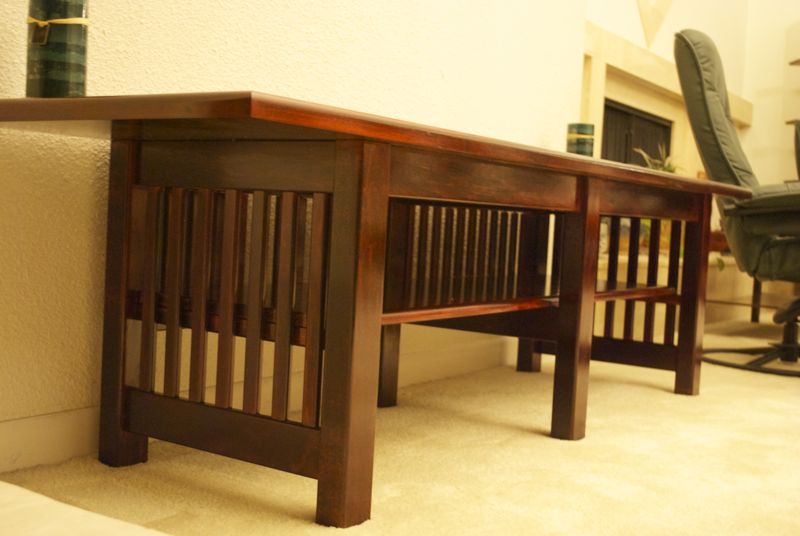
- Longest bench: 9 ft long, solid mahogany, polyurethane finish.
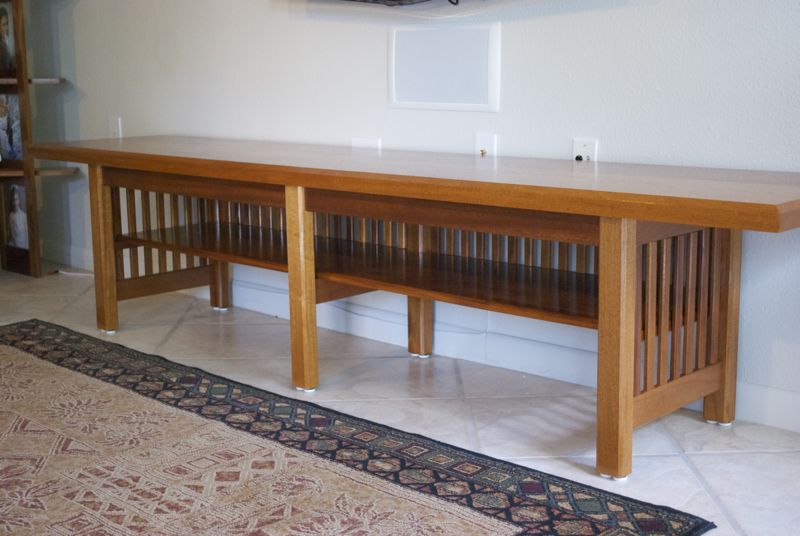
- Longer bench: 8 ft long, solid mahogany, polyurethane finish.
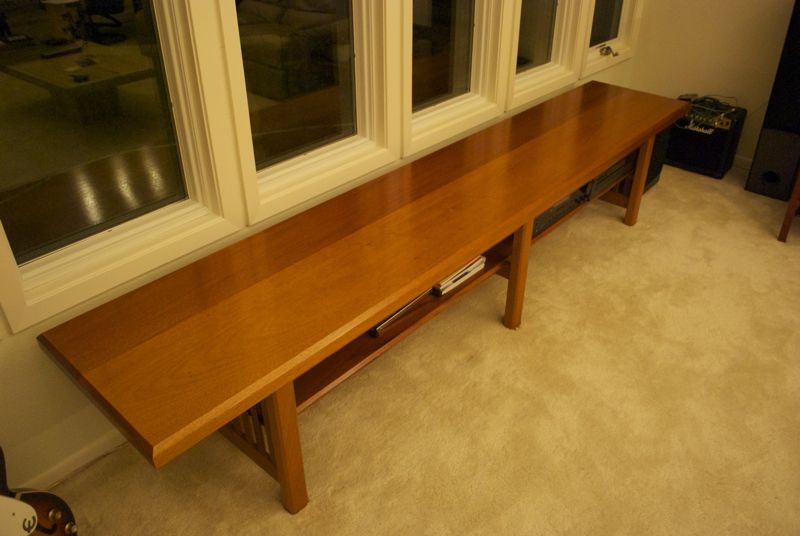
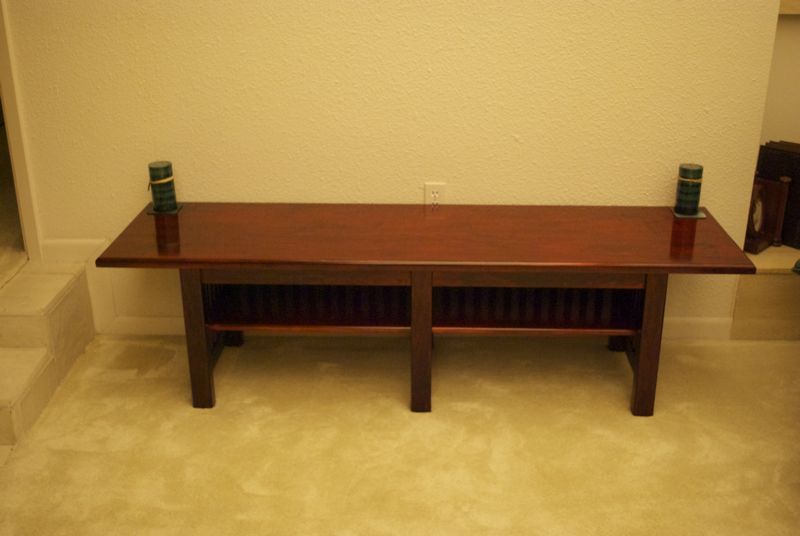
- Long bench: 6 ft long, white (hard) maple, medium red mahogany stain, polyurethane finish.
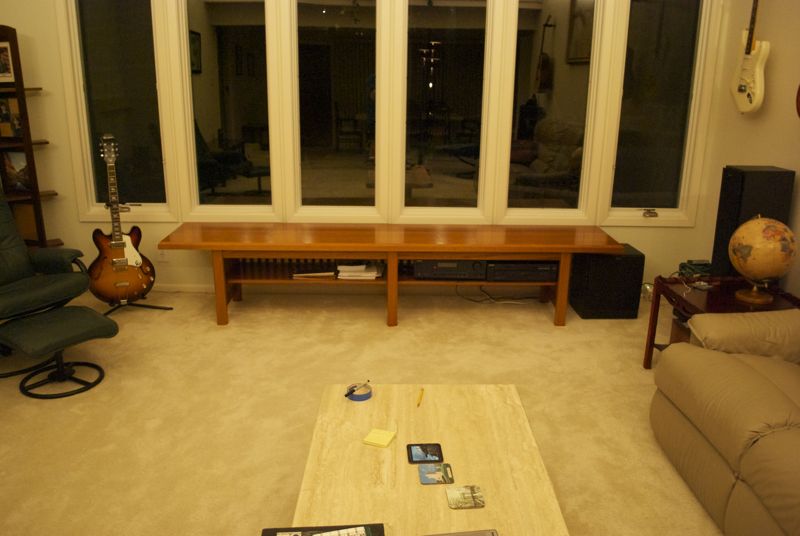
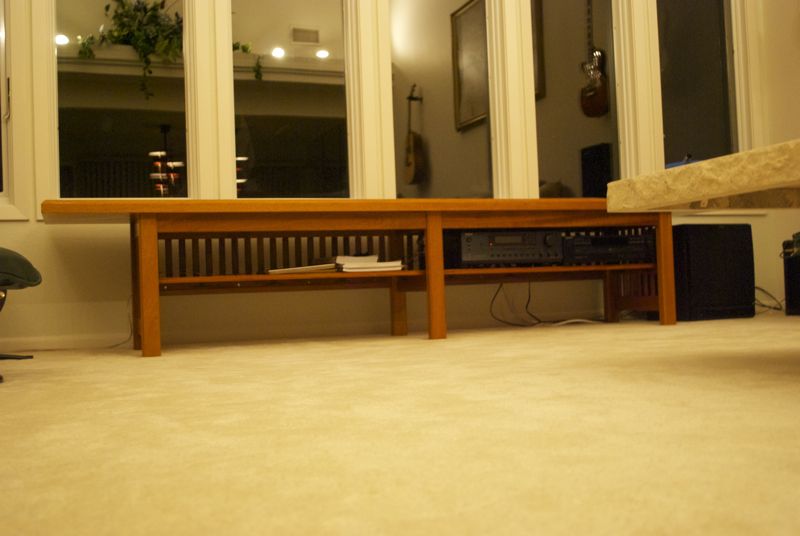
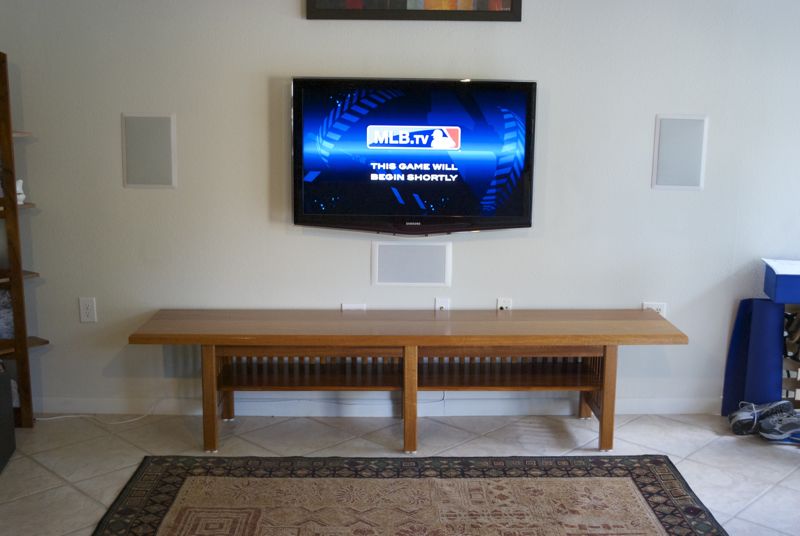
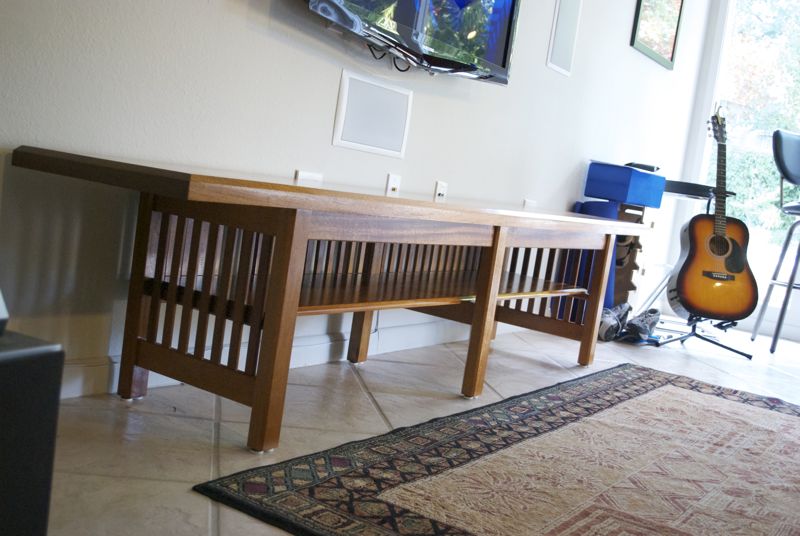
I entertained a lot of thoughts on how to use it, but none was terribly exciting. I finally settled on making some long benches that would go nicely in various places in the house. We often need to drag around chairs when we have large groups over, and there was not much seating in the den/kitchen area, so this would ensure ample seating everywhere. A long, thick bench-top was the perfect use of the lumber, both for its functional purpose as well as its decorative enhancement to the rooms. There would be 3 benches in total: two from the mahogany and 1 from the maple. They would be 9 ft, 8 ft and 6 ft long.
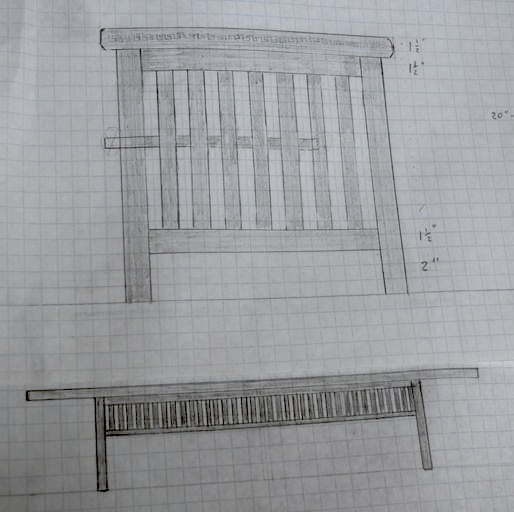
To the right are the plans I drew for the project, though needed to scale them in the length direction for the 3 different lengths planned. There's some design elements I borrowed from the original entertainment center design this wood was bought for, though those designs are very much inspired Frank Lloyd Wright's furniture designs (e.g., vertical slats, cantilevers). I also incorporated an under-bench shelf that would allow us to put various other items, such as our stereo receiver and some guitar accessories.

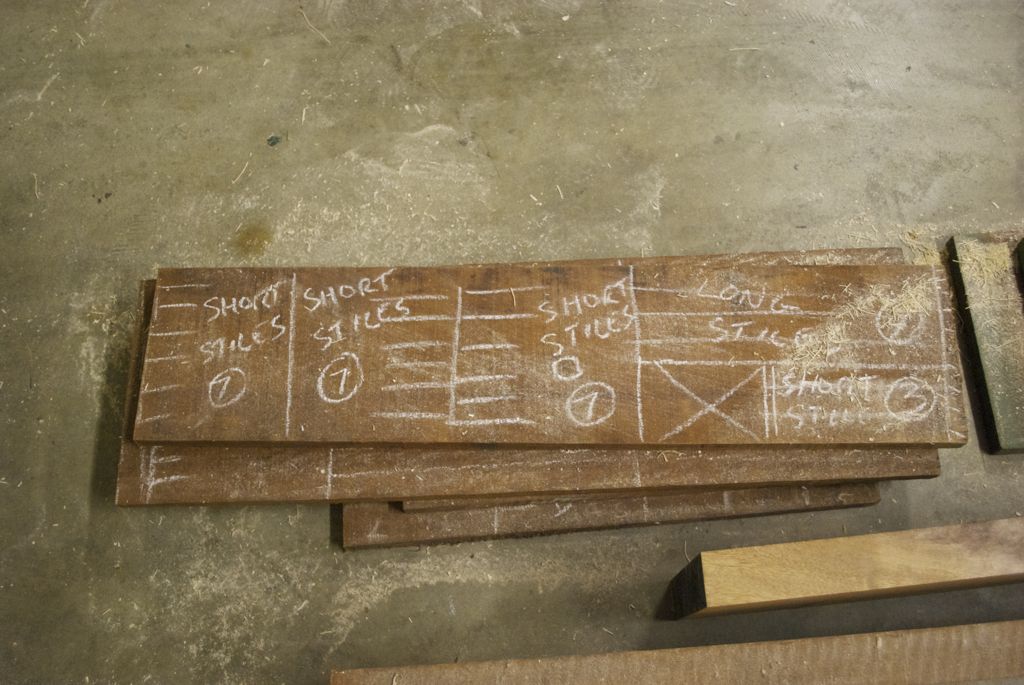
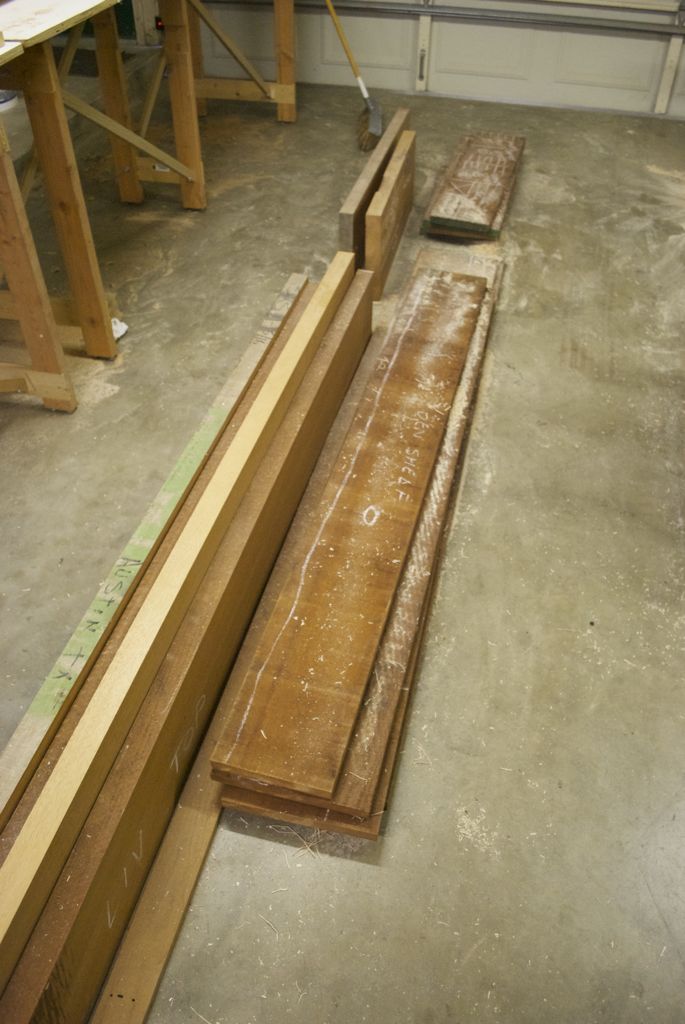
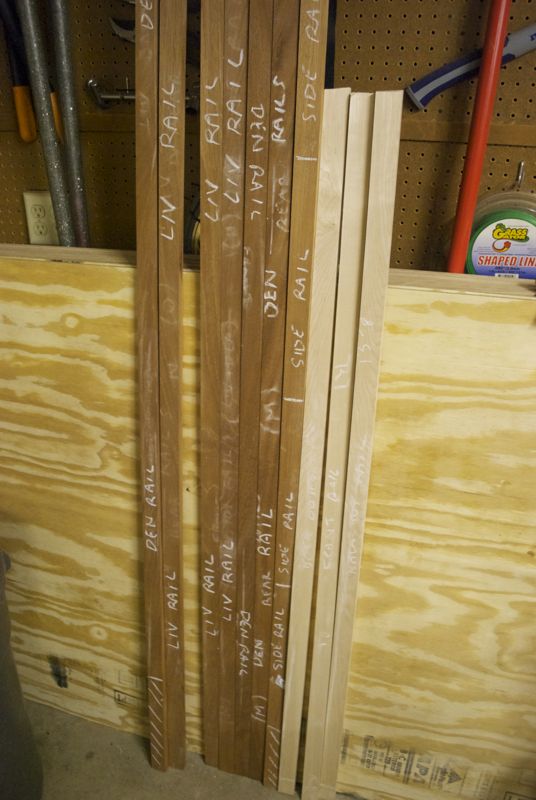
After having a relative firm design, the first task was to lay out all the lumber and inspect it for cracks, knots and other types of imperfections, and then mark it up to see what pieces would be cut from what parts of each board. This is a bit like a bin packing or puzzle problem, trying to minimize the lumber waste while avoiding the imperfections. I could easily scale the bench plans to whatever length the lumber would accomodate, and since I did not plan to buy any more wood, the overall dimensions of many parts was constrained to the pieces of lumber laying before me.
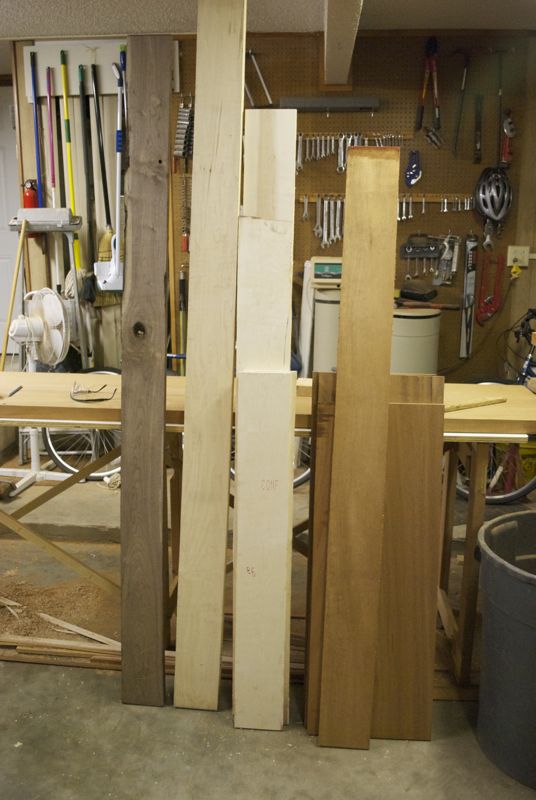
As nice as the lumber I had was, it was very, very roughly cut, so most had very little evenness or straightness to them. The first operation was to plane the wood to an even thickness. To determine this, we first had to layout the pieces so we knew what pieces we would get from what board. We would need 3 different thickness: very thick (1.5 to 1.75 inches) for the top and legs, 3/4 in. for the support rails and shelves and 1/2 in. for the decorative slats that would run underneath on the sides and back.
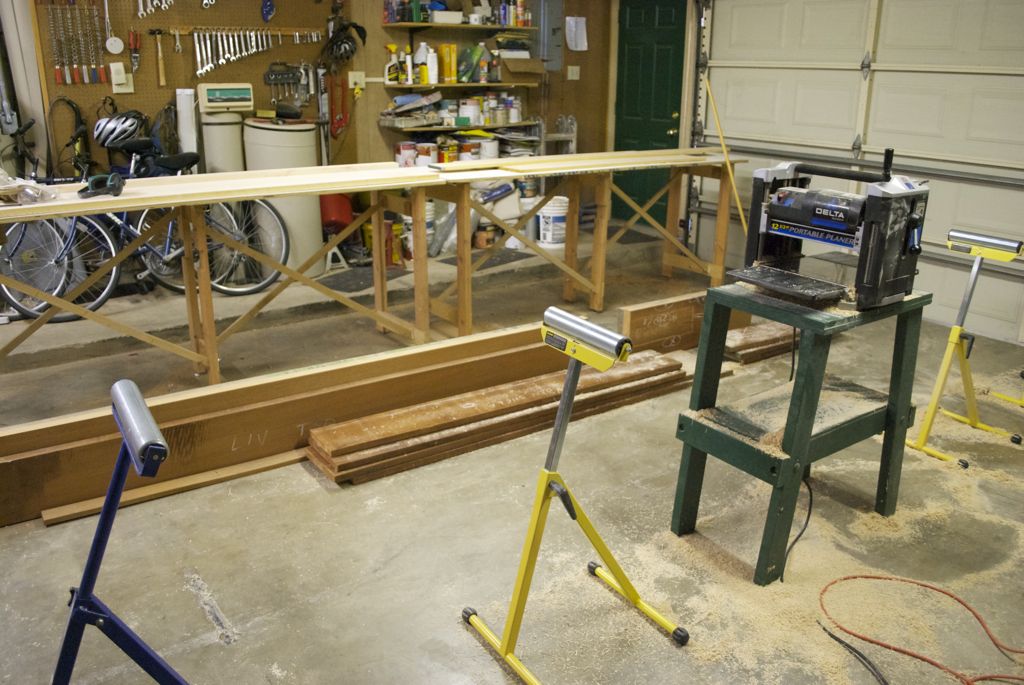
After planing the next step was to map rip (lengthwise) cuts. The first cuts were too make the edges straight to provide a reference edge for further cutting. With boards longer than 9 feet, and my table saw fence being about 2 feet long, it is a challenge making a straight cut when none of the board edges start straight.
Two fairly standard tricks were used to do this: the first is the build a "sled" where the board to be cut can be clamped down to it without relying on any edge, and you use the straight edge of the sled to make one edge straight. The second trick is to build and auxiliary fence that fits over the smaller fence to extend the length of the straight edge you have. I built both of these with some MDF (medium density fiber board). I hate this material, but for a fixtures, and especially because straightness was of paramount importance, it is a good choice.
Note that a 2 inch thick piece of mahogany that is over 9 feet long and 12 inches wide is fairly heavy. Continually lifting these for many passes through the planer and then lifting these when attached to the sled was no easy task, and something I could not have done without help from my wife (not the only help she provided on this project). This was a fairly physically demanding part of this project.
With one straight edge, we could then use the auxiliary fence to get a straight edge on the other side, and then we could begin to rip cut the boards to their rough widths. After cut to width, we then cross cut the board to rough length to get the rough-sized pieces we needed.
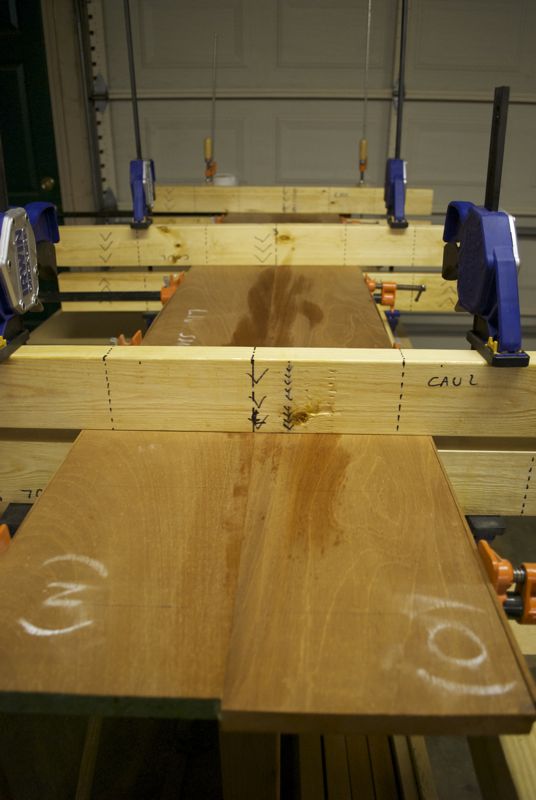
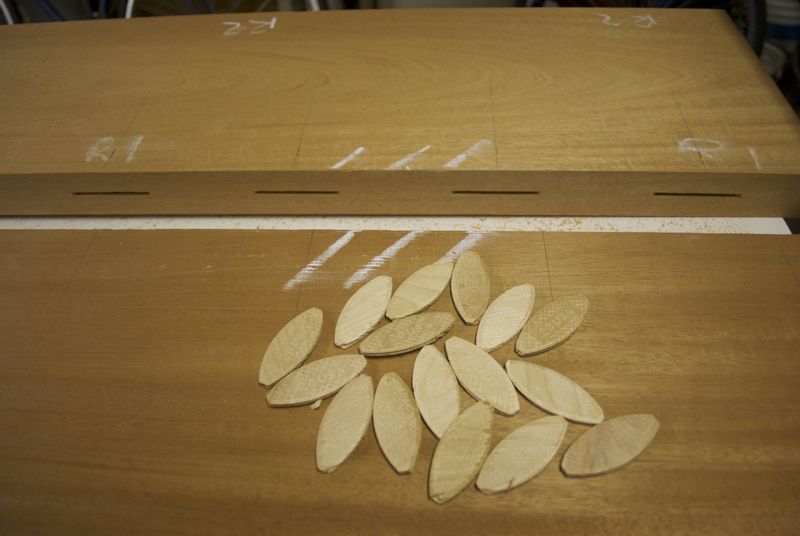
With the boards matched up to have good jointing edges, it was time to do the butt joints. However, two preliminary things needed to be done before actually applying the glue. The first was to make "cauls" which are used when you clamp the boards edgewise to ensure they stay flat and do not bow up in the middle due to the clamping pressure. The second thing that needed to be done was to cut biscuit slots. The "biscuits" are small ovals of wood that are used to align and strengthen a butt joint. They are not always needed, but given the imperfect edges, the length of boards and their thickness, this was a good safety measure. However, probably the most important part of using biscuits was to align the boards from front to back face. If the faces are off (and then tend to move as you apply clamping pressure), then you have a ridge that you need to more aggressively sand to get a smooth surface.
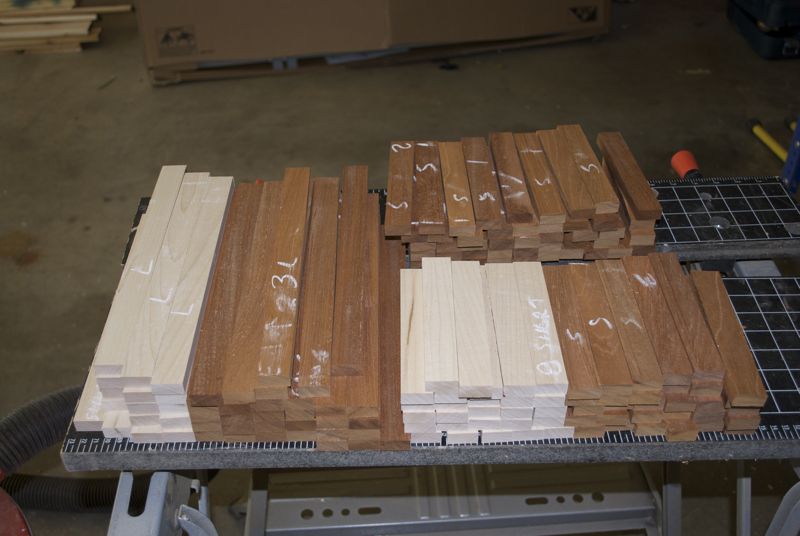
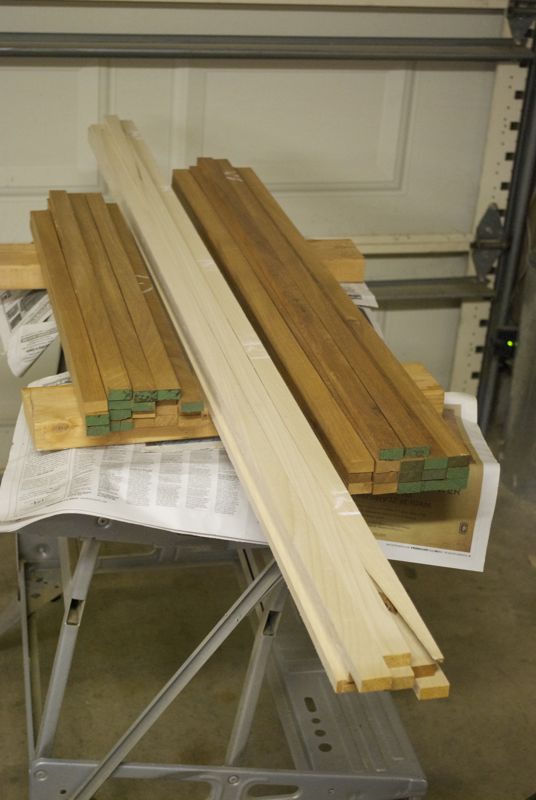
With the new wood, it was then back to the planer, then back to the table saw sled, and re-cutting everything to width and length. This was done for all the support rails, since I would not use the previous ones I cut. I also decided to get thicker maple than I previously had for the legs. For the maple bench legs, I was going to join two 1" pieces to get a 1.75" thick part, but since I had to buy new wood anyway, I found thicker maple so I would not need to rely on jointed legs. One final benefit of buying new wood was that the maple shelf could be made to the same width as the mahogany shelves. I was going to make it less wide because I did not have enough wood in the original amount to make it wider.
With the parts all to the right widths, we then began the cross-cutting to the final size. For most of the parts the exact size was not as important as the consistency of size, so special fixturing was done to ensure repeatable cuts.
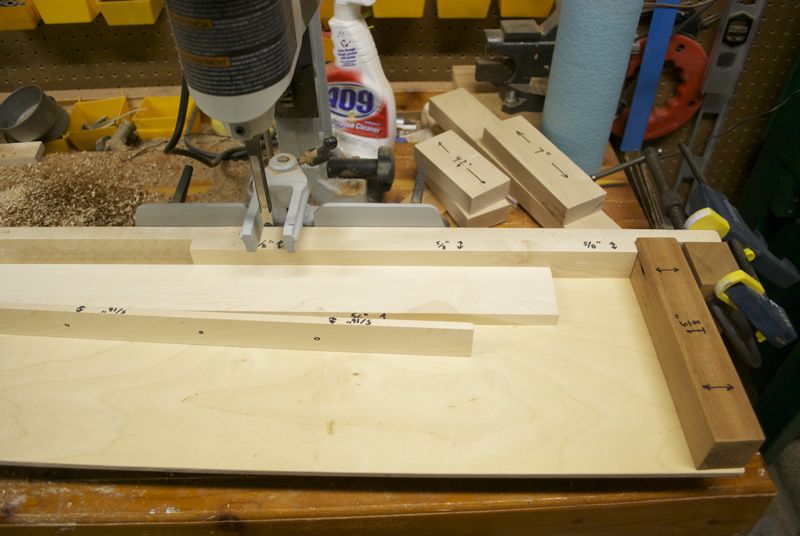
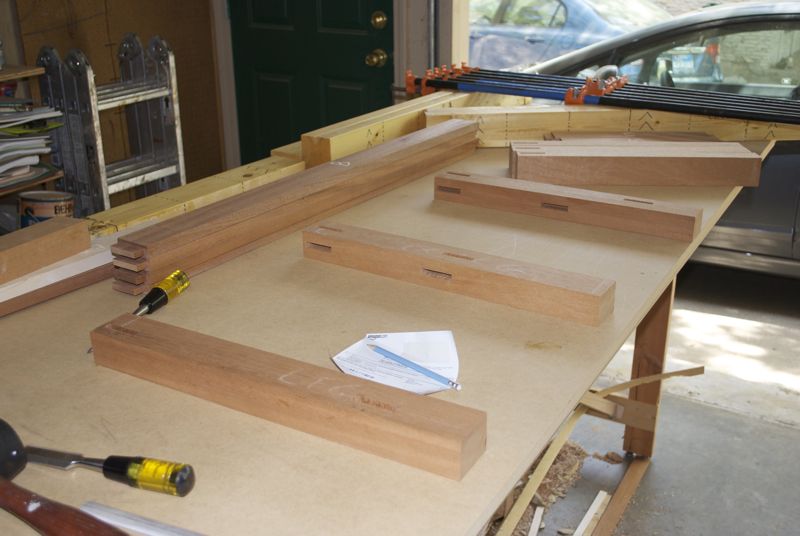
The key to a good mortise and tenon joint is precision. You want the tenon to fit into the mortise tightly, but not too tightly. However, not only does the size of the mortise and tenon matter, their location being precise also matters. If they are not all at identical heights along the leg, then the support rails will be crooked which would cause all sorts of complications. To ensure precision, I precisely cut a bunch of spacers so that once the mortising machine was set up, cutting the 6 different locations needed for the mortises could be easily done with precise reproducibility. For the tenons, I used my new router table which offered a whole lot of convenience and accuracy. I'd used my table saw for tenons in previous projects, but it was far easier to use the router table, and provided a lot more fine-grained control of the dimensions. Tip: Always cut the mortises first. It is a lot easier to adjust the tenon to match the mortise than to have to chisel the mortise to match the tenon..
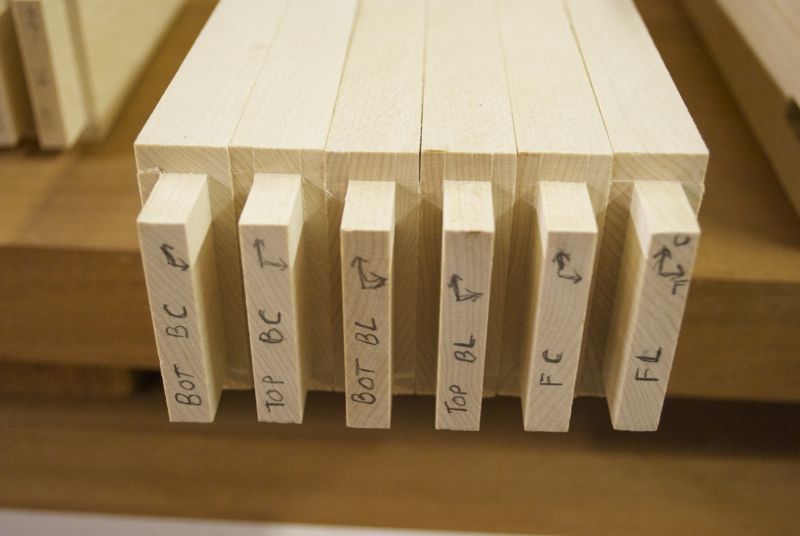
Despite a great effort at making the mortises and tenons as precise as possible, there will still be variations due to the limits of what my bench-top machiery can produce. You do not want to wait until you have finished the parts and applied the glue to find out something it too loose or too tight. After you have applied glue there should be no surprises. One key to this is to do a dry fit assembly to ensure everything will actually fit together. Also, if you do not do the final assembly with exactly the same parts in exactly the same positions, dimensional variations can lead to surprises, so you want to ensure that you mark which part goes where.
The other important thing that happens here is the decision about exactly which part should go where. You want the best looking pieces to be in the most visible places, which means selecting which parts go in front, which go in back and what face should point in what direction.
Finally, since there is dimensional differences in the mortises and the tenons, there is often the need to hand adjust the fit with a chisel or file. The fits were mostly pretty good, but there was the need for a bit of chiseling to clean up the somewhat rough mortise inner sides.
Another thing dry fitting allowed me to do was to see just exactly how long the slats needed to be. Too long and the upper and lower rails would be too far apart to meet their corresponding leg mortises. Too short and there was be an unsightly gap and visually exposed dowels.

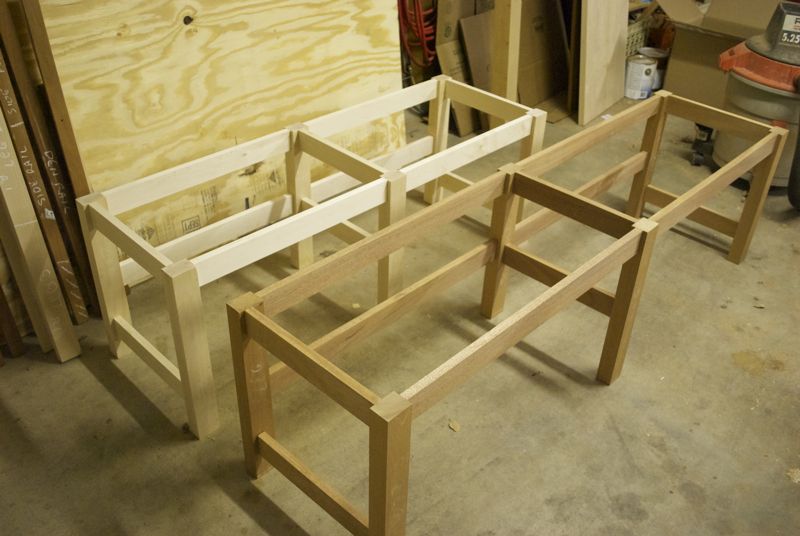
After refining the mortise and tenons and dry fitting to form the frames, I could also get a much better visualization of the assembly process as well as work through some assembly issues that had not been worked out yet. I had not exactly decided how the shelves would be attached and I was not sure if I could insert the shelves after the frames were assembled. With the dry fit of the frames, I could test if there was enough room, since it would make assembly extra complicated if the shelves had to be in place while assembling the frames.
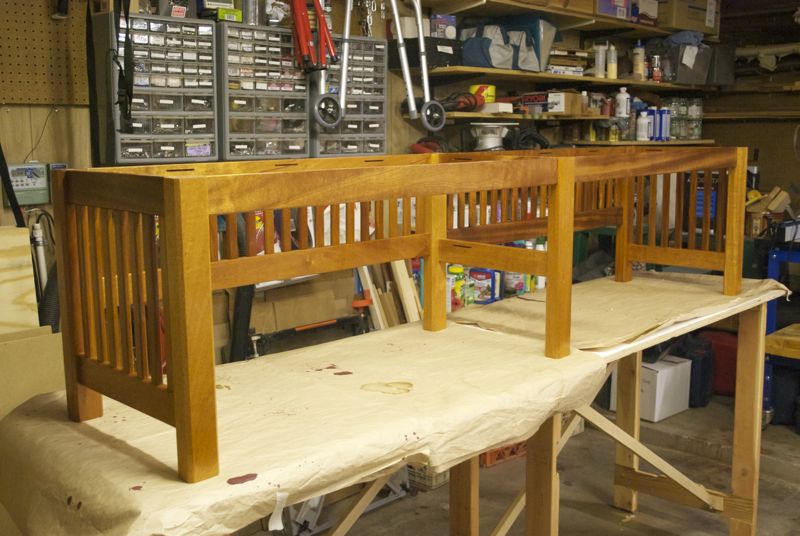
With the frames dry fit, I naturally could not resist the tempation to lay the raw cut tops on top of it to see a blocky version of what it would look like. Even without any glue, the frames easily supported the heavy tops, including two people sitting on it. Being pretty strong and stable without glue was a good hint that the final result would be plenty strong.

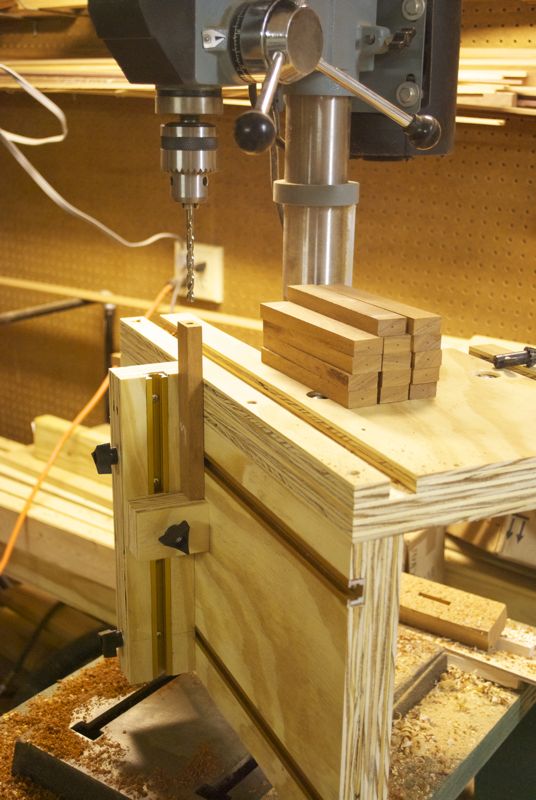
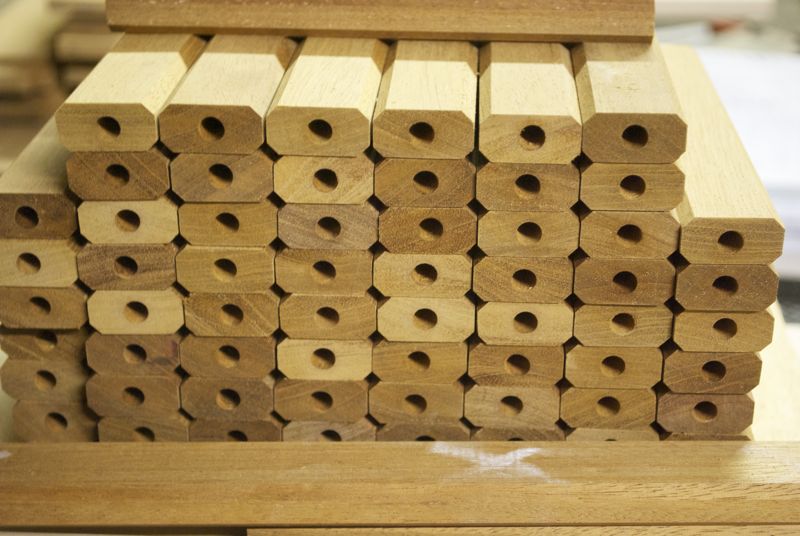
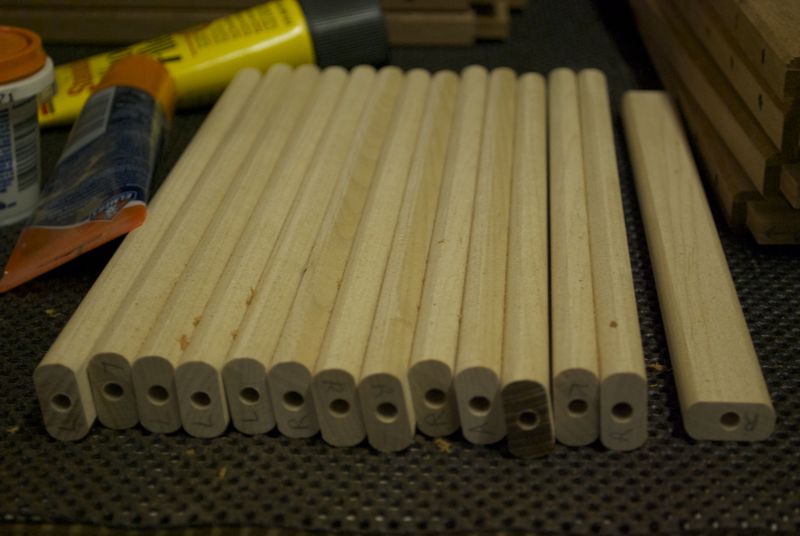
The decorative slats would span between the upper and lower rails that would themselves be connecting the legs. Dowels were the chosen jointing method, so the next steps was to drill all the holes for these dowels. This meant drilling about 500 holes: two for each slat, and then the corresponding holes in the upper and lower rails.
A key thing here was to ensure the holes were accurately located and drilled straight, or else the slats would be crooked looking, or sticking out from the rails. The visual factors were important, but not nearly important as the assembly issues. Without accurate location, it could be very, very hard, and maybe impossible to assemble the benches. To get the needed precision, I used a dowel hole locator to mark the location, and then built a new drill press table that would be stable and allow the slats to be positioned on end.
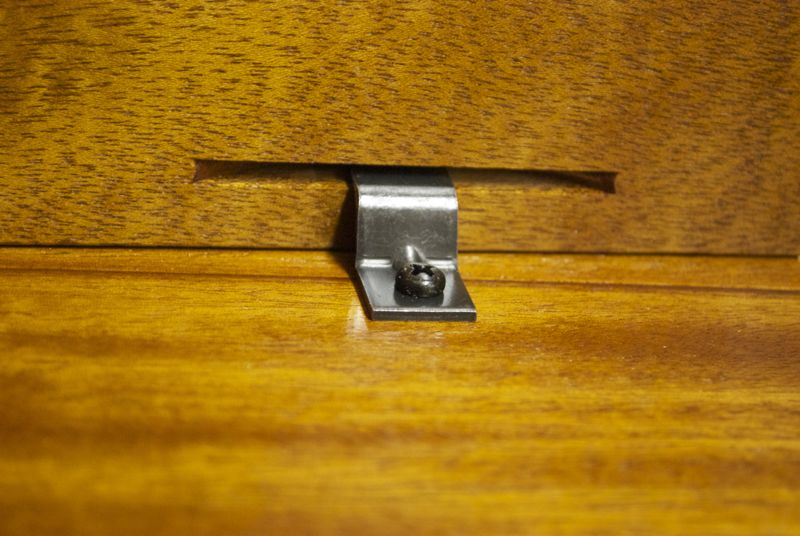
One deferred design decision was the exact way in which the shelves would be fastened. I settled on using small brackets that would lie below the shelves (mostly hidden) and which would screw into the back rails and side slats. This was 4 more parts, per bench, that needed to be cut and have the screw holes drilled. Back to the table saw and drill press. .
These shelf supports, since they were hidden below the shelf, wound up being the step-child parts during the subsequent processing. They did not get the same deep consideration in cutting, sanding and finishing as the rest of the parts.
The shelf supports would attach to the shelves using table top fasteners. These are special little pieces of metal that allow you to firmly clamp a top down, but allow it to move a little due to expansion and contraction as its moisture content changes. These were also the planned method to join the bench top itself with the support rails. To accommodate these fasteners, you need a little slot in the supporting wood, where the fastener screws into the underside of the top/shelf. The easiest way to cut these slots is to use a biscuit jointer, which happens to be just about the shape you want and which provided fairly precise depth control. So the rails and the shelf supports were given these extra slots in enough places to ensure there was plenty of strength.
What we now had was all the pieces cut to size and all the necessary holes, tenons and slots cut. Nothing was left to be done...sort of. We could have just assembled the benches and been done, but this would be without any of the finishing touches, so it would look like a bunch of blocks of wood, with fairly rough surfaces. We still needed a few things: sanding, design elements, sanding and more sanding. Then we also needed to do the actual finishing work of staining and varnishing.
We first sanded all of the blocky pieces down to 120 grit, and then were going to add some design elements to soften the look. The first sanding pass was at 60 grit, and the purpose of this is to remove all the planing and saw marks. For the butt-jointed tops and shelves, this also was used to removed the ridges between the jointed boards. The second sanding pass was then at 120 grit, and keep in mind just how many parts there were, and hoe many surfaces each has, including the edges that needed to be smoothed. Sanding was not the most pleasant part of this project.
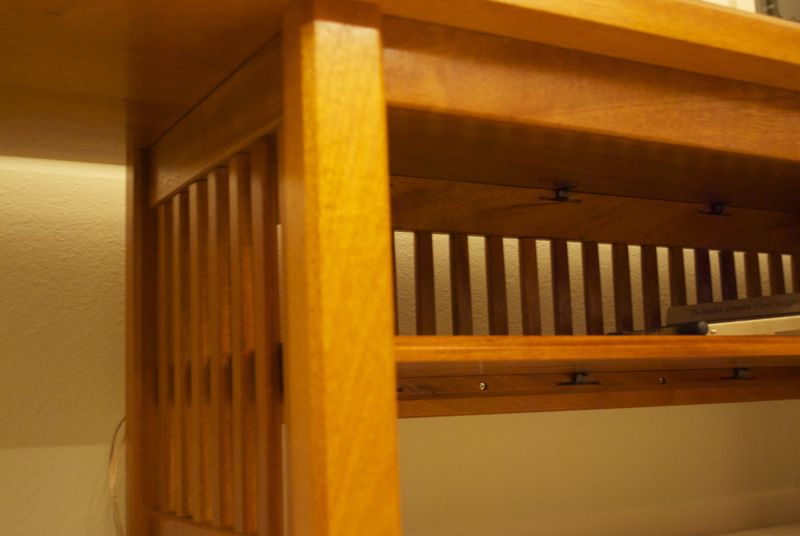
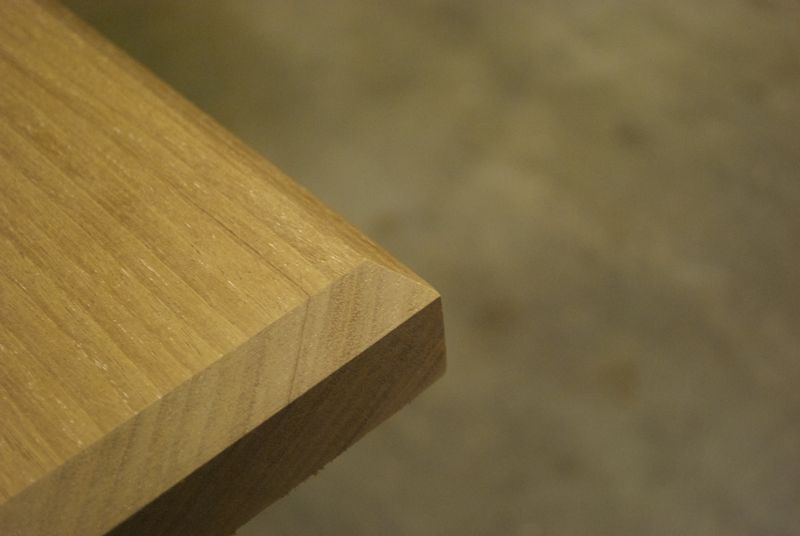
With the parts relatively smooth, we now were going to use the router to turn those blocky pieces of wood into nice pieces of furniture. For the maple bench, the decorative theme was rounded edges, while the mahogany benches were going to use beveled edges. Thus, most ever edge on every part was fed through the router table to get the designed design element.
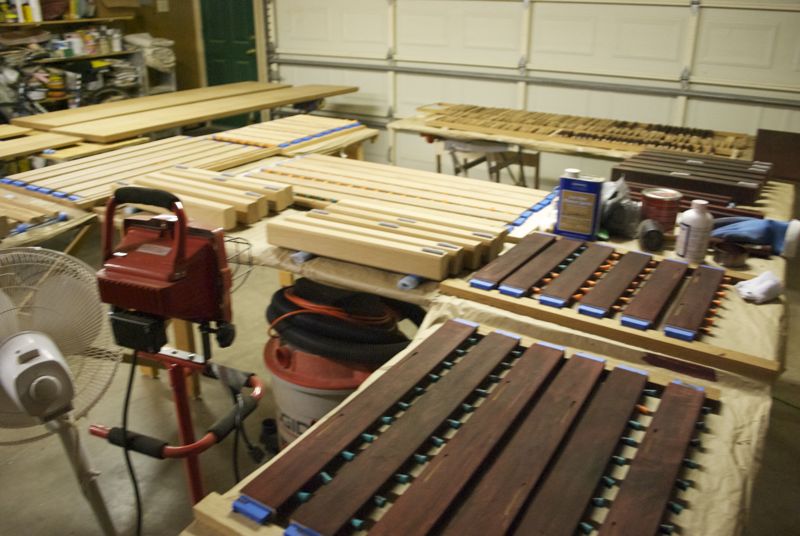
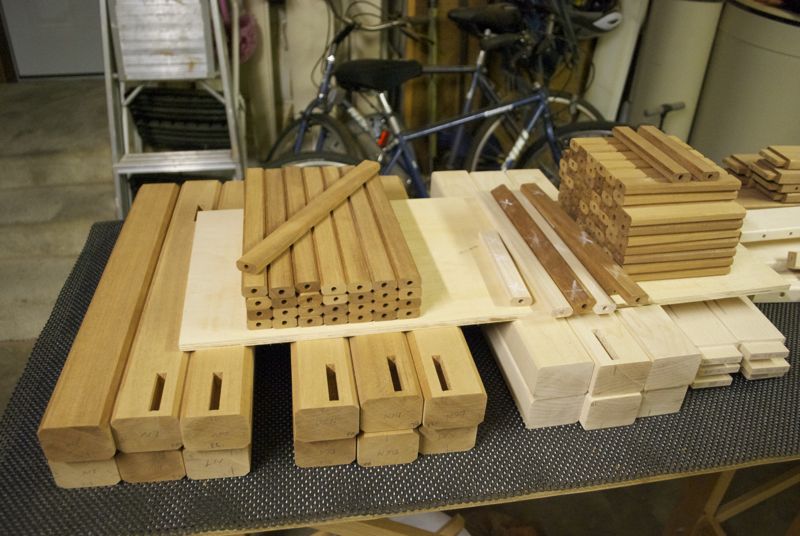
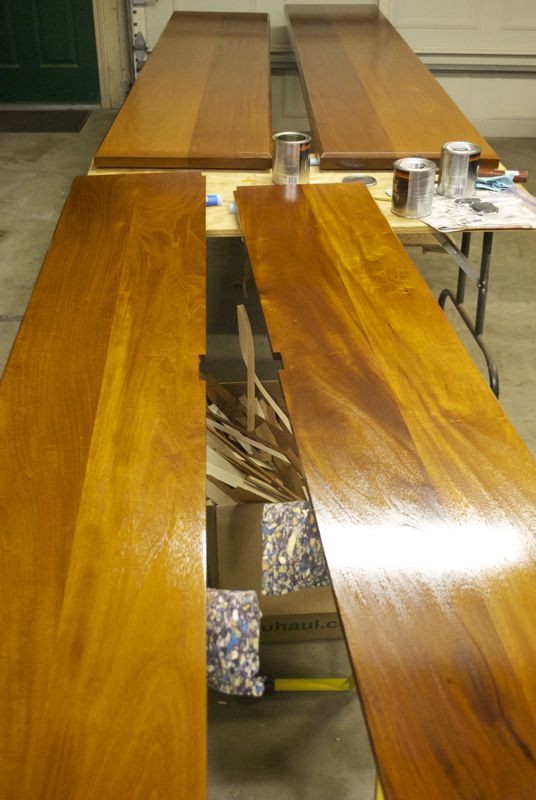
One of the constant issues in this project was finding enough space for everything. There were a lot of parts and a lot of big parts, so creative ways of moving things around was needed. However, during the cutting and sanding parts, I could stack parts on one another to make more efficient use of the space. However, with the staining and varnishing steps I would need to have enough table space to store all the parts without any stacking. If I did not have enough space, I would have to do the finishing in stages, thus extending the amount of time it would take as I would need to wait for things to dry sufficiently between applications.
With some clever arrangement of tables, boards, buckets and roller supports, I was able to just barely get enough space for all the parts. There was actually one part I did not have room for, but this was a result of having started another small project, Under-sink Sliding Shelving. However, this was a more crude piece of work, and it was the frame that was not too critical to be done exactly right.
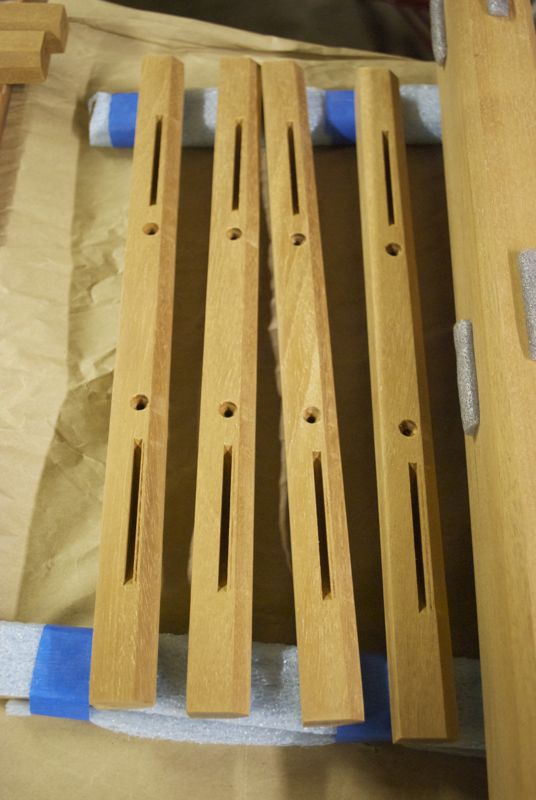
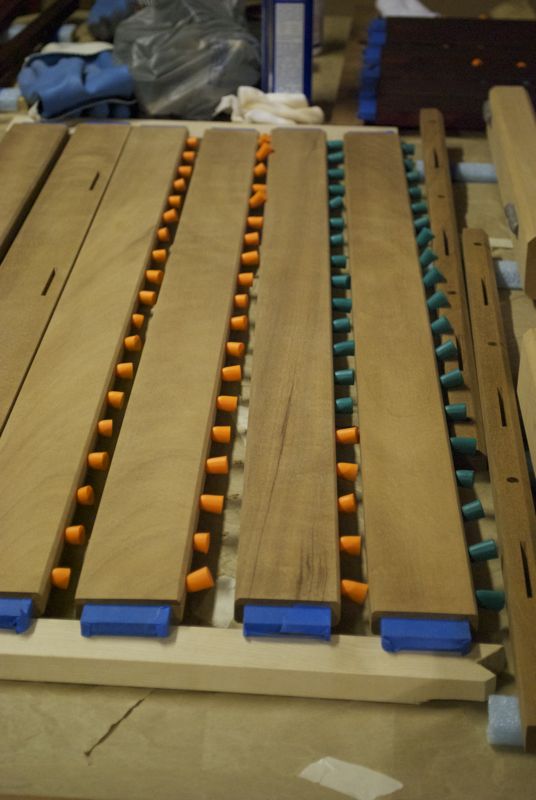
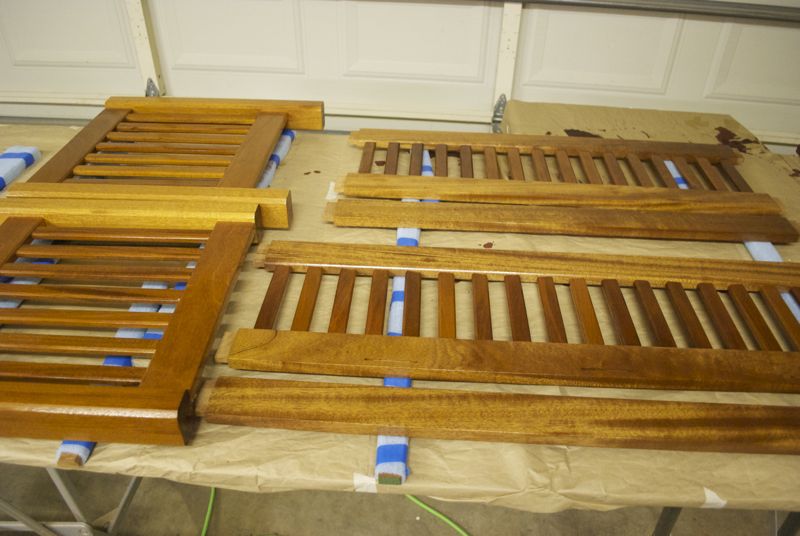
Laying out all these parts was necessary because I was going to "pre-finish" them. I had never done the finishing of the project before assembly, so this was the first time I was going to do this. Because things were not yet glued, the most important part is to make sure stain and varnish does not get onto the surfaces that need to be glued. This meant the mortises, tenons, dowels and dowel holes needed to be masked in some way.
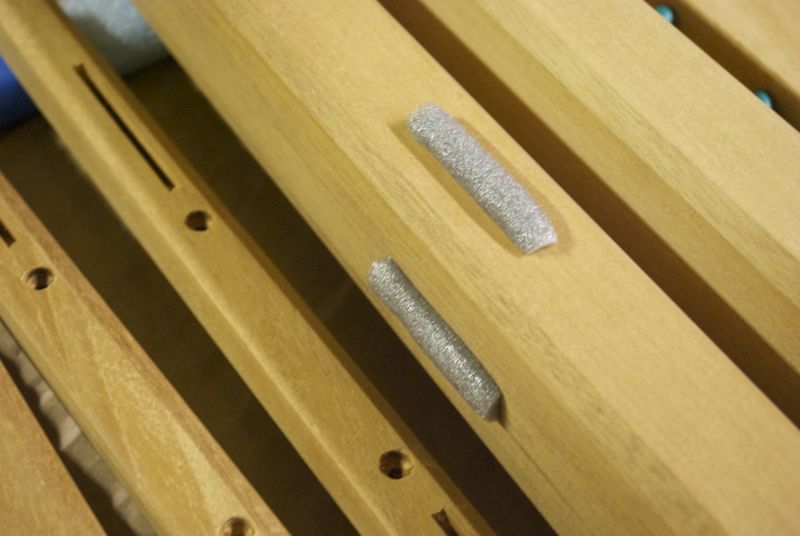
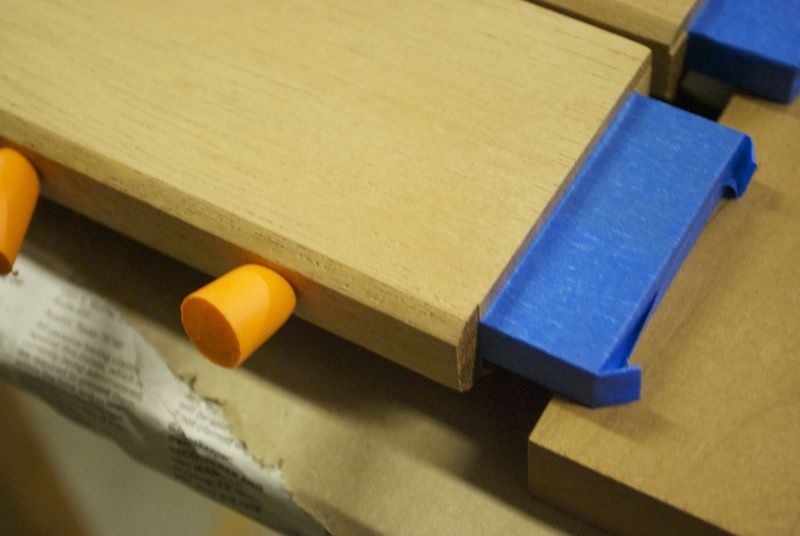
For the tenons, the masking was easy: just blue tape them since they are easily accessible. For the dowel holes, I came upon using foam ear plugs which I normally use when running the table saw and vacuum since they have the good ability to be squashed and reform. The mortises would be a little trickier, but I found a good solution from some on-line research that suggested using the round foam used to seal shower doors. For the dowels themselves, no masking was done because there were too many of them and it would be easy enough to keep them clear. Also note that by this point I had decided not to glue the slats' dowels in place since this would make assembly much more tricky, and less forgiving if a mistake was made and a redo was needed.
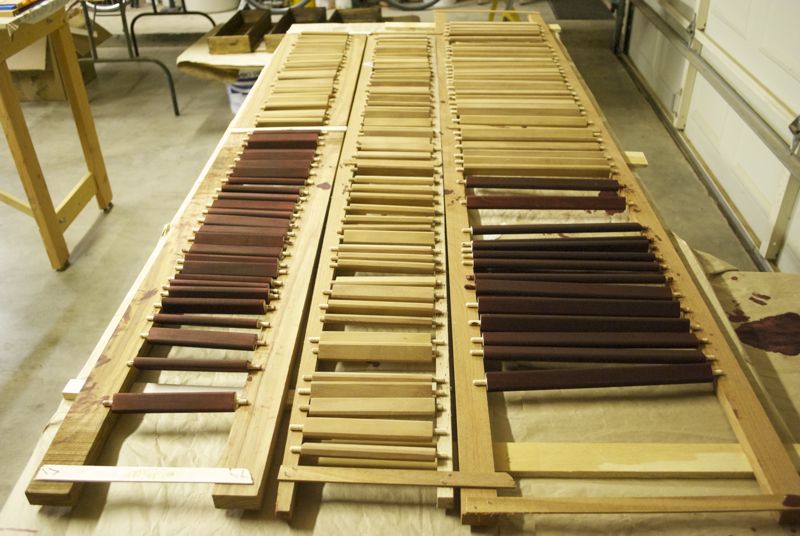
Another issue with the staining and varnishing was whether or not I could do both the top and bottom of the parts or have to wait in between for them to dry before flipping them over. If I could do the tops and bottom at the same time, I could finish them in half the time. For the rails, the presence of the masked tenons on the edge meant I could grab them and do both sides, them rest them elevated on the masked tenons. For the slats, the dowels on both ends gave the same sort of opportunity for holding and resting them on non-varnished surfaces. The legs, tops and shelves did not afford this same opportunity, so those would have to be done in two passes.
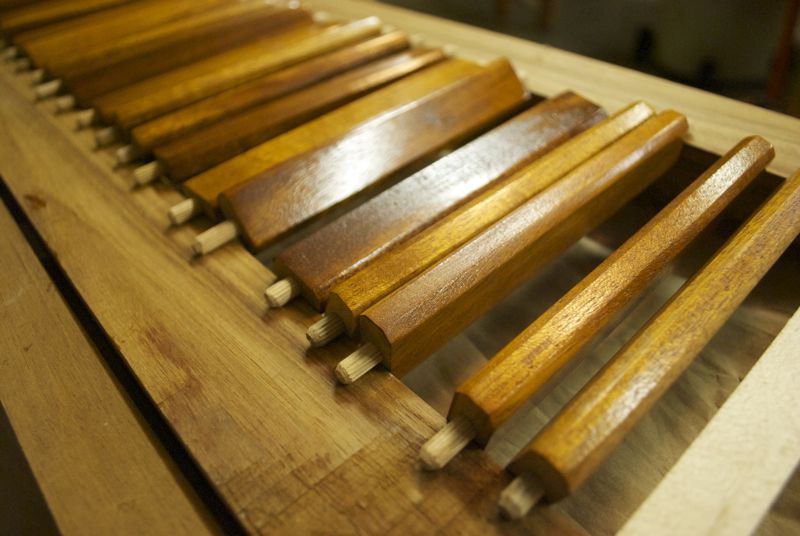
For the rails, I could use two pieces of wood to rest the end tenons on and keep the part elevated for drying. For the slats, and given there were so many of them, I could do a similar thing, but the complication here was that the slats had round dowels on the end, and not flat tenons. Thus, they have a tendency to move a little when you rest them. This means they could roll into each other, or if the wood was not exactly parallel, roll off the supports and onto the table with the varnish acting as a glue more than a finish. To solve this problem, I constructed a few frames that would ensure long expanses of parallel support wood with enough space to accommodate all the slats with some room for movement. Yet another special fixture needed for this project.
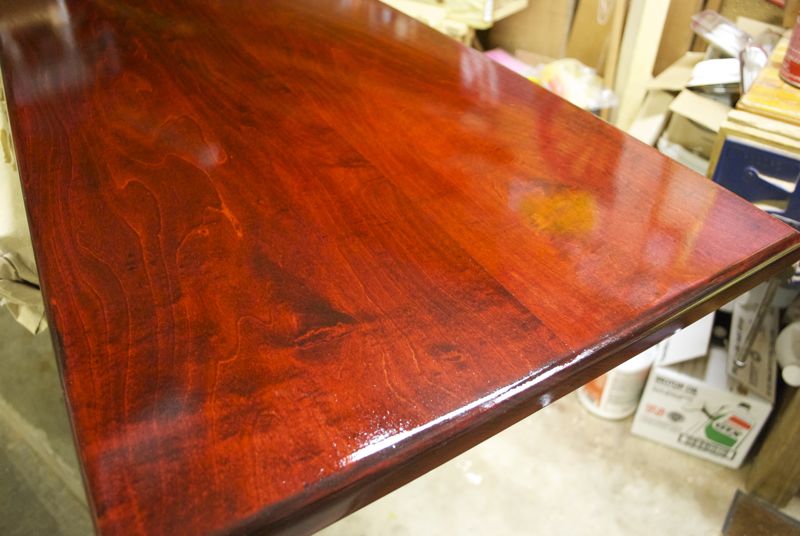
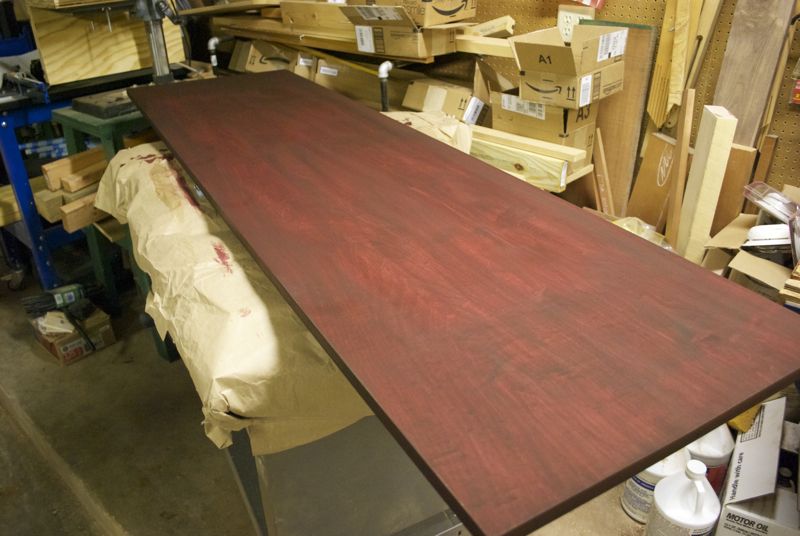
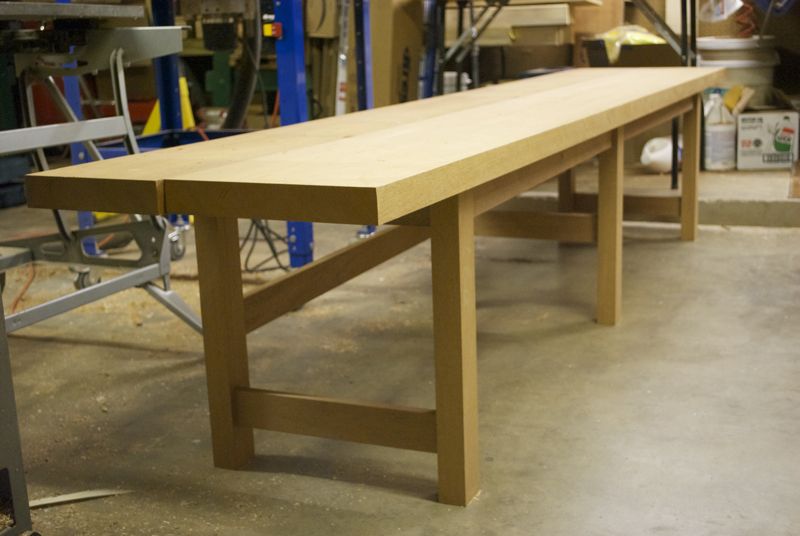
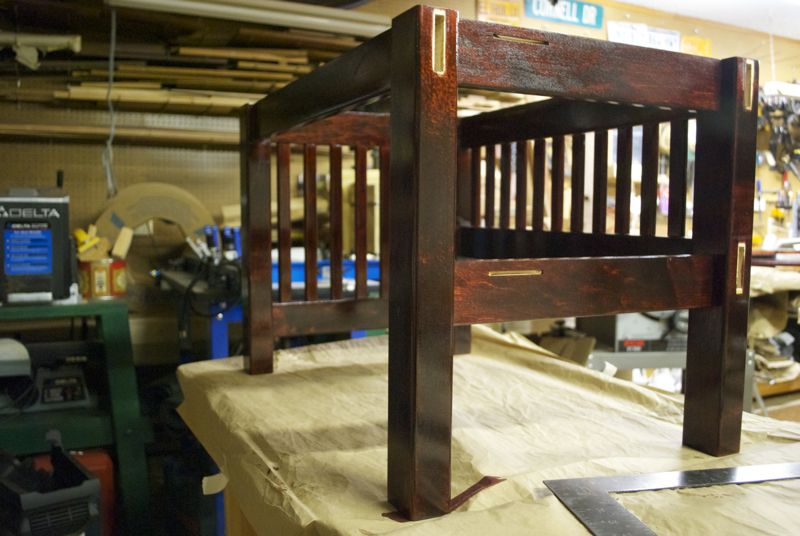
After applying a generous first coat of stain, despite my use of the pre-stain sealer, the top and shelf looked just as blotchy as the previously made Hallway Bench. Since I could not live with it that way, I decided to put a second heavy coat of stain on it, which helped, but the blotchiness still remained in places. I then did a third coat of stain and there was no more blotches, however the parts were super dark and this worried me a bit. I hoped it would look better after some varnish, but I was not quite sure. Generally, unfinished wood looks very, very dull and it masks much of the grain patterns. This is all due to the reflective and speculative aspects of the surface of the wood. Once varnish is applied, the specularity and reflectivity changes a lot and it looks much much nicer. In the end, the varnish did make the maple look fantastic, and the conclusion was that a heavy stain is the way it is supposed to be done, and that I did not apply enough on the Hallway Bench project.
Before applying the polyurethane, you want to remove as much surface contamination as possible. After all the sanding was done, much vacuuming of the parts and the garage was done to remove all the sawdust. Sawdust anywhere in the environment can get kicked up from air currents and movements, and you really do not want dust in the air when applying varnish or as it dries. This is one of the disadvantages of varnish, whereas oil finishes can tolerate a dusty environment since it is not a surface coating. De-dustifying the garage was done a few times, with ample time (days) given to letting everything settle. Now, even with all this dust removal, and a good cloth wipe down of the parts, there is still fine sawdust that gets trapped in the grains of the wood. Thus, the final step before applying the varnish is to wipe down all the surfaces with mineral spirits. This will pick up the fine embedded dust and other impurities that can prevent a good varnished surface.
Each pass of polyurethane was a bit of a labor, but having to only do this 3 times, and knowing this was the last time I would need to do an operation across all the parts made it go quickly. The end result was not perfect, but it was pretty good, and world's better than I could have achieved if I tried to varnish this after assembly with the many nooks and crannies that would exist.
-
"For the human makers of things, the incompleteness and inconsistencies of our ideas become clear only during implementation."
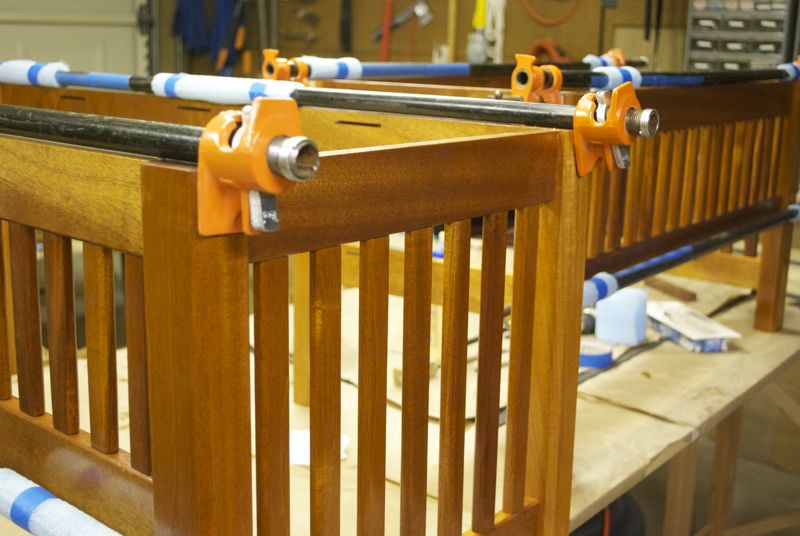
- Put slats in side upper and lower rails
- Glue side rail tenons into leg mortises to get 3 assemblies: two side supports and one center support
- Put slats into (left half) back upper and lower rails
- Glue (left half) back and front rail tenons into left side and center support assemblies to get assembled half frame
- Put slats into (right half) back upper and lower rails
- Glue (right half) back and front rail tenons into remaining (right) side assembly and half frame assembly
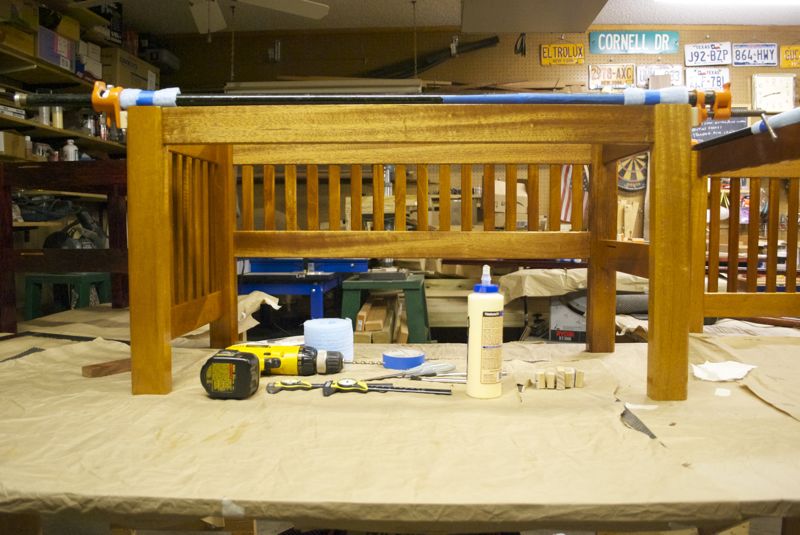
- Locate, drill and screw in table top fasteners from frame rail slots to underside of bench top
- Insert shelf and locate, drill and screw in 4 shelf supports
- Locate, drill and screw in table top fasteners from shelf supports to underside of shelf

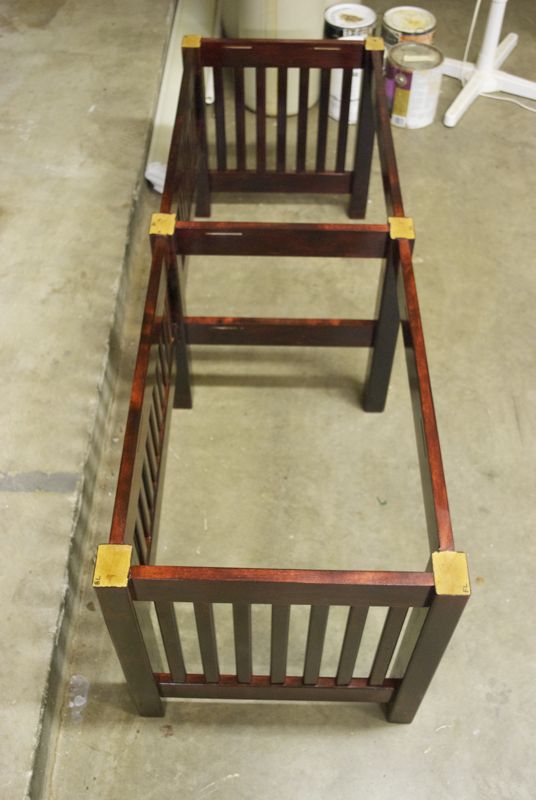


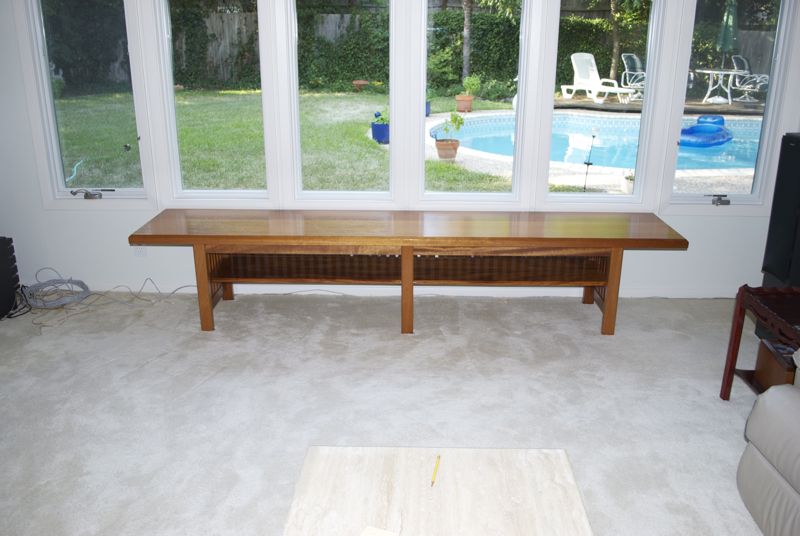
As the original sketch shows, there was initially only going to be four legs, two at each end. I had drawn a version with extra legs and did not like the look at much as the one with fewer legs. However, many practical issues came up and adding extra legs solved all of them.
First, I was getting nervous that after some years the benches would start to sag given the long expanse between supports. I looked up engineering tables on the strength of woods and recommended support distances based on thickness, so the data seemed to imply I could get away with fewer legs, but after seeing the size of the legs and the span they needed to support, I was worried..
Second, to span 7 feet between the legs would require long supporting rails. Finding wood that is 3/4" and dead straight for a 7 foot length is hard, and the wood I already had was not that straight.
Lastly, the rail issue was exacerbated by the fact that I was going to have the rails on 1-1/2" wide. I preferred them to be 2-1/2" wide for strength, but the amount of wood I had was not enough to make them this thick, plus the extra thickness would make the under bench shelves harder to access and have less clearance.
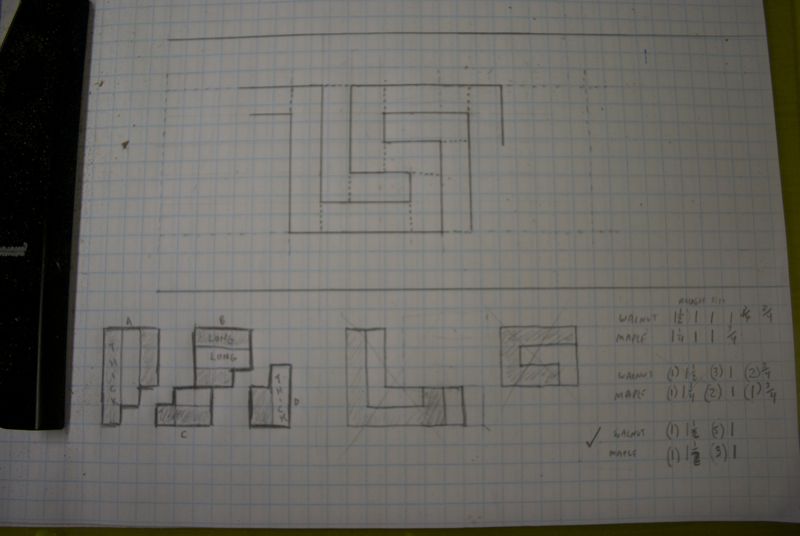
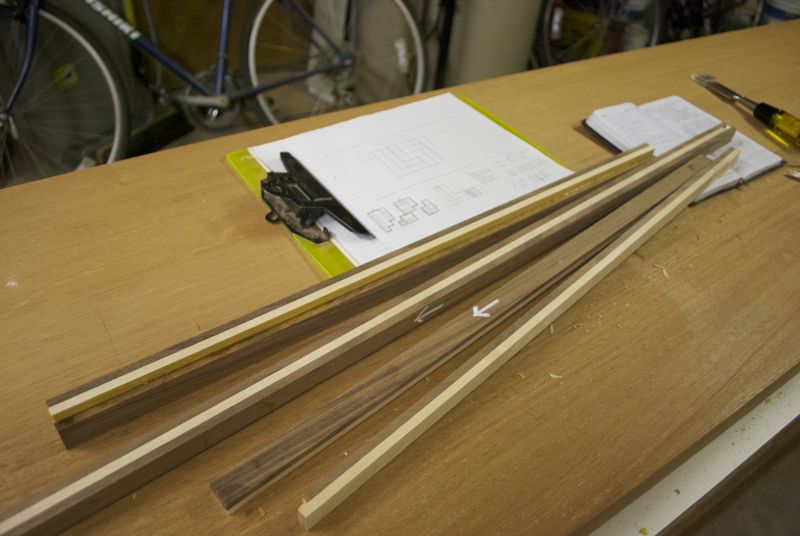
My original design was going to add a "greek key" patterns around the perimeter of the edge of the bench tops. I had no idea how to do it, but I thought it would look neat. I thought of many ways to do it in the end, but most all of them involved tricky or very labor intensive work. I needed a way to do the greek inlay at sclae, and that would be relatively easy to install. I came up with a way to make a greek key through a series of carefully planned cuts and gluing. At right you can see how I came up with the plan for creating many greek keys from regular strips of wood, cleverly arranged.
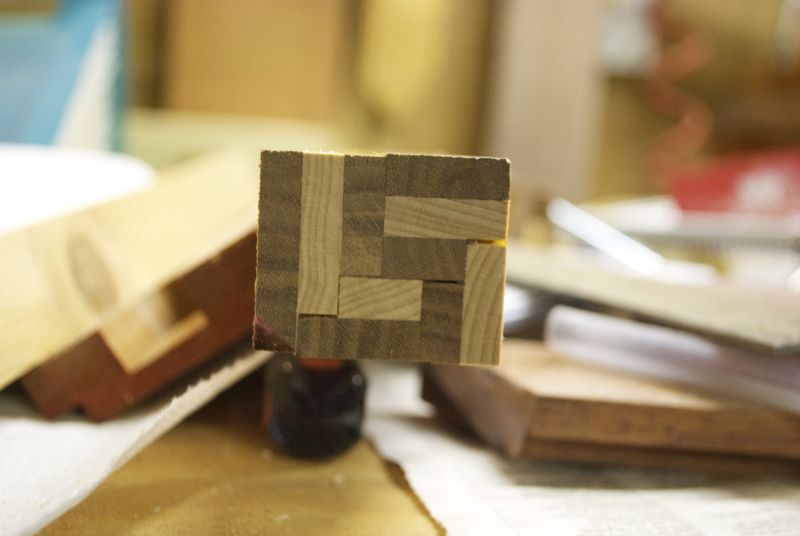
I had enough scrap peieces of light and dark wood (maple and walnut) that I tried to make a prototype to gauge its feasibility. In the end, it mostly worked, but the result has the end grains of the wood as the visible part, which was not desirable. This combined with the tricky routing and extra labor made me abandon doing inlays for the benches.