 Cassandra.org
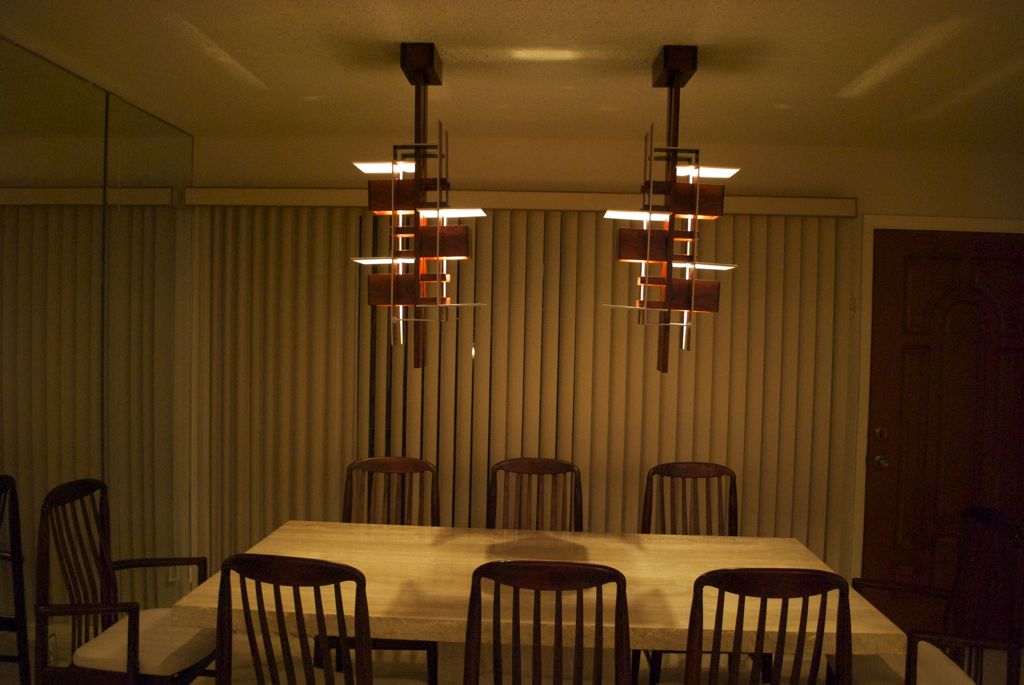
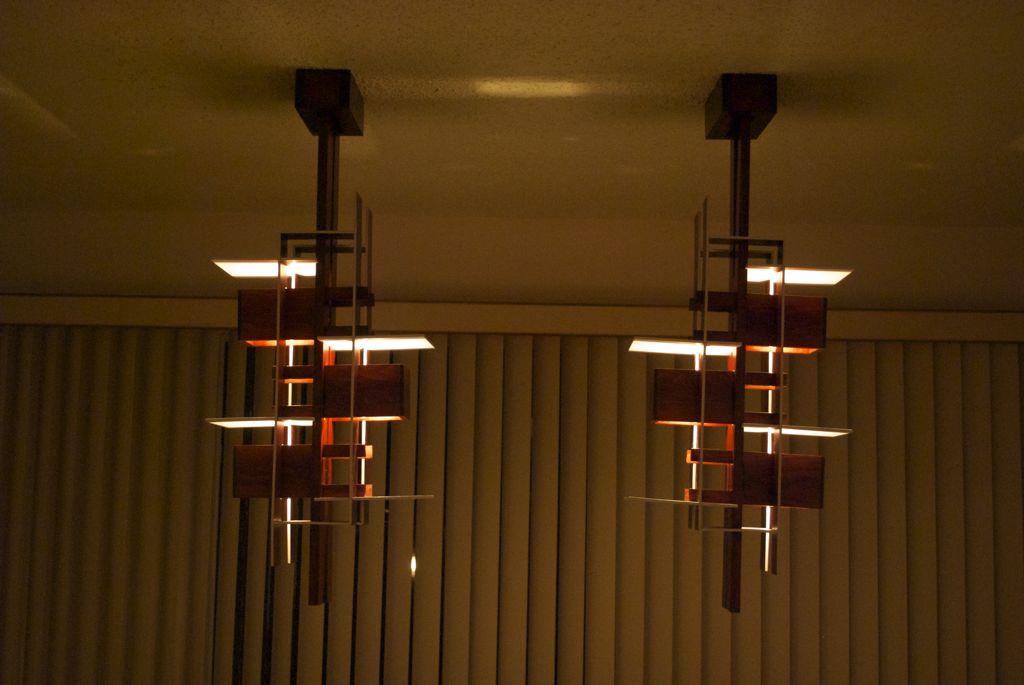
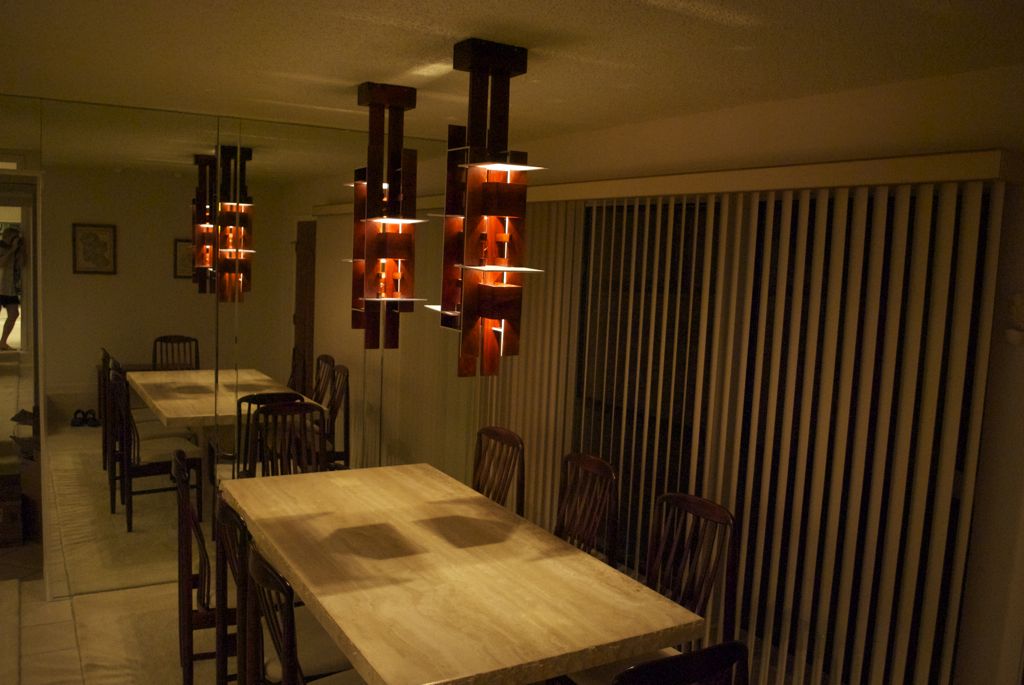
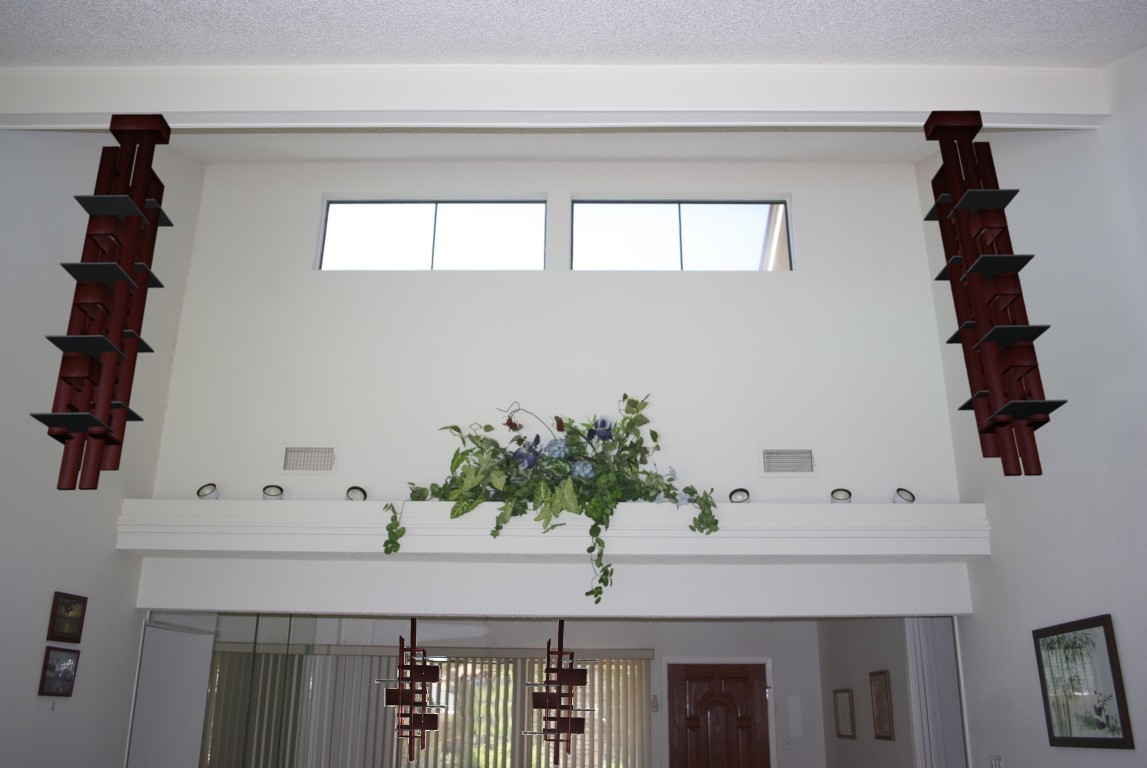
Installed Pendant Lamps (low light)
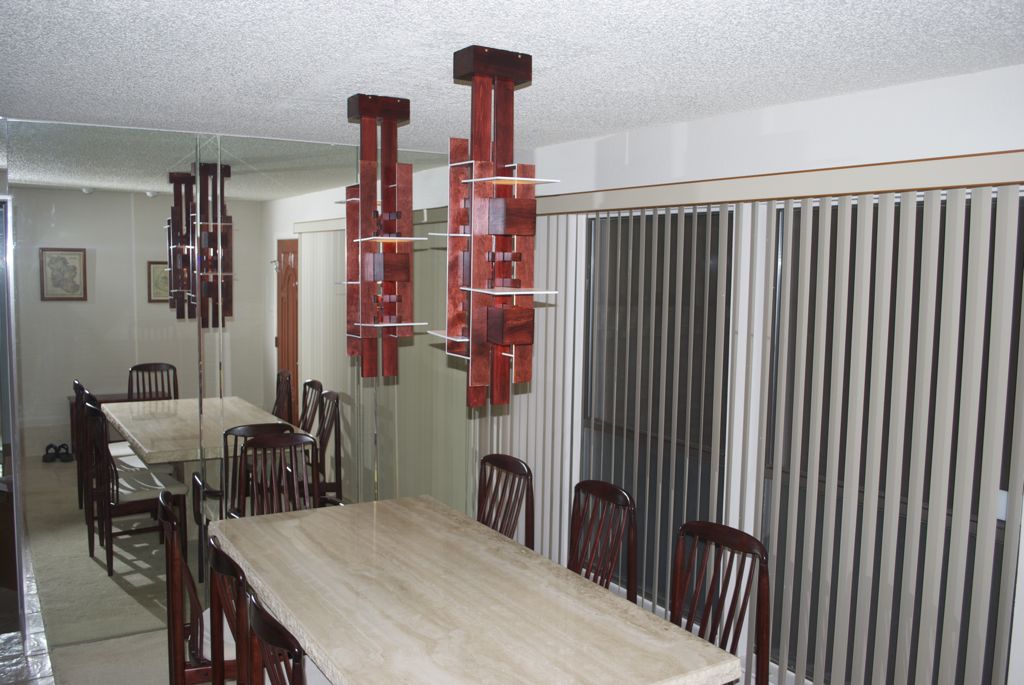
Installed Pendant Lamps (with flash)
Specifications
Made of 3/4" and 1/2" maple and 1/4" Birch Plywood, stained with a medium red mahagony
and polyurethane finish. Illumination is by 25-Watt Candelabra
bulbs (one per "light box").
Story

Old Lucite Chandelier
The chandelier in our dining room is made of lucite in a very 1980's
design (maybe even 1970's?). It is both loved and hated. I've been trying
to find something to replace it that would sway the lovers of the lucite.
These hanging (pendant) lamps are inspired by lamps made by Frank Lloyd
Wright for the auditorium of his Hillside School at Taliesen in Spring
Green, Wisconsin.
You can actually buy reproductions of these lamps at various places (though
they are all the same price and come from the same source). You can see
them here,
here
or here
and admire their $2,600 price tag. Seemed simple enough to make (not that
simple really, but reasonably feasible at least), so I embarked on trying
to make a pair since they met the approval of the lucite loyalists.
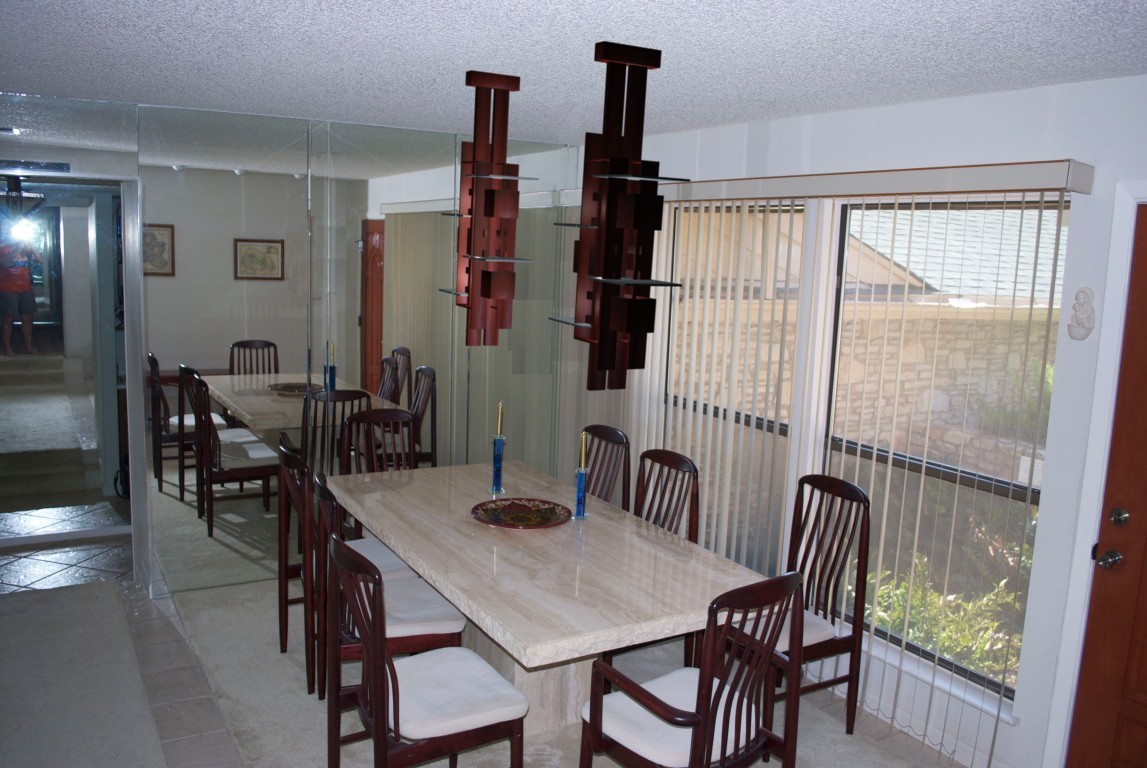
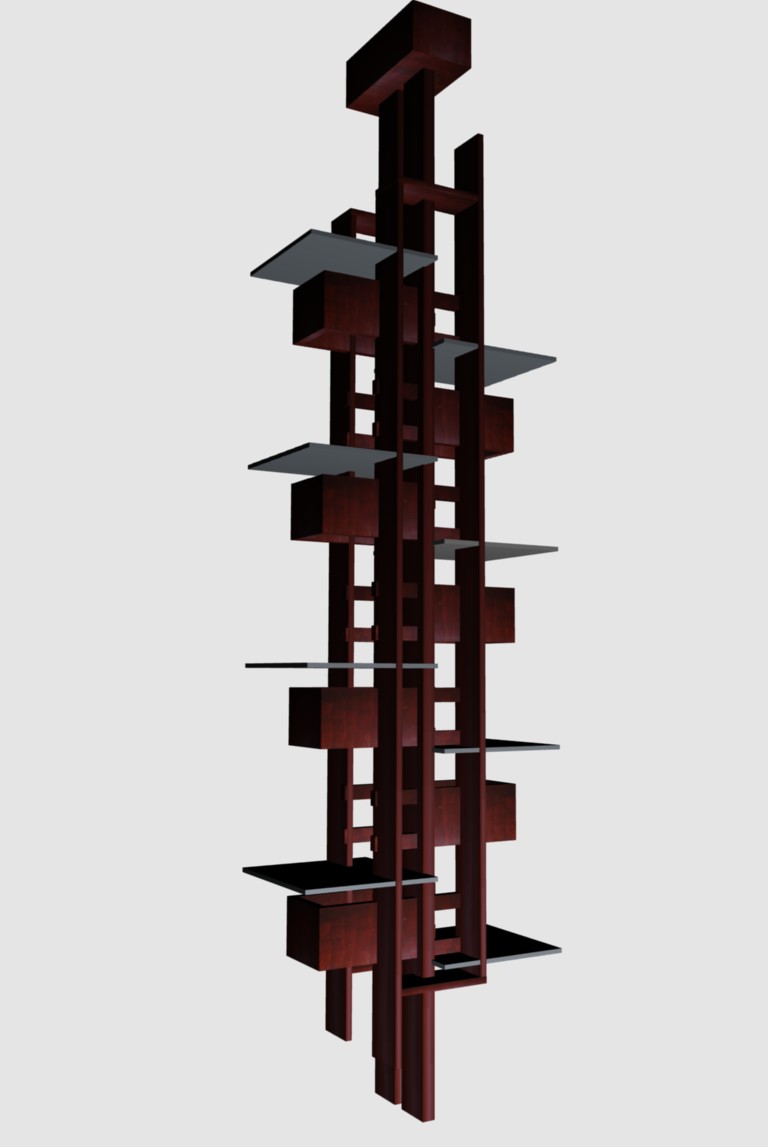
Simulated View
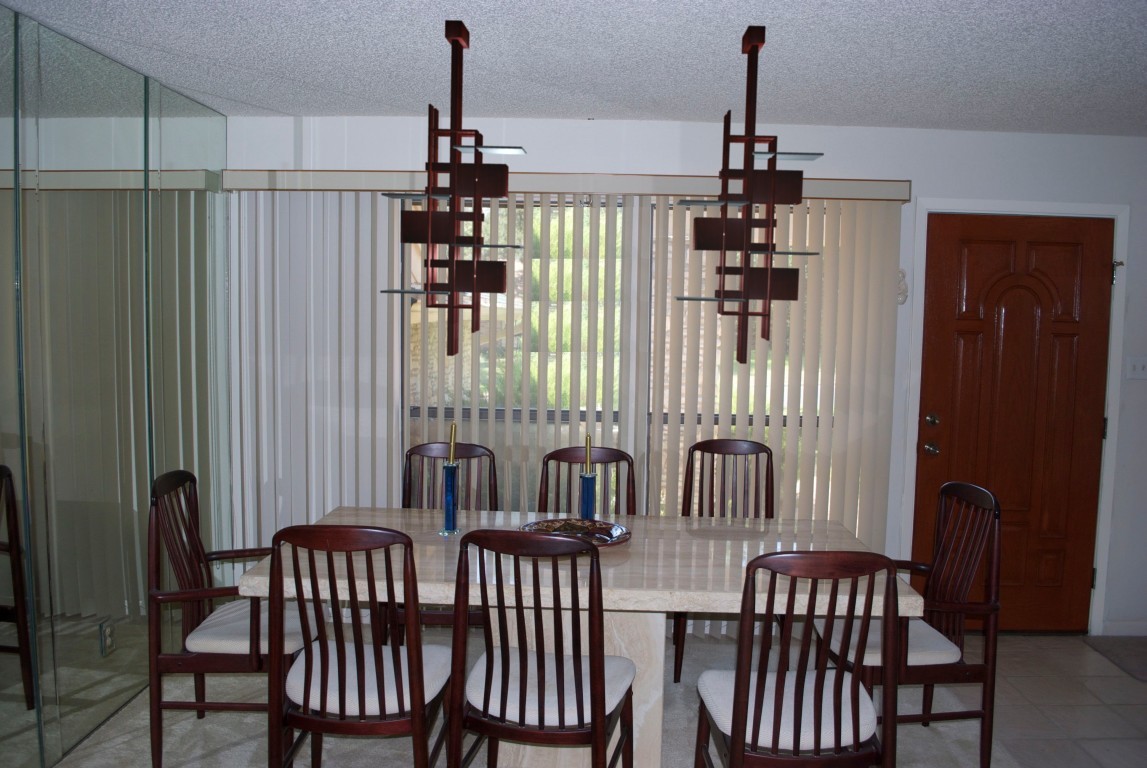
Simulated View
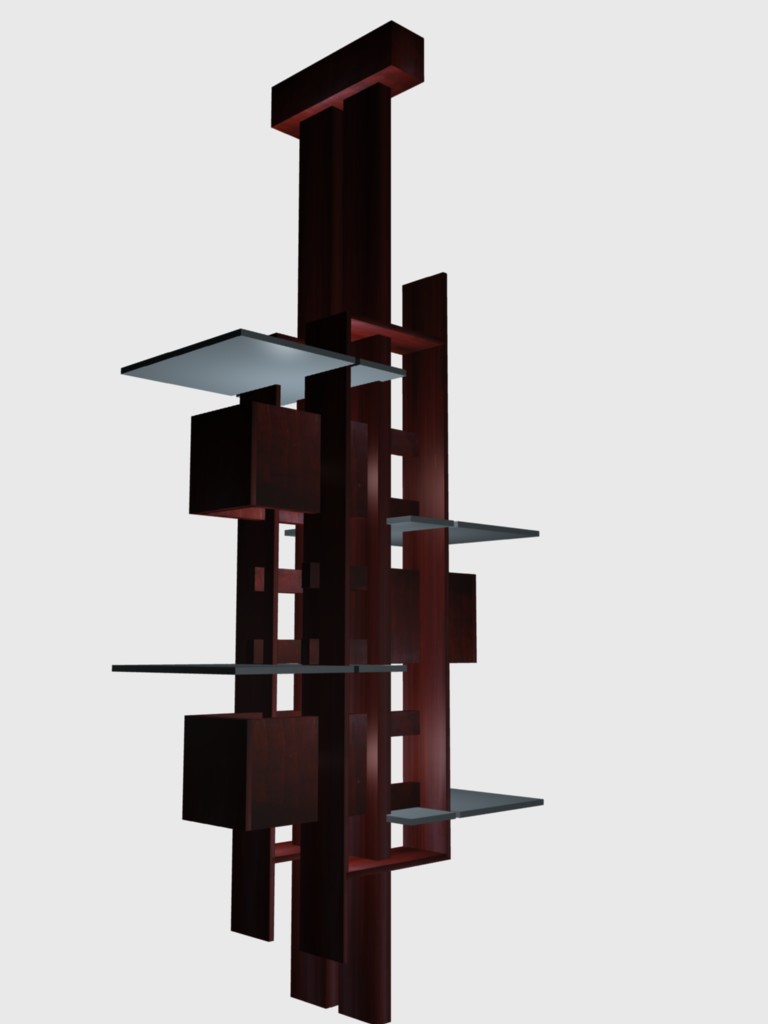
3D Model
Because I was working from very few pictures of these, I needed to work
out all the dimensions by guess-timating. To help with this, I created a
3D model of the pieces using the program Blender. This is a seriously powerful 3D
modeling program, so it also allowed me to "see" what the dining room would
look like before actually building and installing them. Compare the
simulated view at the right-most picture to the picture at the top of the
page which is the final result. Pretty good way to visualize how something
might look. Also note how the 3D model has vampire-like qualities, which
the real ones lack.
Construction
While this is classified as a woodworking project, there was just as
much, and maybe more, non-woodworking time spent on this project. The
first phase of the project was actually the 3D modelling and drafting plans
with specific dimensions to work from. I got about 90% of it visualized,
but initially was not clear on exactly how these things would hang from the
ceiling or exactly how I wo-uld wire them. These were worked out during
the process of construction and underwent a number of revisions (in my
mind).
Woodworking Phase
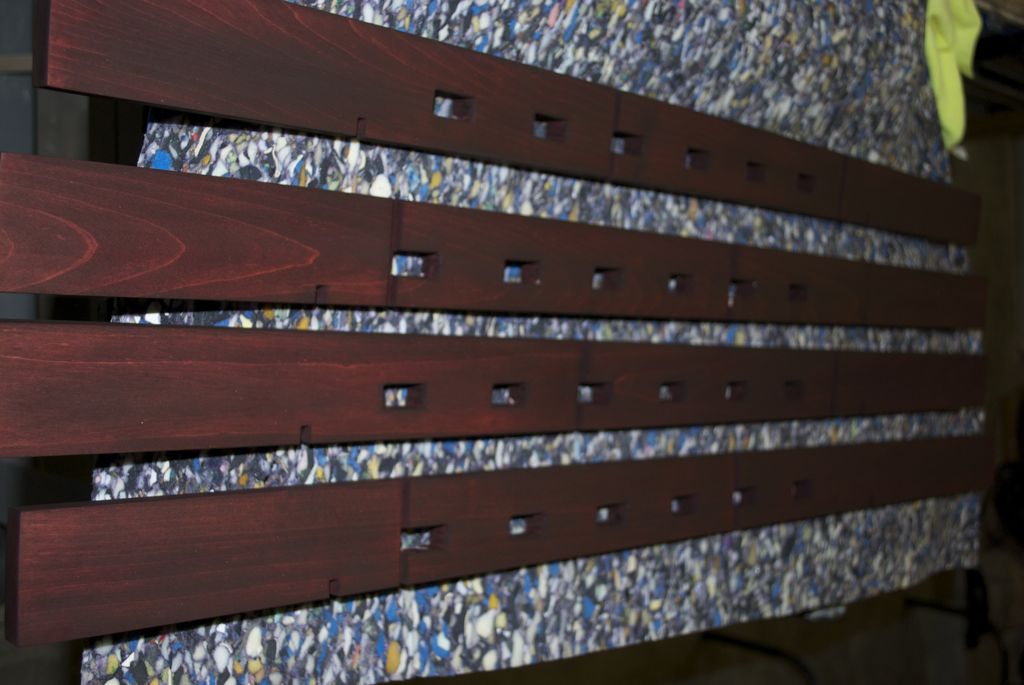
The pieces for this lamp are very much like one of those
three-dimensional puzzles you have to put together in the right shape. In
fact, it would require very little glue to hold together, which is good in
case they need to be disassembled for redoing the wiring or something.
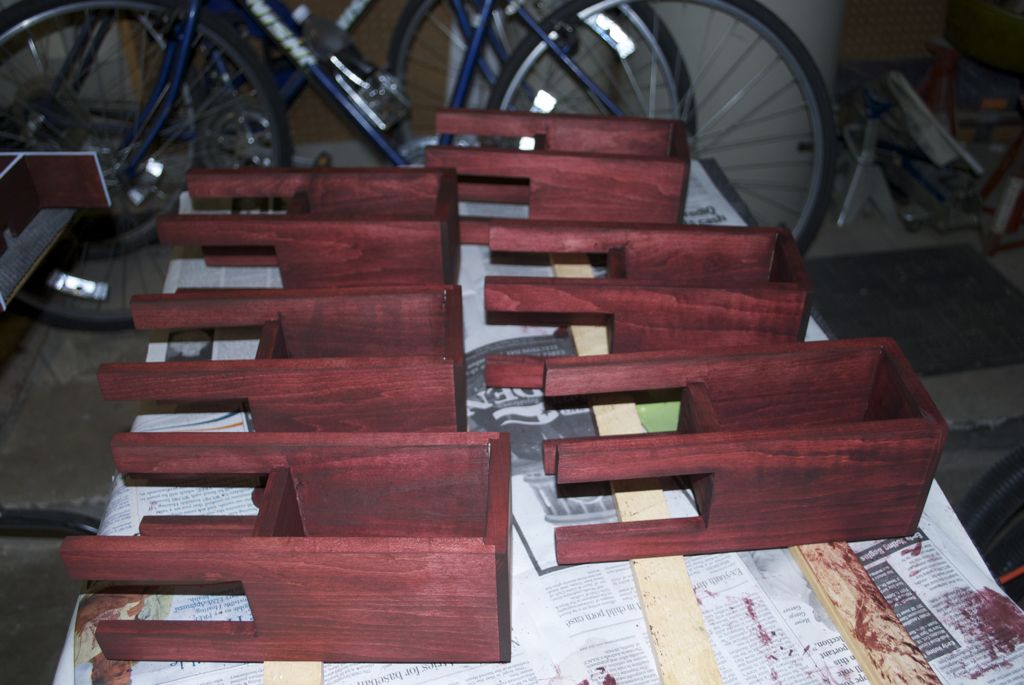
However, this quality meant that the cutting had to be fairly precise.
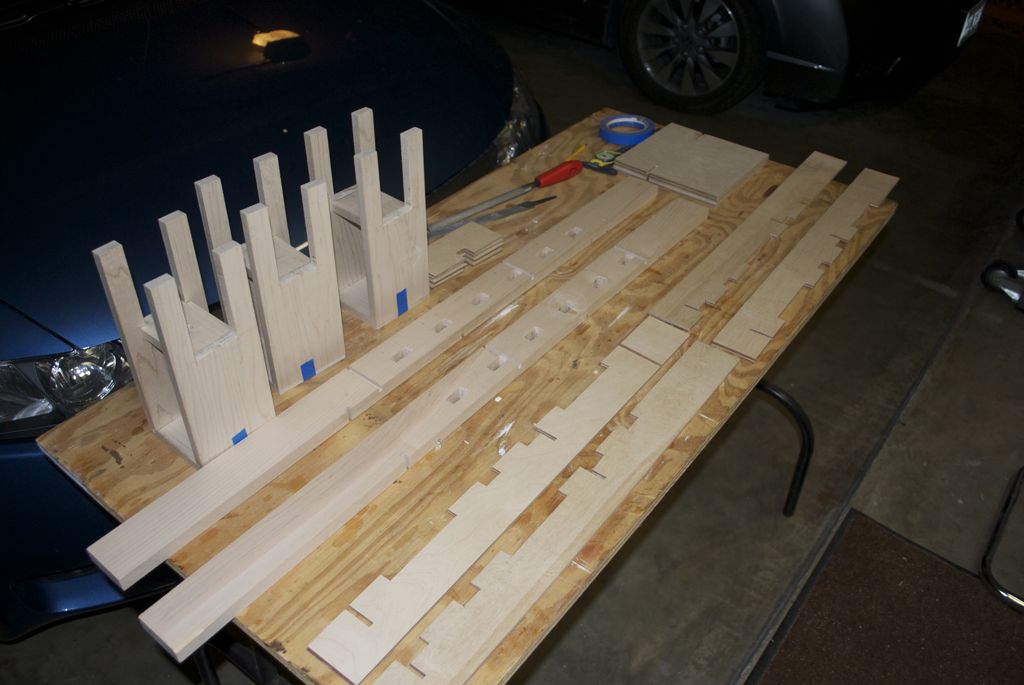
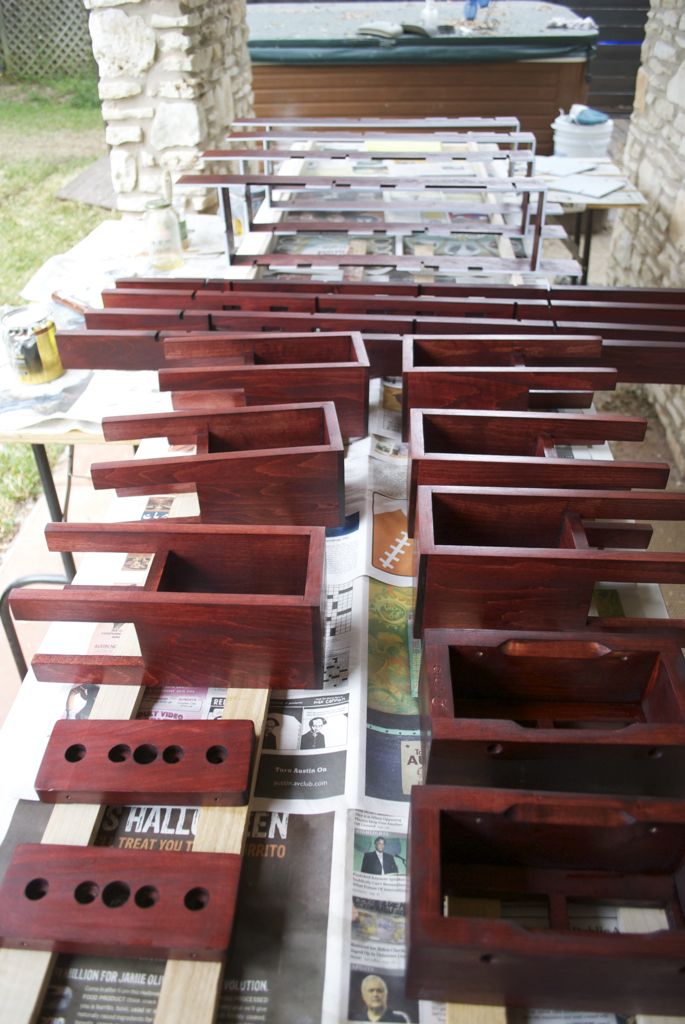
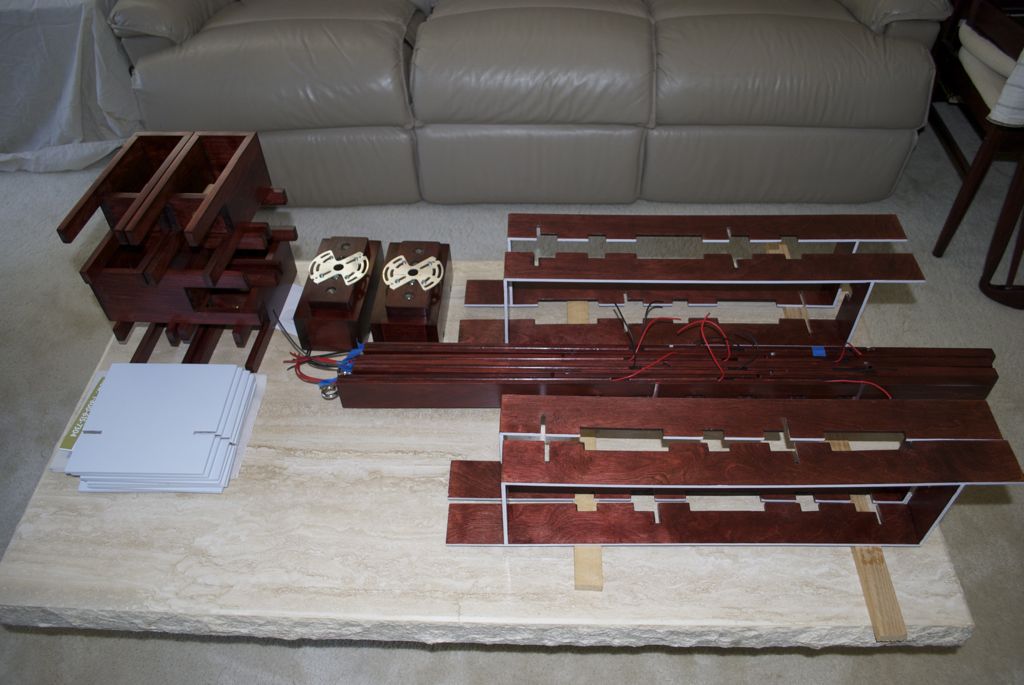
Raw Finished Pieces
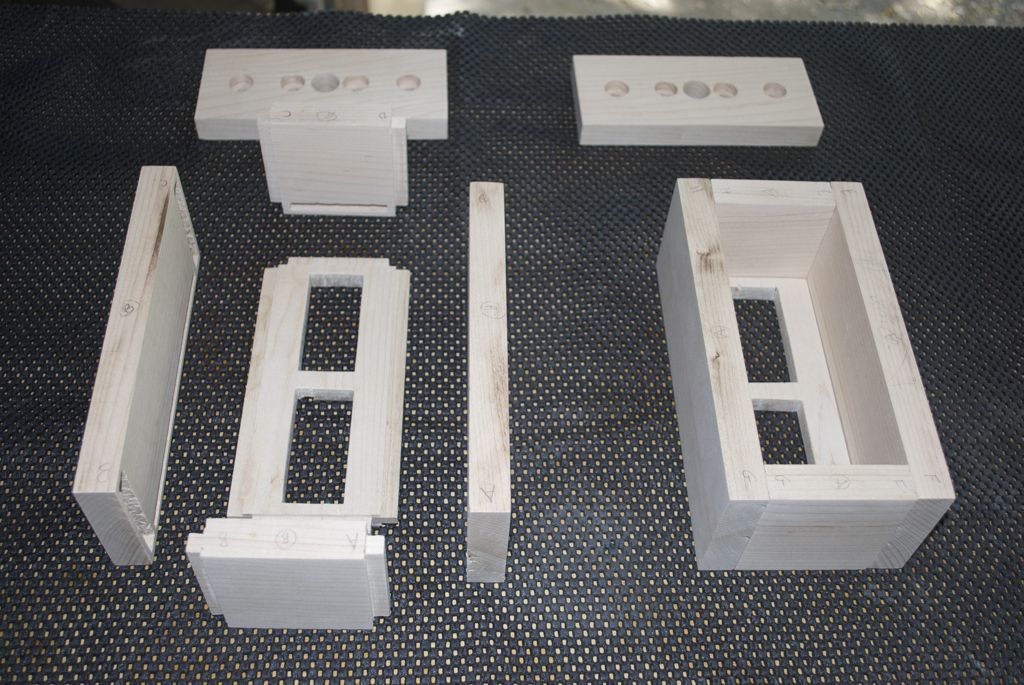
Hanger Boxes
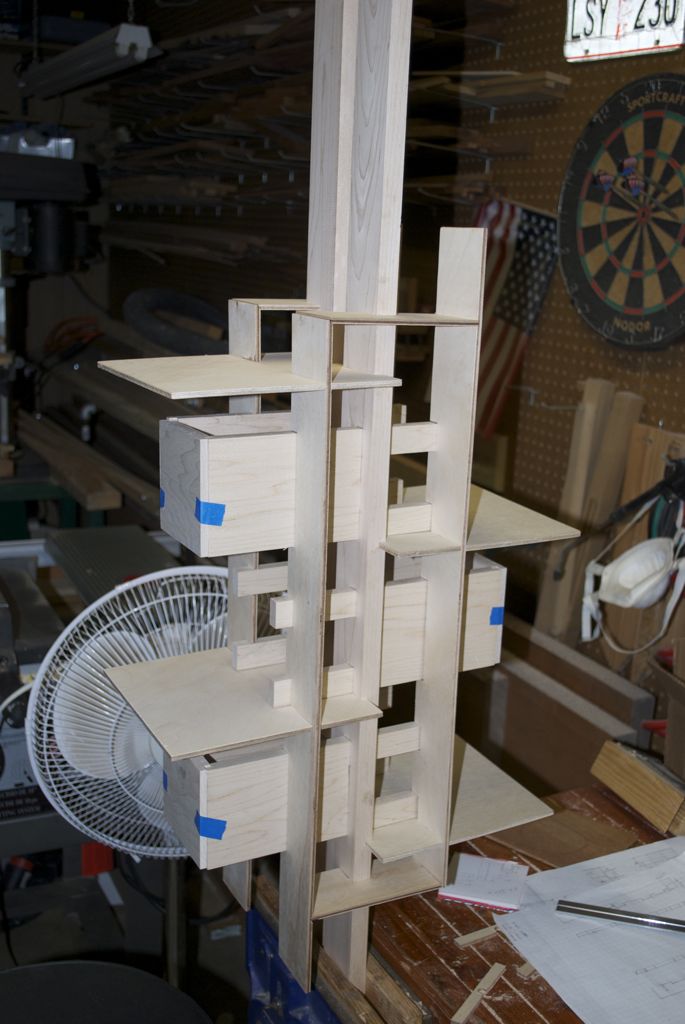
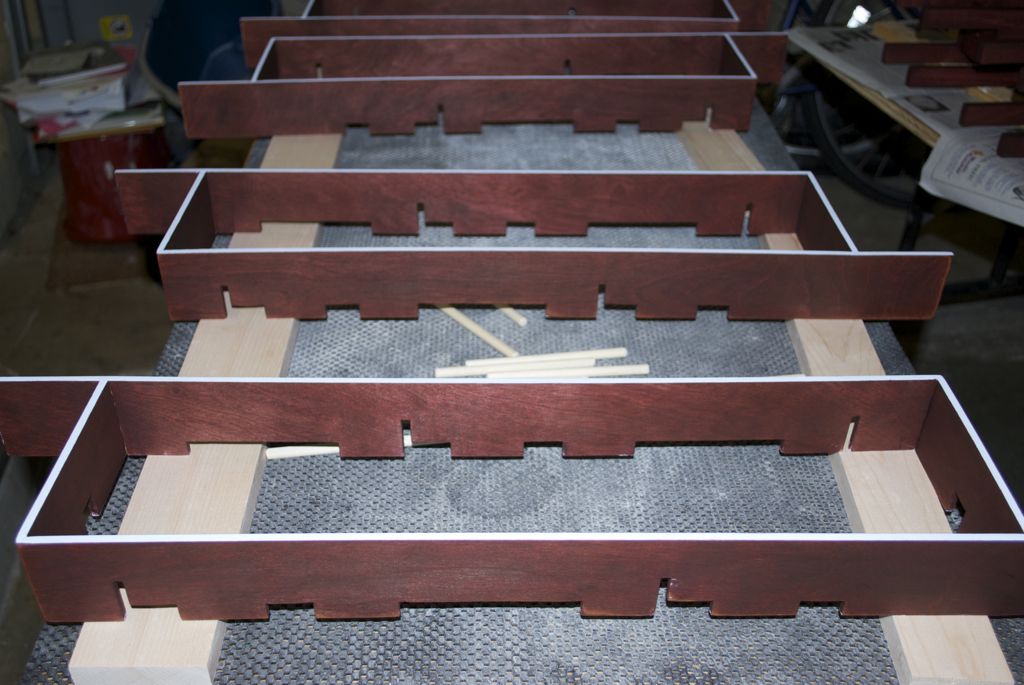
Dry Fitting Test
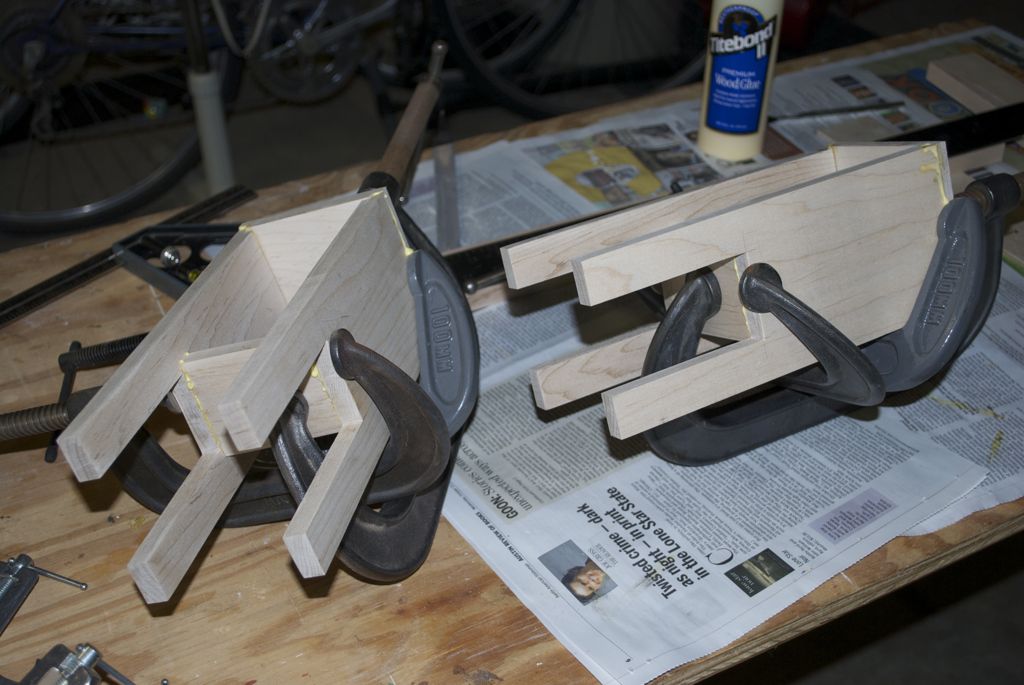
Assembling Light Boxes
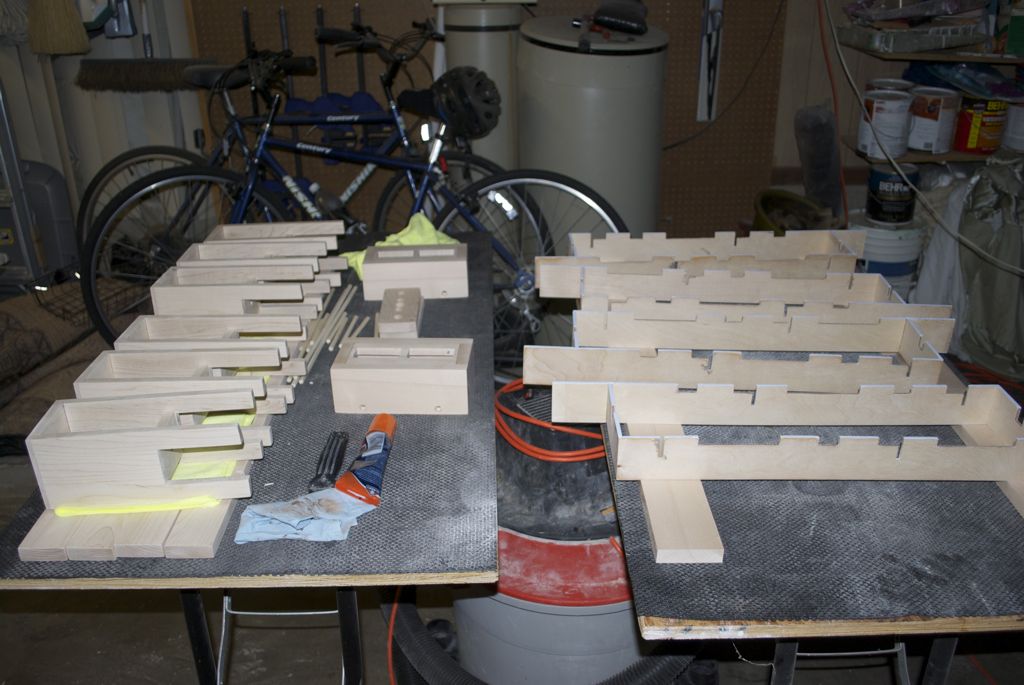
After Glue-ups
As mentioned, the trickest part was designing the way in which these
would hang from the ceiling. I had no pictures or evidence of how the
"store bought" ones tackle this, so I was on my own. The easiest way was to
design them to fit into a typical lamp ceiling box. What I came up with is
more elegant than my first two designs, but still a little clunky. On the
positive side, these brackets can hold about 200 lbs, which is likely way
more than the ceiling box itself will support, both of which far exceeed
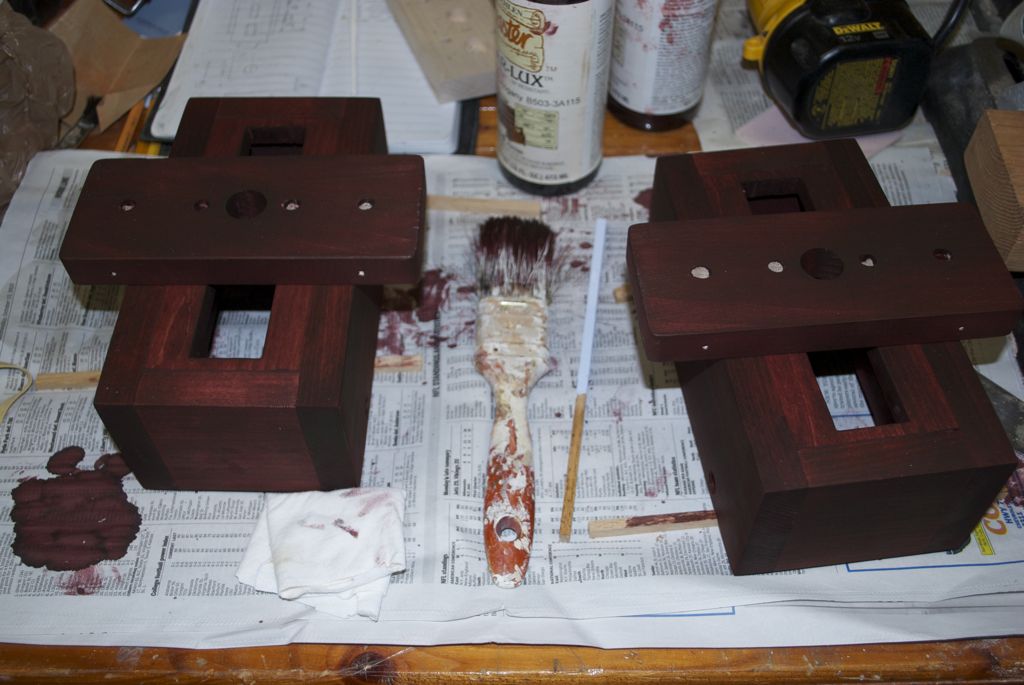
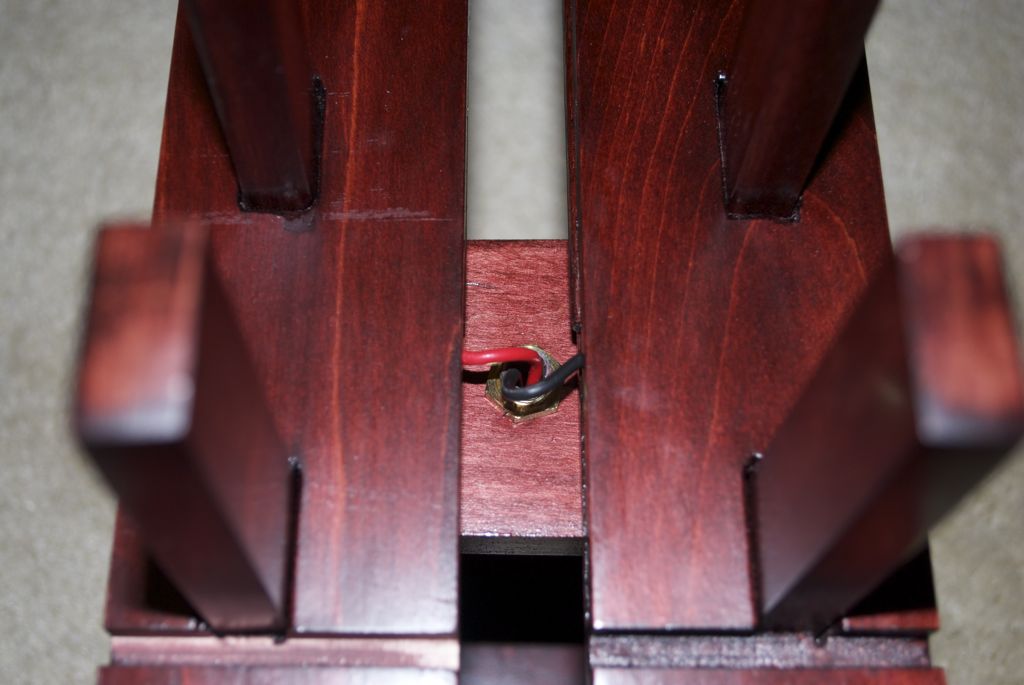
the actual weight of the lamps. The hangers are in two pieces: the hanger
itself has a bracket to attach to the ceiling box, and a U-hook to hang the
lamps from; the hanger cover is the other pieces that slips over the hanger
and hides the hardware mechanisms.
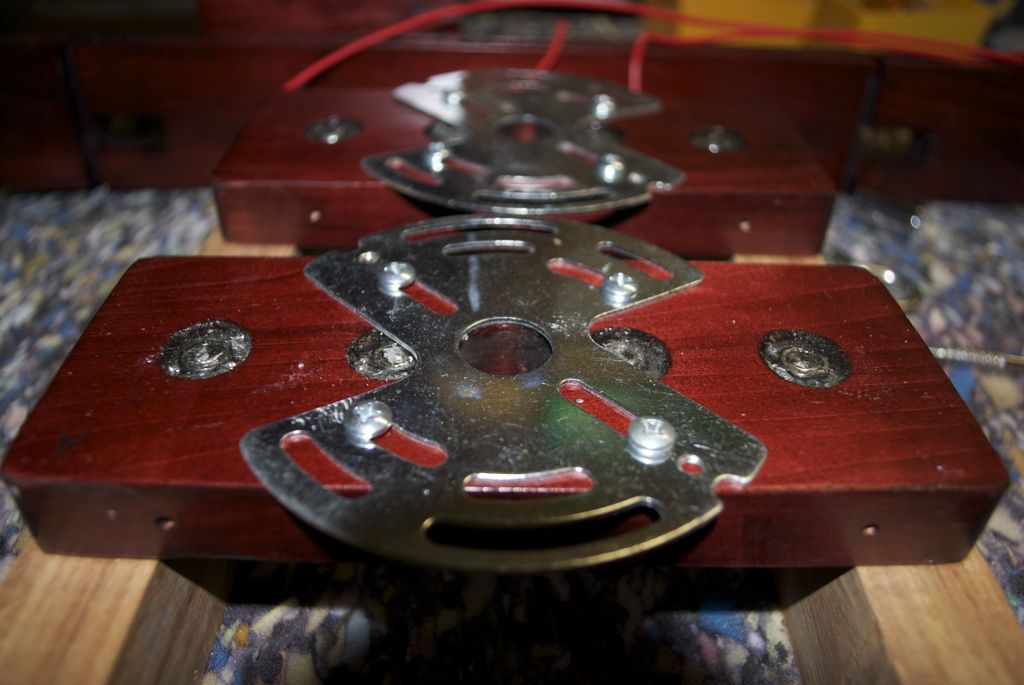
Ceiling Box Bracket on Hanger
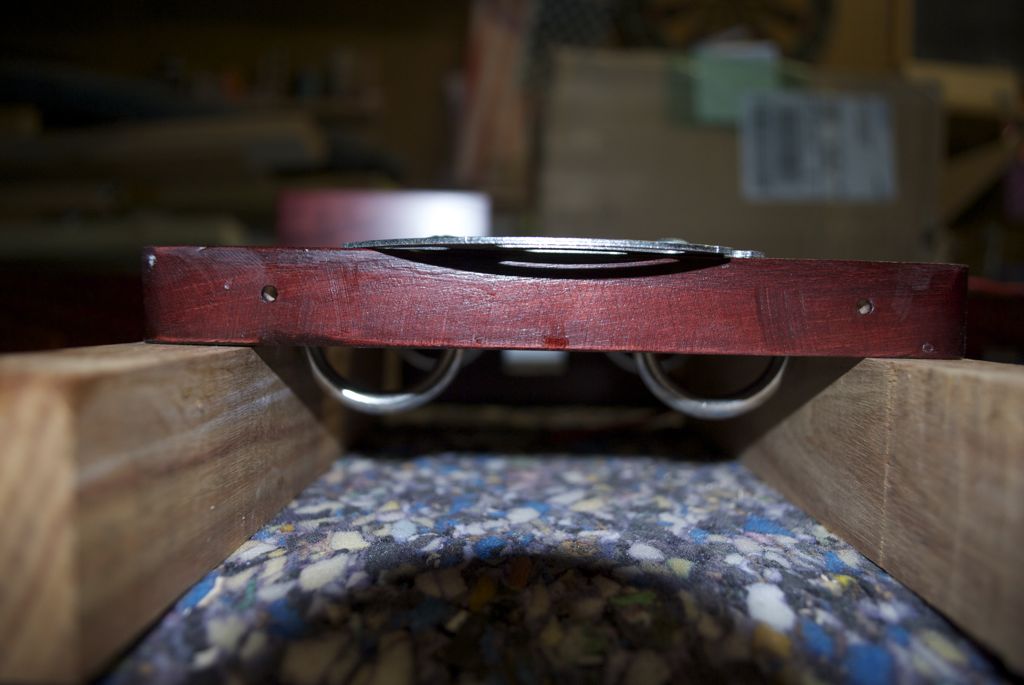
Lamp U-hooks on Hanger
Staining Phase
To match the decor and other furniture I built for the living and
dining rooms, I used the same wood and same stain as the other projects to
get a dark red wood finish.
Light Boxes
Main Posts
"Wings"
Hangers and Covers
Finishing Phase
I debated with myself on whether to use an oil stain (looks slightly
better) or a polyurethane varnish finish (more durable). I decided on
polyurethane because I believe that it has better thermal properties and
some of the finished wood is going to be very close to the light bulbs.
There is also actually some regular latex paint needed. The "shades"
are a very light color to reflect the light better, and they appear to be
a blue-ish grey in the product images. We picked out a color that was more
light blue than grey, but it looked pretty good. Also, this paint is
actually continued around on the side edges of the "wings", which actually
gives it a very pleasing appearance and ties the wood and paint colors
together well.
Polyurethane Layout
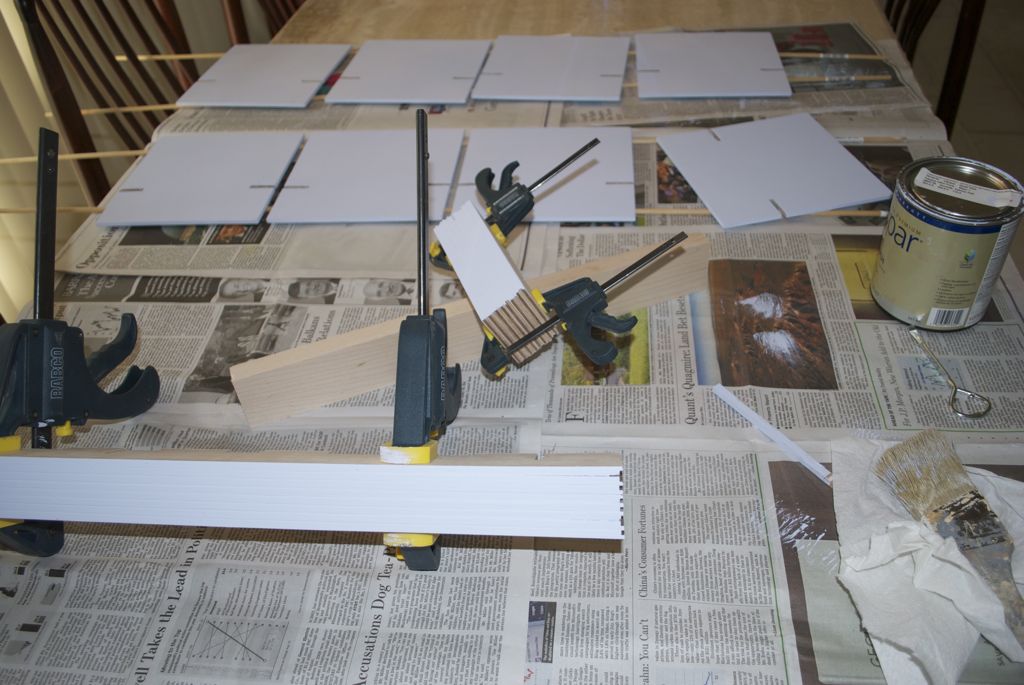
Painted Shades and Edges
Assembly Phase
Next to designing the hanger, figuring out the wiring was the next
major challenge. I did not want wires showing, so wanted to hide them, but
in a way that would nake it easy to replace and not be overly complicated.
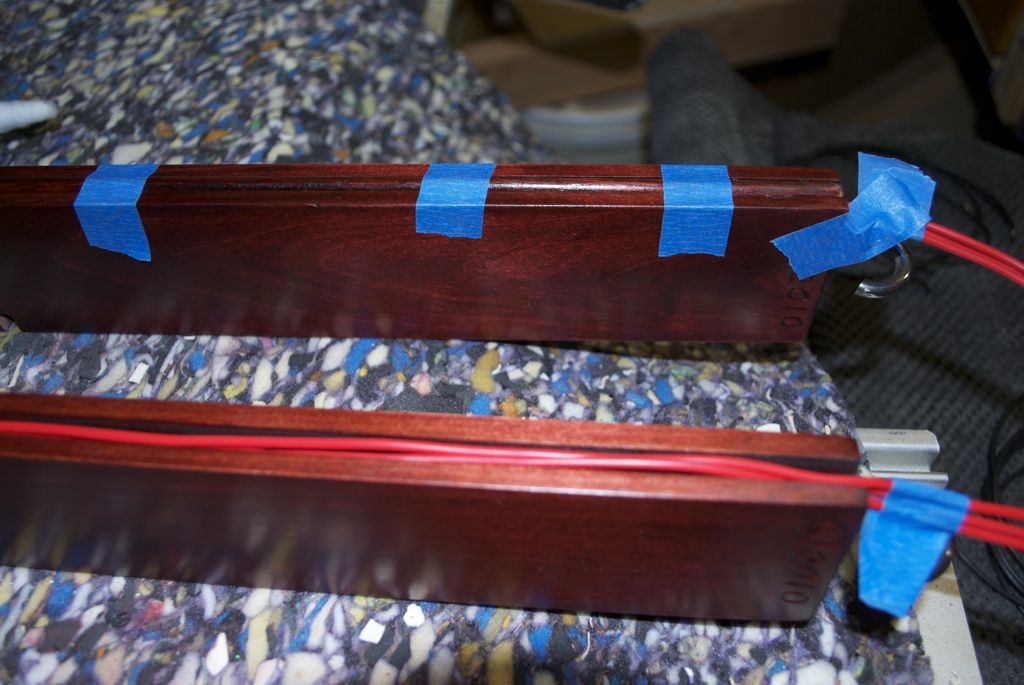
I am fairly pleased with the solution I came up with which uses a channel
on the inside edge of the main posts, and then I cover the wires with a
thin dowel embedded in the channel. The dowels are held in with chaulking,
so they could easily be removed if it had to be re-wired.
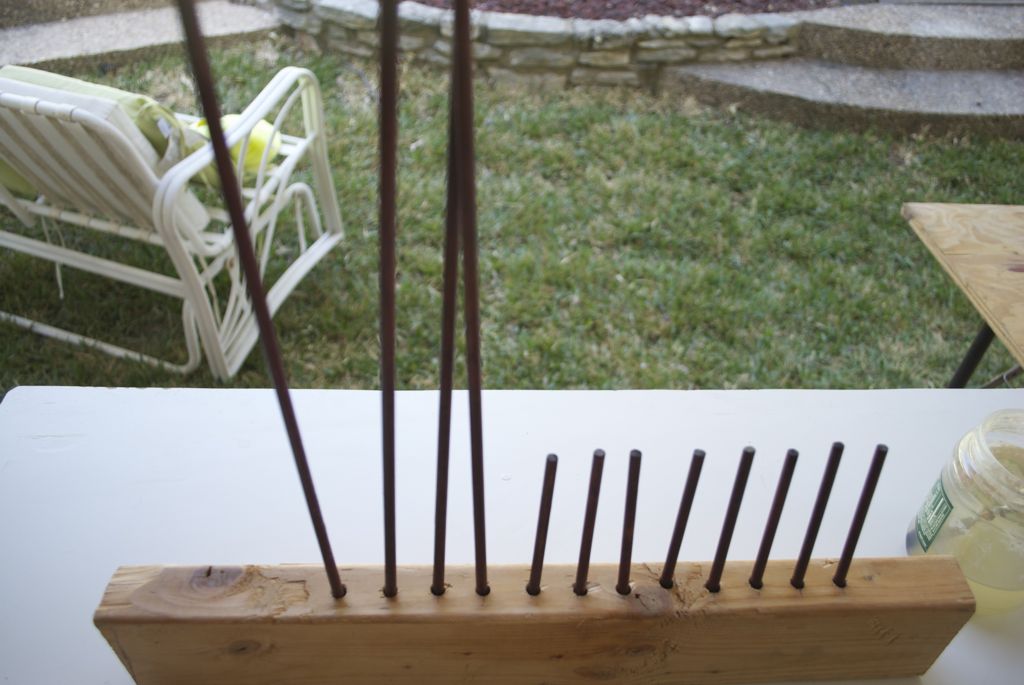
Dowels to Hide Wiring
Wiring Main Posts
Assembling all the pieces was an exciting phase of the project: when it
all comes together. I first had to install the light bulb sockets into the
light boxes, and the wires would be attached after they were affixed to the
main post (which already had the wires installed running down their
length).
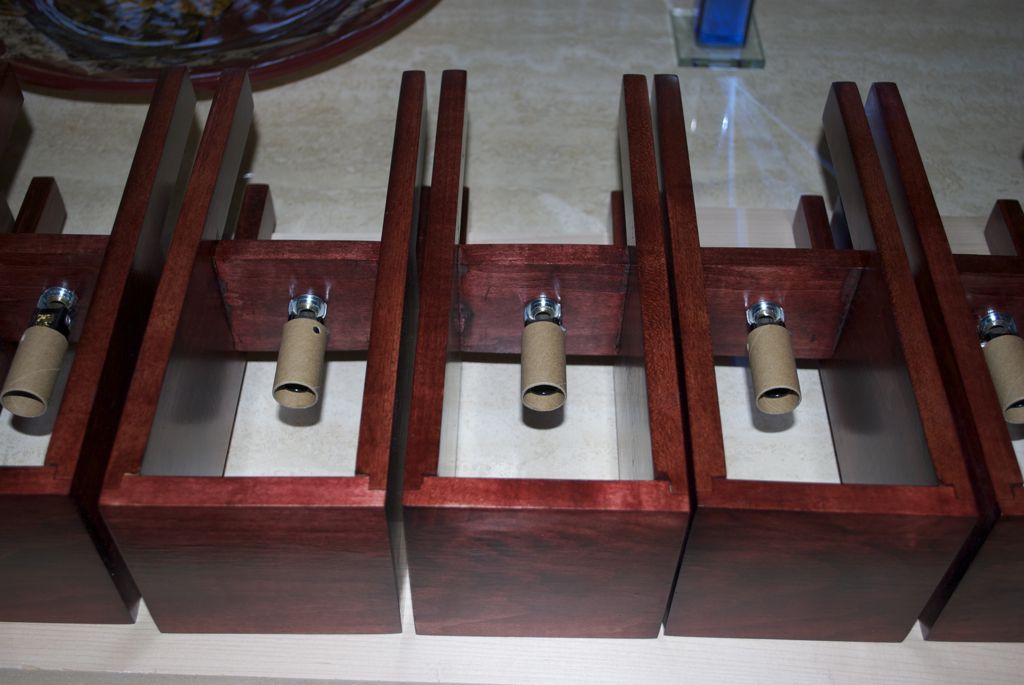
Light Sockets
Pre-assembly Pieces
Box Wiring
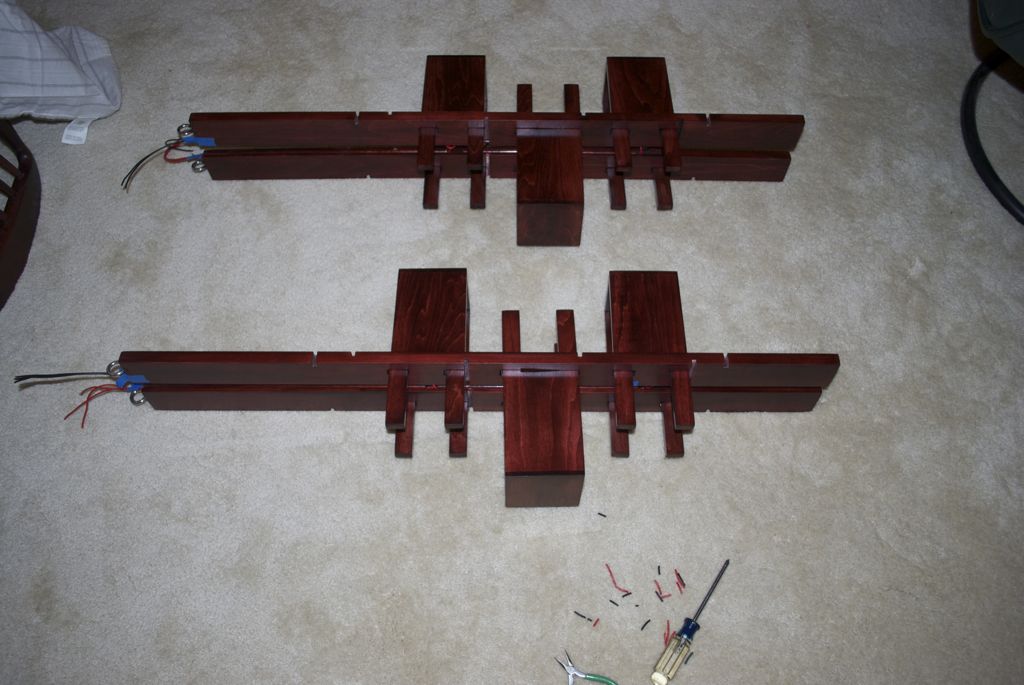
Partially Assembled
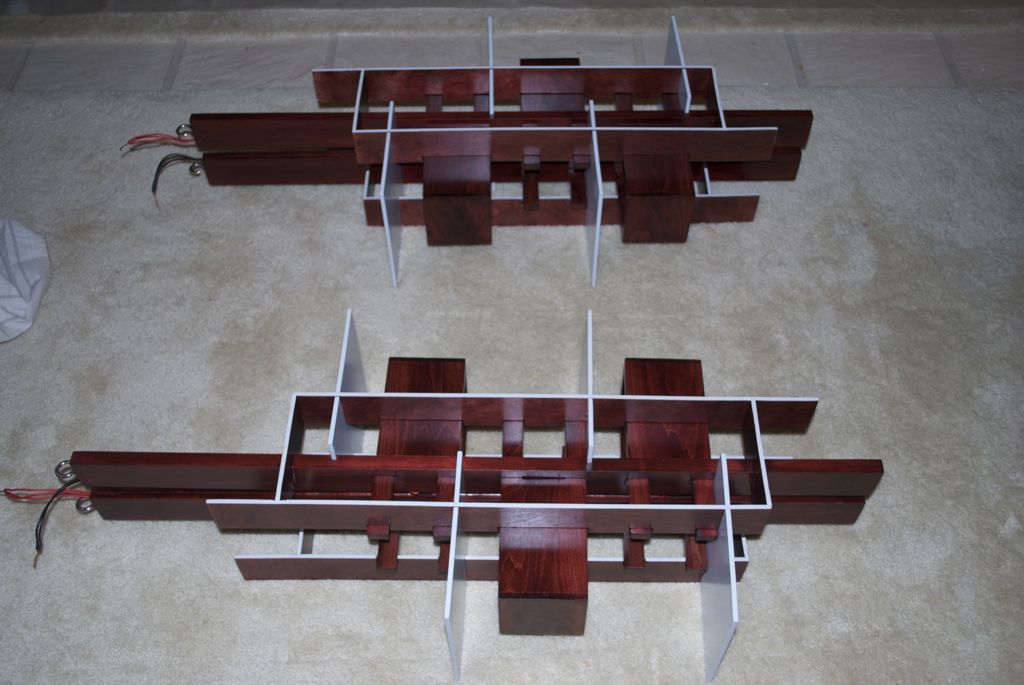
Full Assembly

Post-assembly Closeup
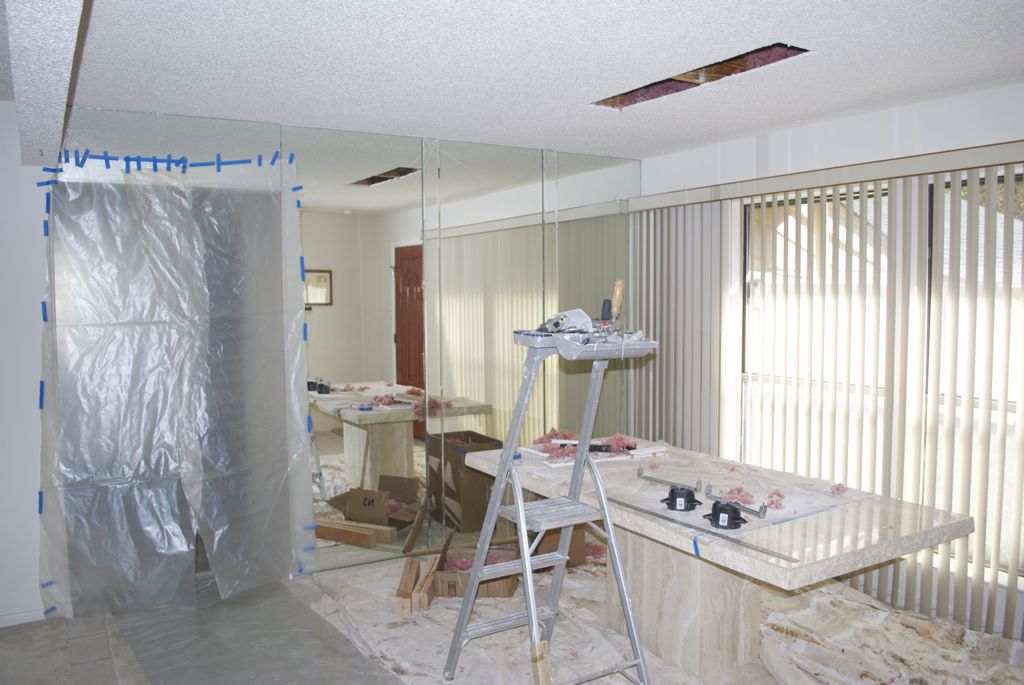
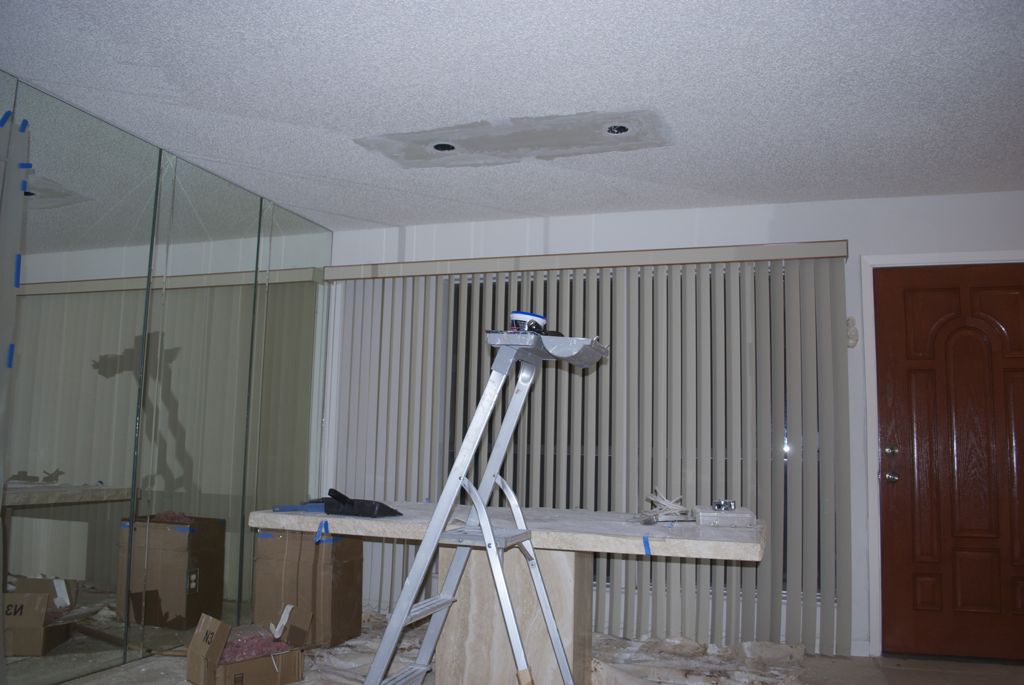
Installation Phase
So, the lamps are assembled, all we need to do now is install
them. Simple right? Not so fast. We currently have a single hanging lamp
and now we need two. The single one is in the middle of the table, and now
we need each offset from the center. This means we need to remove the old
ceiling box, add support beams for two new ceiling boxes and then re-route
the electrical wires from the old to new location. And you cannot do
either of those unless you start cutting sheetrock (since I could not
access the space from the attic).
Opened Ceiling
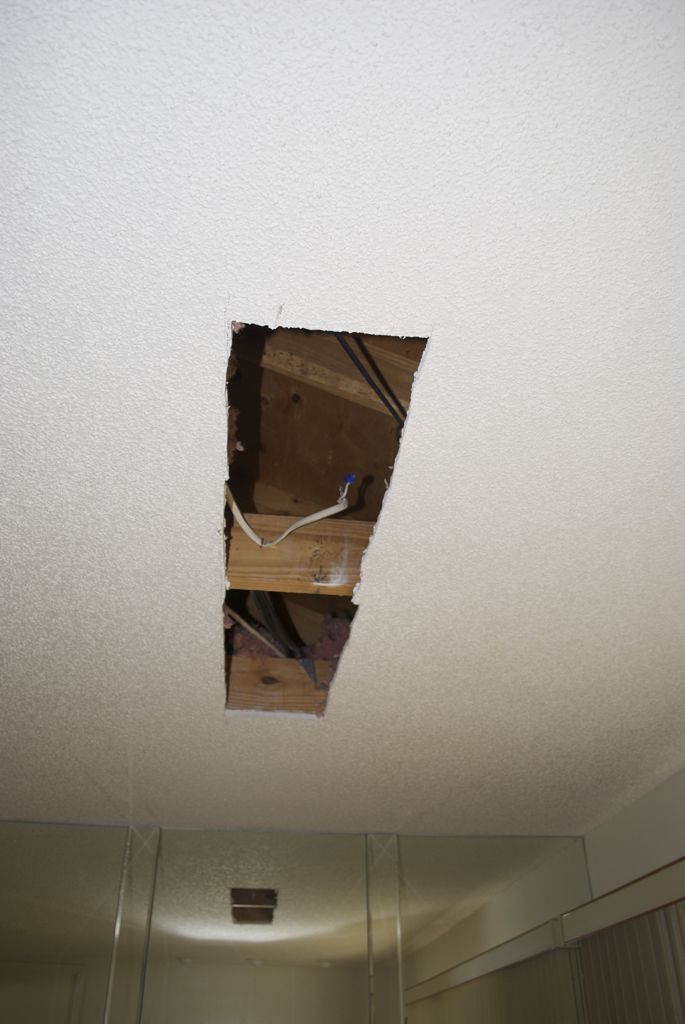
Old Ceiling Box Removed
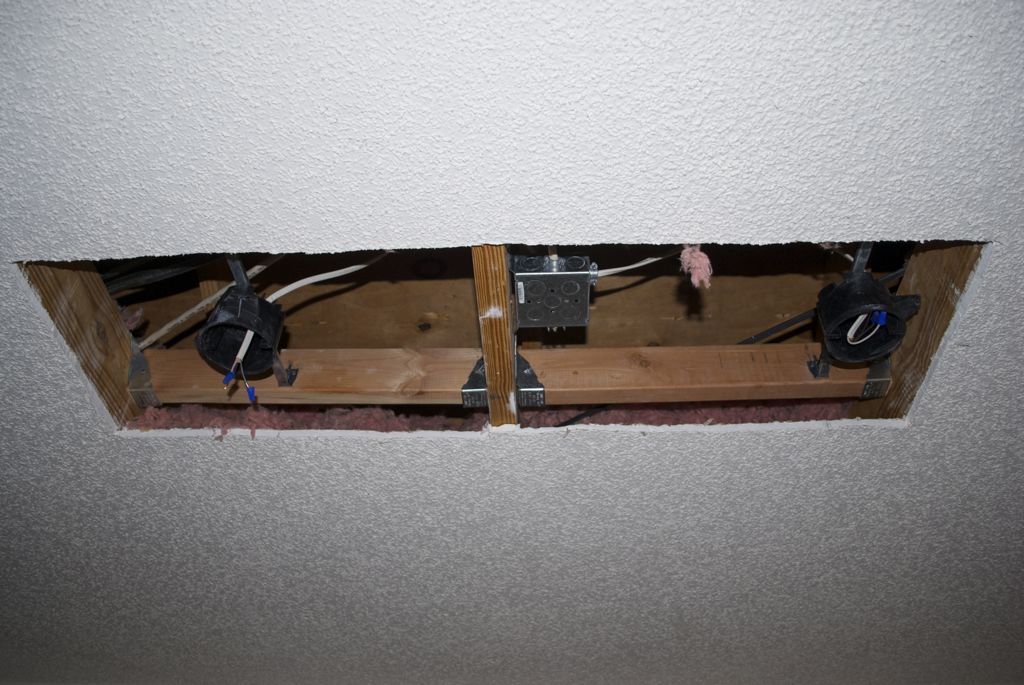
After Rewiring
After New Sheetrock
The final pain in the butt was re-popcorning the ceiling to match the
existing texture. The stuff in the cans can be mader to work, but unless
you know how and have a lot of experience, you will waste a lot of money
getting the experience.
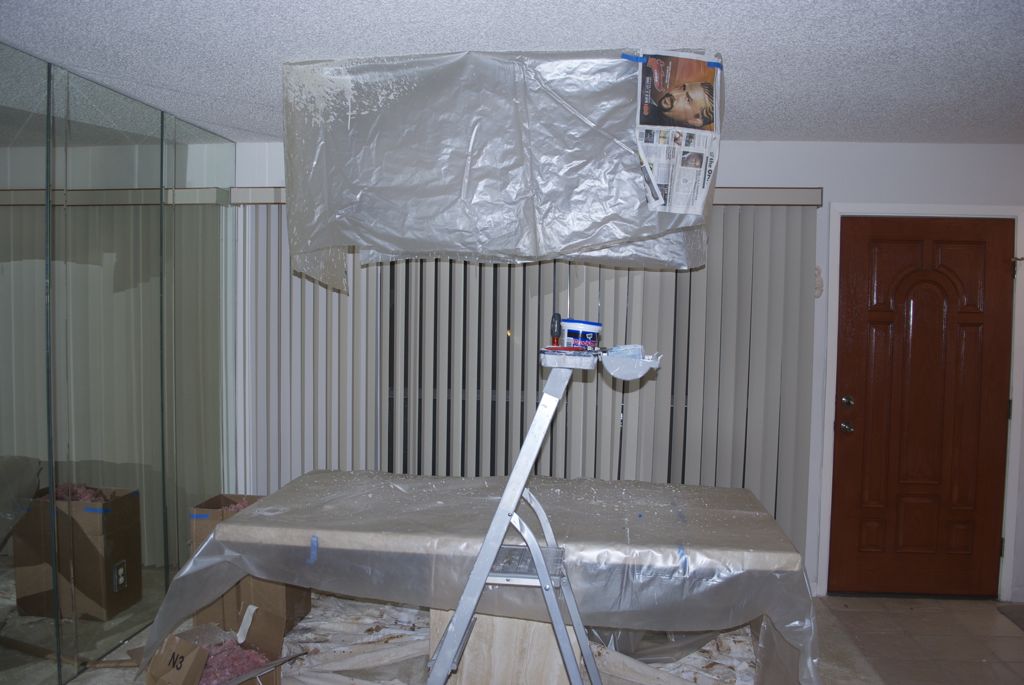
Prepping for Popcorn
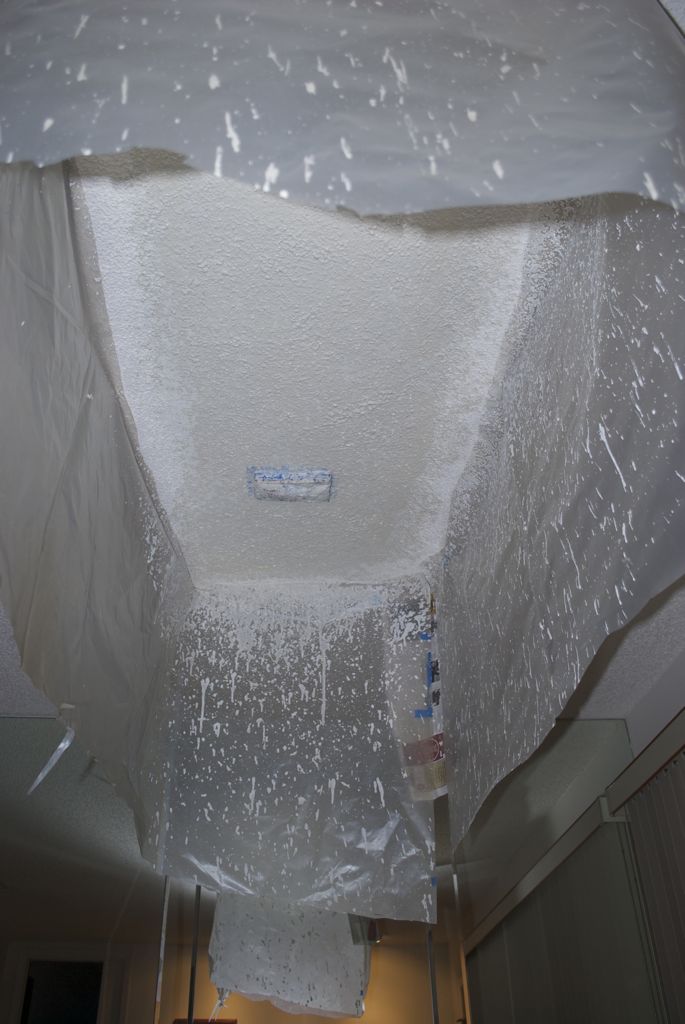
Popcorn Application
Final Phase
With the fresh paint dried, all we had to do now was hang the lamps,
attached the woring and put the hanger boxes over it. The final result was
very, very pleasing, so despite the challenges, was very worthwhile. Here's
the photos of the finished project.
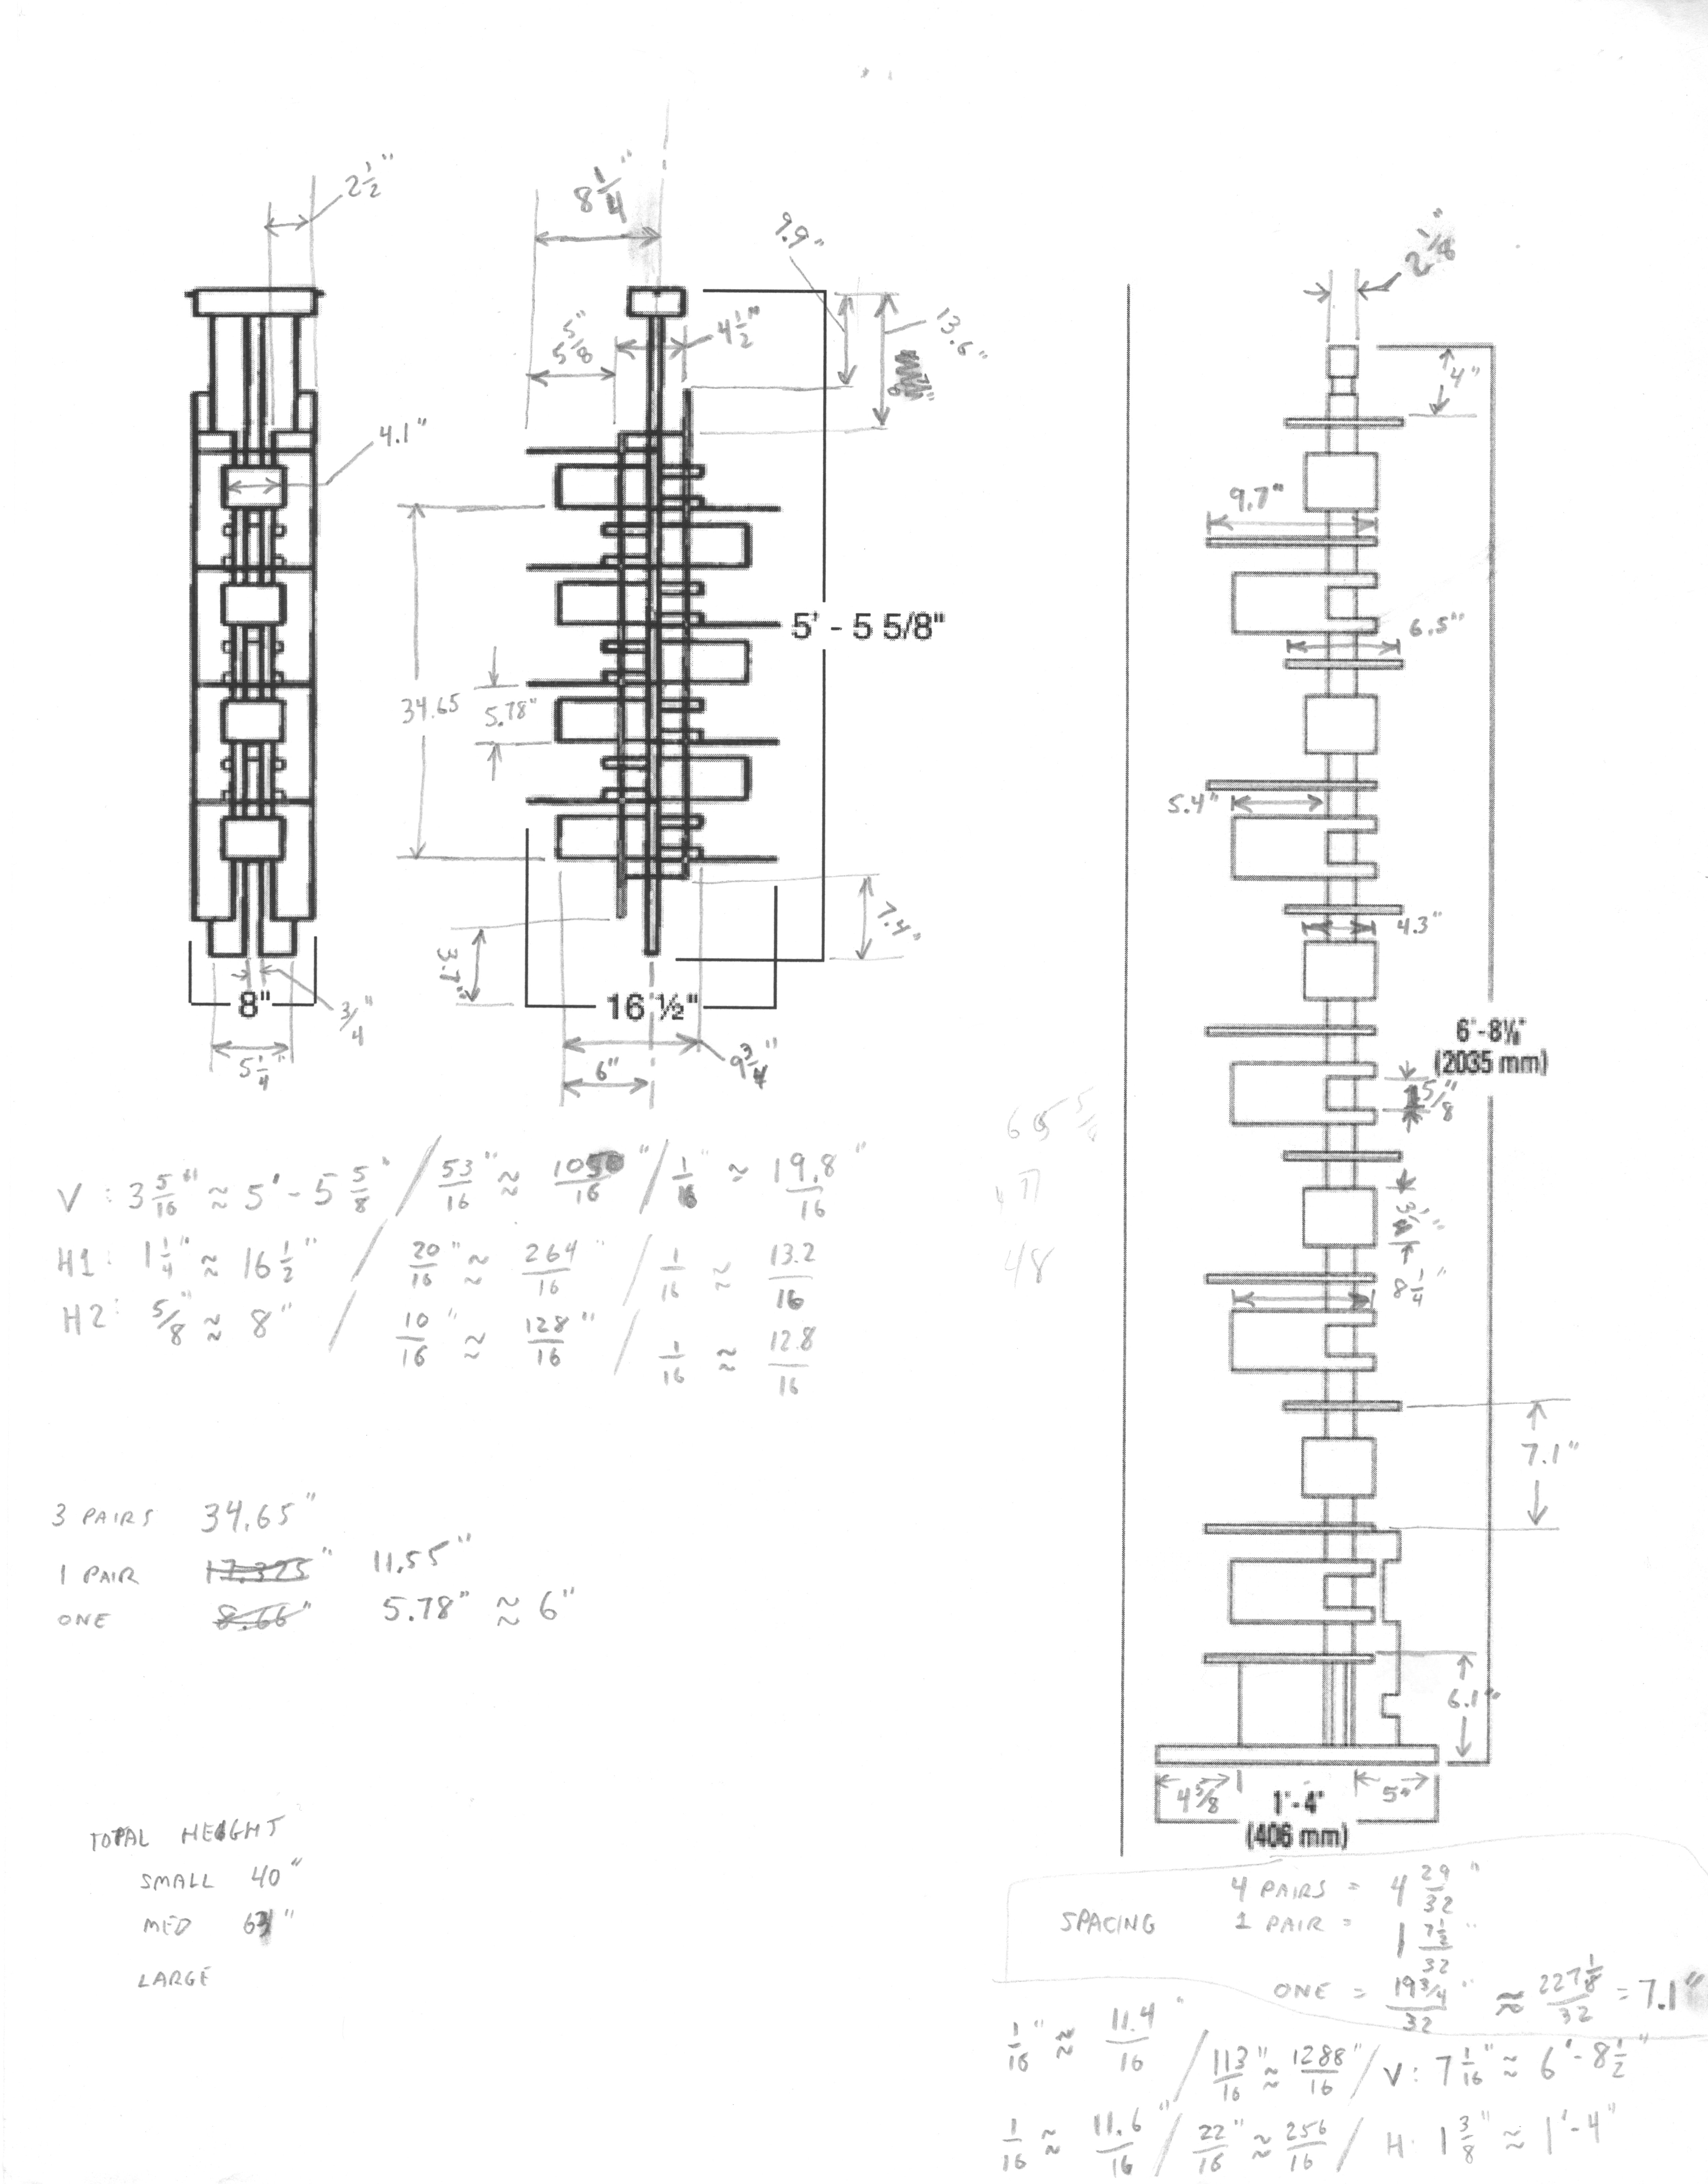
Plans and Schematics
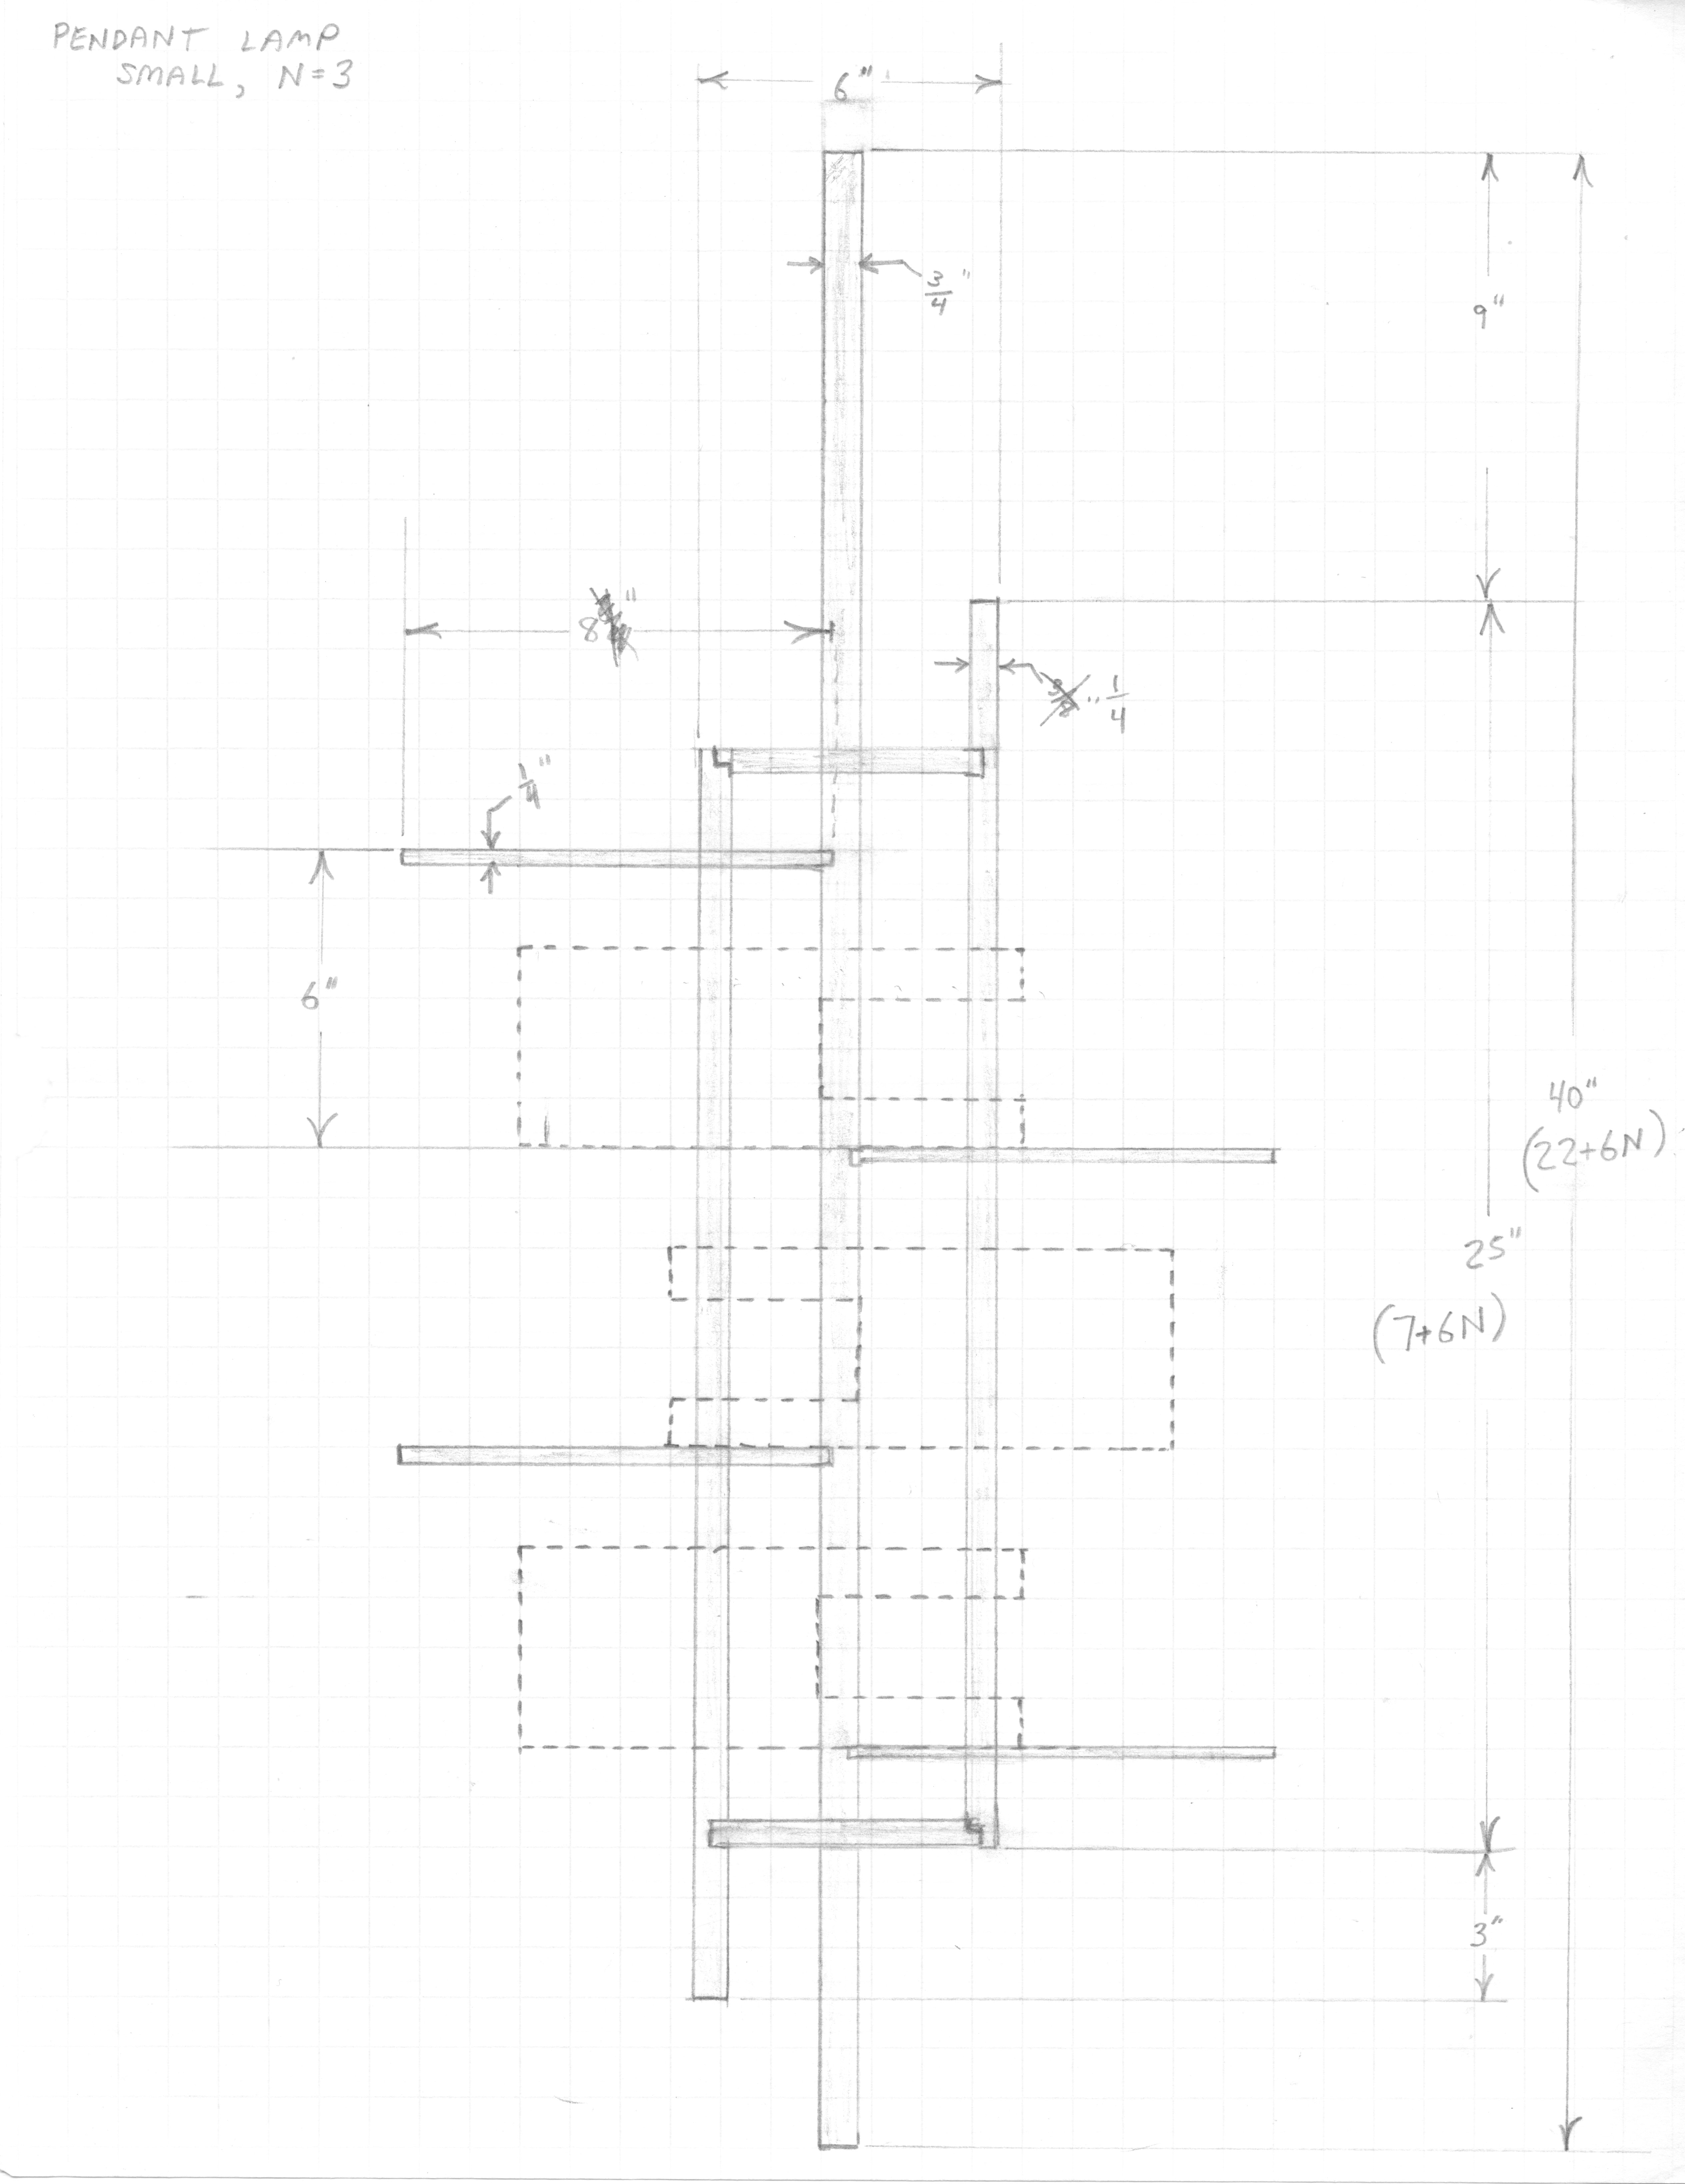
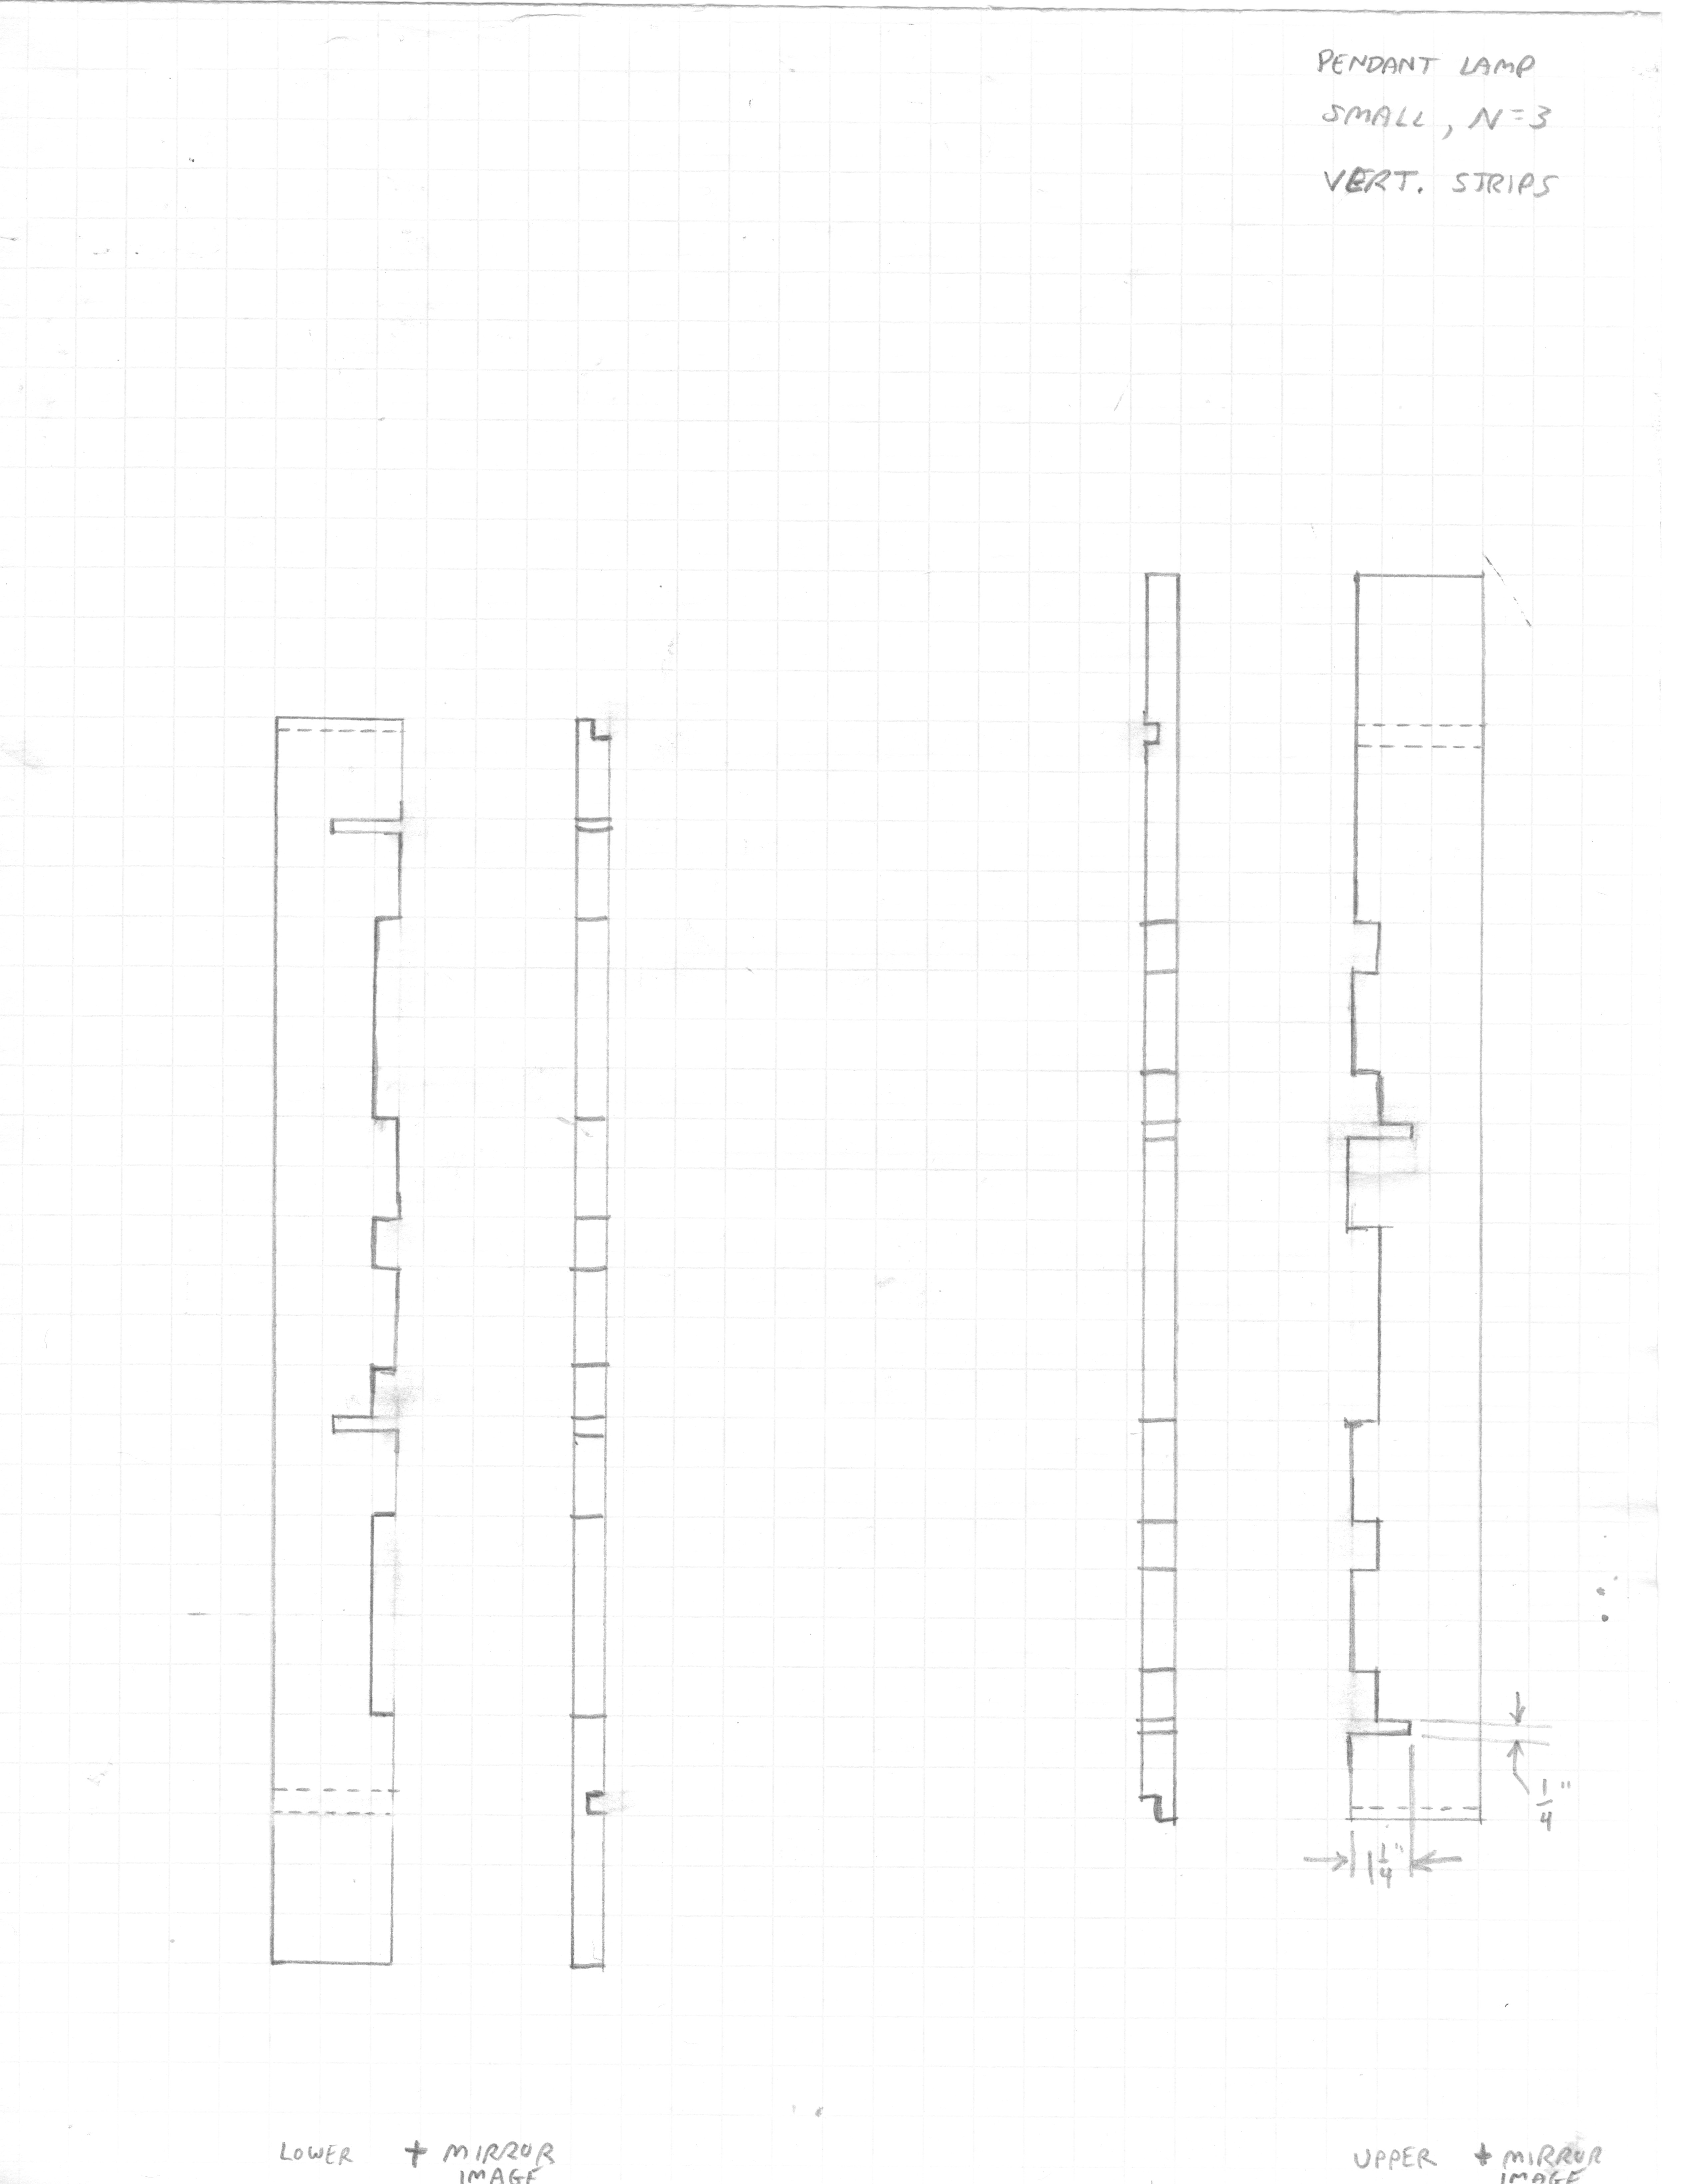
Here are scans of the pencil sketches I used while making these lamps. They are not guaranteed to reflect the final dimensions and make lack soem last-minute chnages, but they can provide a very good start for guiding building. These were done on graph paper (see the faint lines) and the scale was generally 1 inch per box.
- Rough Dimensioning Worksheet - I used these rough diagrams I found on the web, though found out they were not even approximately to scale with the aspect ratio very distorted. You can see my attempt to compensate for the skewed aspect ratio here and which served as the initial rough dimensions for the project.
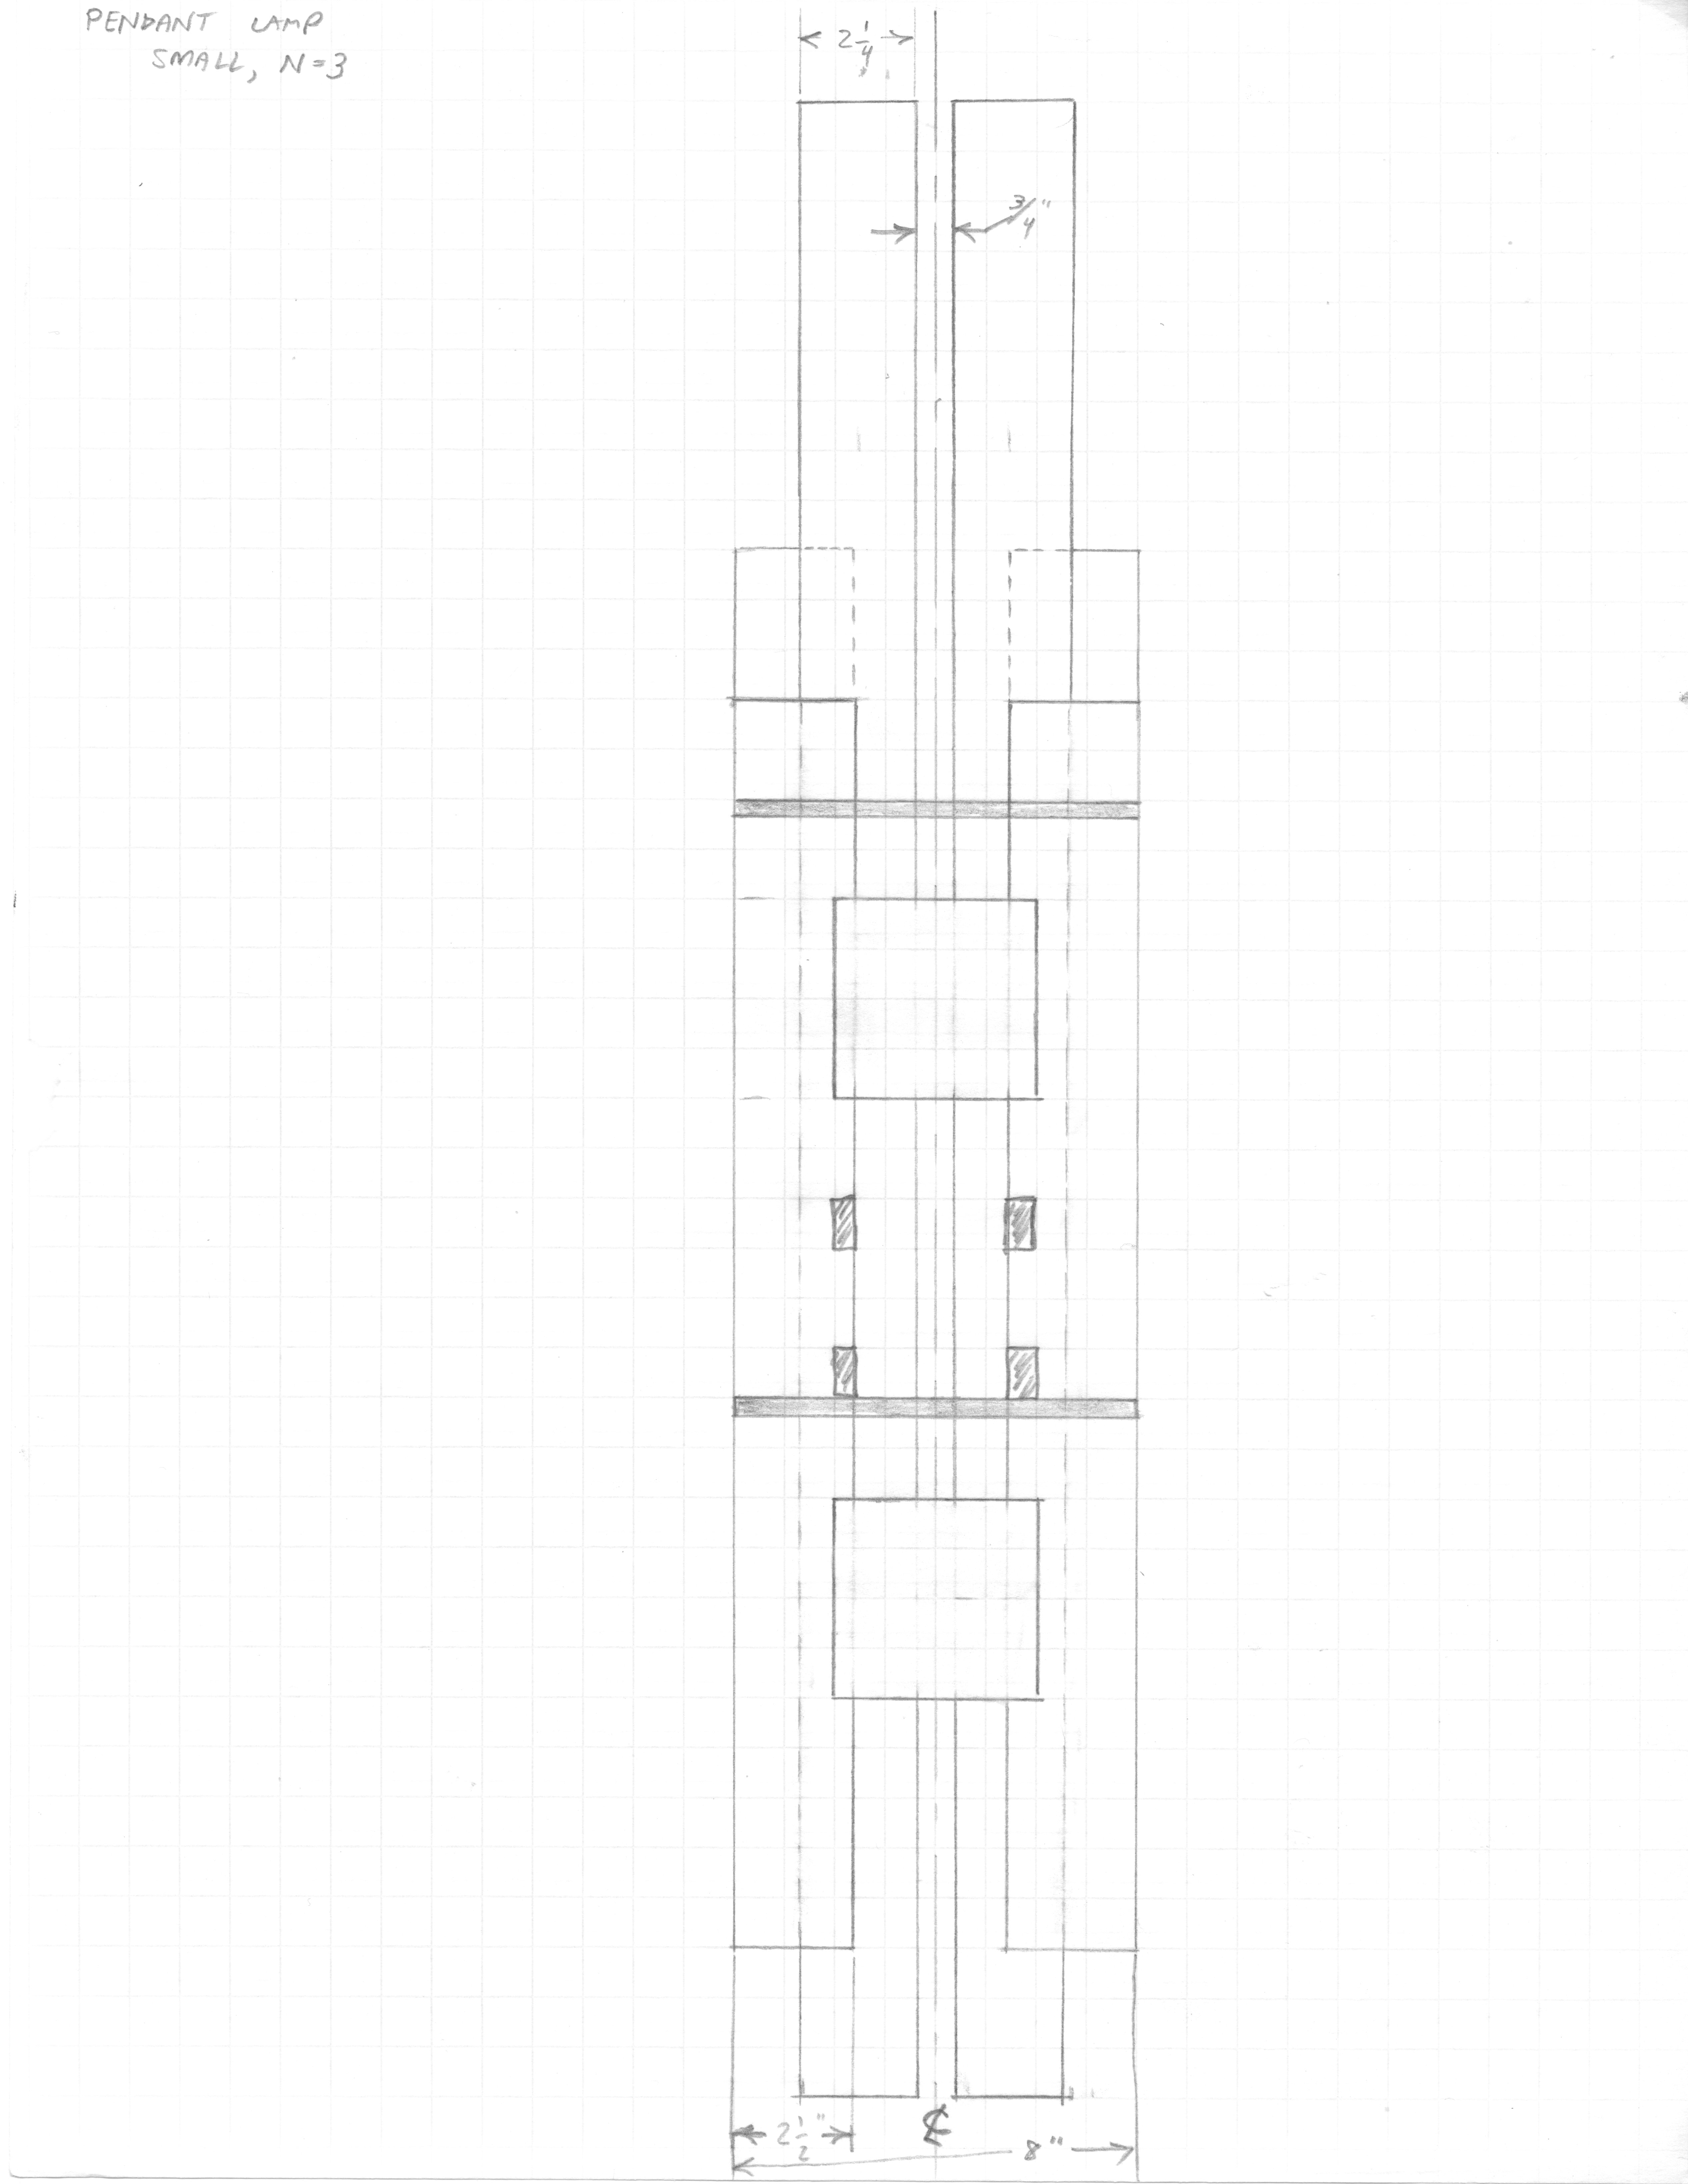
- Front View
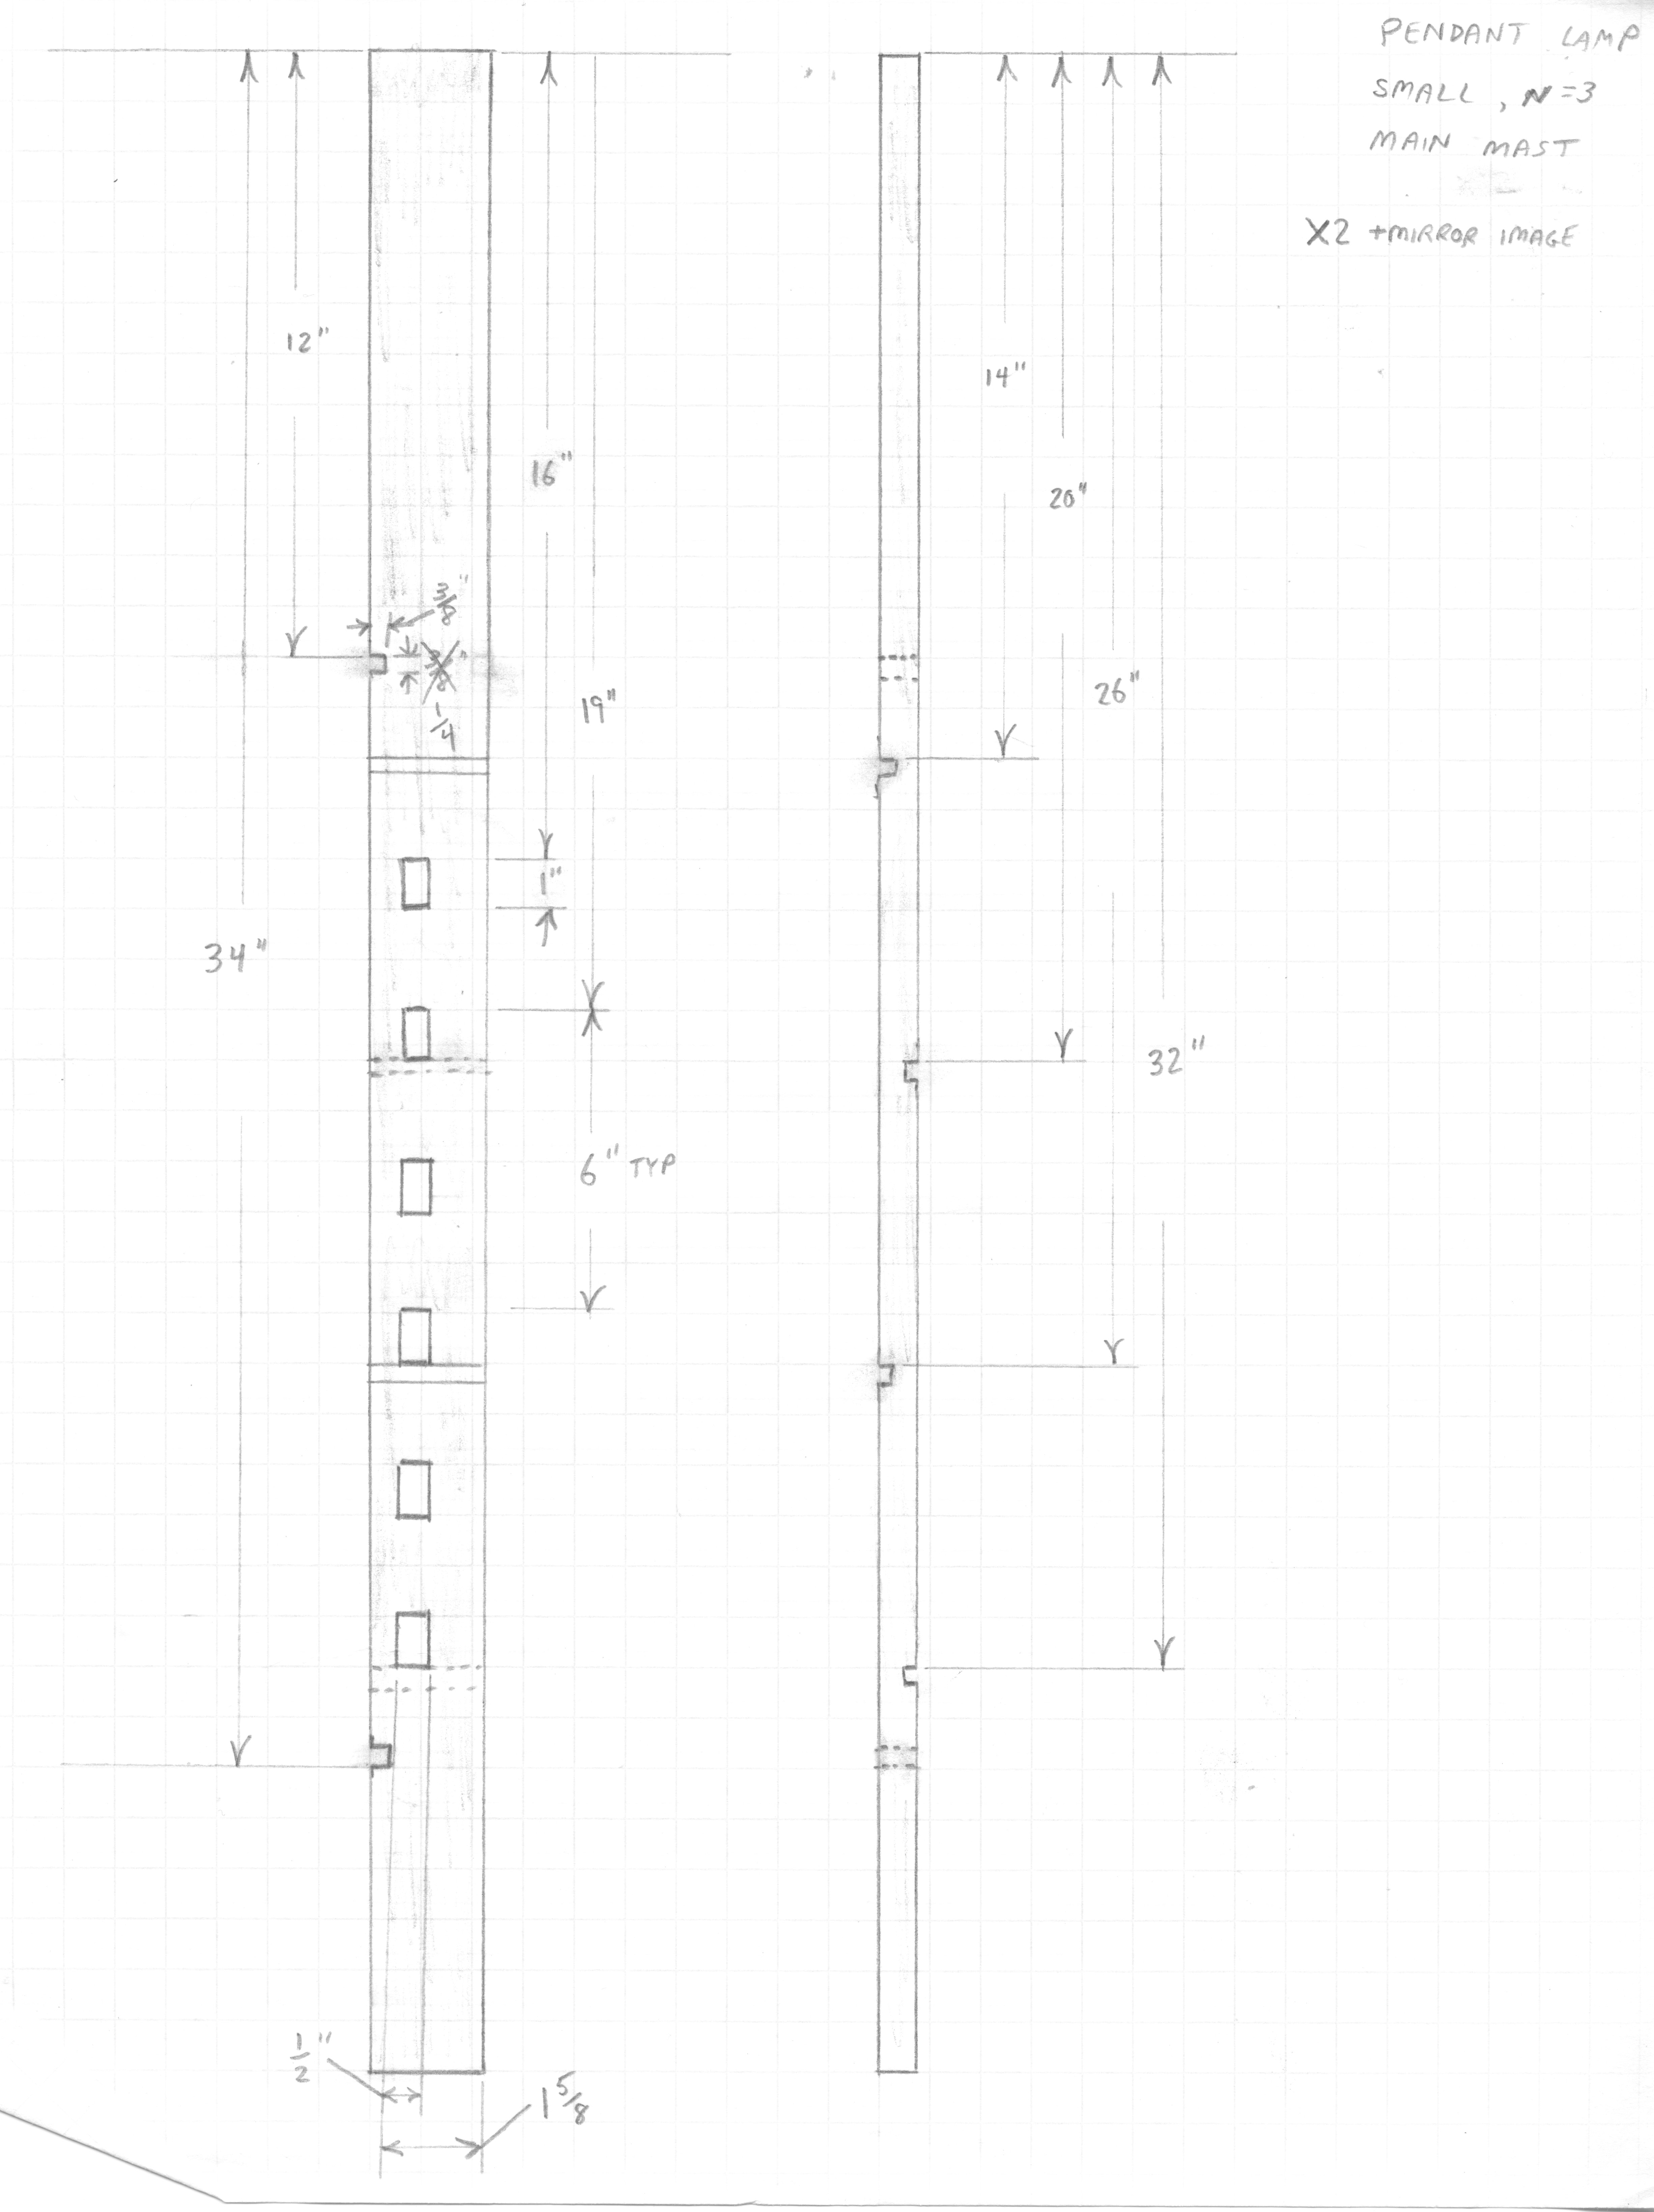
- Main Posts - These are based on my ceiling height and how far over the dininhg table I wanted them to be. If you ceilings are different or want a different height, the lengtrhs would need ot be adjusted.
- Side View
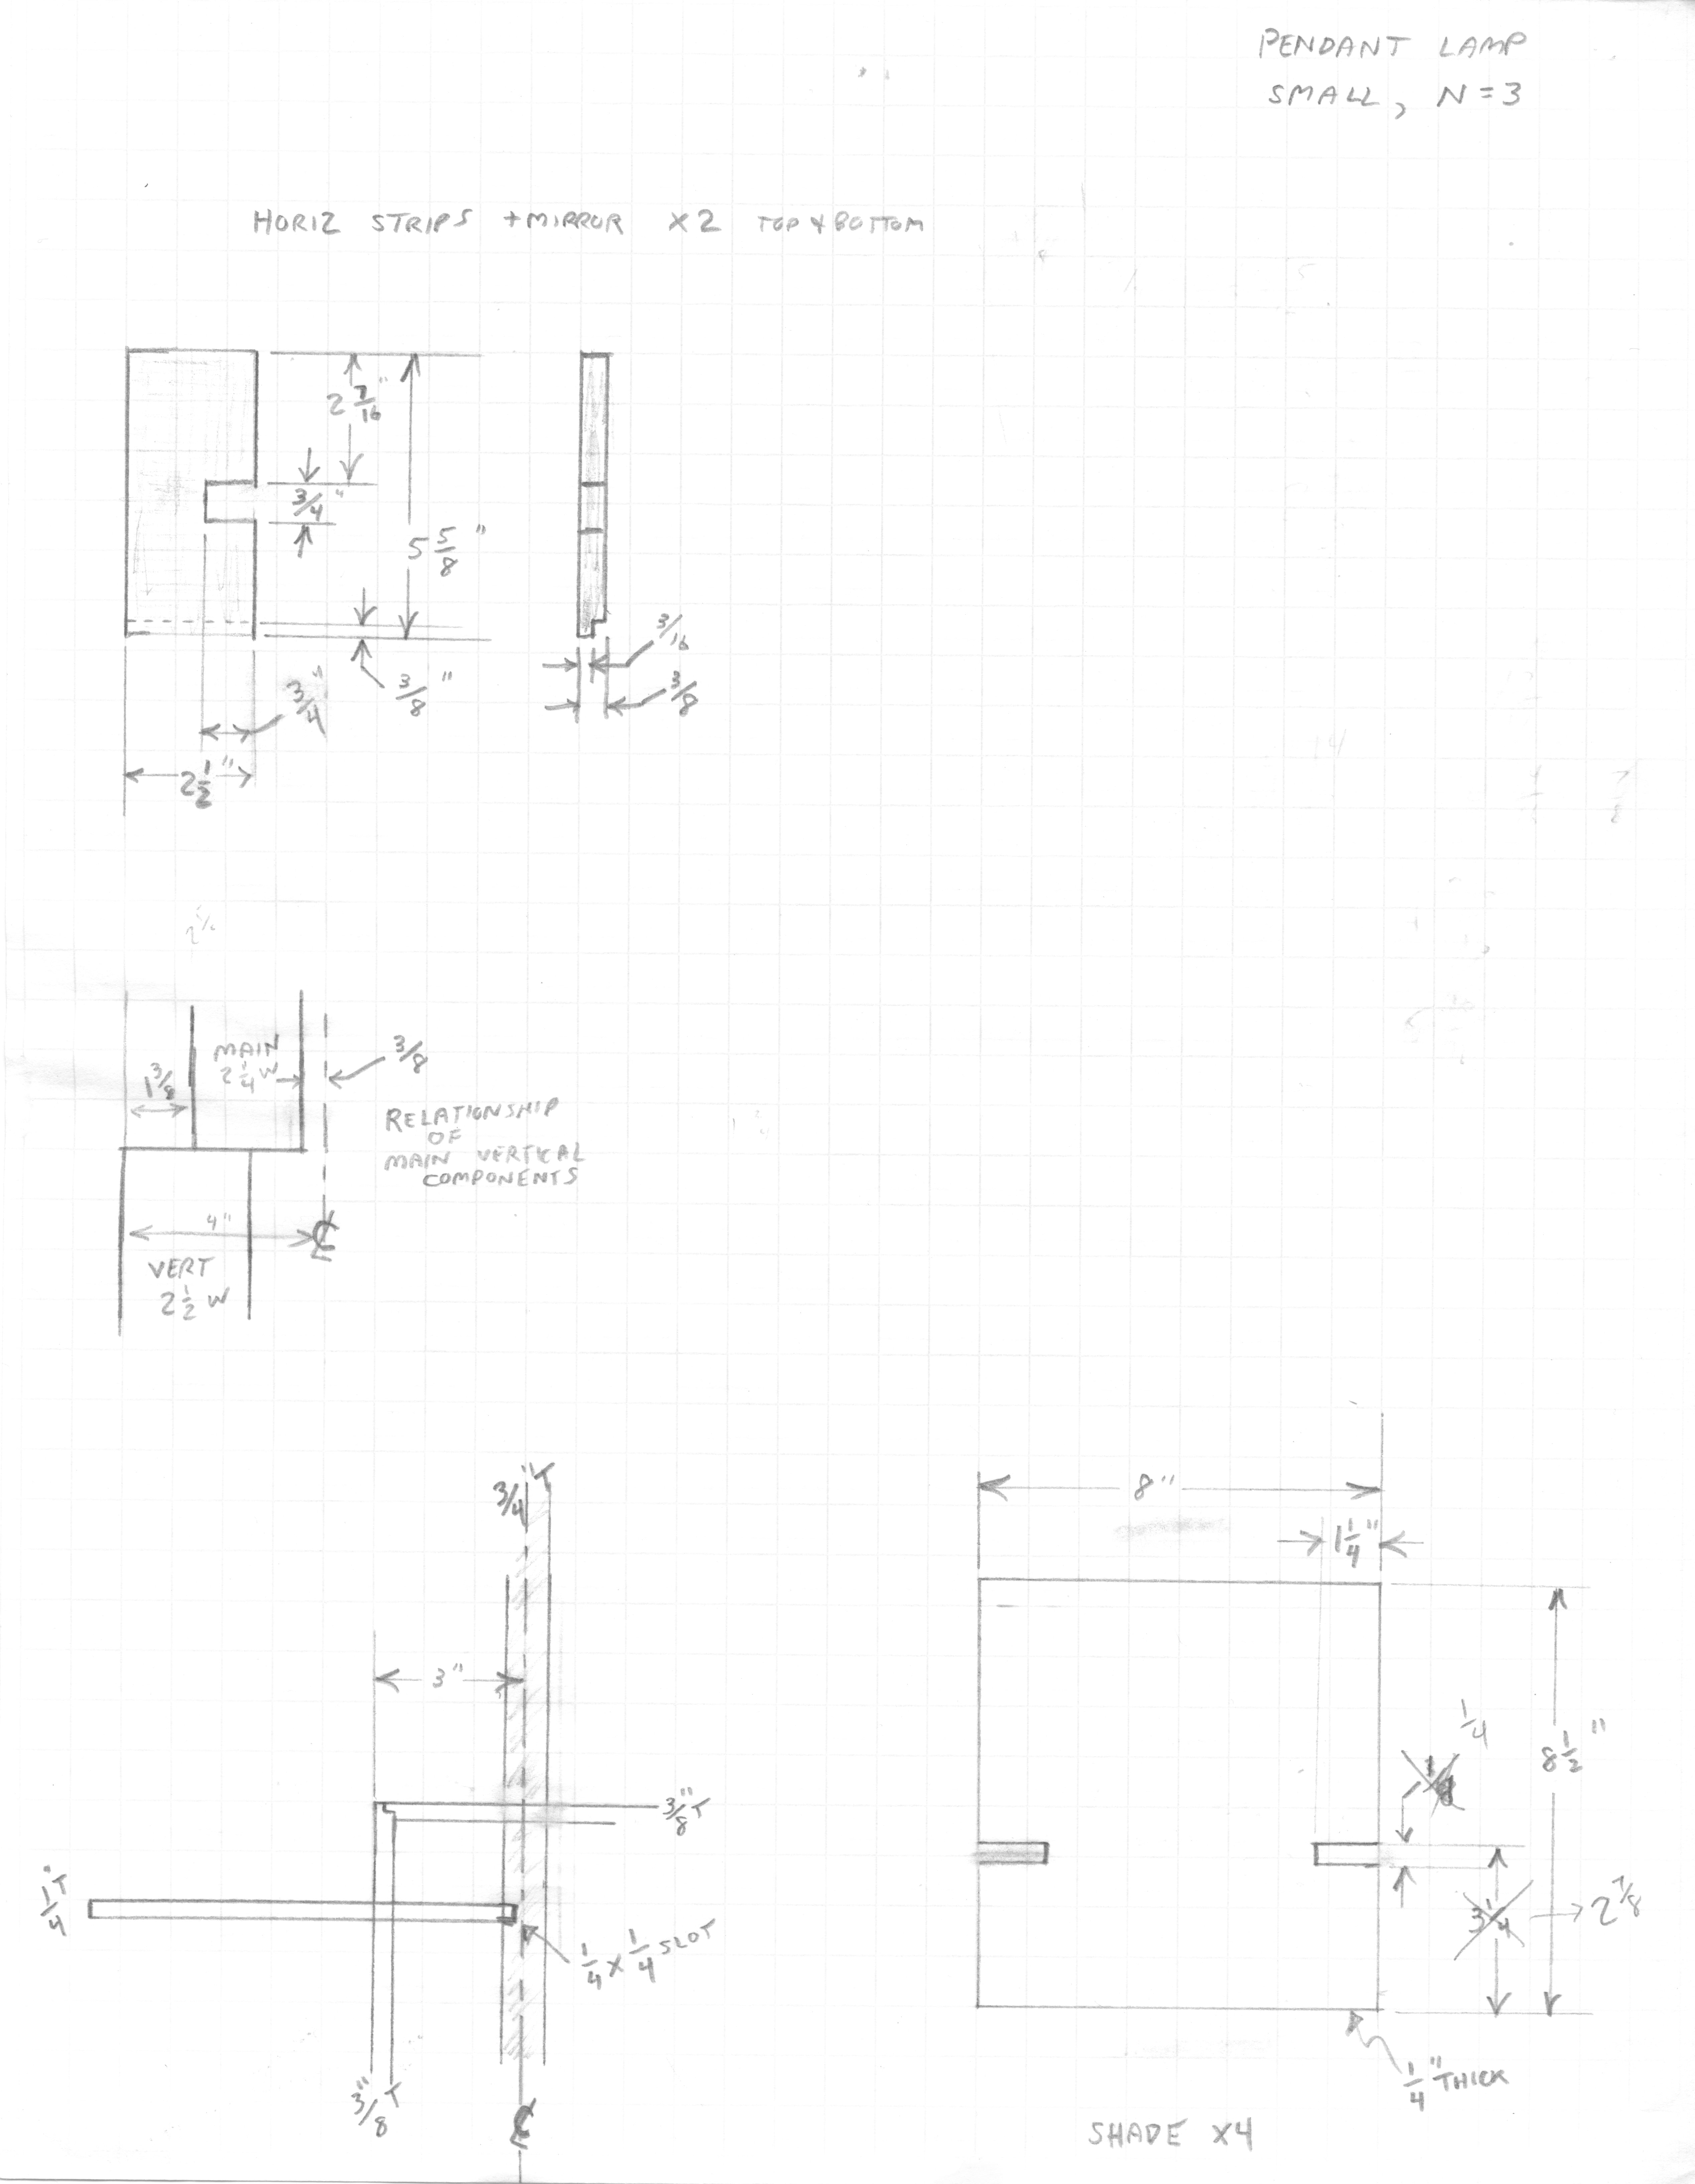
- Decorative Shades
- Shade Details
- Light Box Details
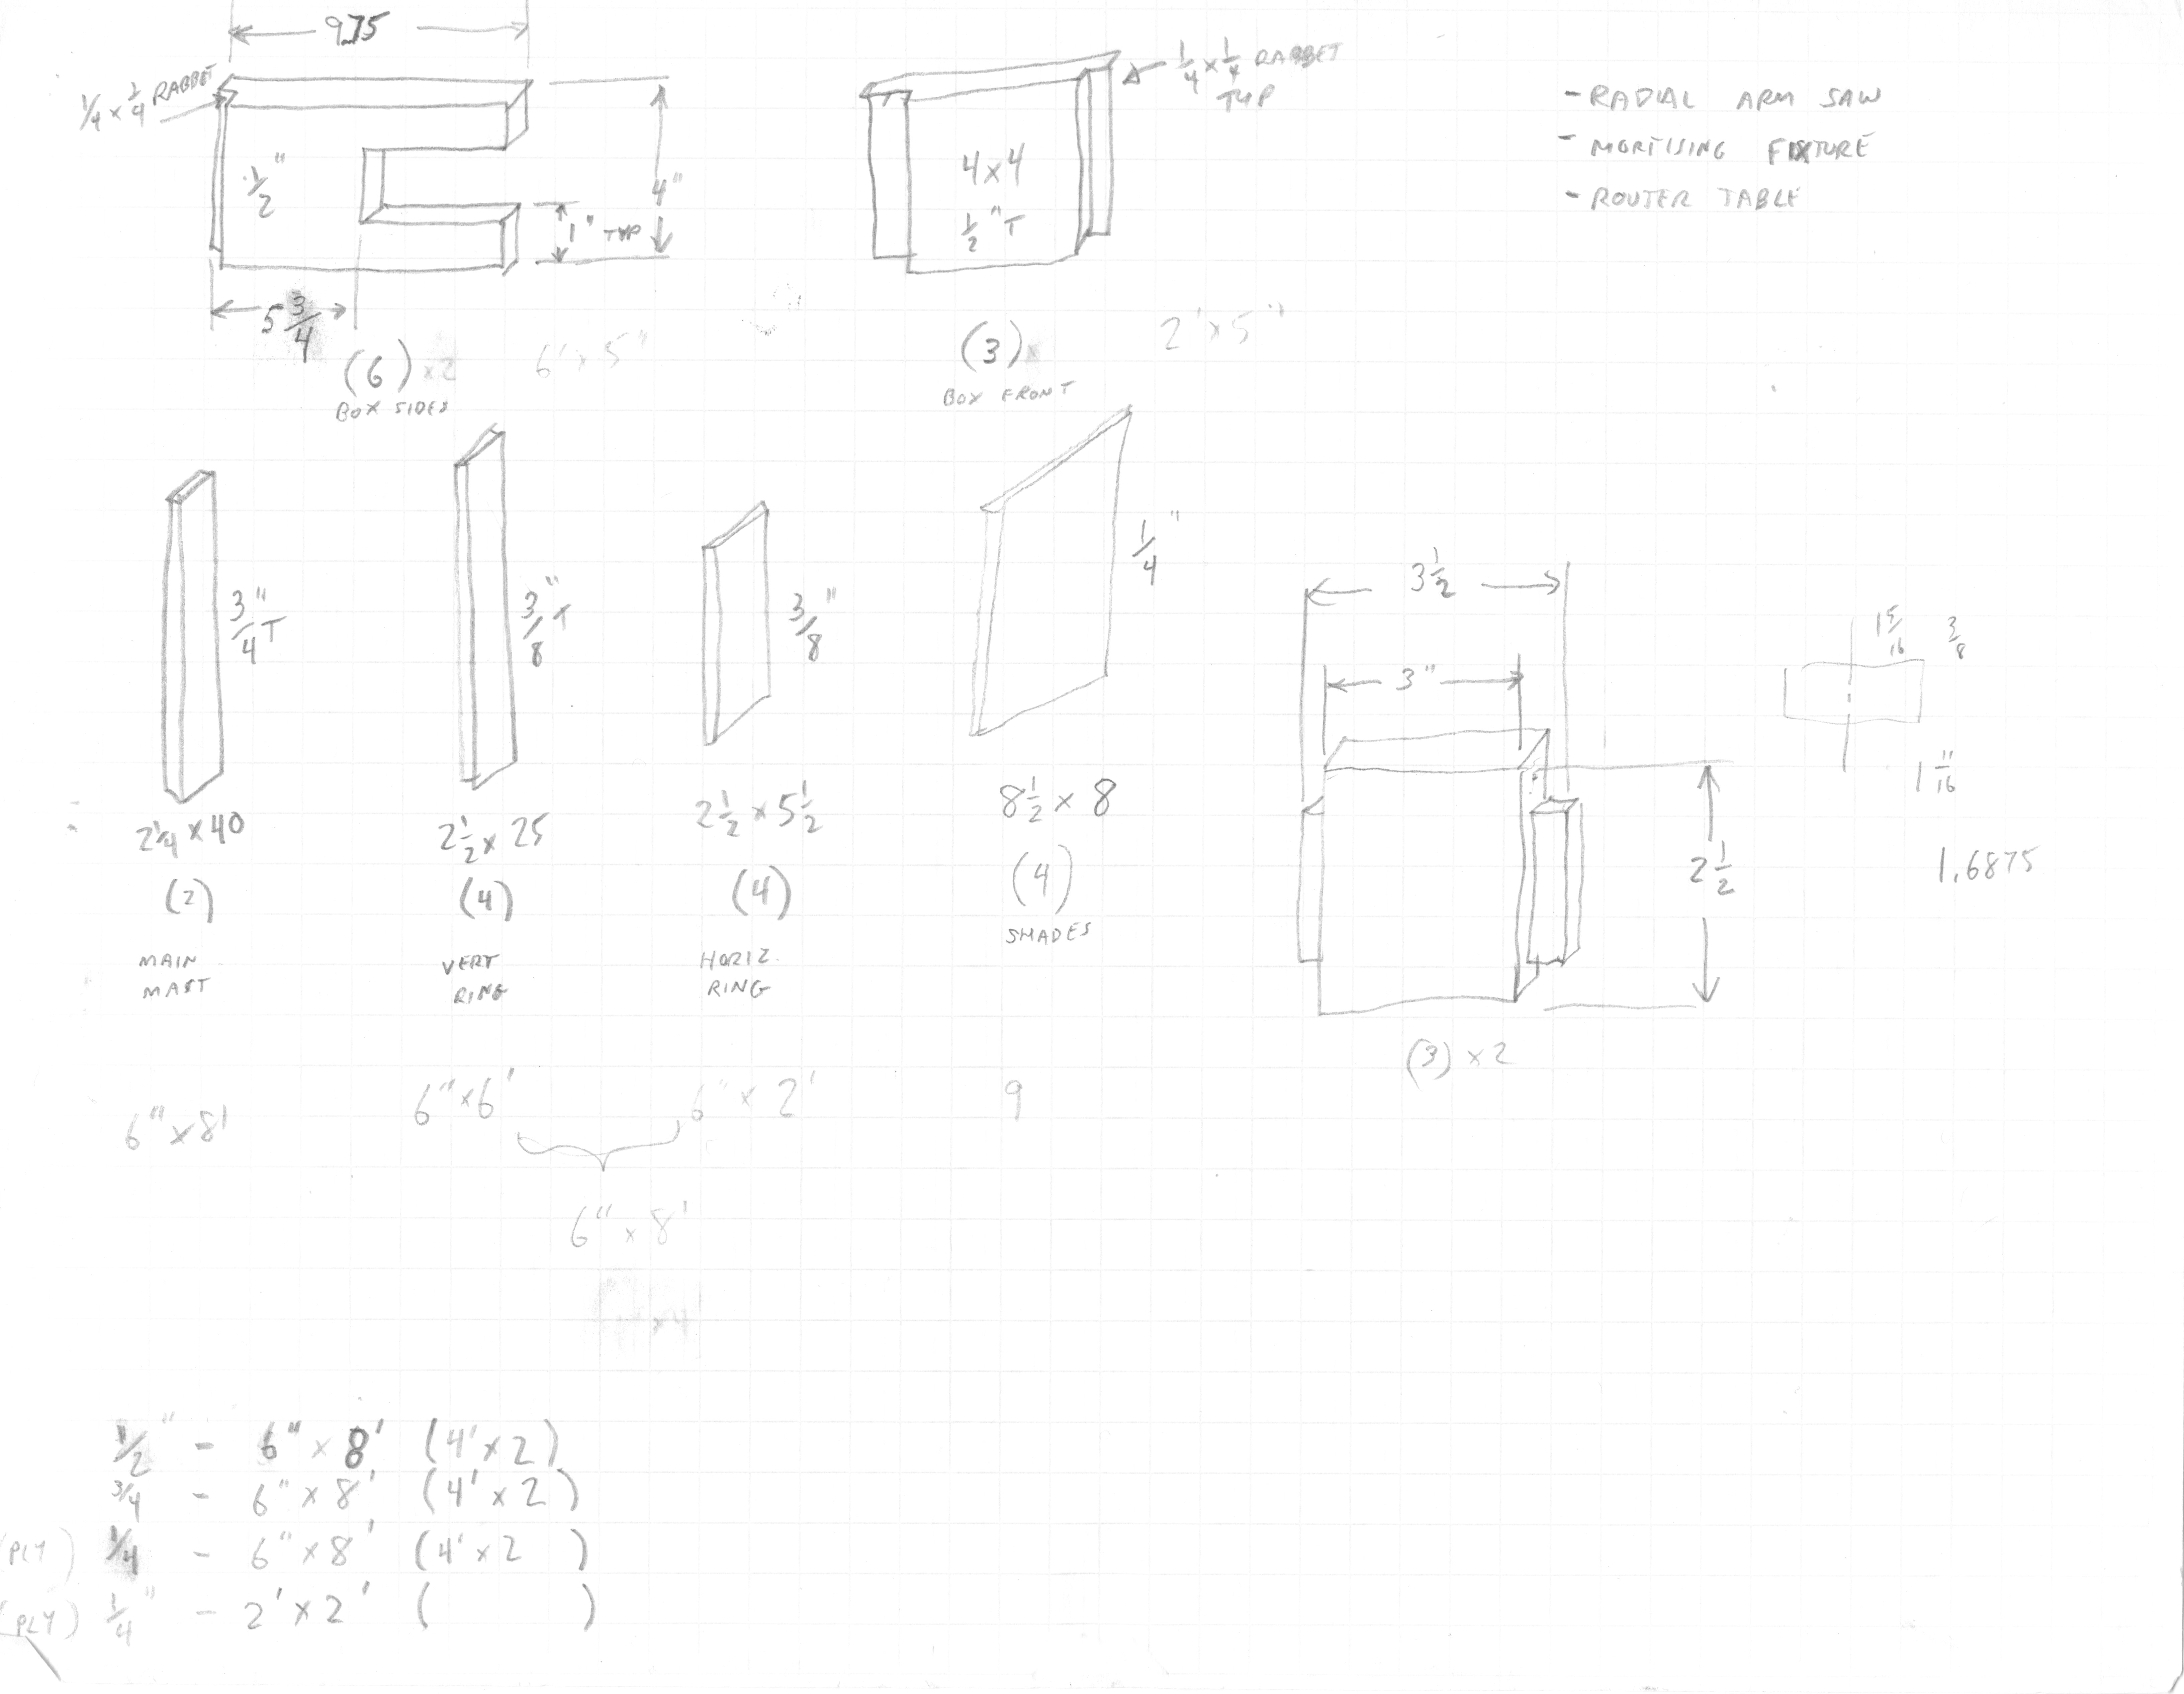
- Parts List
Some notes on construction:
- Because there are 3 light boxes, if you allow them to hang via gravity like I did, one side is heavier than the other and they will be slightly non-vertical. Adding a weight (lead) to some hidden place inside the light box is what I plan to do, but have not done this at the time this page was written.
- The mortise and tenon joint I used for the back end of the light boxes was ill-advised. There was too little clearance to the edge of the sides and the wood just broke off. I would replace this with something else like a rabbet joint.
- To hide the wires running up the posts I used a 1/4" dowel that I also stained and used a clear acrylic chaulking as the adhesive so I could easily take it off to disassemble. I used 3 pieces so there was a gap for the entry of the wire into the channel from each light box.
- The final solution for the ceiling hanging bracket was very improvised at the end. Some U-bolts ground down, some I-hooks opened up and a regular ceiling box mounting plate were used to allow it to gravity hang and give it some sway in case accidentally bunmped into. The images above are the best source for seeing the details.,
Future Project
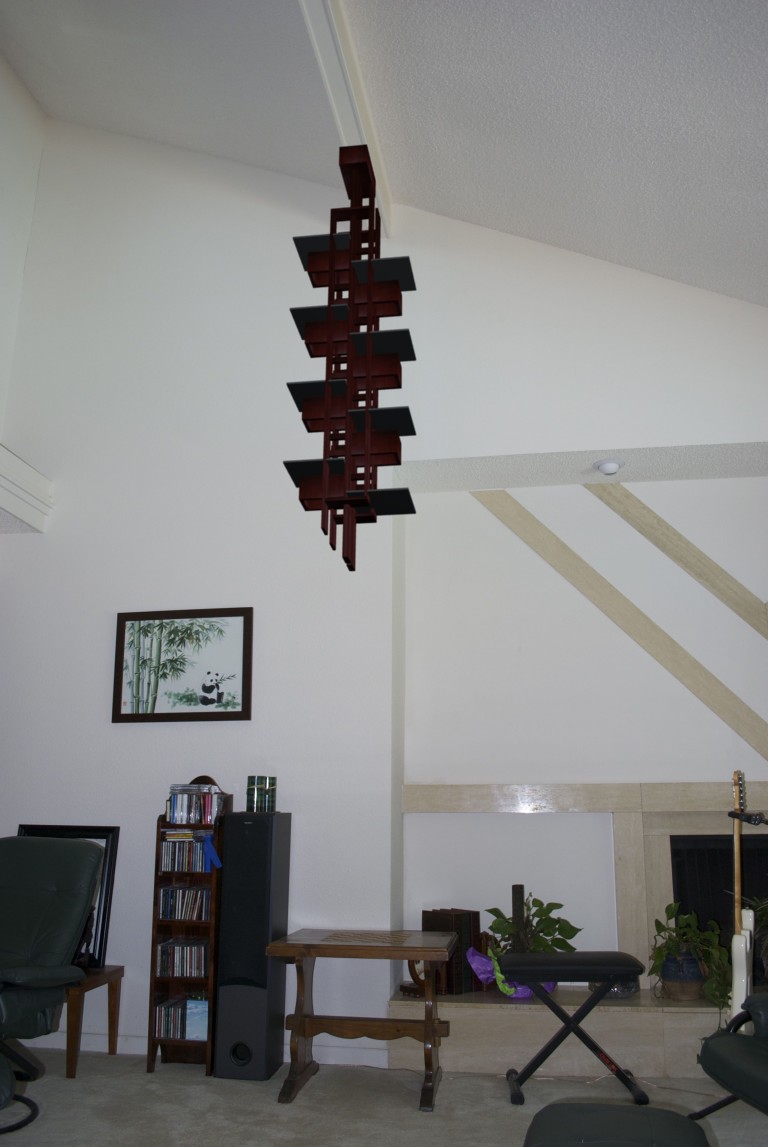
Living Room Views (Rendered from 3D model)
3D Model of Medium-sized Pendant
I believe these pendant lamps are actually more majestic looking when
they are longer (more "light boxes"). You can buy incrementally longer
ones, but the price also gets longer. We have a fairly high living room
ceiling and the idea is to make matching pendant lamps hang from the
ceiling as shown in software simulated views below. There's probably less
than a 25% chance these will ever get made though.