 Cassandra.org
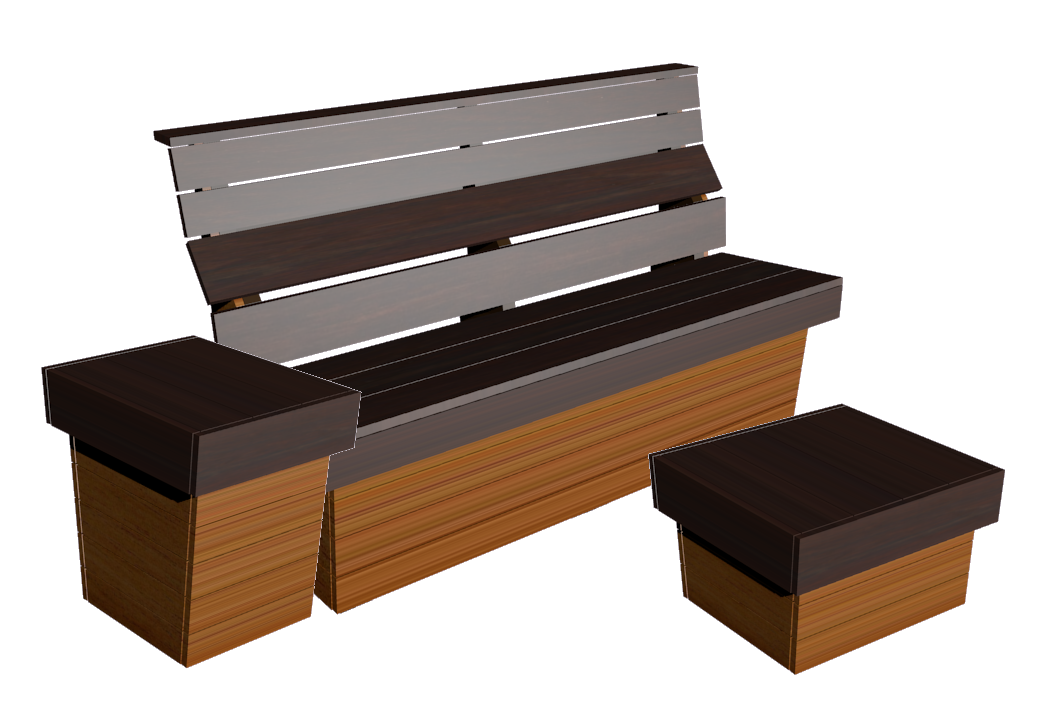
Finished Benches
Finished Tables
Story
As I was researching for designs and features for the New Decks Project, I really liked
the decks I saw that had built in furniture: benches, tables, planters,
etc. My original designs had such features but a few things conspired
to make me opt for stand-alone furniture:
- I started to get very particular about the geometry of the benches and tables for maximal comfort;
- I started wanting a lot of benches and tables;
- I decided to contract out the structural deck work;
- I worried about not getting things built exactly as I wanted;
- I worried that this would probably ad a significant amount to the cost;
- I liked the flexibility of being able to move the furniture around, even taking it with me if I ever had to up and move, or just moving it if I find a better layout;
In the end, this first phase consisted of building the following pieces:
- (4) benches;
- (3) narrow side tables;
- (2) wide side tables; and
- (3) ottomans.
Ergonomics and Prototypes
Bench frame side profile
Assembly of Prototype
I wanted a lot of bench seating, and I wanted it to be comfortable
seating, so I spent a fair amount of time looking at designs and
researching seat ergonomics. The two most influential sources were a
rough bench design sketch I found via Google (see
here), and a PDF file from an office chair manufacturer on seating
ergonomics. The dimensions of the bench design image were not crystal
clear, and the size of the lumber was larger than I liked so I adapted
this general pattern with the preferred lumber sizes and researched
dimensions from the office chair company's PDF.
Good office seats have many adjustable components because good
ergonomics are dependent on a person's height and body dimensions. One
size does not fit all. Since I was not going to make adjustable deck
benches, I had to find a good compromised of comfort for the varying
sizes of people. Not knowing if the compromise dimensions would work,
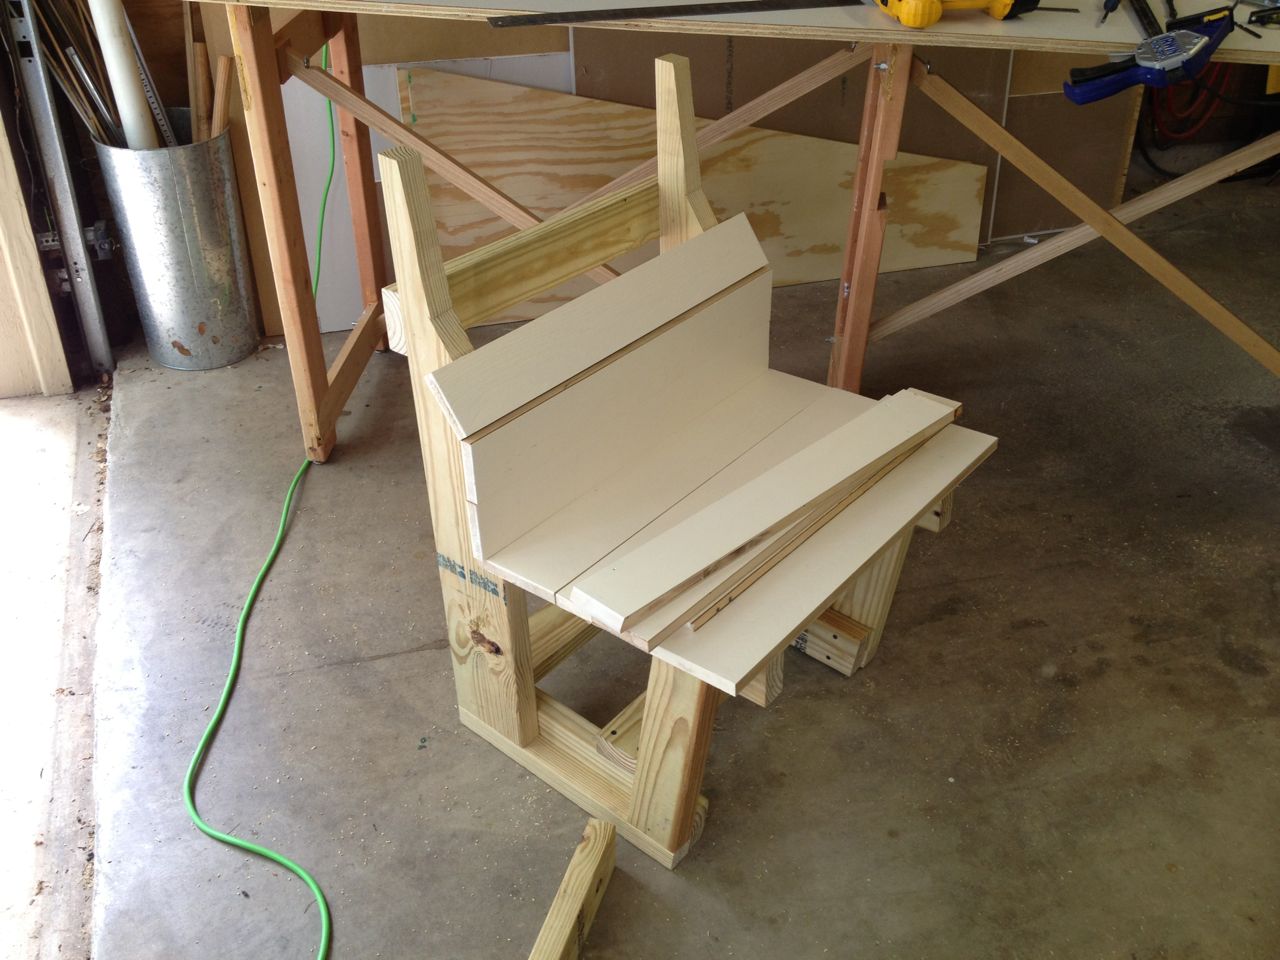
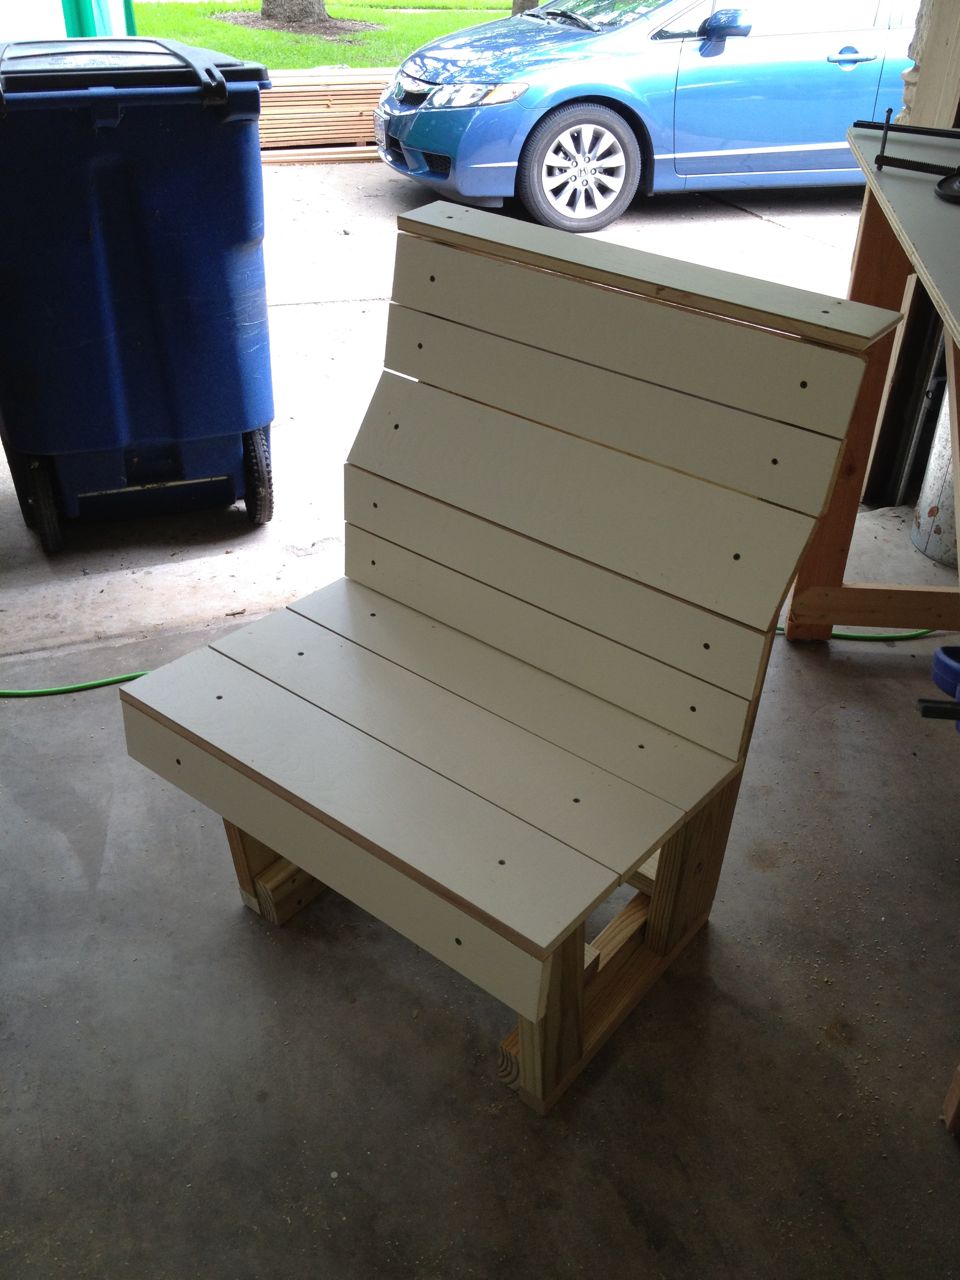
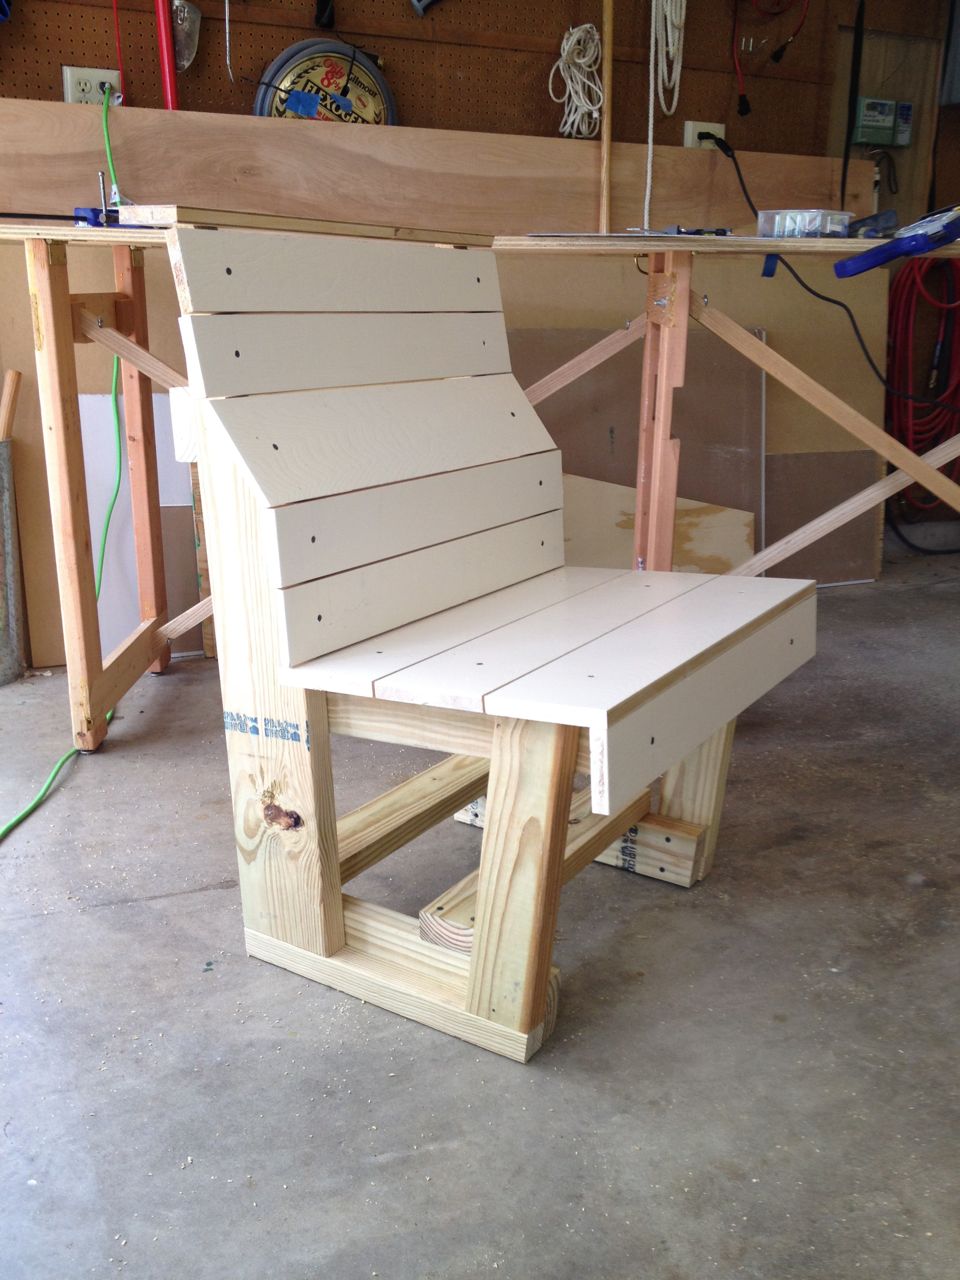
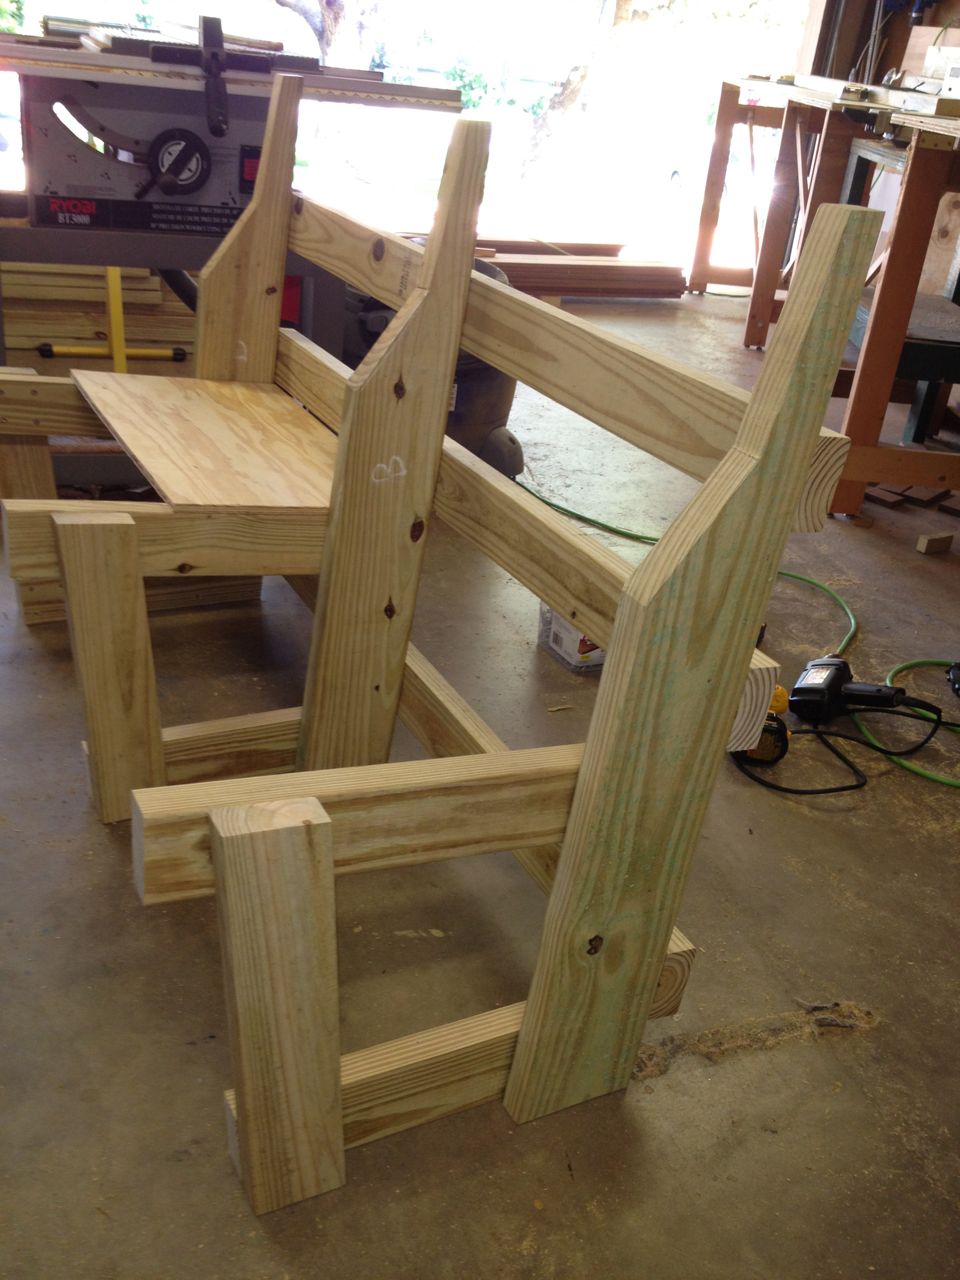
and having some spare wood in my garage, I decided to make a prototype
bench before committing to the final bench dimensions. It was more a
chair than a bench, due to the length, but it had the same ergonomic
profile. This turned out to be an invaluable exercise. I found that
just a half inch difference in the height of the lumbar support
inflection point would be the difference bewteen a completely
uncomfortable chair and a very comfortable one. The prototype allowed
me to avoid building uncomfortable benches.
Prototype side view
Prototype front view
Another important part of comfortable leisure seating (for me) is
having armrests. It is usually bad to have armrests for a computer
chair, but these were for relaxing not typing. I also wanted table
space and so had the tables interspersed with the benches to serve both
purposes, as the height of a side table and the height of an good
armrest is just about the same.
I also wanted some ottomans for putting your feet up, as well as low
coffee table-like surfaces and it turns out both these would be the
same height, so I made pieces that could function as either, with the
added side effect of it also being an alternative (albeit lower)
seating option if someone was so inclined. Good seating for kids too I
guess.
Early Designs
Side view of bench
Model Rendering: Original Design
The benches needed to be long-lasting and weather resistant as well as
easy to build. I originally was going to use all pressure treated
lumber with stainless steel screws. I would then paint/stain them to
match the deck, which at this point was going to be something near a
mahogany color (it would change to be Ipe). As I do with all my
woodworking projects now, I begin by sketching in pencil, and once I
have a rough idea, I model them down to the individual pieces of wood
on a computer (using the fabulous Blender software. At right, you can
see the original plans. This allows me to refine the ideas and begin
to visualize how the fasteners will go and how I can best assemble the
work.
Original designs on deck
Original "angled" bench
I had planned to make one of the benches follow the angled contours of
the deck/fence for one placement, but I abandoned this when I did not
want to add complexity to the design and wanted to avoid
special-purpose pieces. Thus, all four benches are identical size and
shapes, which simplified the building process considerably. I found a
good compromised size (5 foot length) that would work in all the
planned locations.
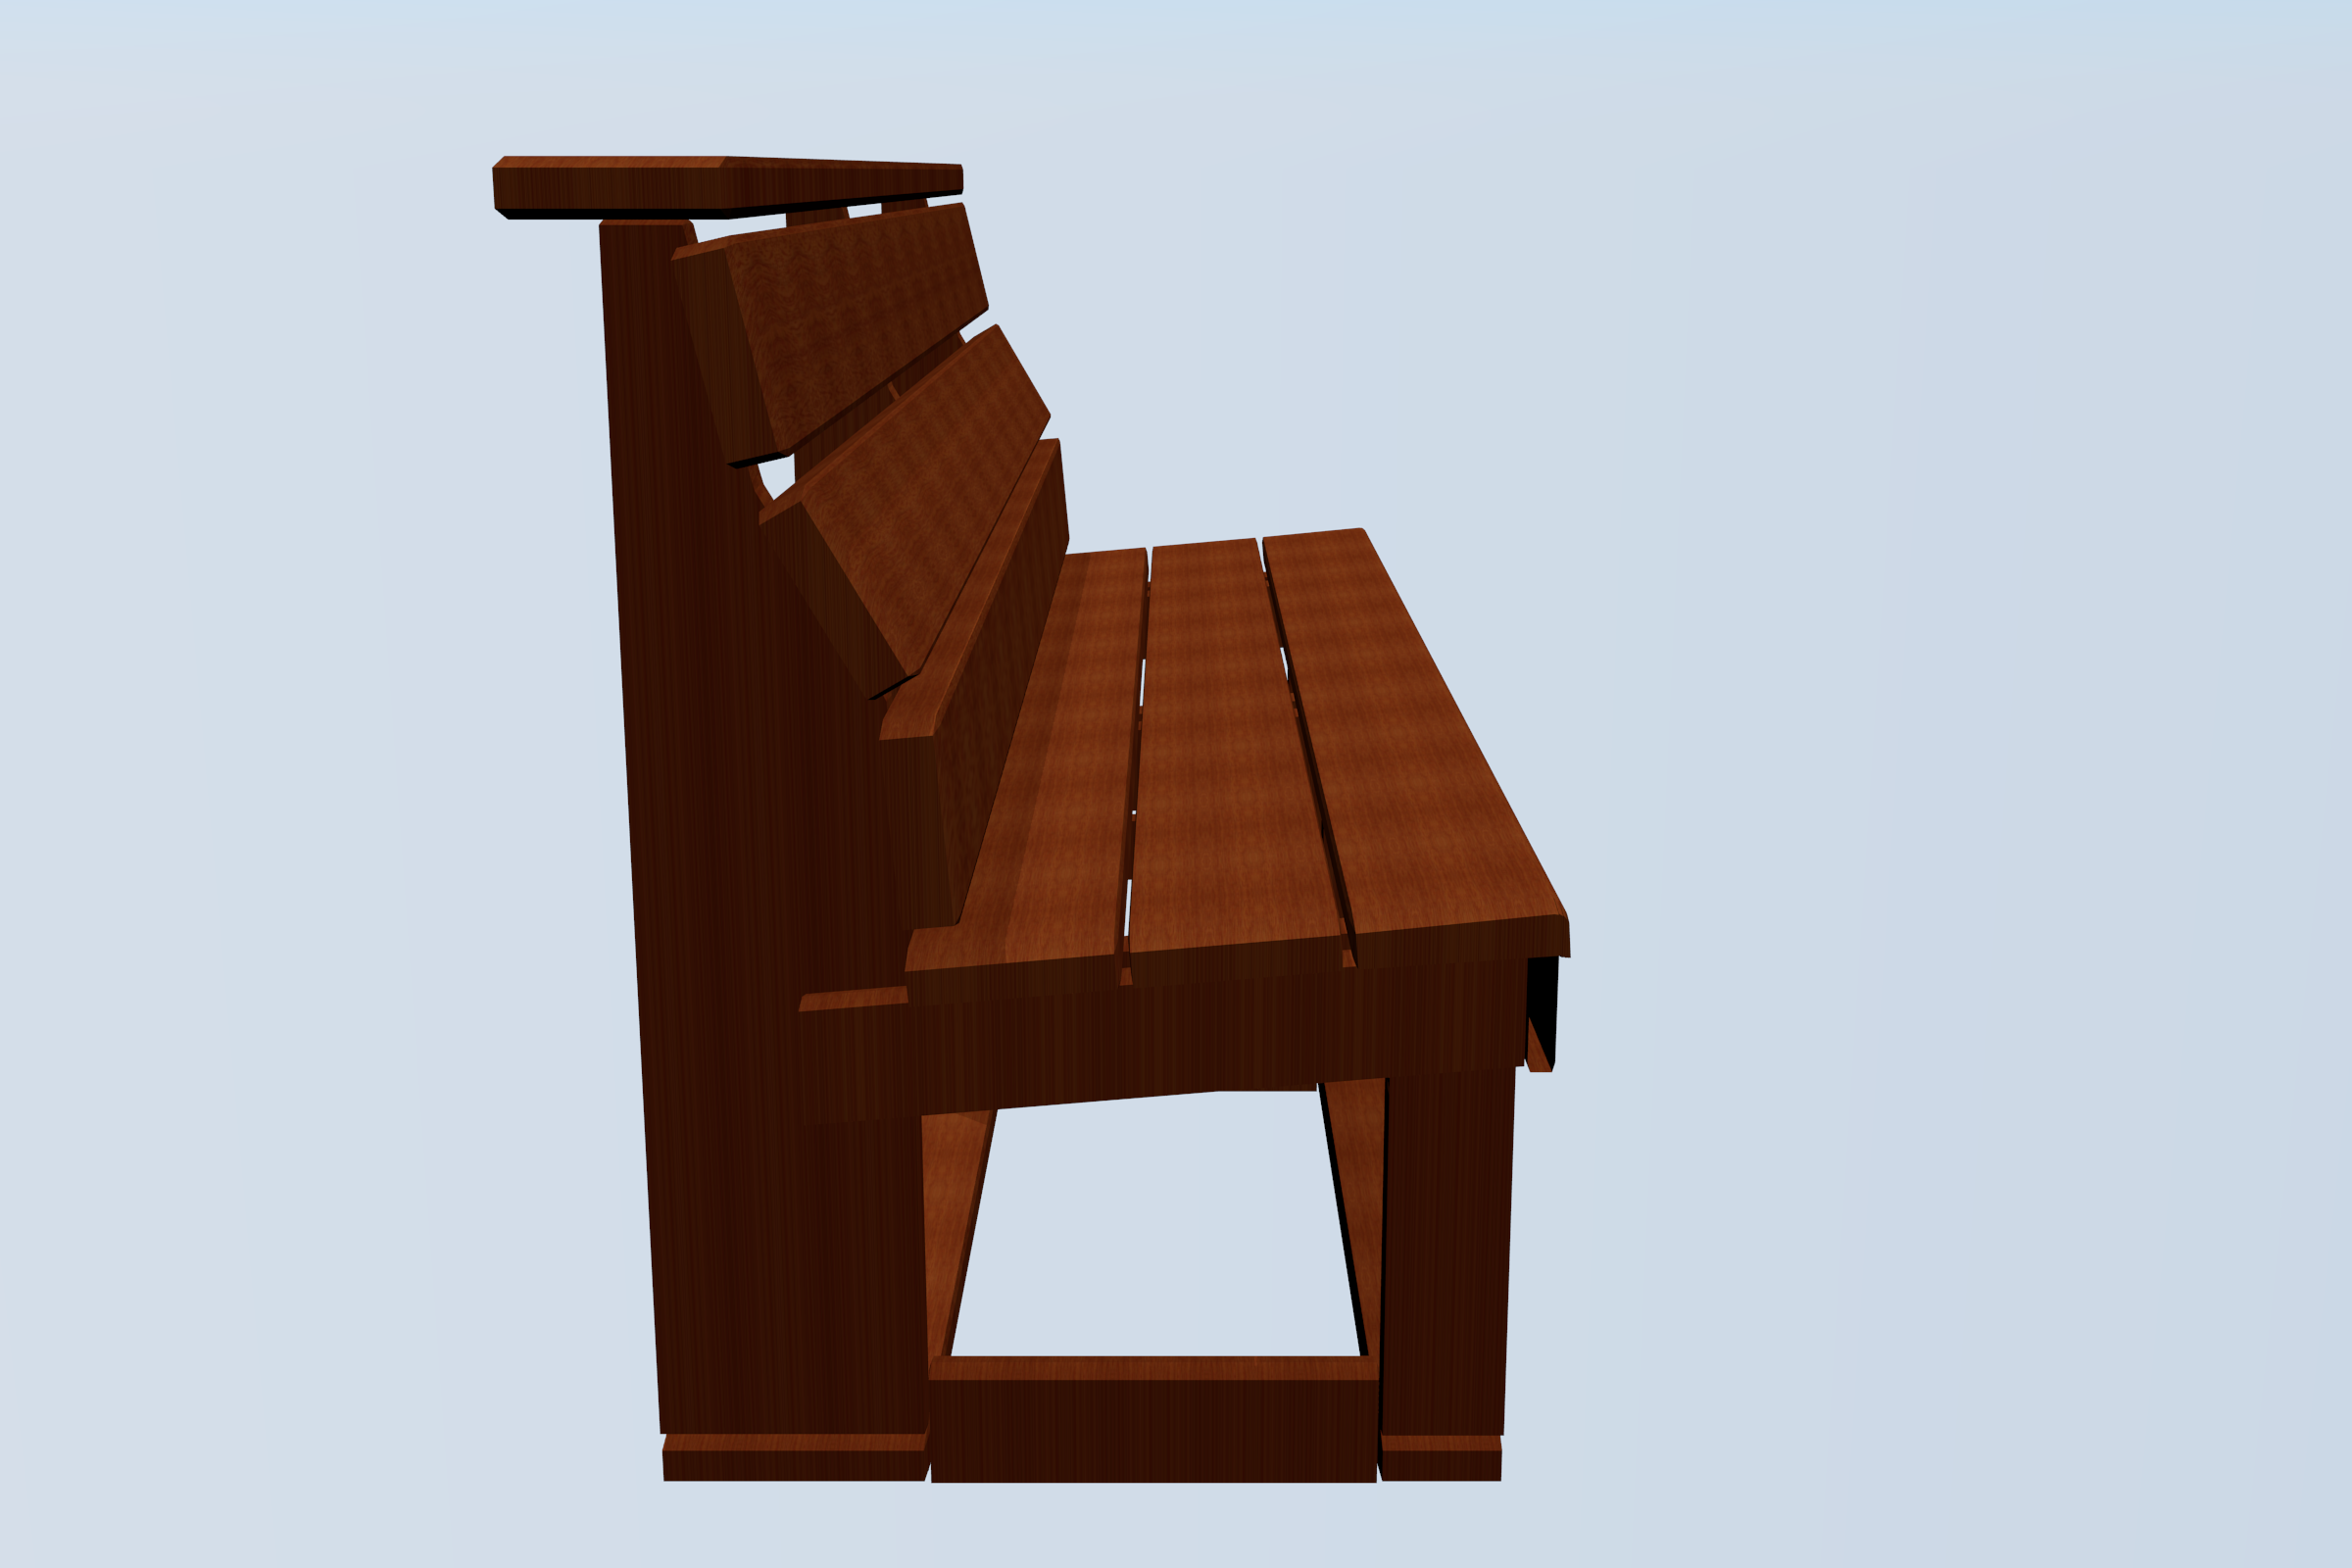
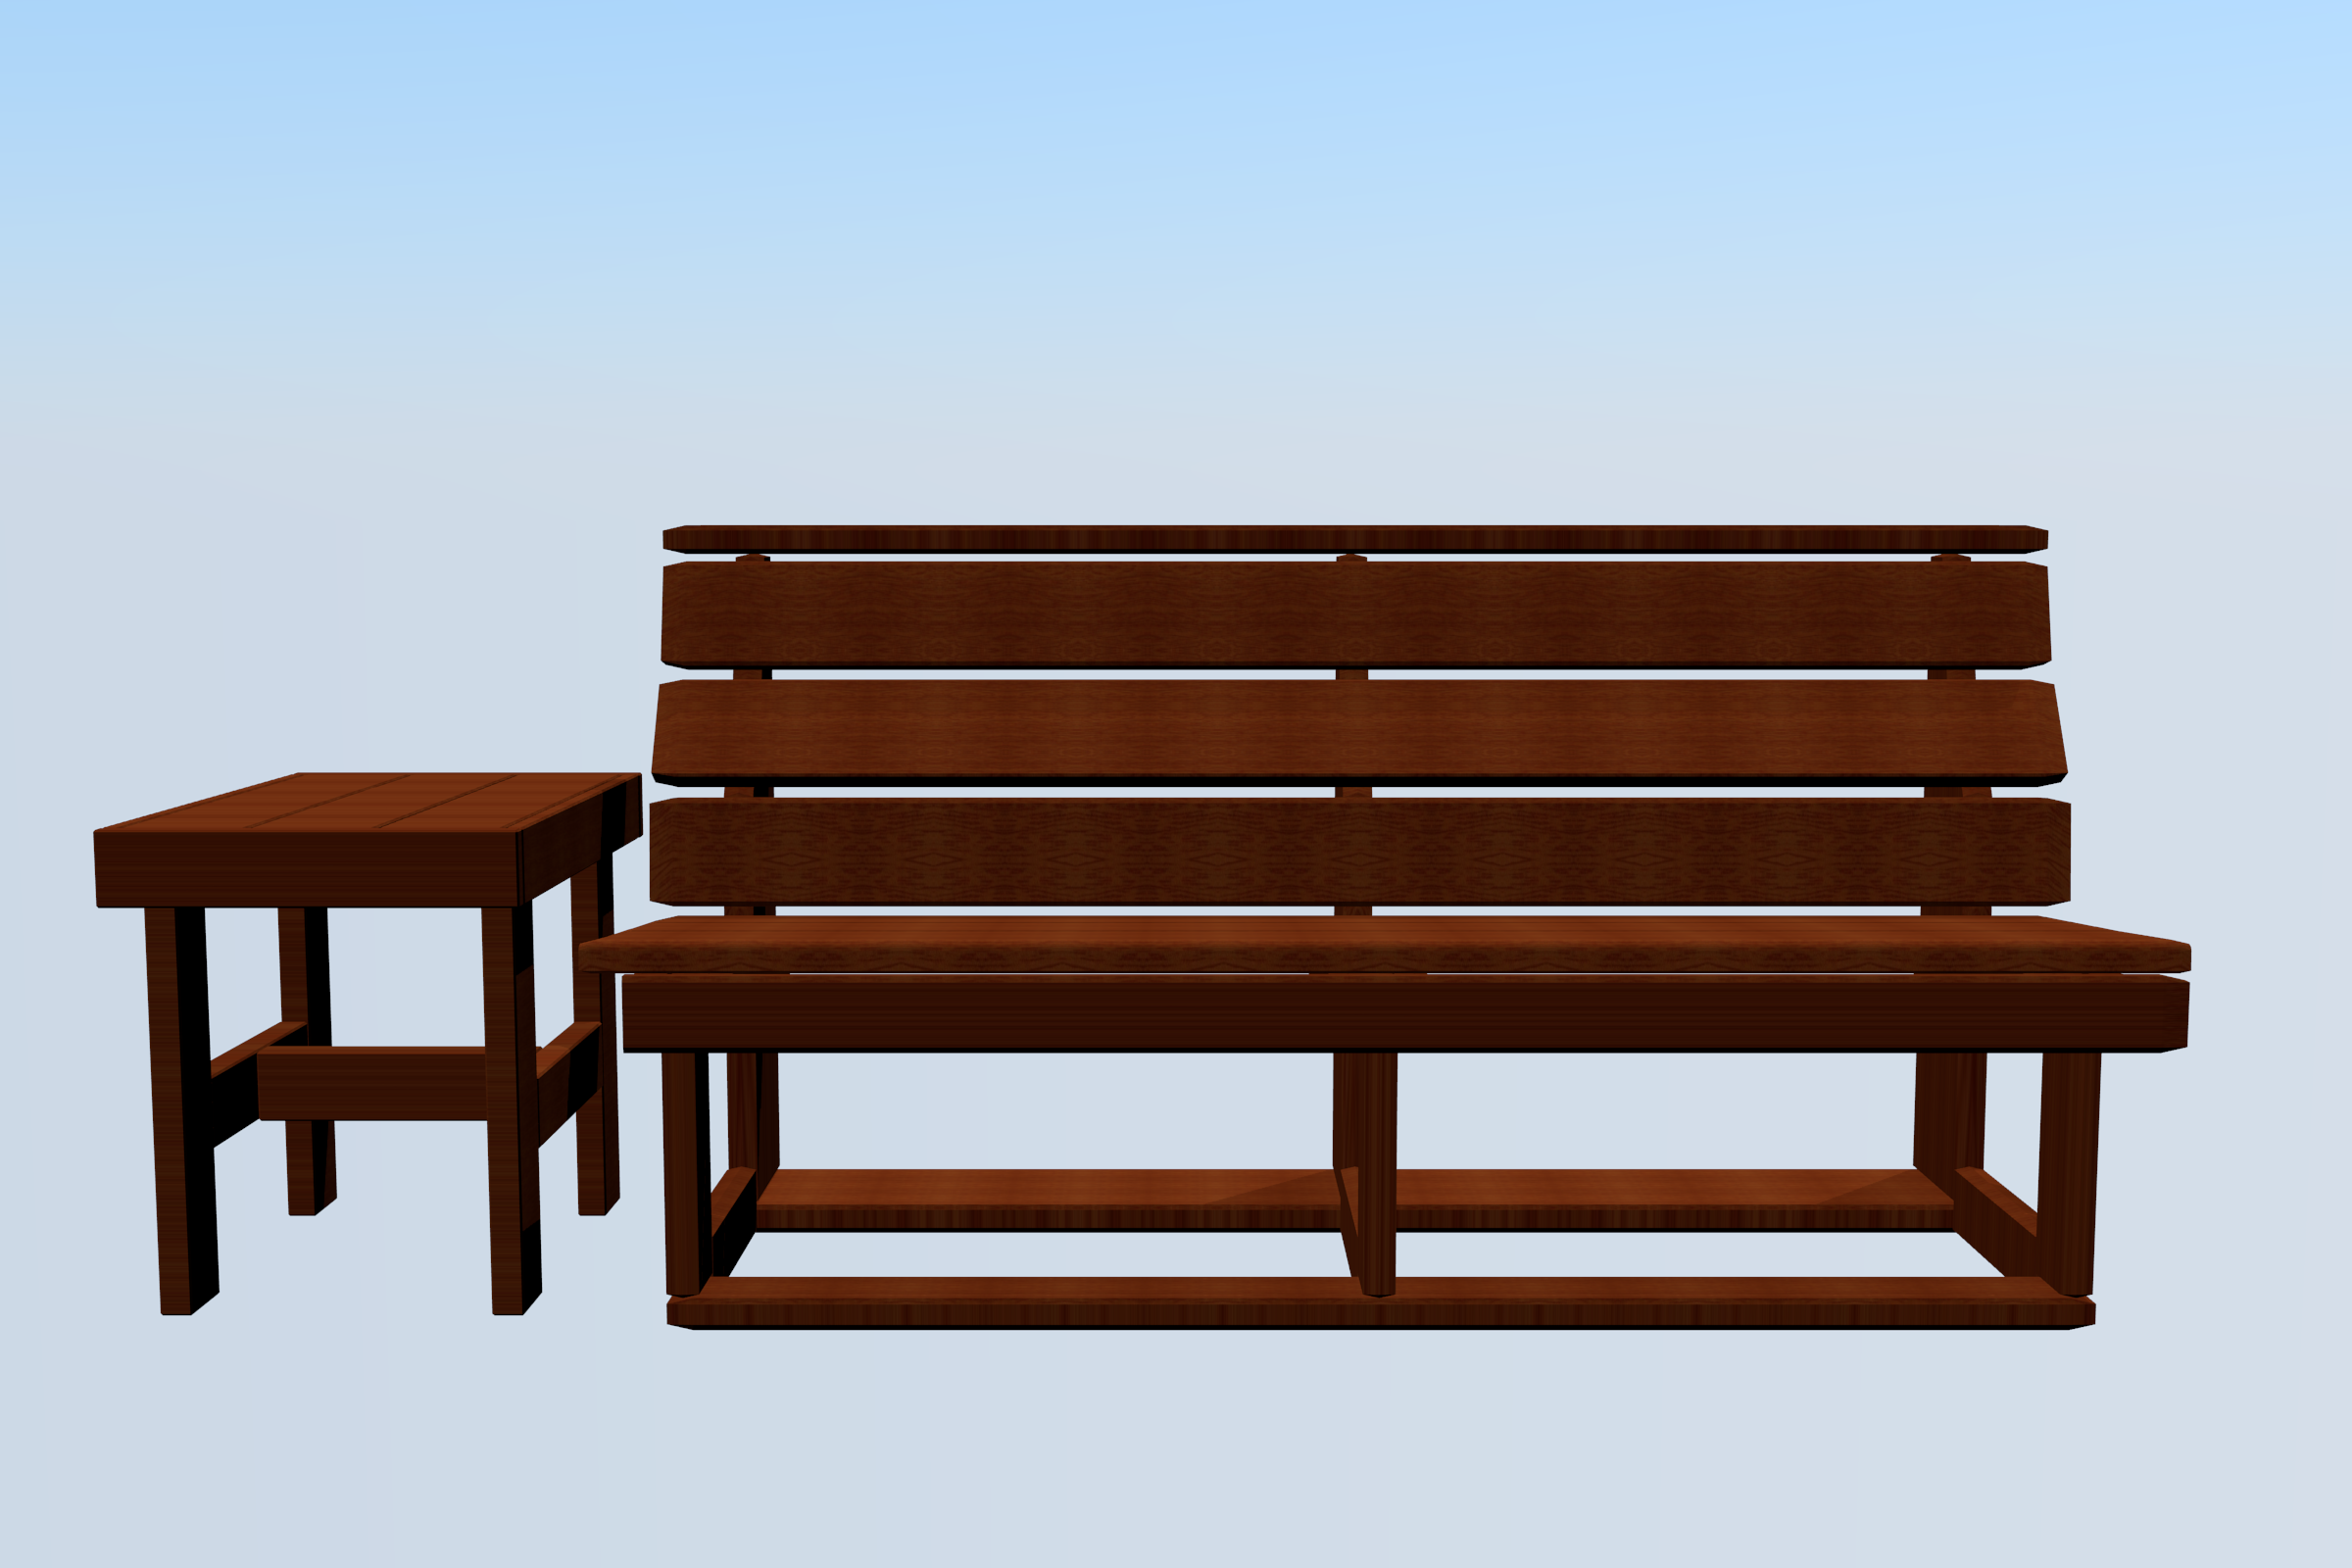
Final Design
Model Rendering: Final Design
The basic design I originally came up with stayed mostly the same, but
there were a few important changes I made before arriving at the final
design:
- Only using pressure treated wood for frame and nicer woods (Ipe and Cedar) for all visible surfaces;
- Moved the infection point for the lumbar support 1/2" lower to accomodate shorter people more comfortably;
- Angled in two sides of the table to match bench angle for consistency of design and to prevent the tables from being too blocky;
- I added a lower "skirt" of cedar planking to hide the frame and give a cleaner look that would match the deck area fences; and
- I used Ipe wood to match the chosen deck material for the wearable surfaces (the seat and back).
Blueprints
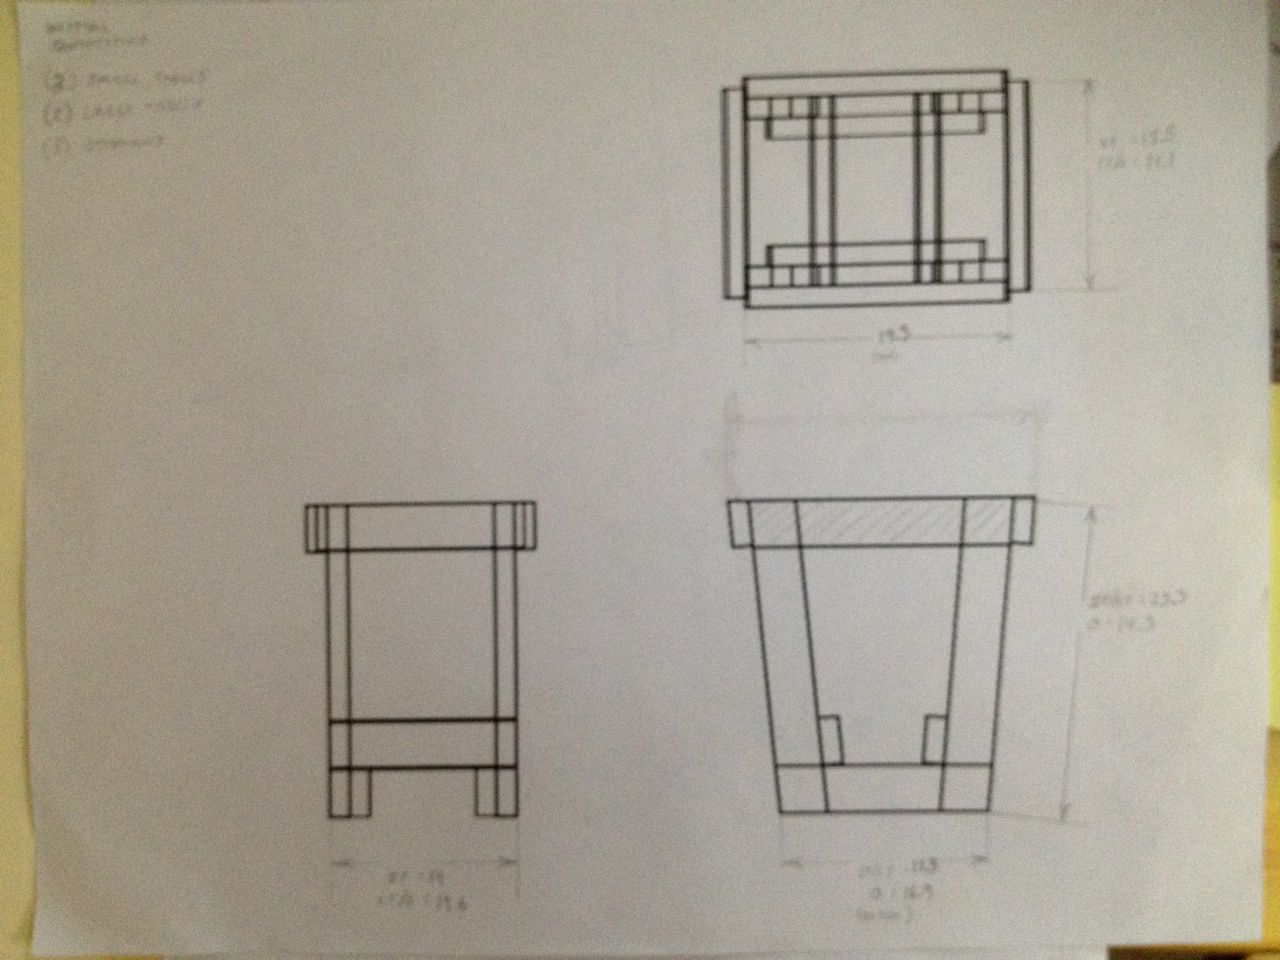
Table and ottoman blueprint
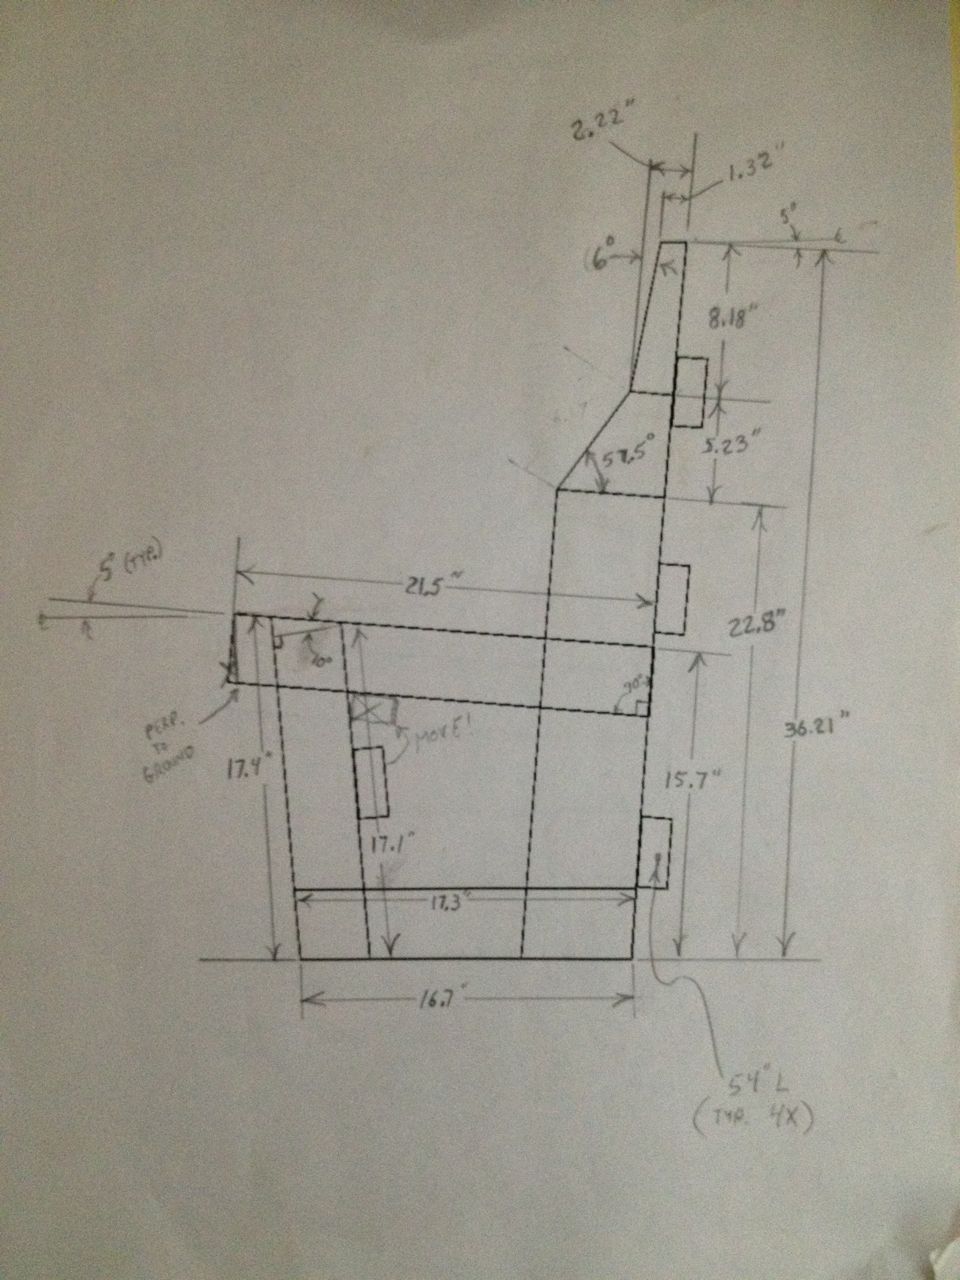
Bench blueprint
One of the annoying things about making a 3D model on the computer is
that it is not very good at producing working blueprints that I need to
print out to work with in the shop. I need to know precise dimensions
of the important pieces when I cut the wood and do not want to
constantly be having to refer to the computer model.
The best solution I have now (and it is a bad solution), is to do the following:
- turn the model into a "wire model".
- render it setting the camera to use an orthographic projection.
- save the rendering to an image file.
- repeat this with the camera pointing in the 3 major axis.
- gather up the 3 rendered images into a single image (I use Gimp).
- print the image.
- manually add the arrows and dimensioning I need with a pencil.
- turn on edge length displays on the model and fill in dimensions cross-referencing with the computer model edge lengths.
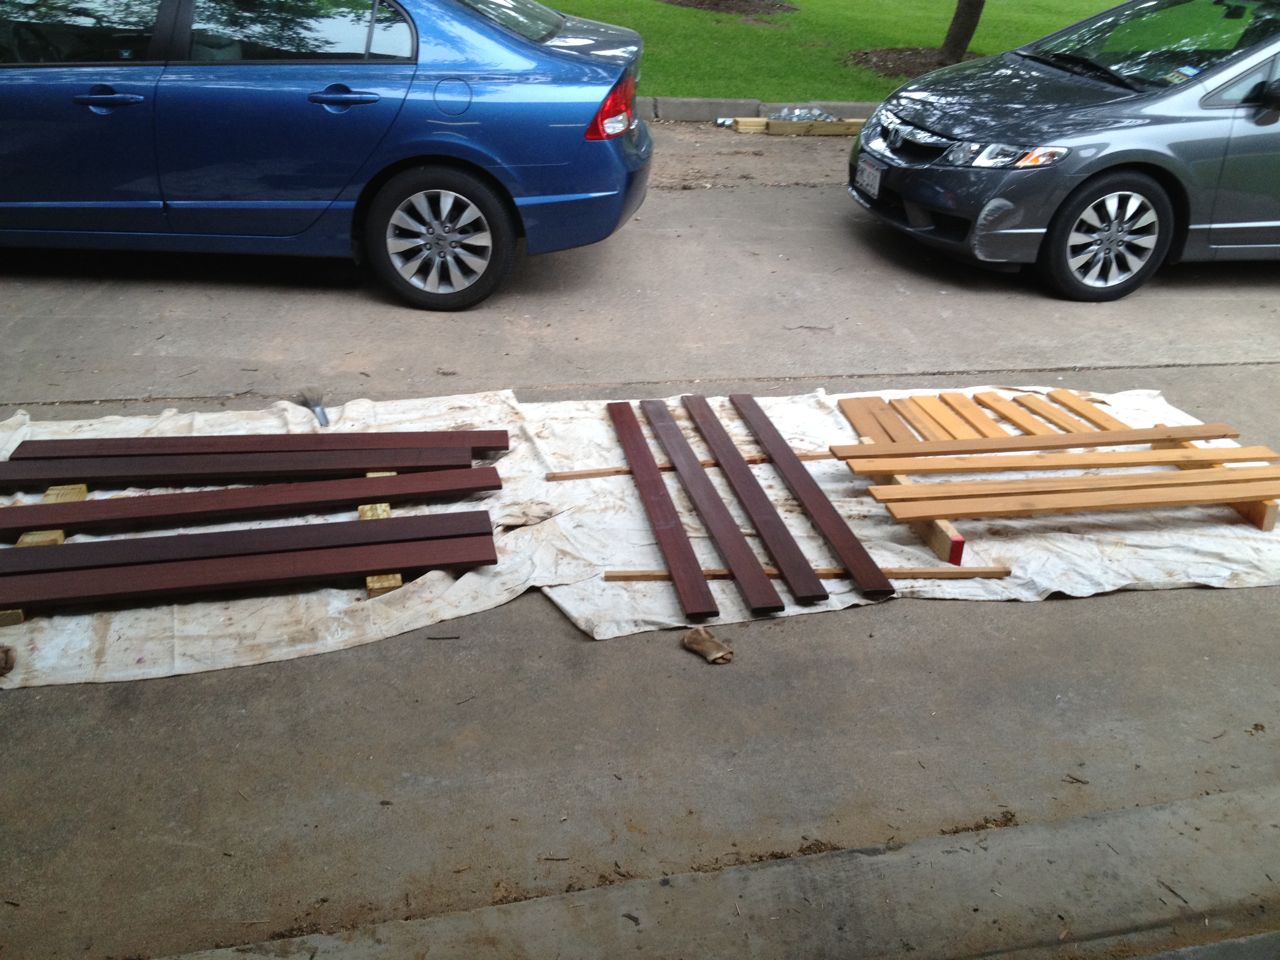
Planning and Wood Purchase
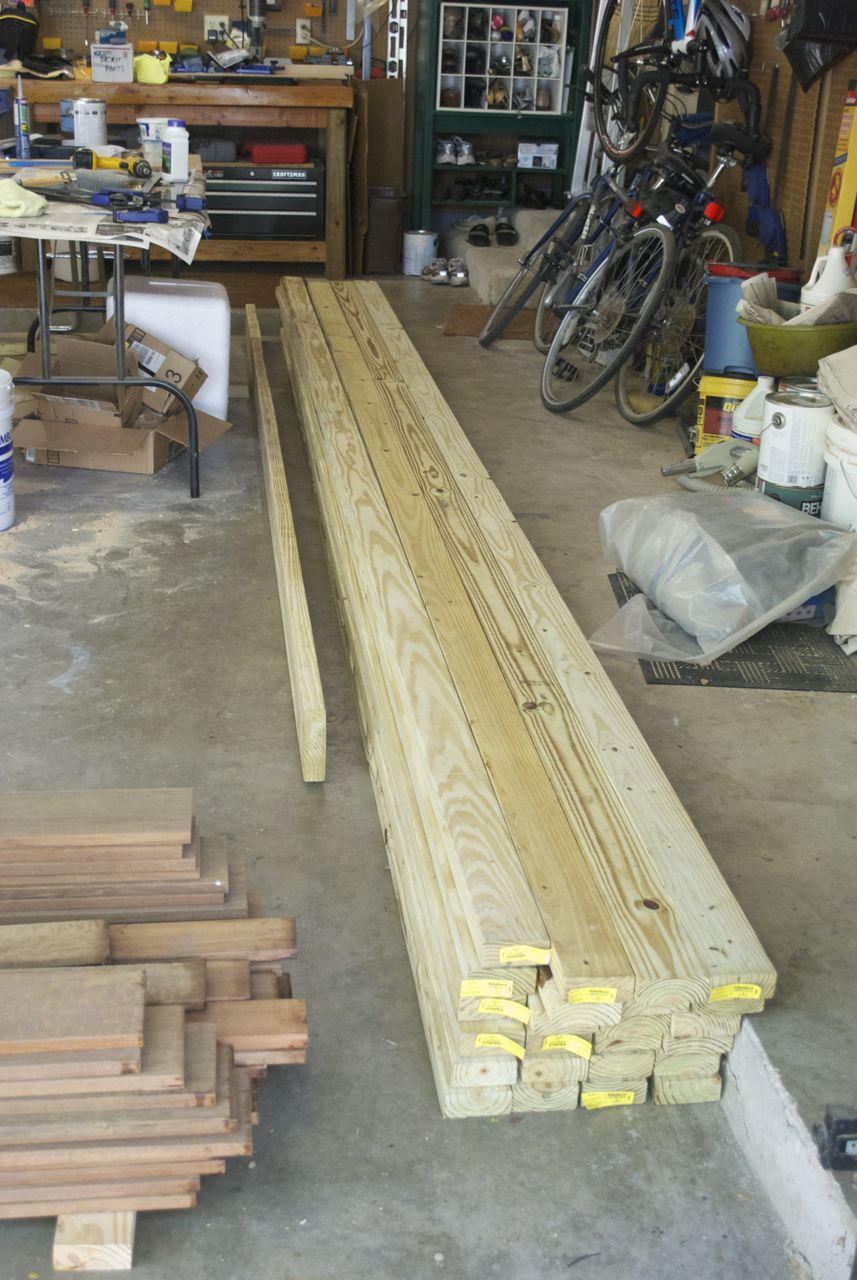
Pressure treated and Ipe wood
Raw wood in shop/garage
I needed a lot of wood and of 3 different varieties:
- Pressure Treated Pine: for the structural frames;
- Ipe: for the wearable surfaces to match the deck boards on the New Decks; and
- Cedar: for the lower skirting that hides the clunky frames.
So how does one know how much wood to order? One has to do a lot of
work planning it. I first enumerate the individual pieces I need to
cut, from what stock I will cut it, and how long apiece I need. Then,
after finding out what lengths of stock the lumber yard stocks, I begin
to layout the pieces on the standard sized stock, thereby counting up
home many of each I need. Naturally, I needed to add some extra for
waste and unexpected happenings.
With a final count in hand, I go to the lumber yard, pick out the
lumber and arrange delivery. When the delivery comes, then I had to do
some serious planning to find a place for it in my shop (a.k.a.,
garage) in such a way that I could work with it. Carrying all that
lumber from the driveway into the garage was quite a workout as well.
The Ipe is quite heavy, especially in 16 and 20 foot boards, and the
pressure treated lumber in 16 foot lengths is not too light either.
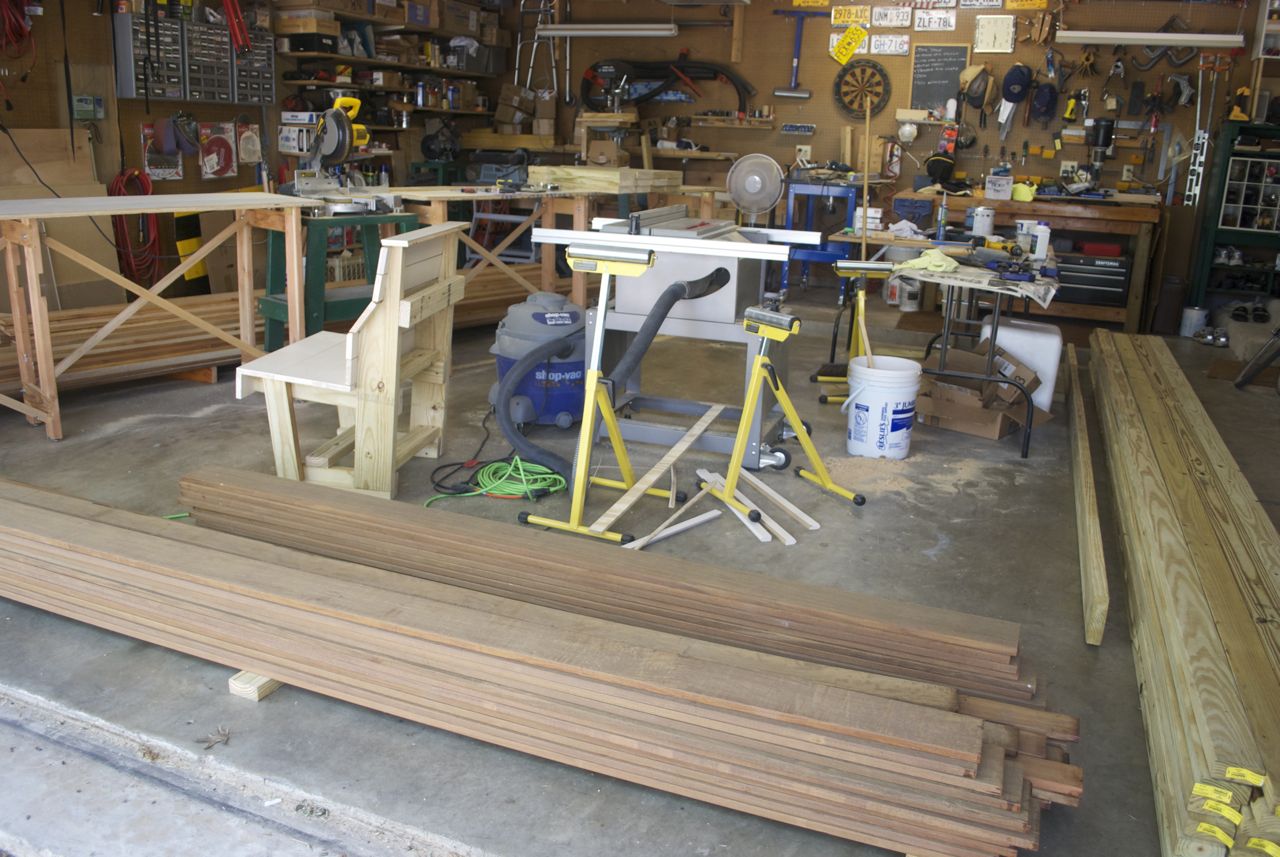
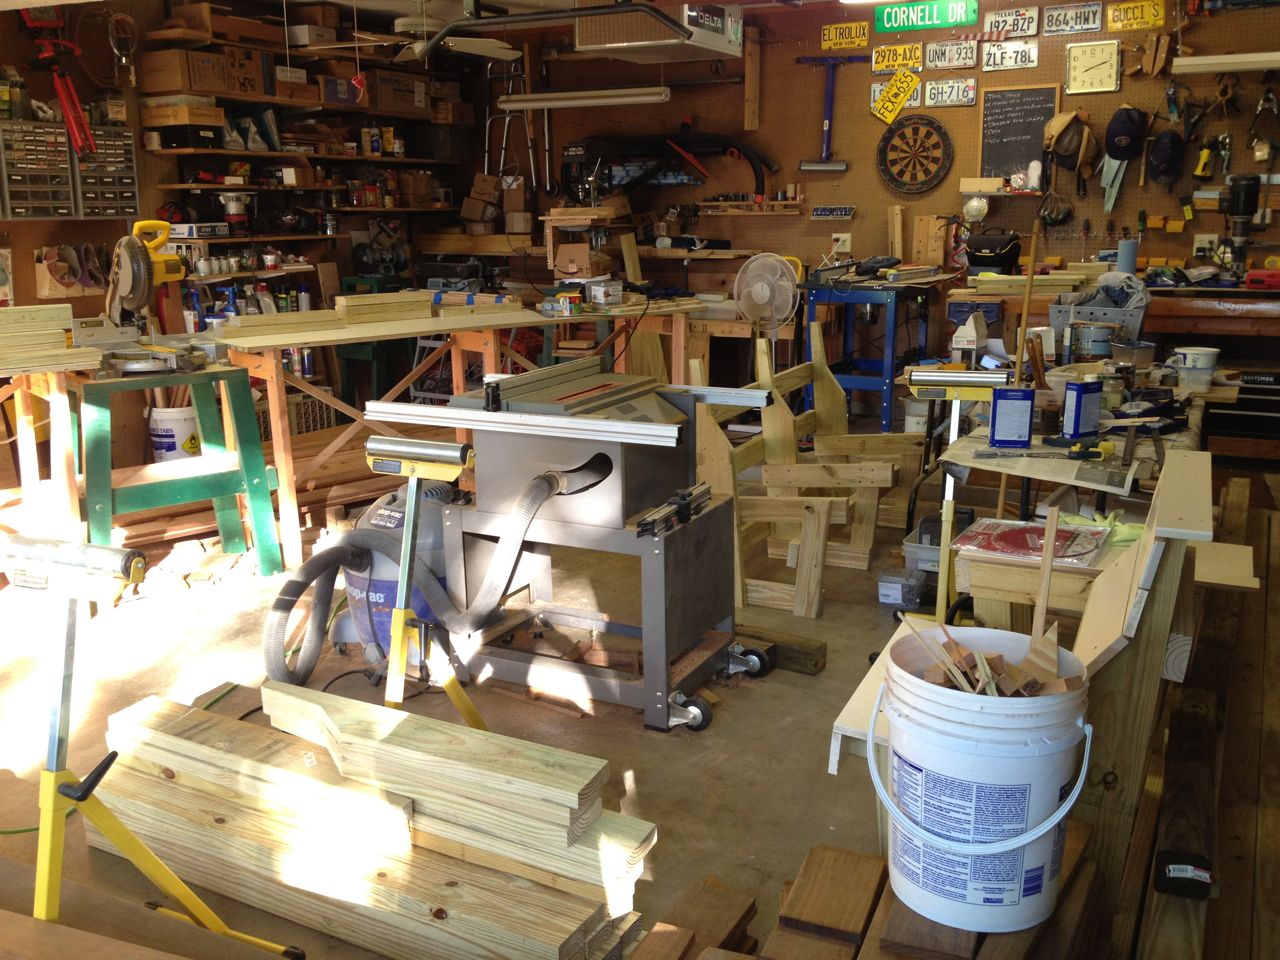
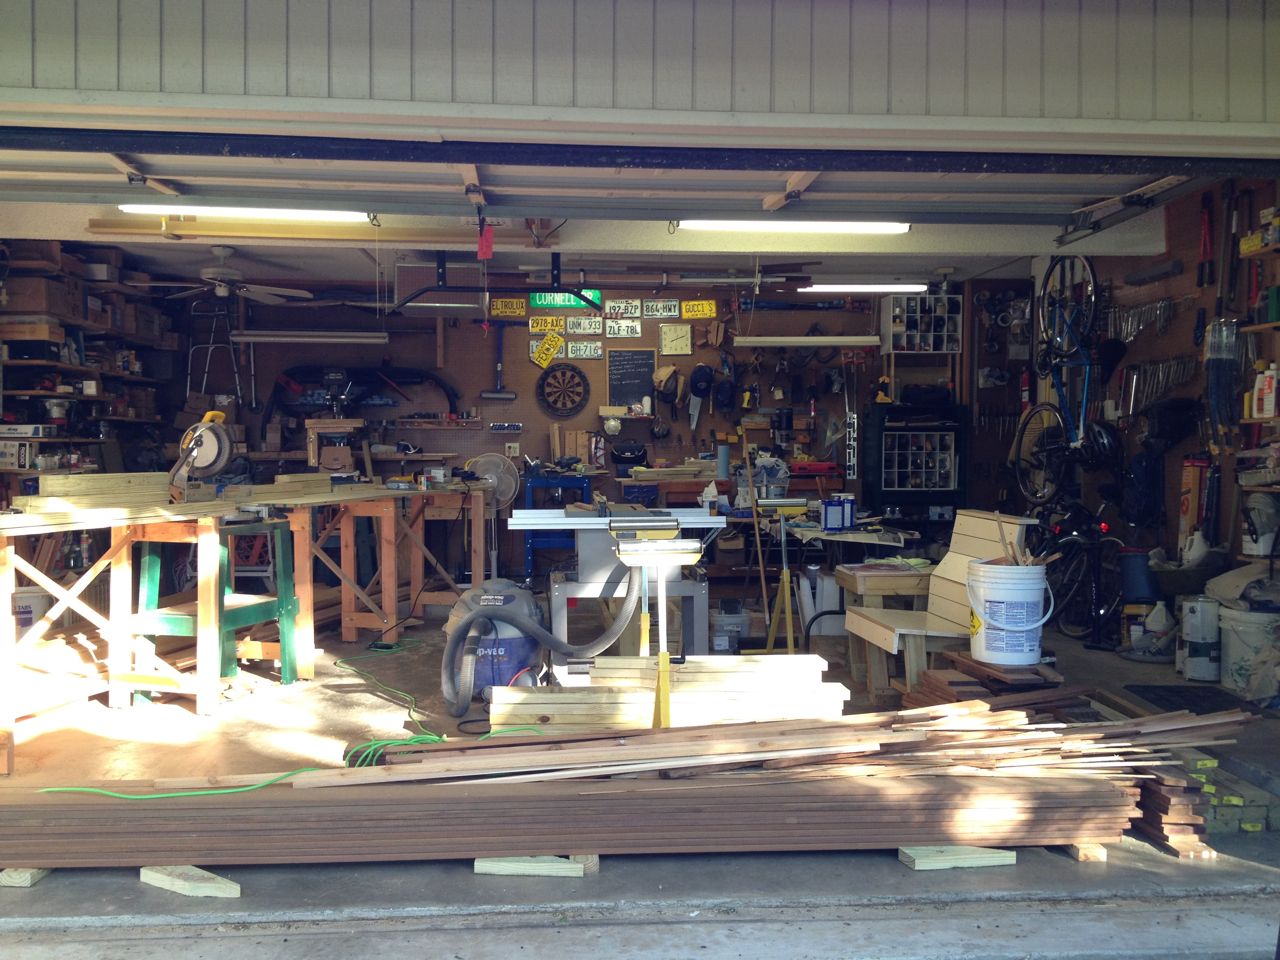
Shop Preparation
Shop setup
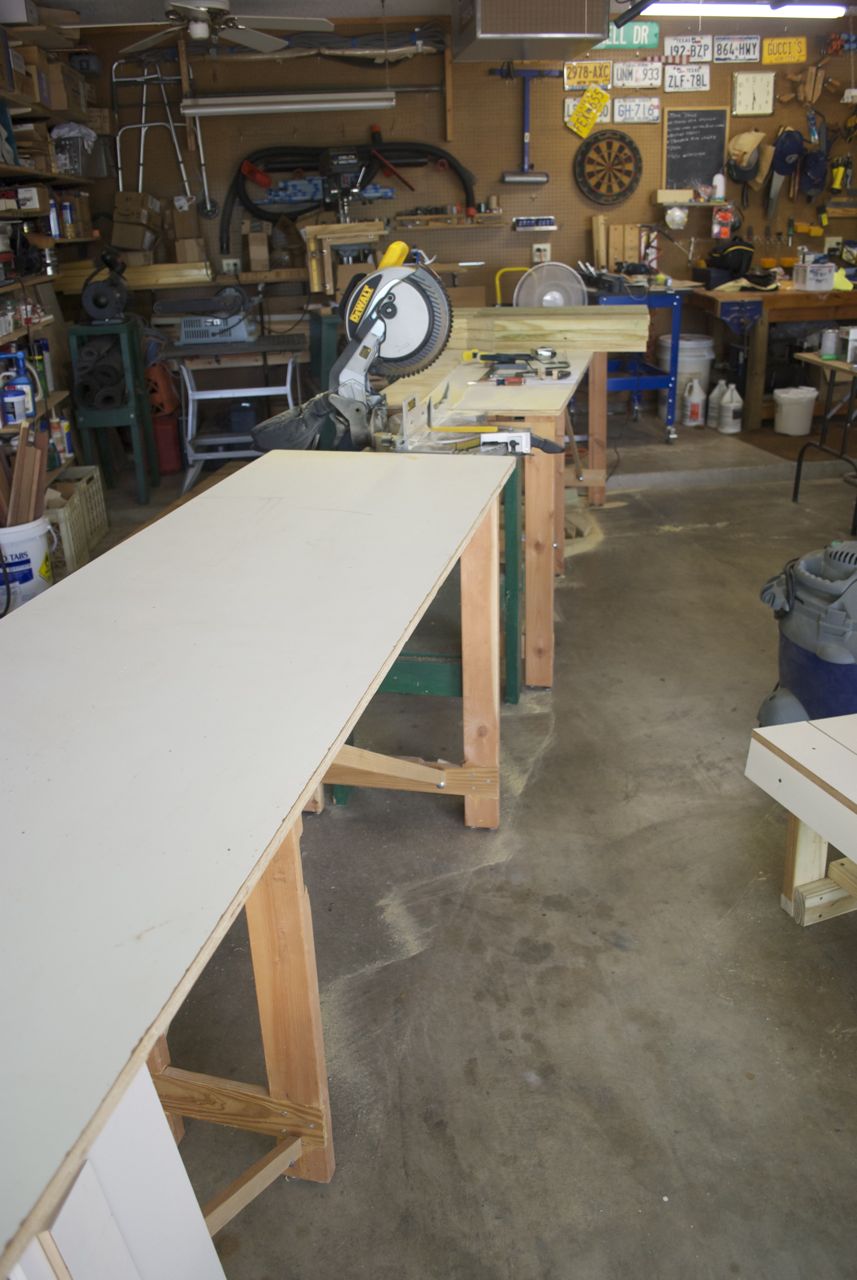
Miter saw setup
Being able to handle and cut very long (some 20 feet) lumber required
some thought. I needed to be able to get at the lumber, move it to the
miter saw, but also be able to cut something on the table saw if I
needed. It got even trickier when I had a combination of cut pieces to
store and uncut stock. Things were wuite cluttered for a while. I
have two 8 foot tables that I put on each side of the miter saw which
allows me to cut the long stock, but only if the garage door is open
and it hangs out.
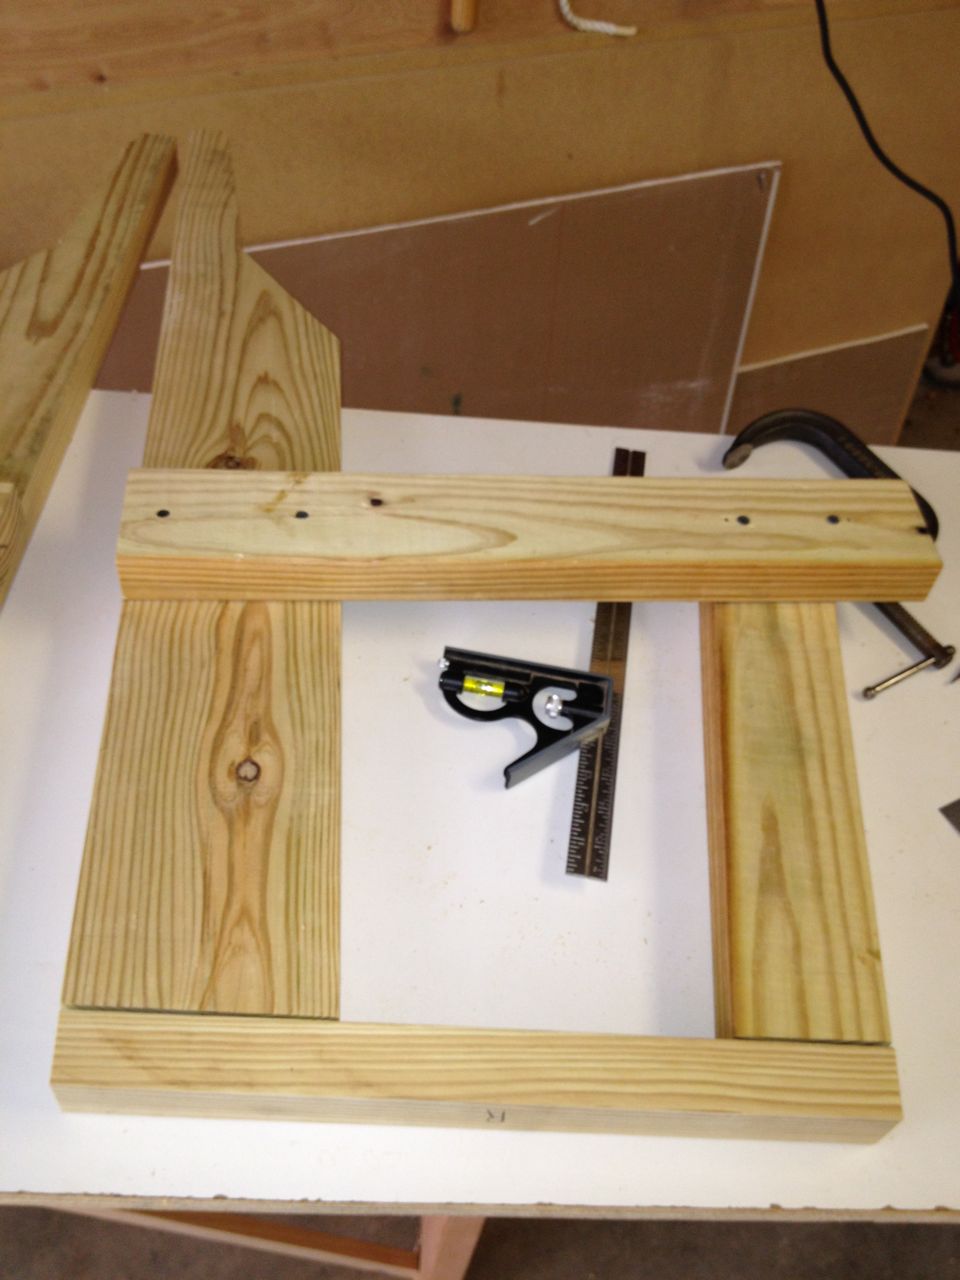
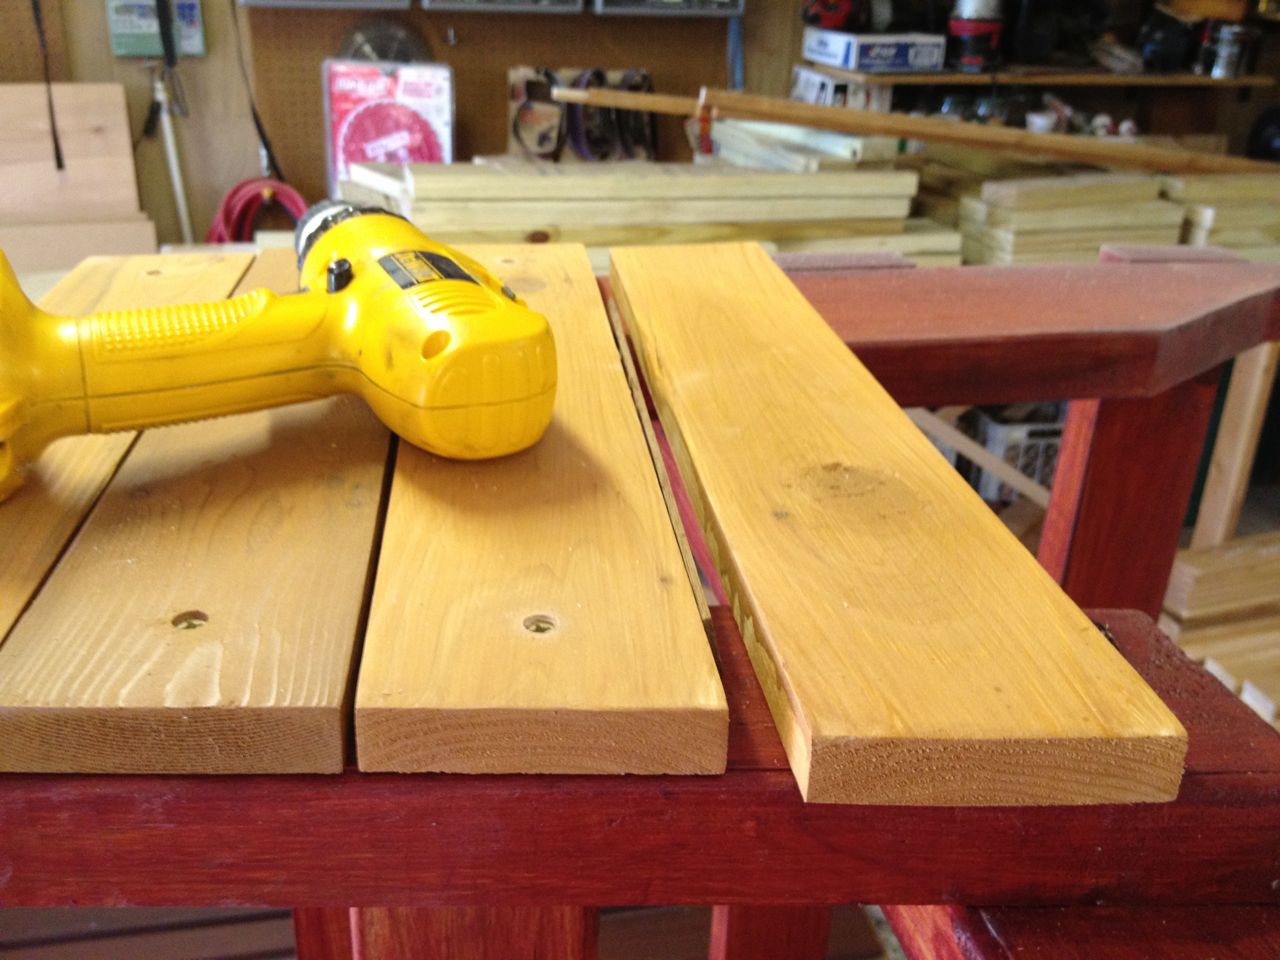
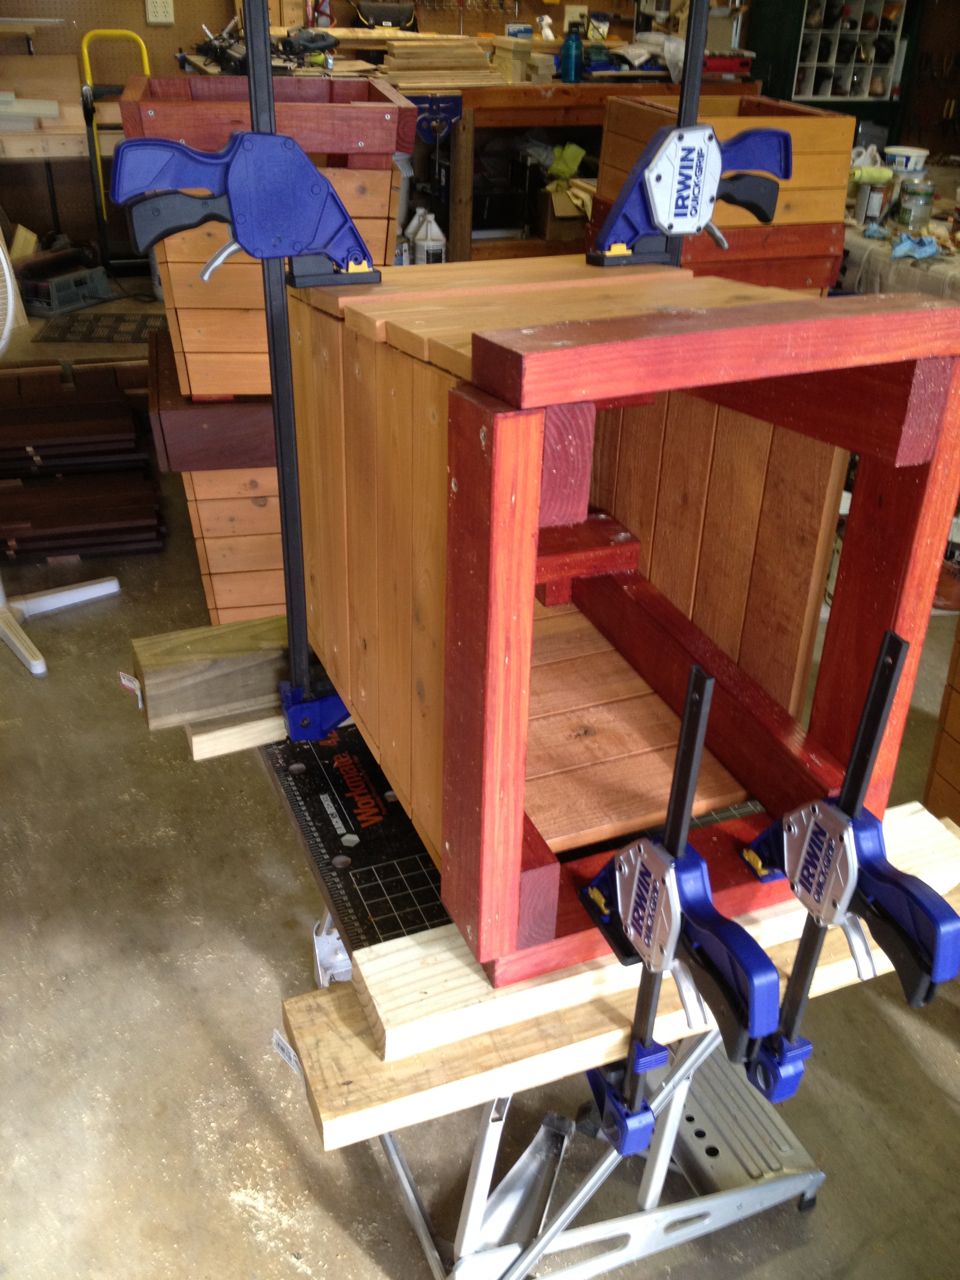
First Table
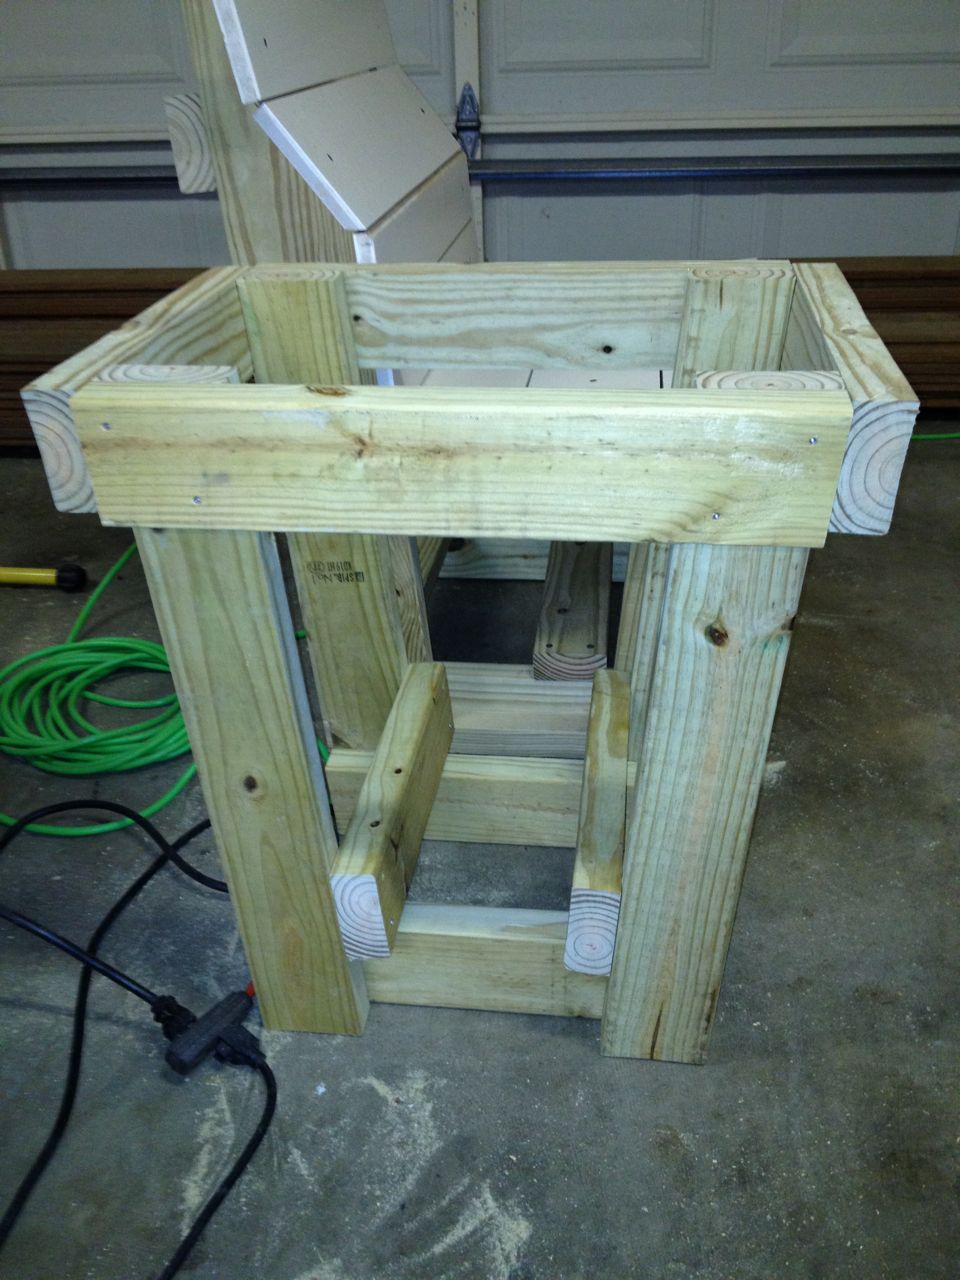
Assembled first table frame
Assembling first table
By building the protoype bench, I had worked out the details of the
sizes of the pieces and how to assemble it. But the tables and
ottomans were nothing but a concept at this point, so before I went and
cut all the wood for all the tables, I wanted to first build the frame
for one table to ensure I had the right dimensions and figure out how
to assemble it. DUring this process, unforeseen things can come up and
cause slight redesigns (as it did with the bench). The narrow table,
wide table and ottoman all had the same basic structure. They only
varied in a few dimensions. Thus, knowing how to assemble any one
table would give me enough confidence to know how the others would go.
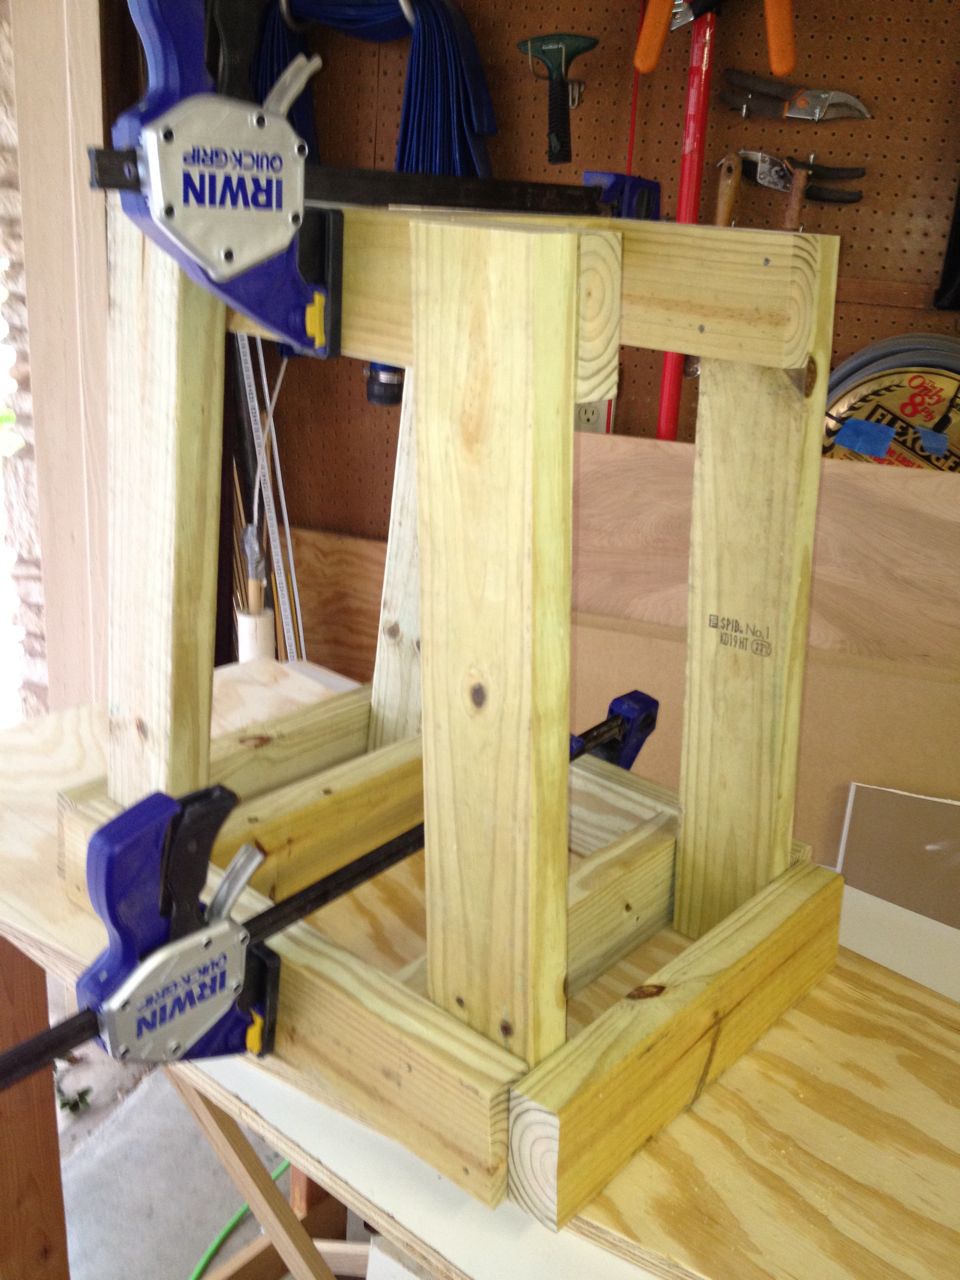
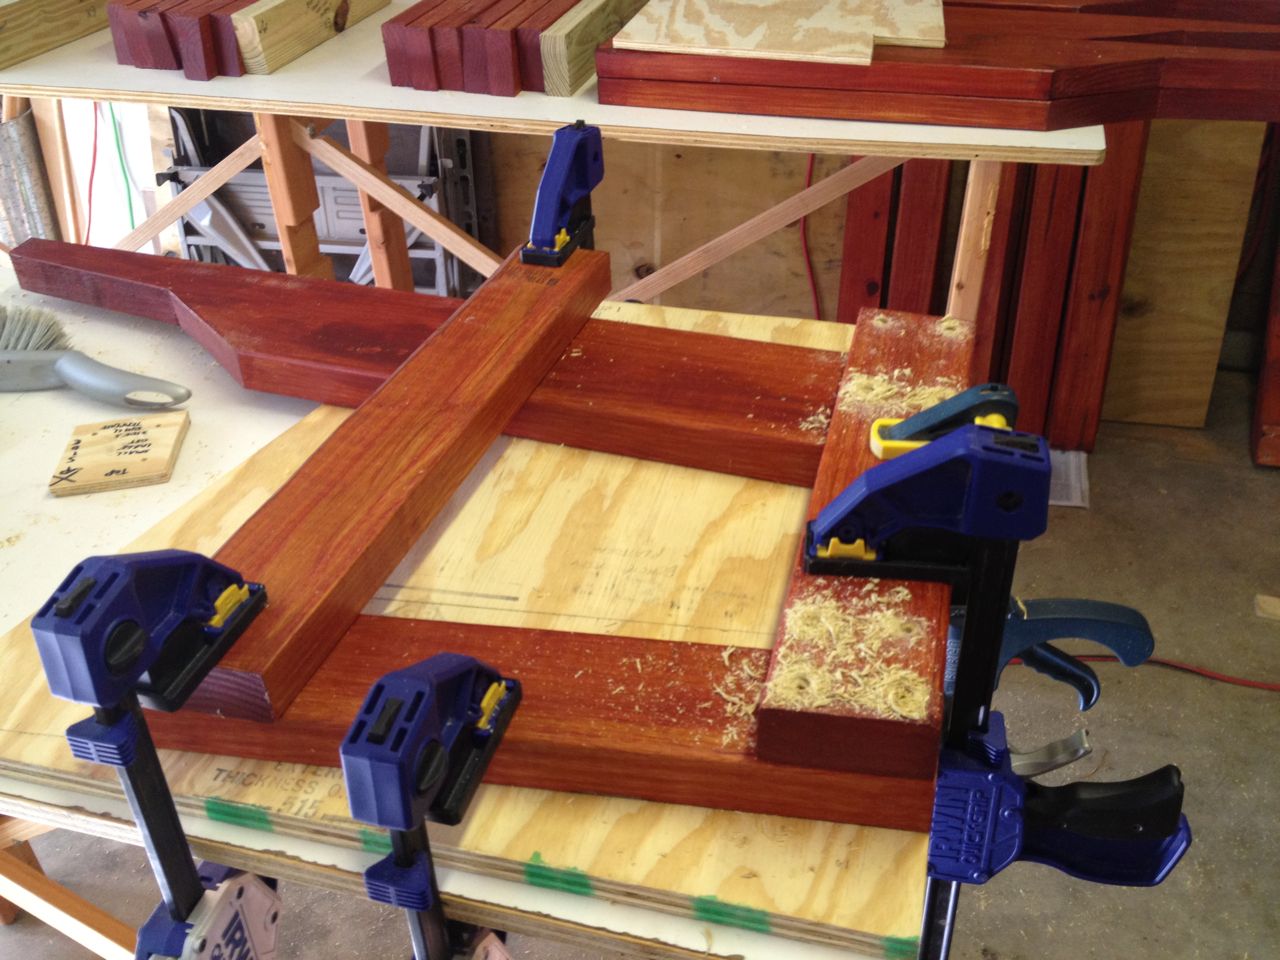
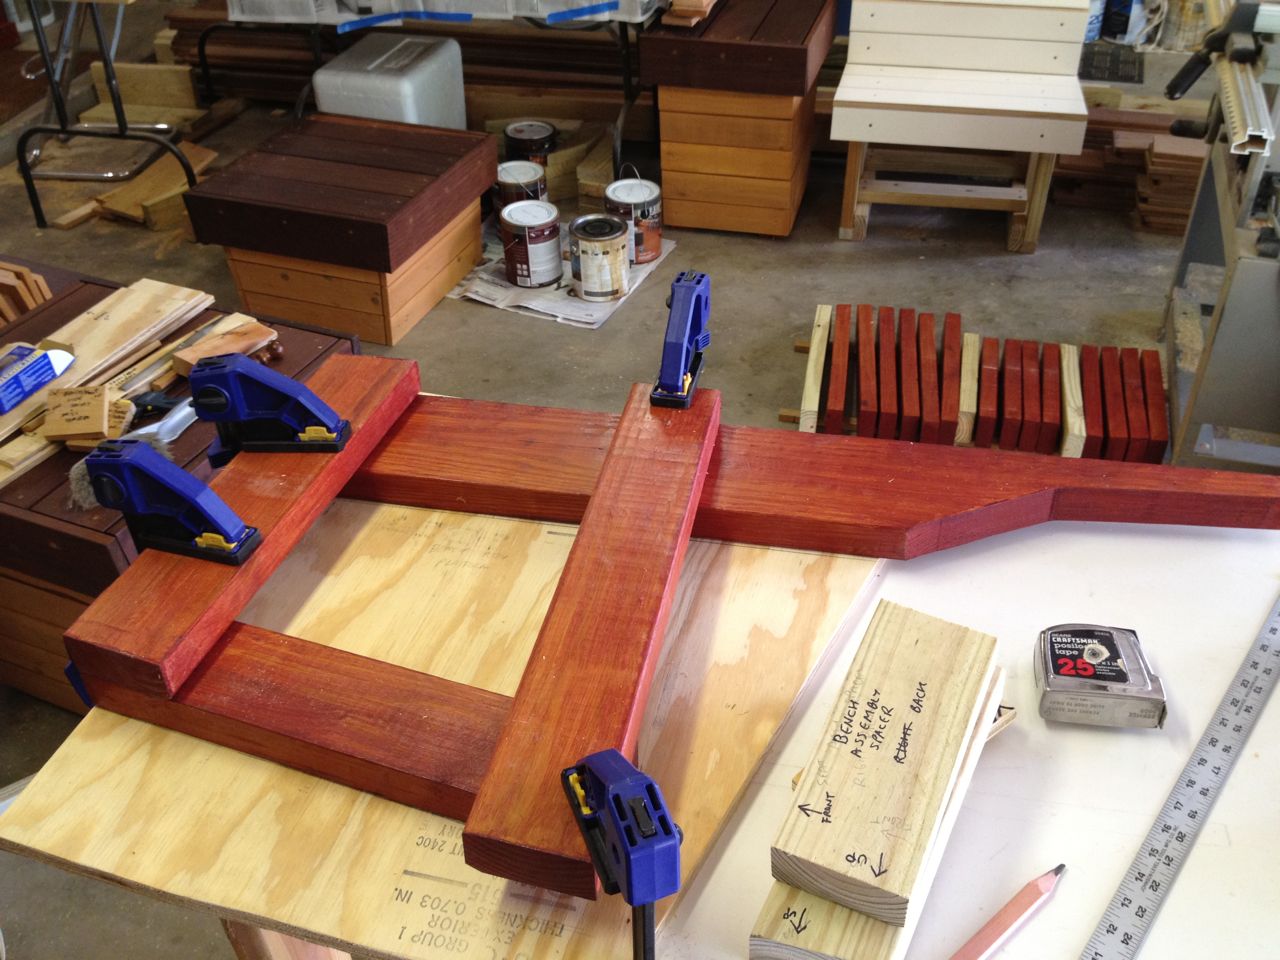
First Bench
Assembled first bench frame
First bench during assembly
Though the prototype gave me good confidence in having the righ sized
parts, assembling a 5 foot bench would require some tricker setup than
the narrow width prototype did. Thus, I wanted to get one bench frame
assembled to work this out. Again, something could come up that causes
a design change to help with assembly. In fact, I did modify exactly
where I was putting the cross-pieces to provide a more stable
structure.
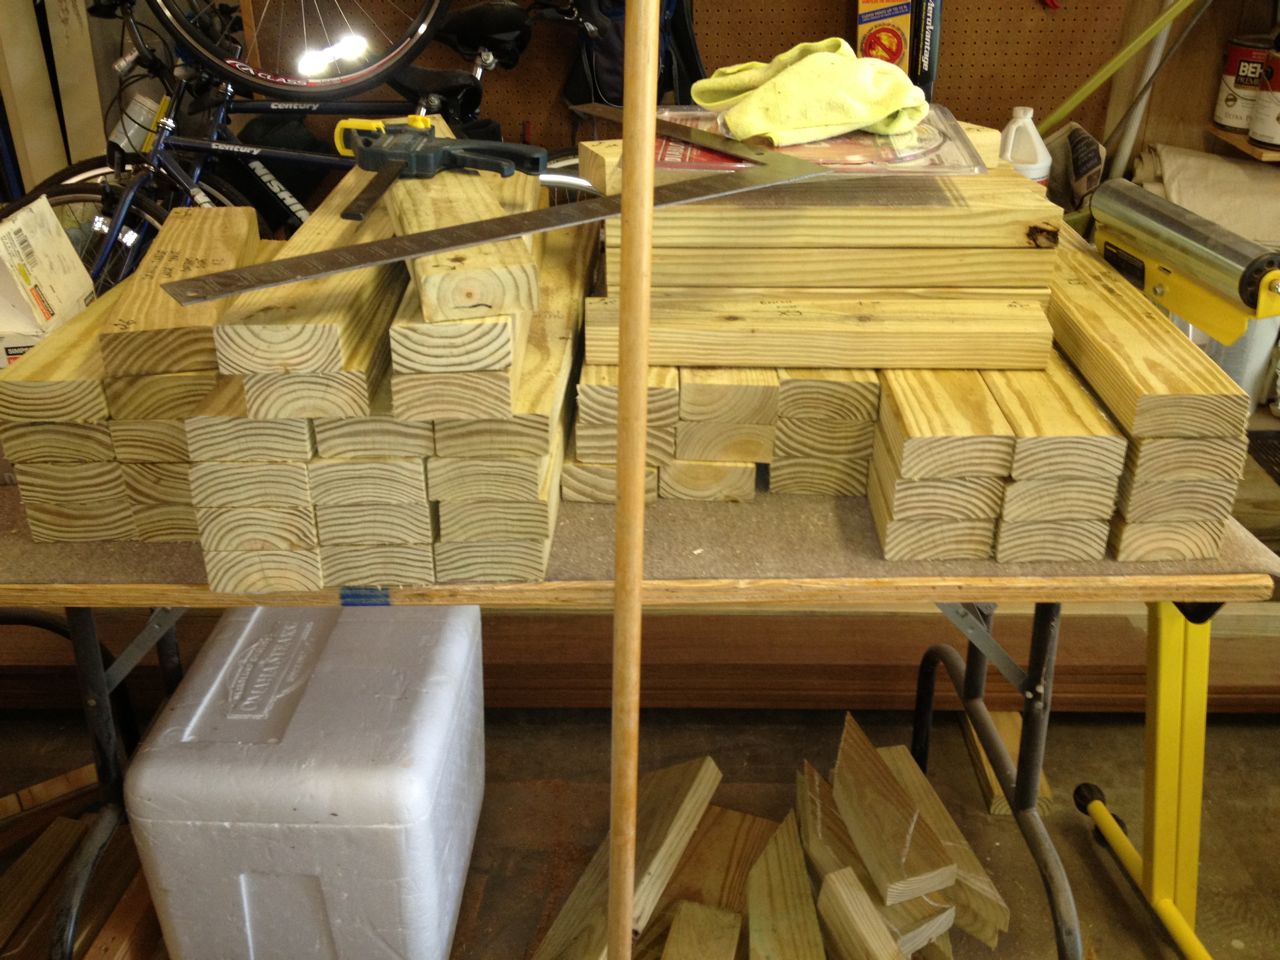
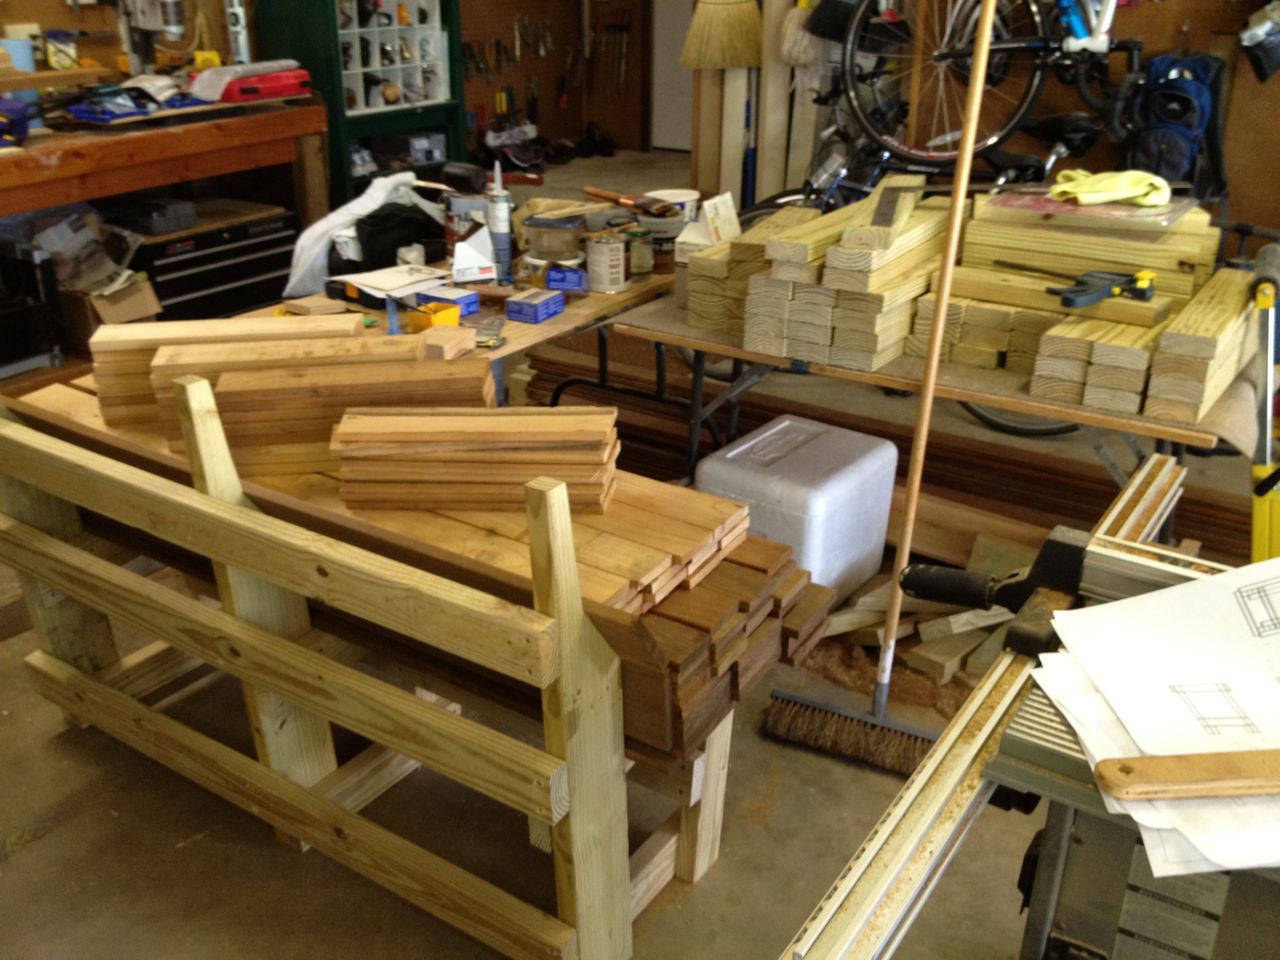
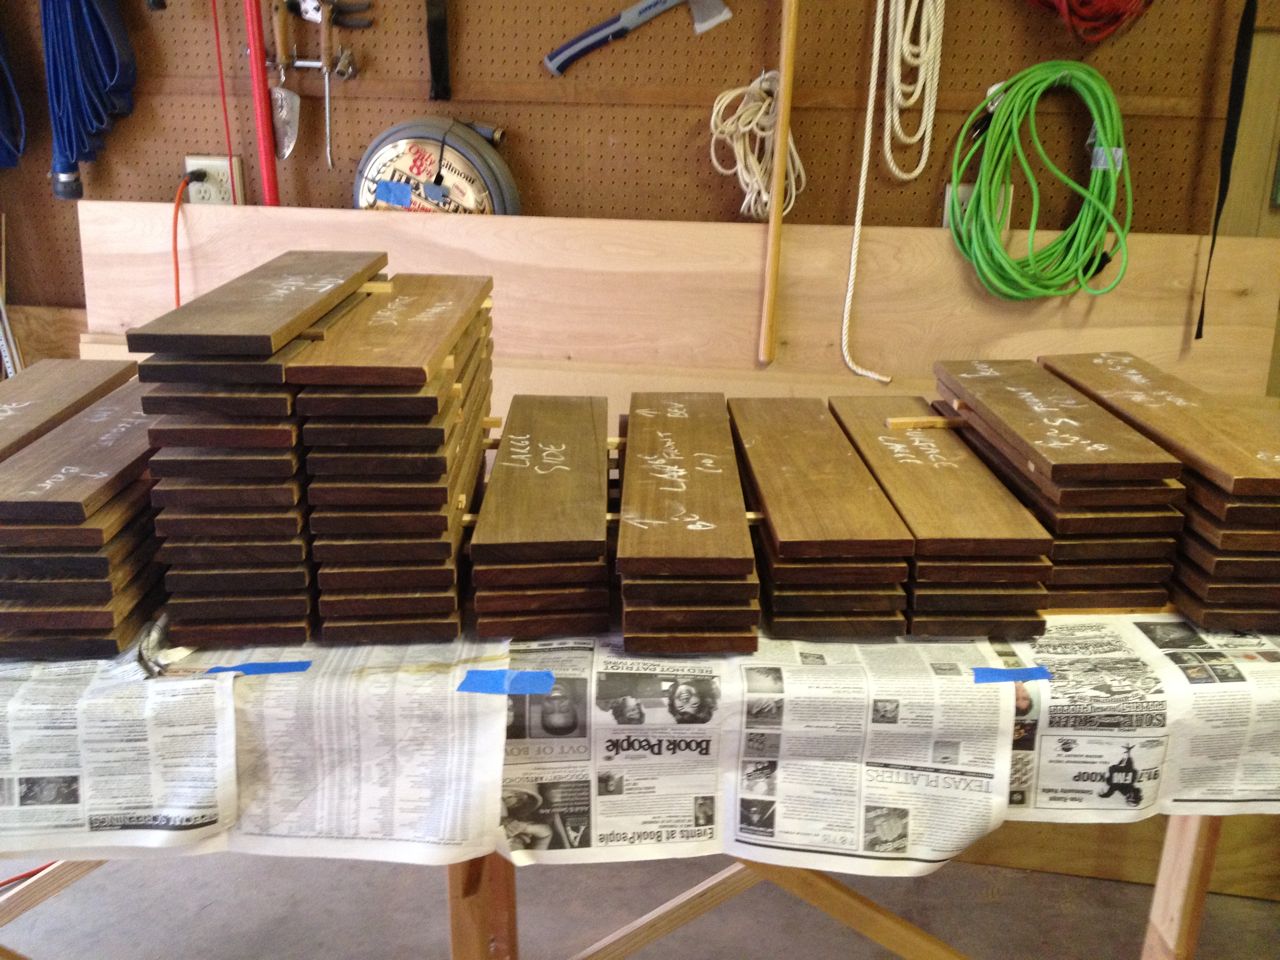
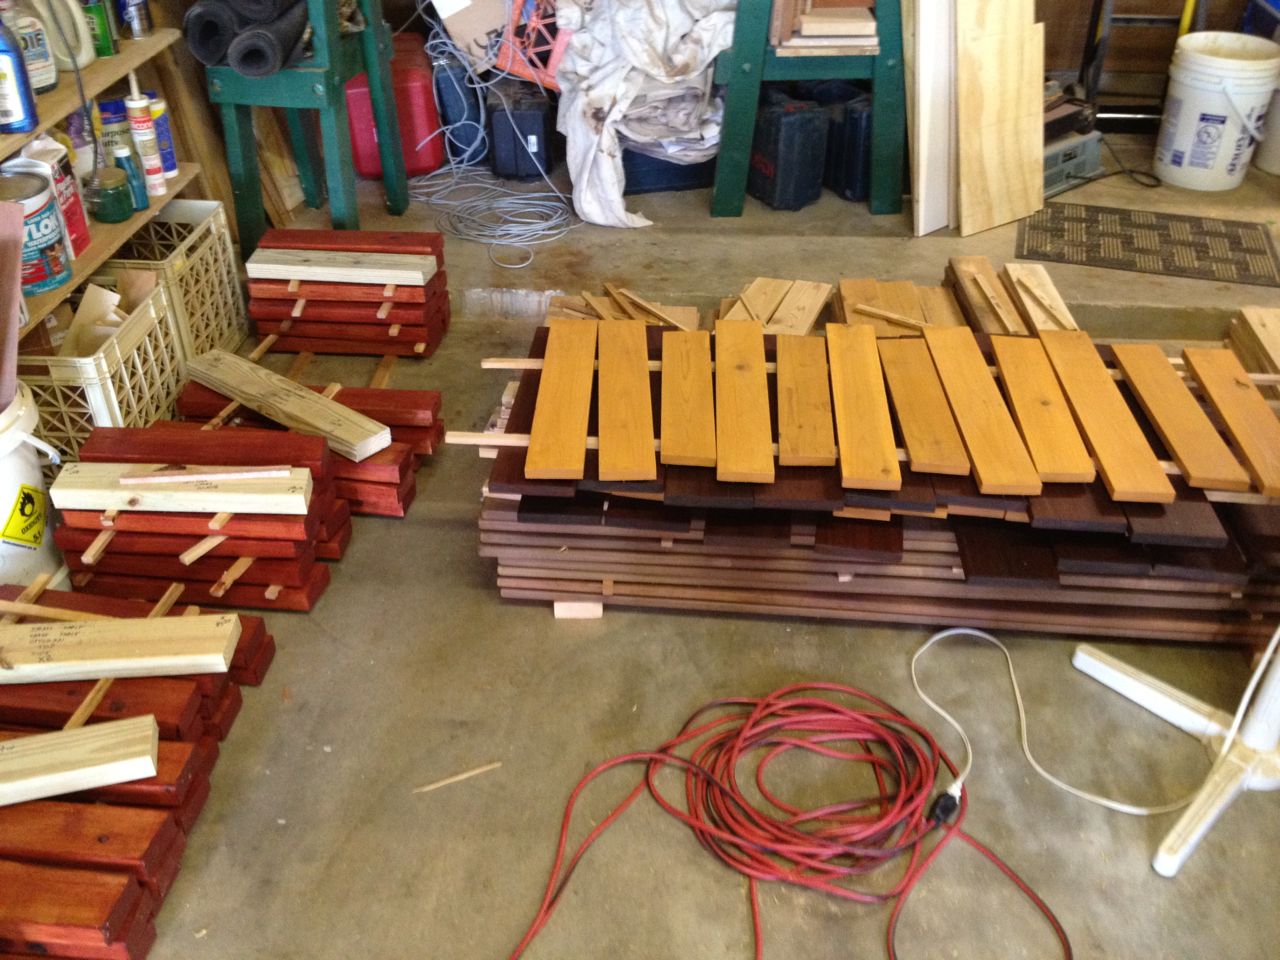
Bulk Wood Cutting
Shop view during cutting
Wood cutting in progress
With no more uncertainty on the part sizes and assembly to worry about,
it was time to cut up all the lumber into the parts I would need for
the total of 12 pieces of furniture.

Cut Ipe surface parts
Cut frame parts
Lots of stacks of parts piled up quickly and it was a challenge to find
surfaces to put them on.
More part stacks
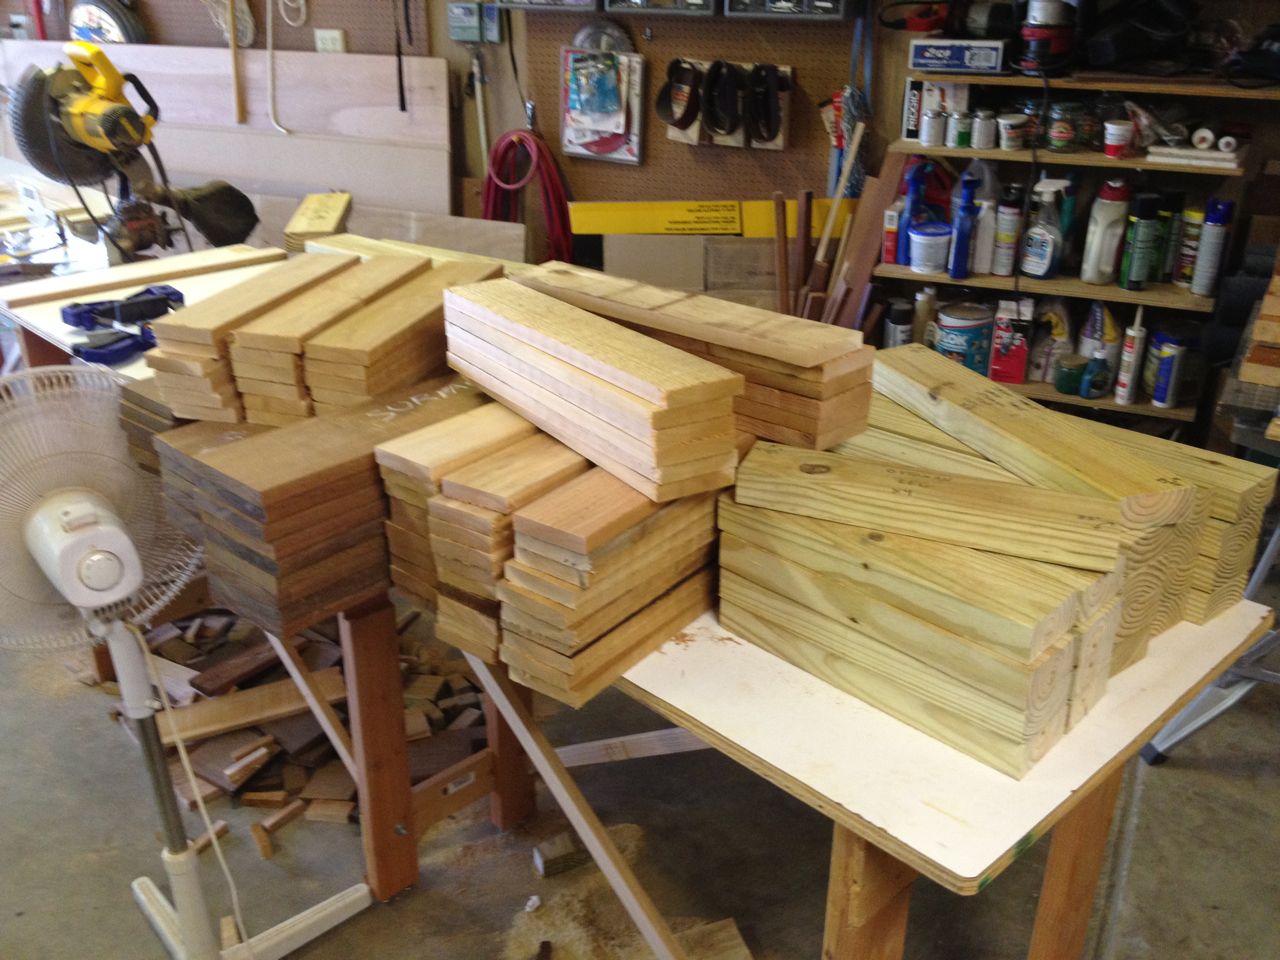
Part stacks after cutting
When the sawdust settled, here's what all the parts looked like.
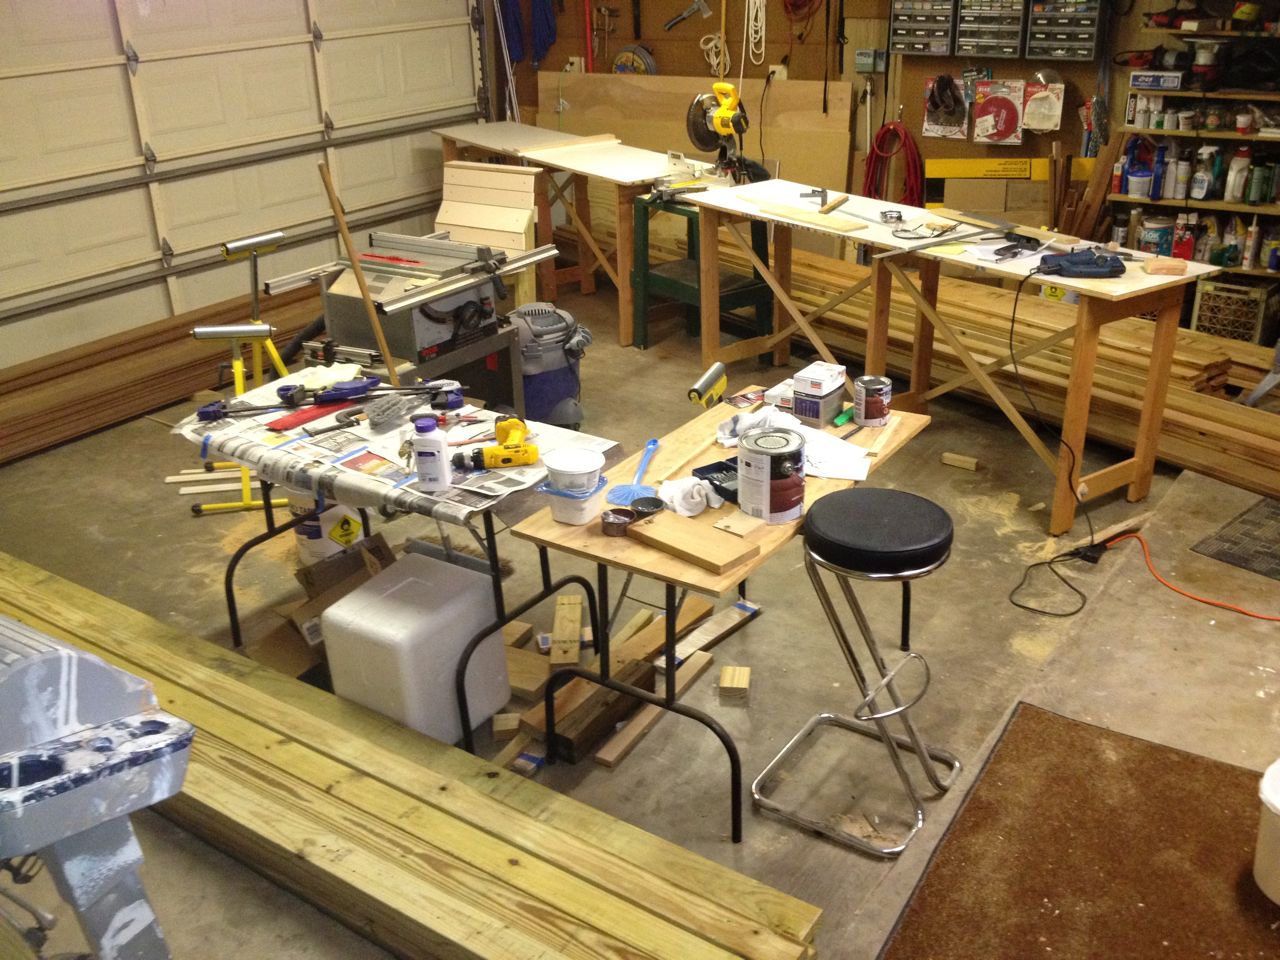
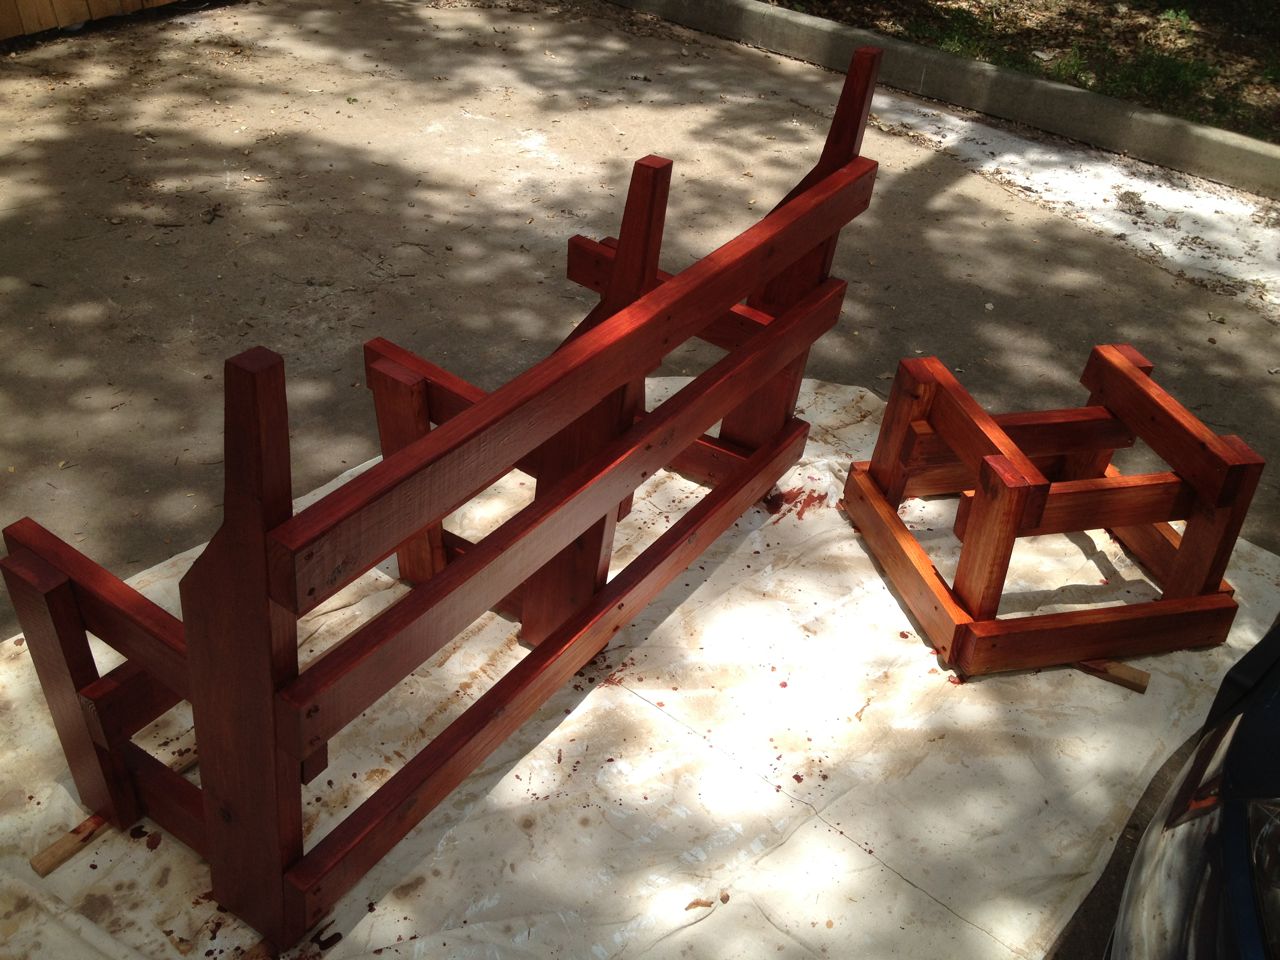
First Oiling, Staining and Painting
Painted frames
Frames: one of each
By this time, I had assembled the frames for one of each type of furniture. Though the frames were pressure treated lumber and mostly be hidden from view, I wanted to paint them because:
- I wanted the cut ends to be better sealed to last longer; and
- though mostly hidden, the gaps in the planks would allow you to see the frames a little, especially if the color was a constrasting light color like the frames were.
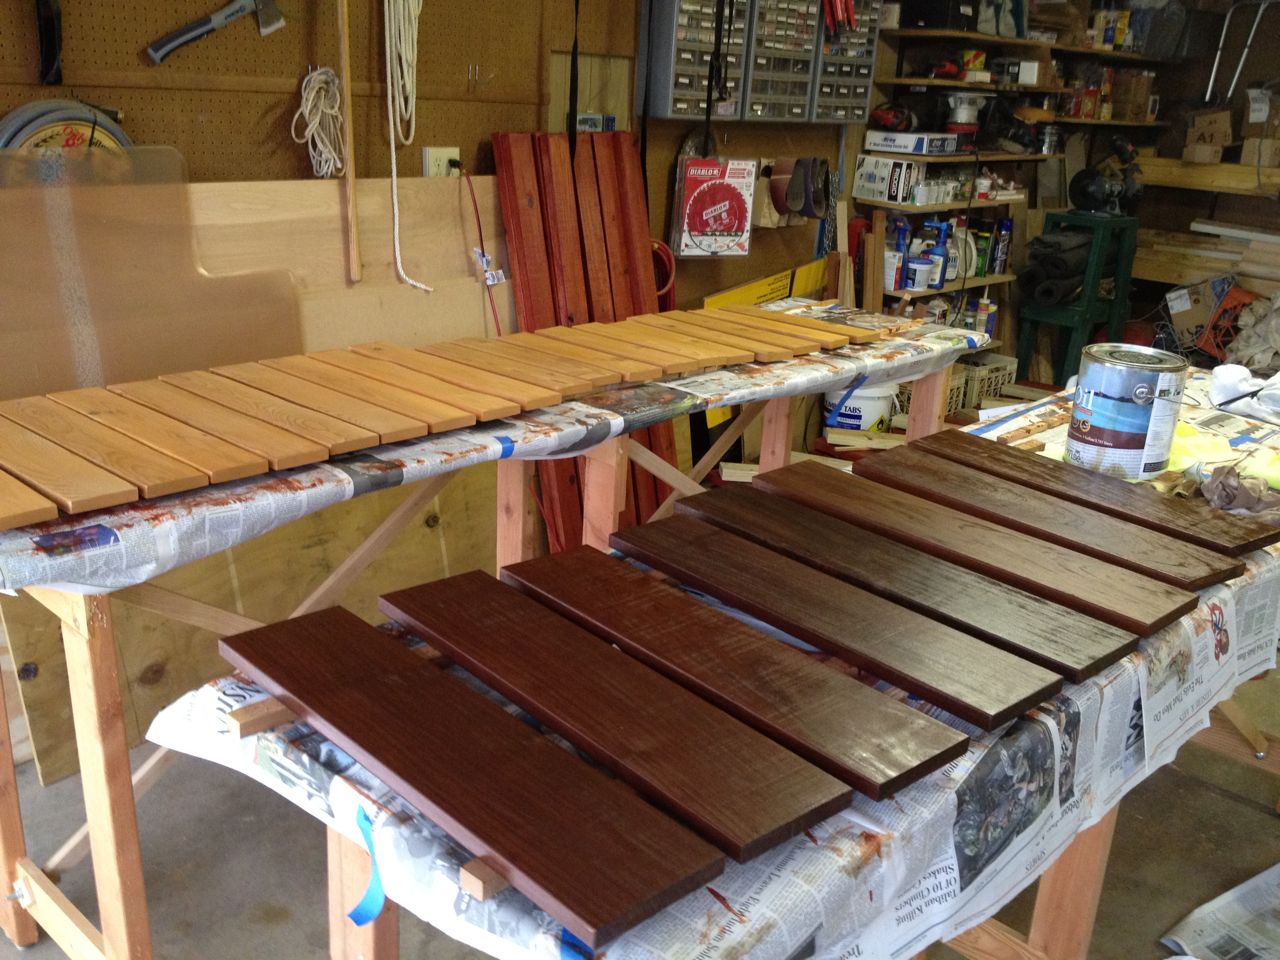
Ipe oiling and cedar staining
End sealing the Ipe boards
Ipe wood, though heavy, hard, strong and long-lasting, has the habit of
"checking, which is the ends getting little splits in them over time as
they dry out. To prevent this, you can use a special end-grain sealer
on them, which I did.
The rest of the Ipe was treated with an oil finish (Ipe Oil) which
helps protect it and brings out a very nice color to it. The cedar,
though generally weather resistant, I chose to stain with a sealer that
would greatly extend their lifetime.
First Bench
Closeup of cedar skirt install
Installing cedar skirting
With the frames painted, the Ipe boards oiled and the cedar planks
stained, all that was left was the assembly. Actually, at this point,
all that was finished were parts enoughn to make one bench. The pkan
was to paint, oil and stain parts one furniture piece at a time. This
interleaving would help break up the monotony a bit as well as get some
finished products before worrying about geting through all the
painting, oiling and staining.
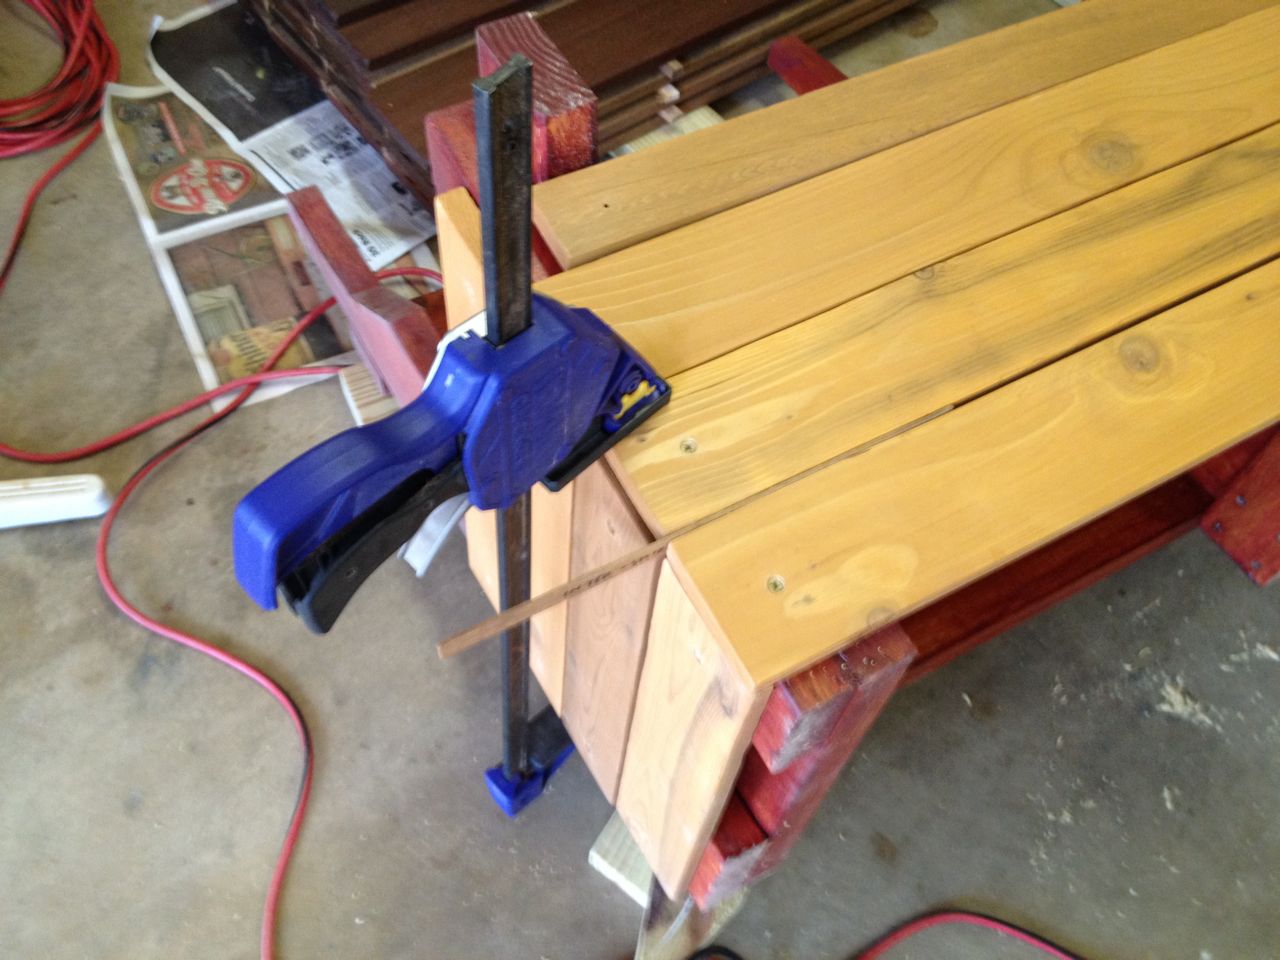
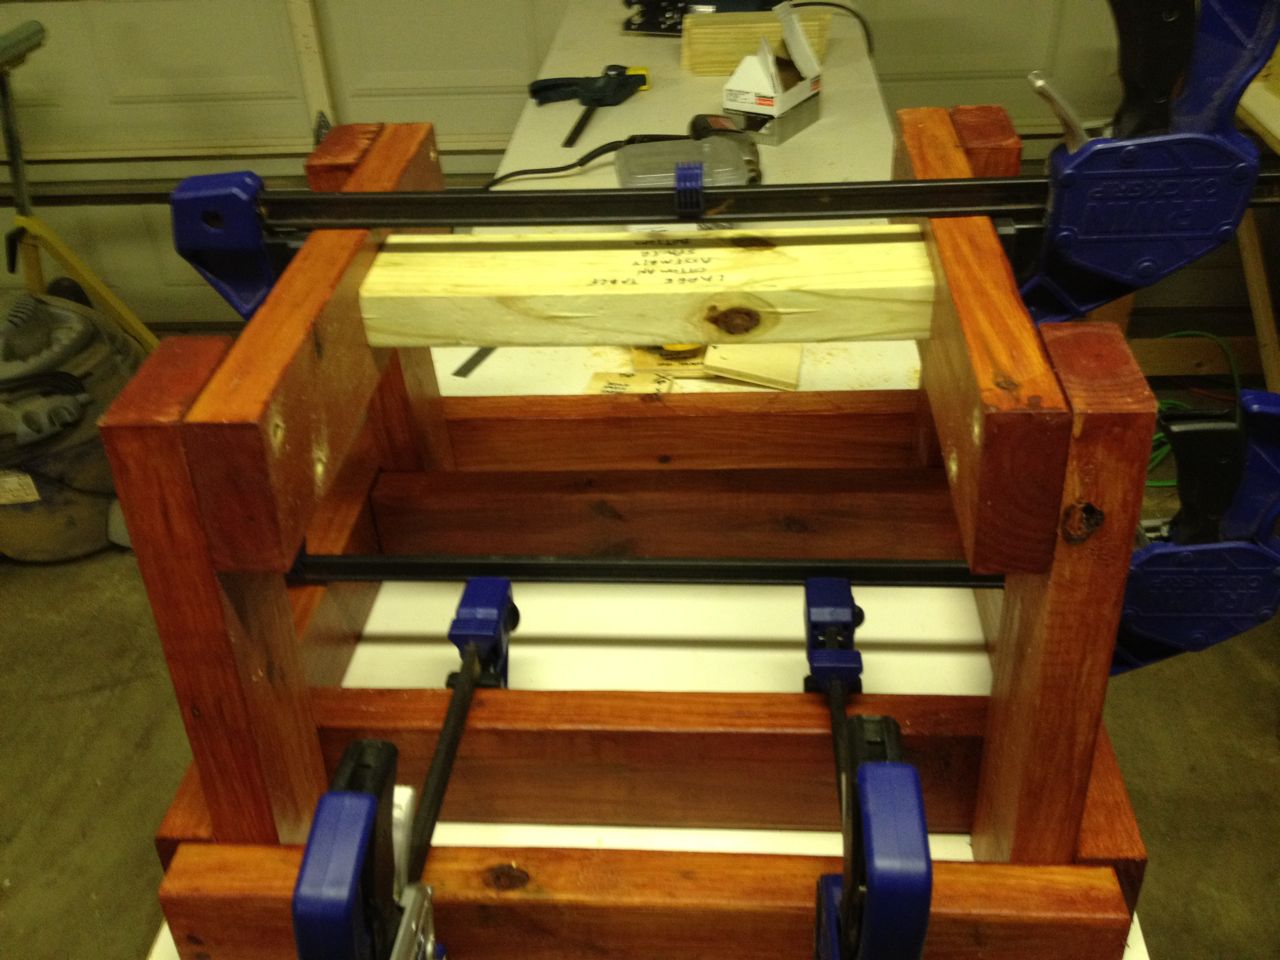
There was only some additional assembly things to be worked out. Though
the assembly of the frames for everything was figured out, putting the
cedar planks and Ipe still had some unknowns.
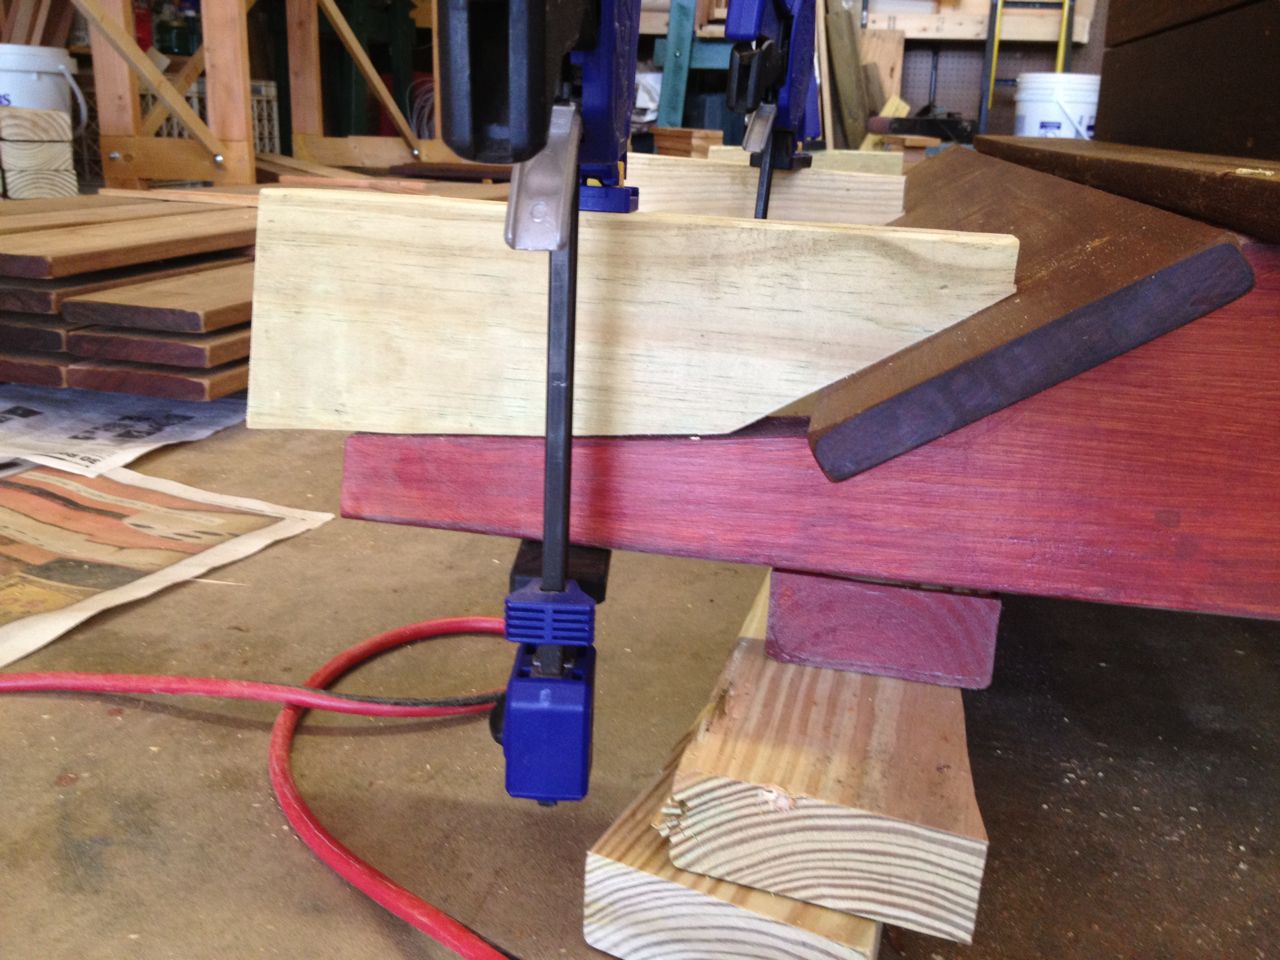
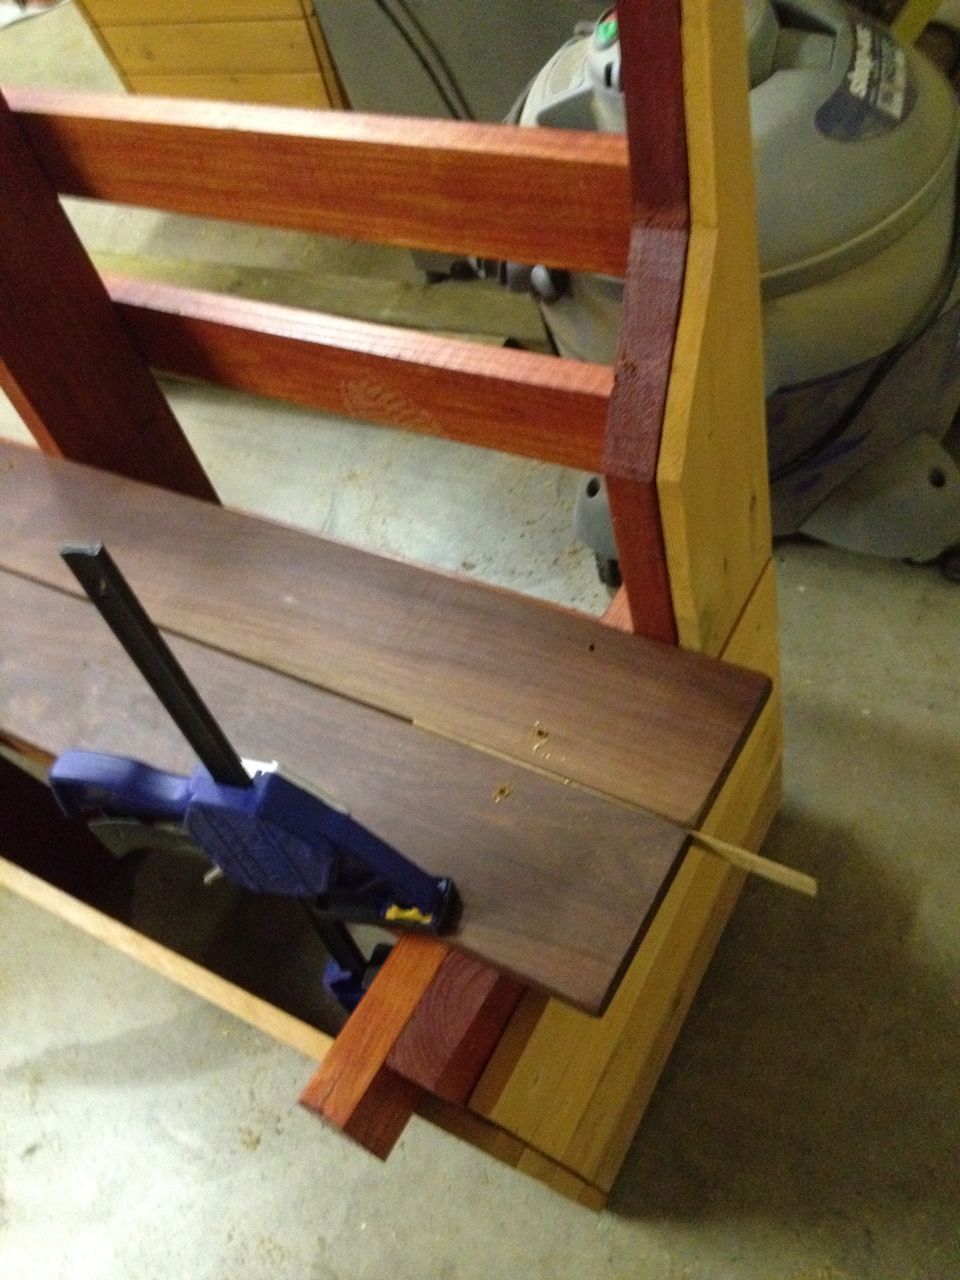
Tricky bench board clamping
The trickiest assembly clamping issue came from one of the seat back
boards of the bench, whcih lies on a weird angle. Luckily, I had not
thrown any of the wood scraps away and I could use the cut-away pieces
from the benches that matches the angle.[ I had to trim them down a
little to allow for installing a screw, but generally the moral of the
story is to not dispose of any wood scraps until the project is
finished.

Finished bench: front view
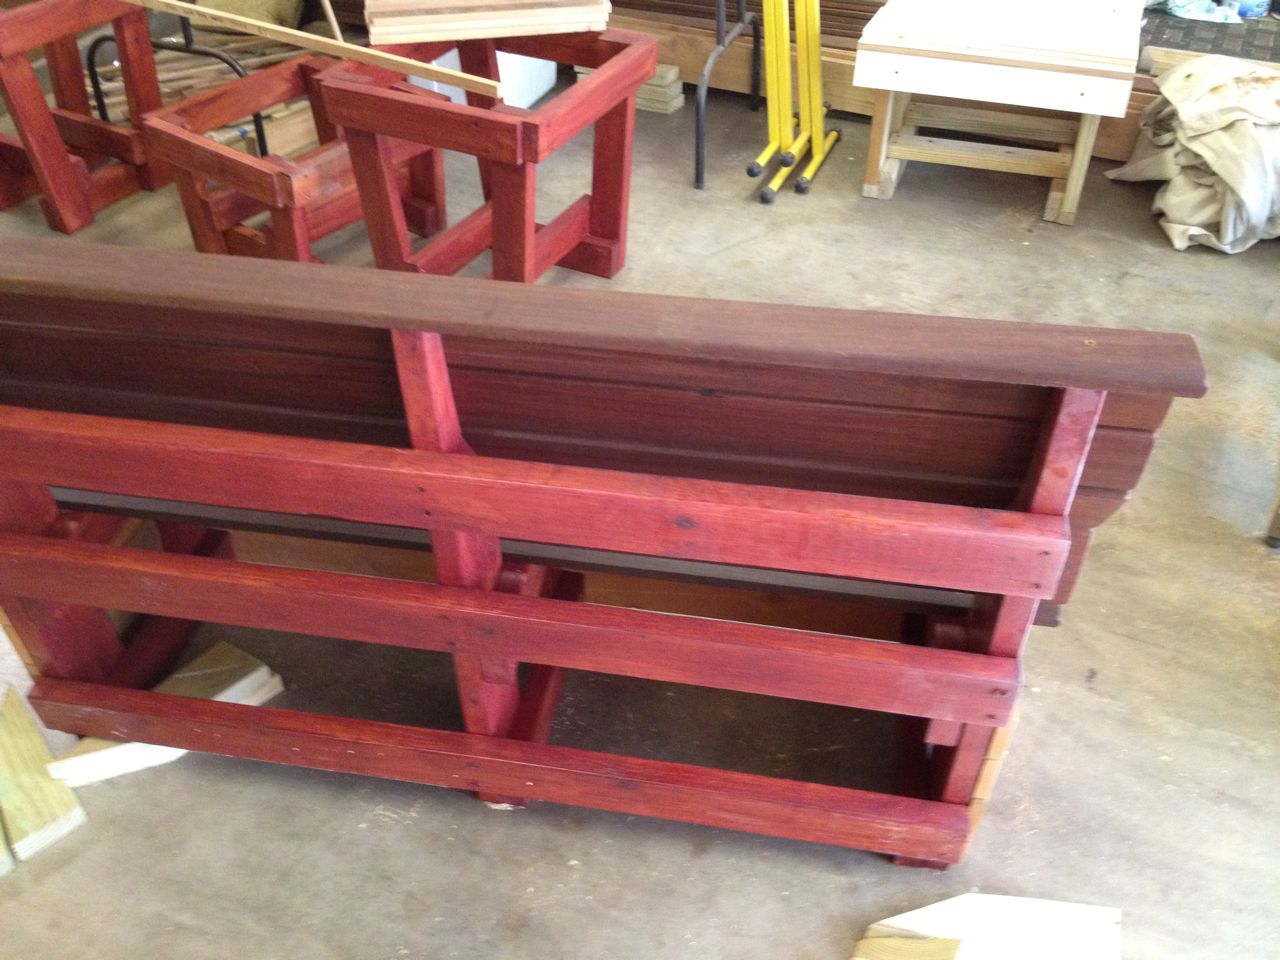
Finished bench: rear view
Getting the first bench completely finished was a big milestone. We
were going away on vacation and the goal was to get one bench done
before we left. We made it by a day or so.
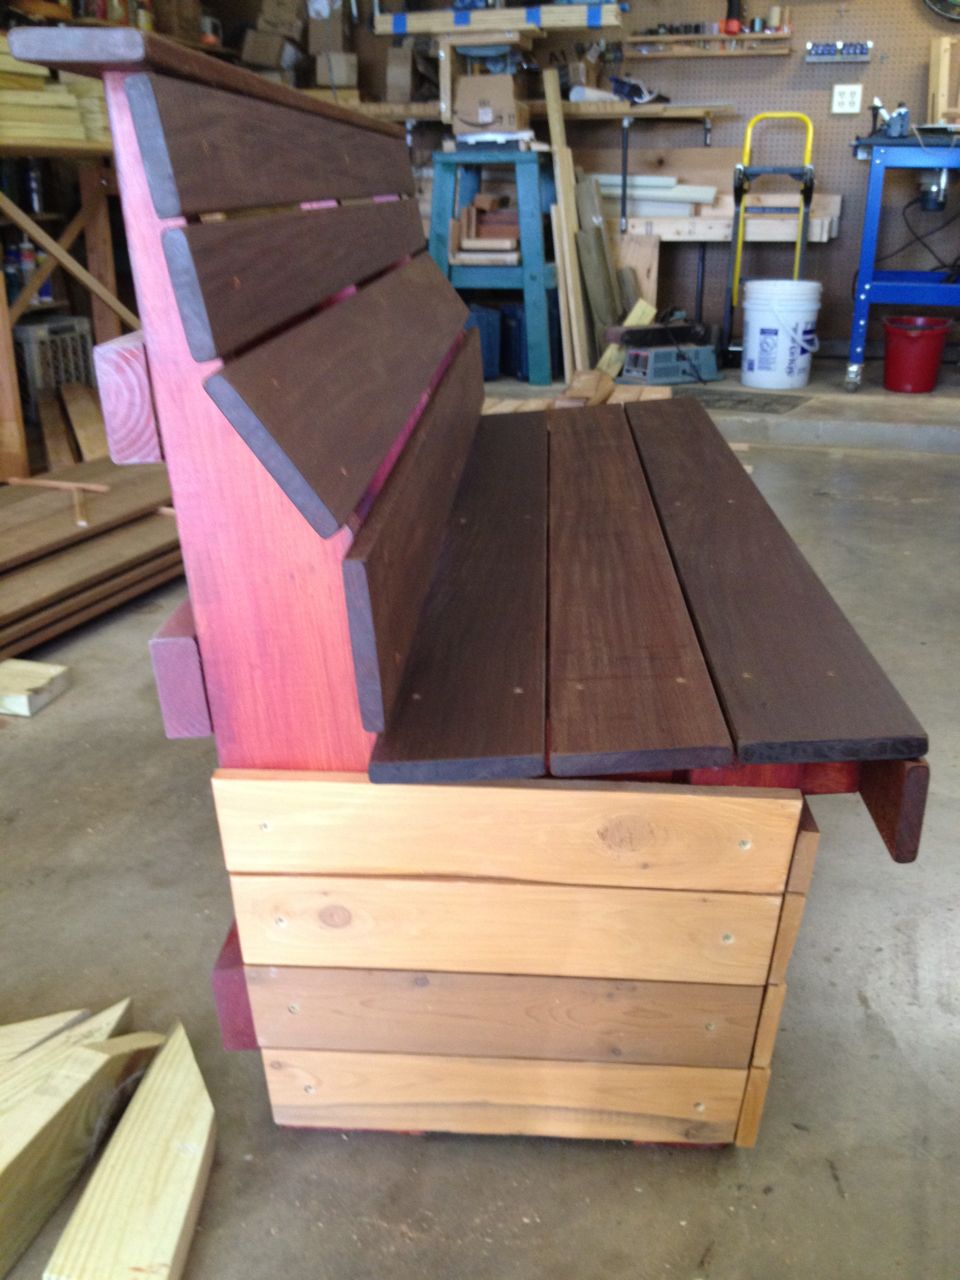
Bench with no upper side cedar
Finished bench
One part I had not made yet was an upper side cedar skirt piece. I was
not sure I would need to add this, but after assmebling it, it became
clear that it looked very odd without it. Thus, I went and cut the
necessary cedar for the 4 benches.
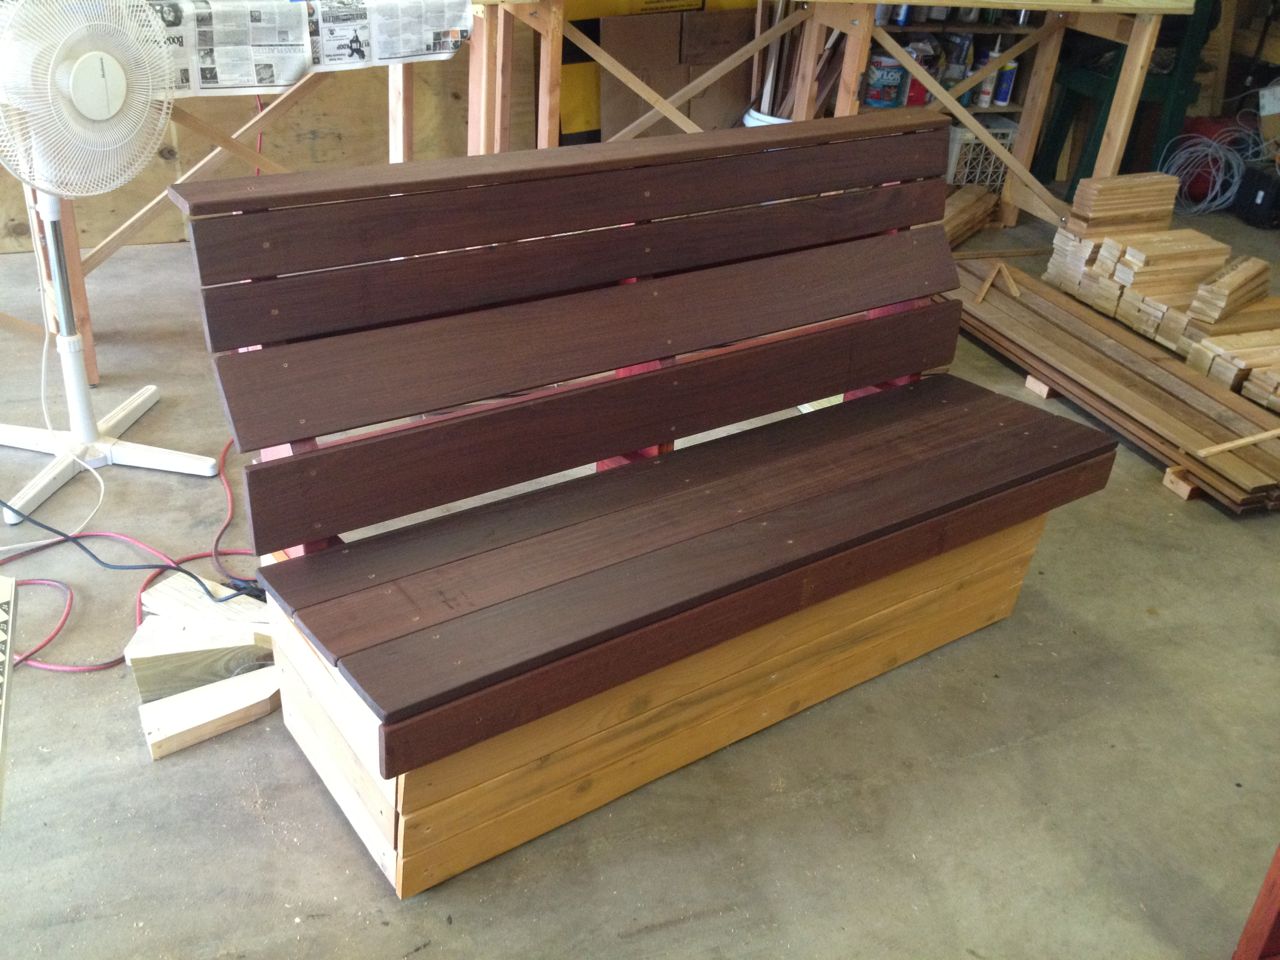
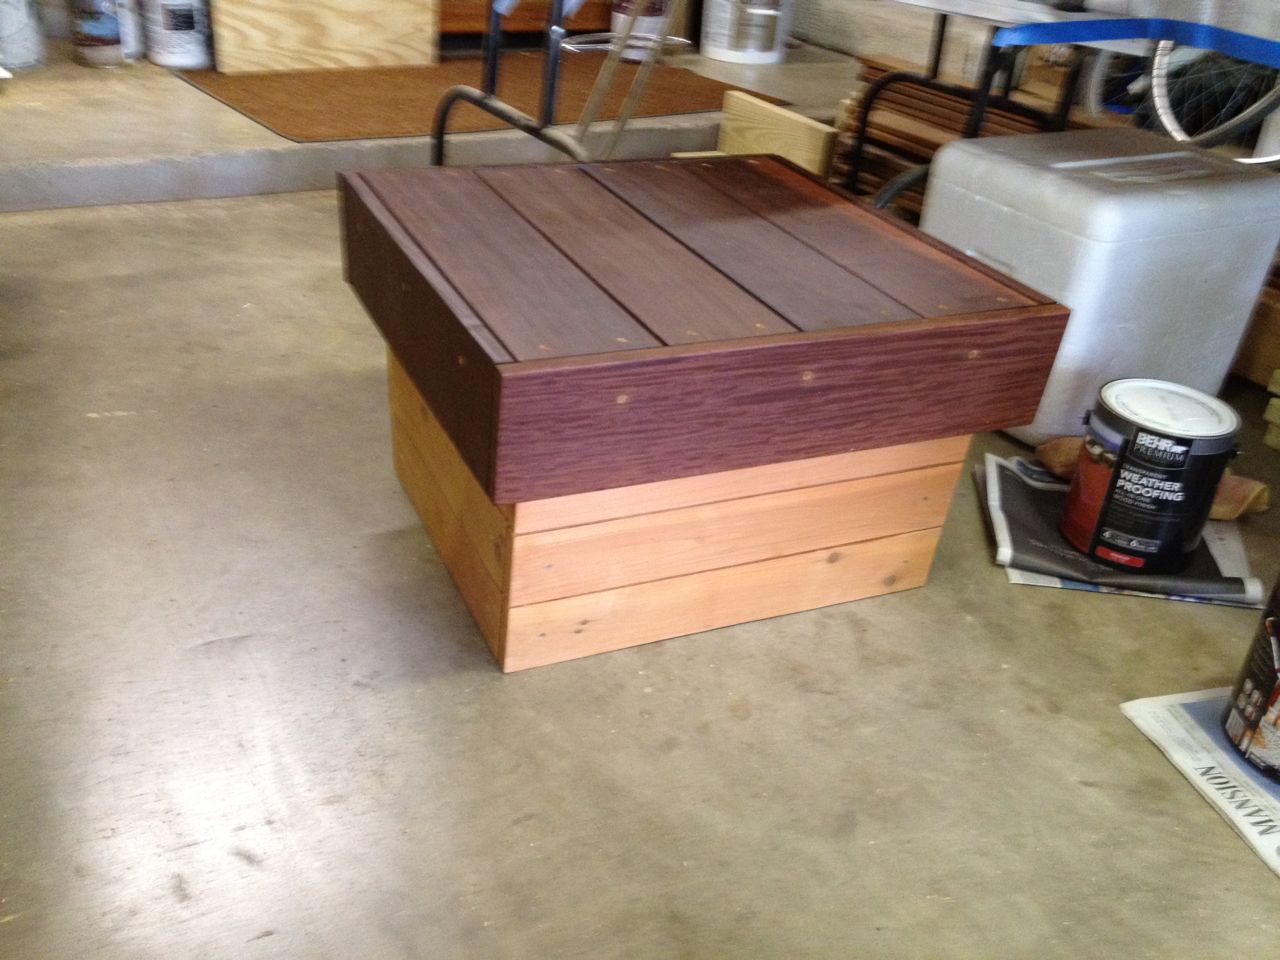
First Table
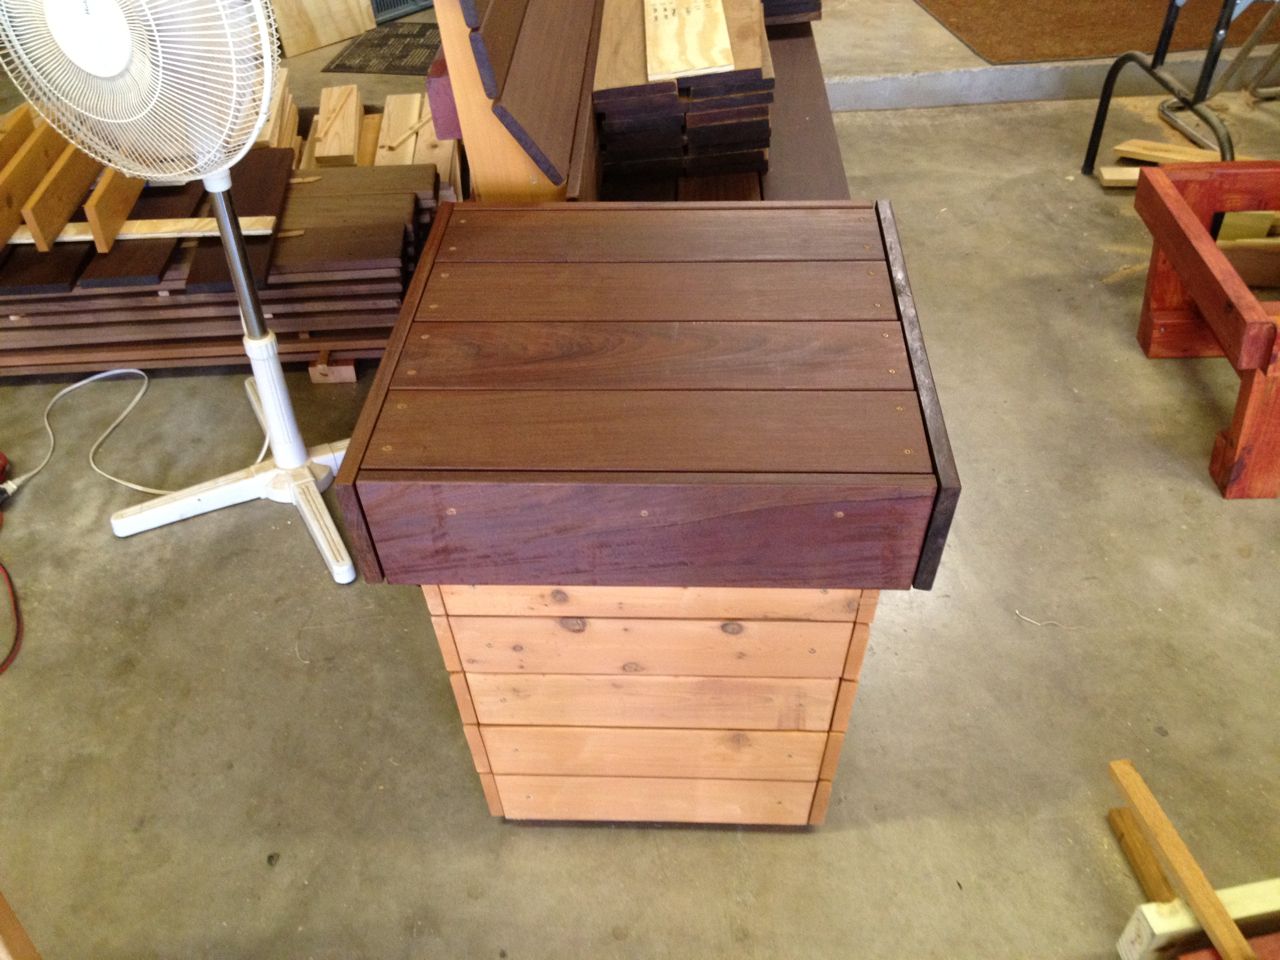
First table: side view
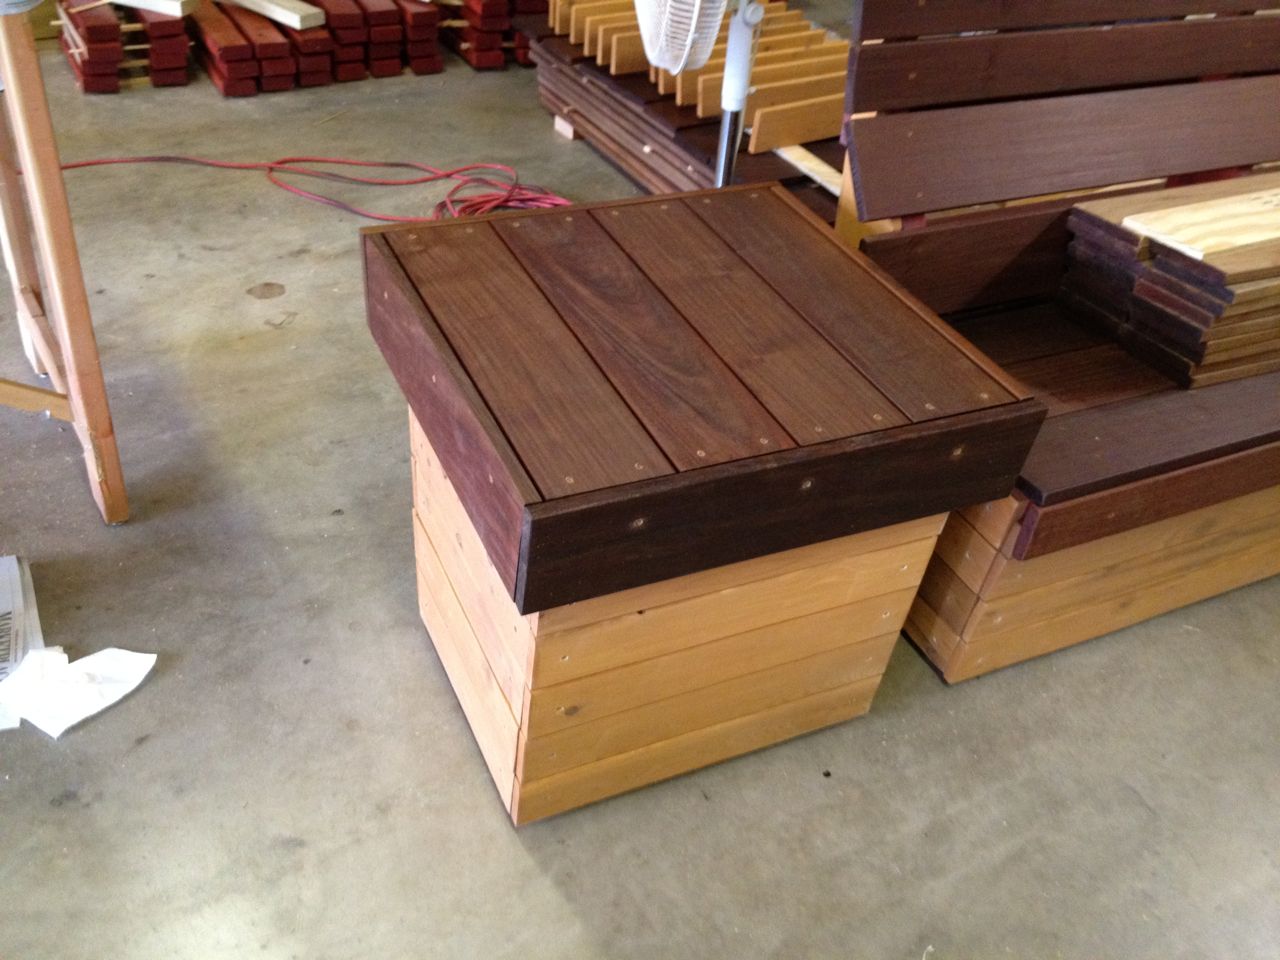
First table assembled
I still needed to work out the assembly of cedar and Ipe boards for the
tables, so did this after painting, oiling an dstaining a set of boards
for a table.
First Ottoman
First ottoman assembled
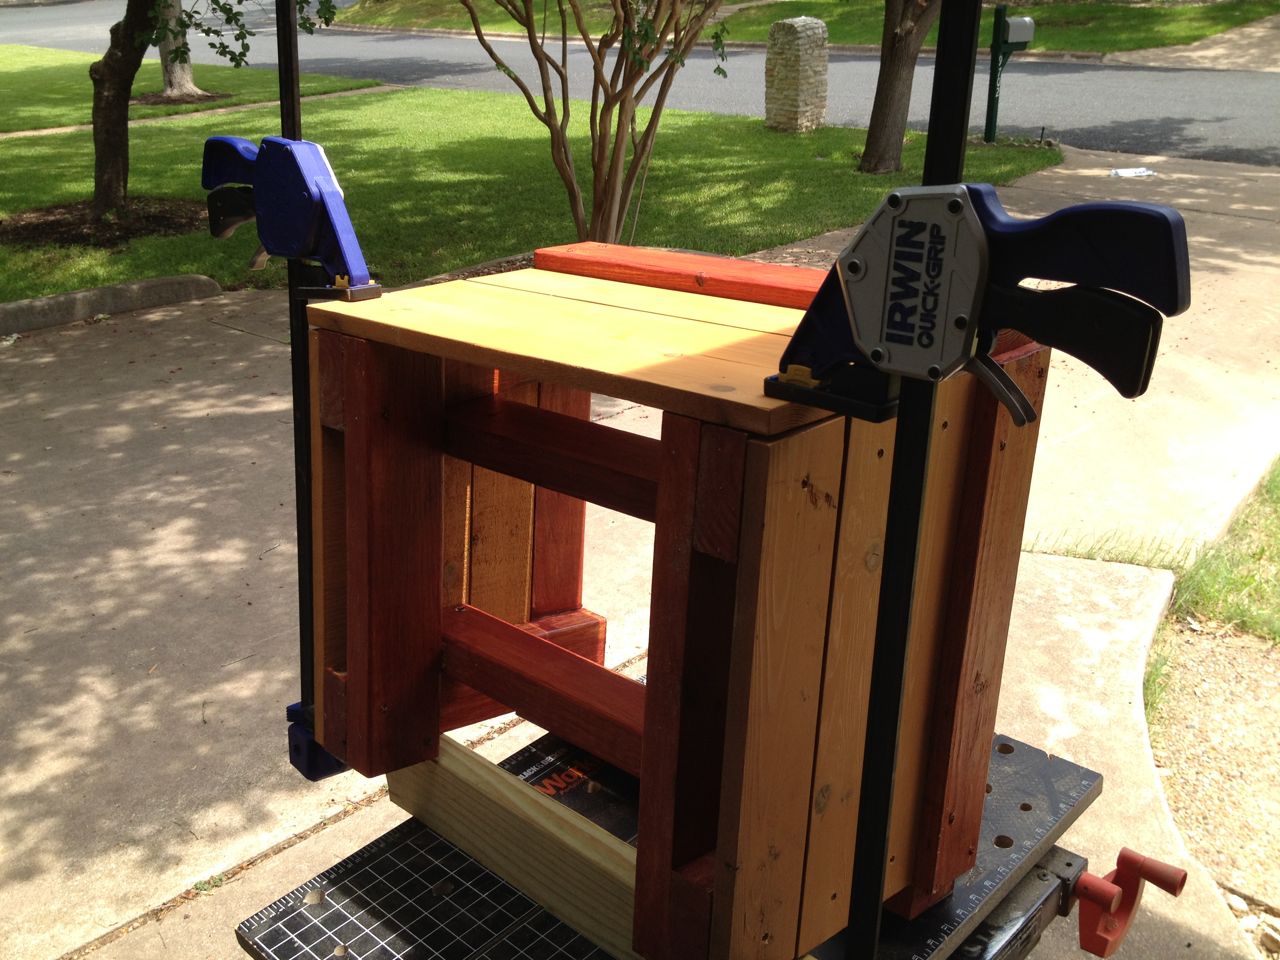
Ottoman during assembly
Though the structure of the ottoman is identical to the tables, it's
short height changes a few things in subtle ways. Thus, the next batch
of parts prepared were for an ottoman to work out all the assembly
details for it.
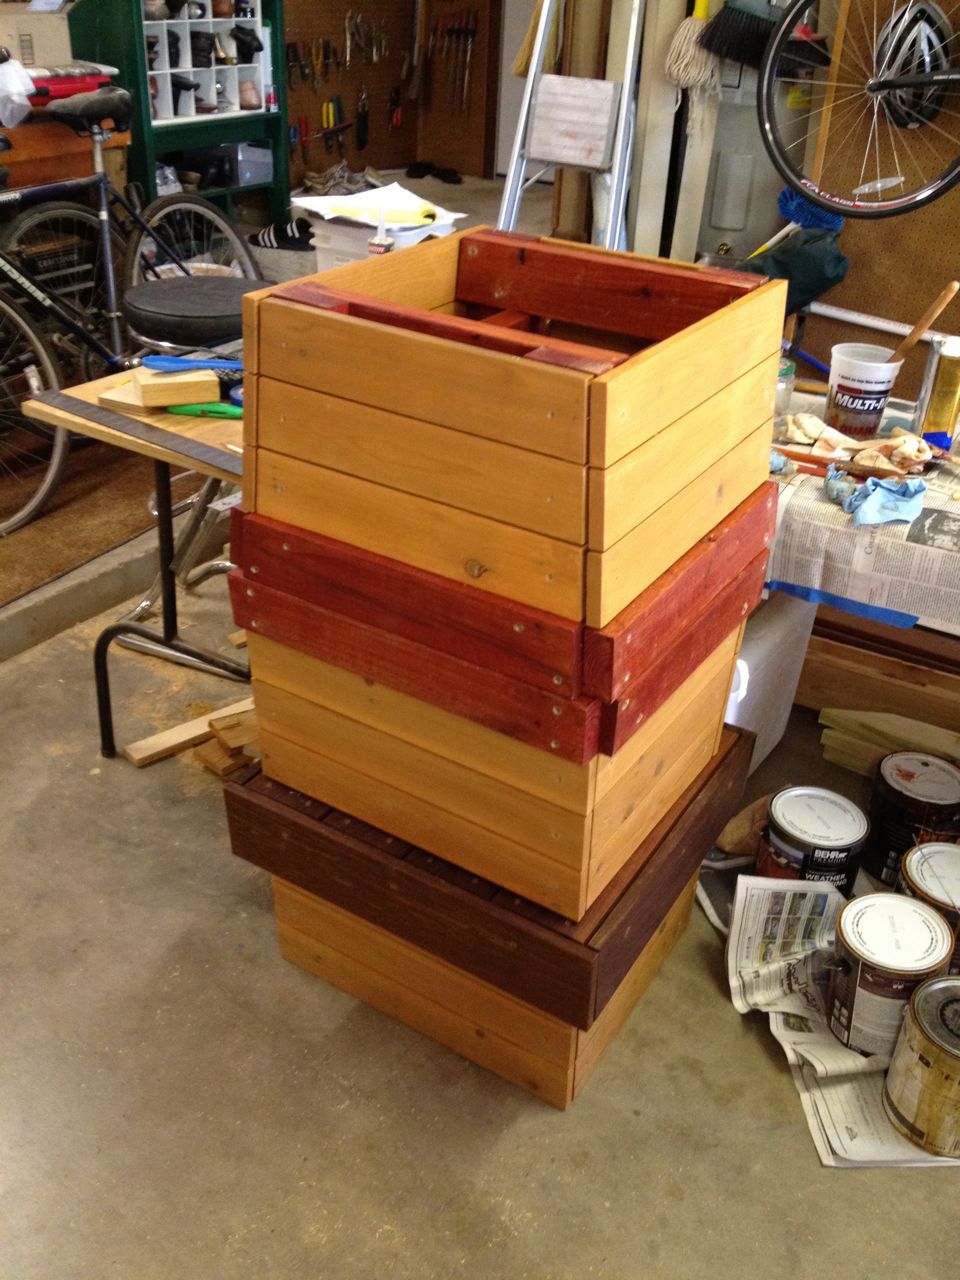
Bulk Oiling, Staining and Painting
Parts after paint/oil/stain
Oiling/staining of table parts
Because of my hectic travel schedule around this time, it turned out to
be best for me to just be oiling and staining parts for a few days.
Though I did this one piece of furniture at a time, I was not
assembling any more pieces until all the oiling and staining was
completed.

Oiled and un-oiled Ipe
Like most woods, Ipe changes color drastically when an oil finish is
applied. The oil finish does have somem pigments in it to protect from
UV rays, but generally, if you just wet the Ipe it takes on a color
much like what is shown here after it has been oiled.
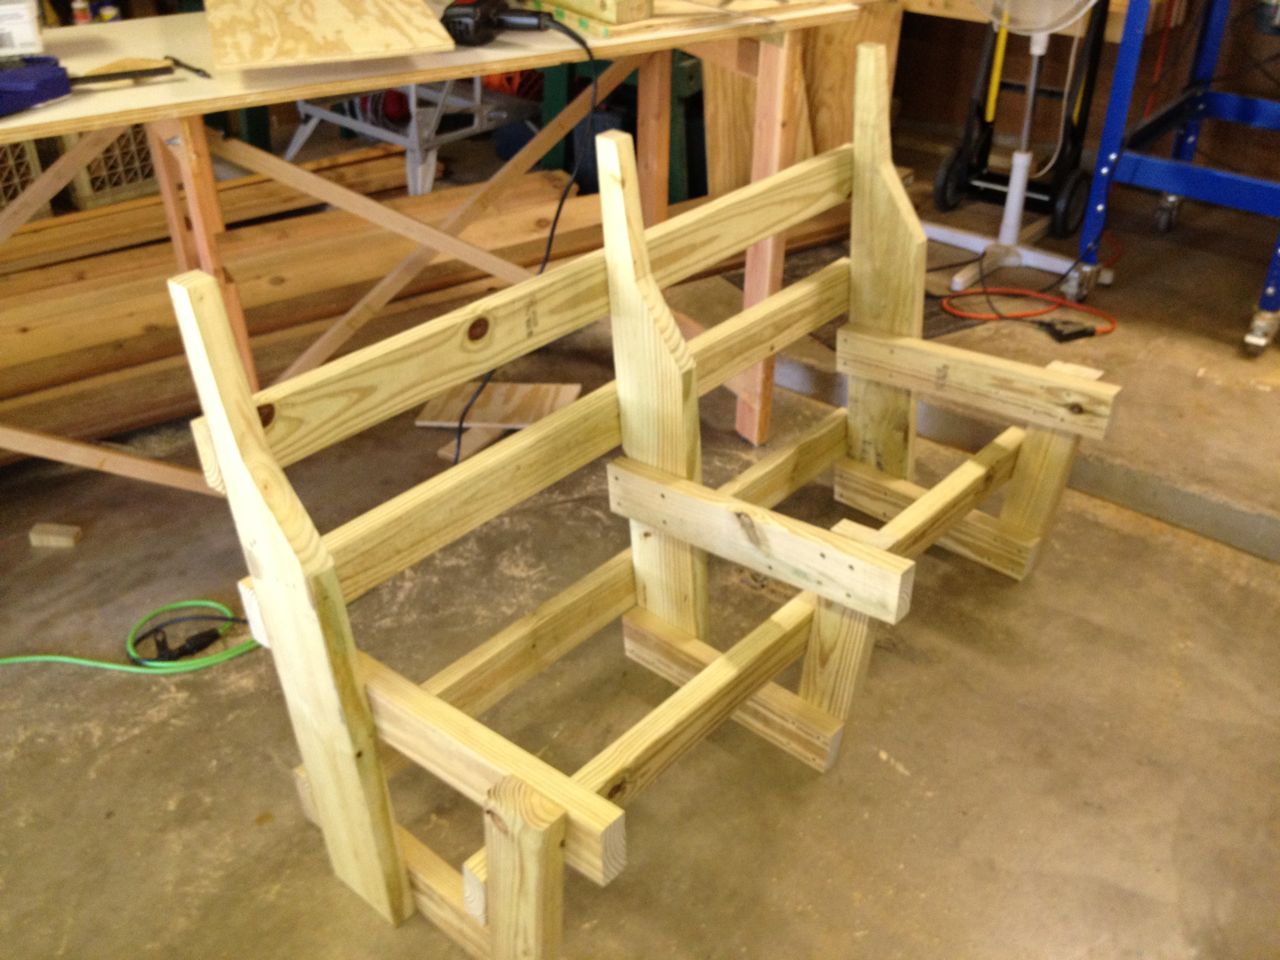
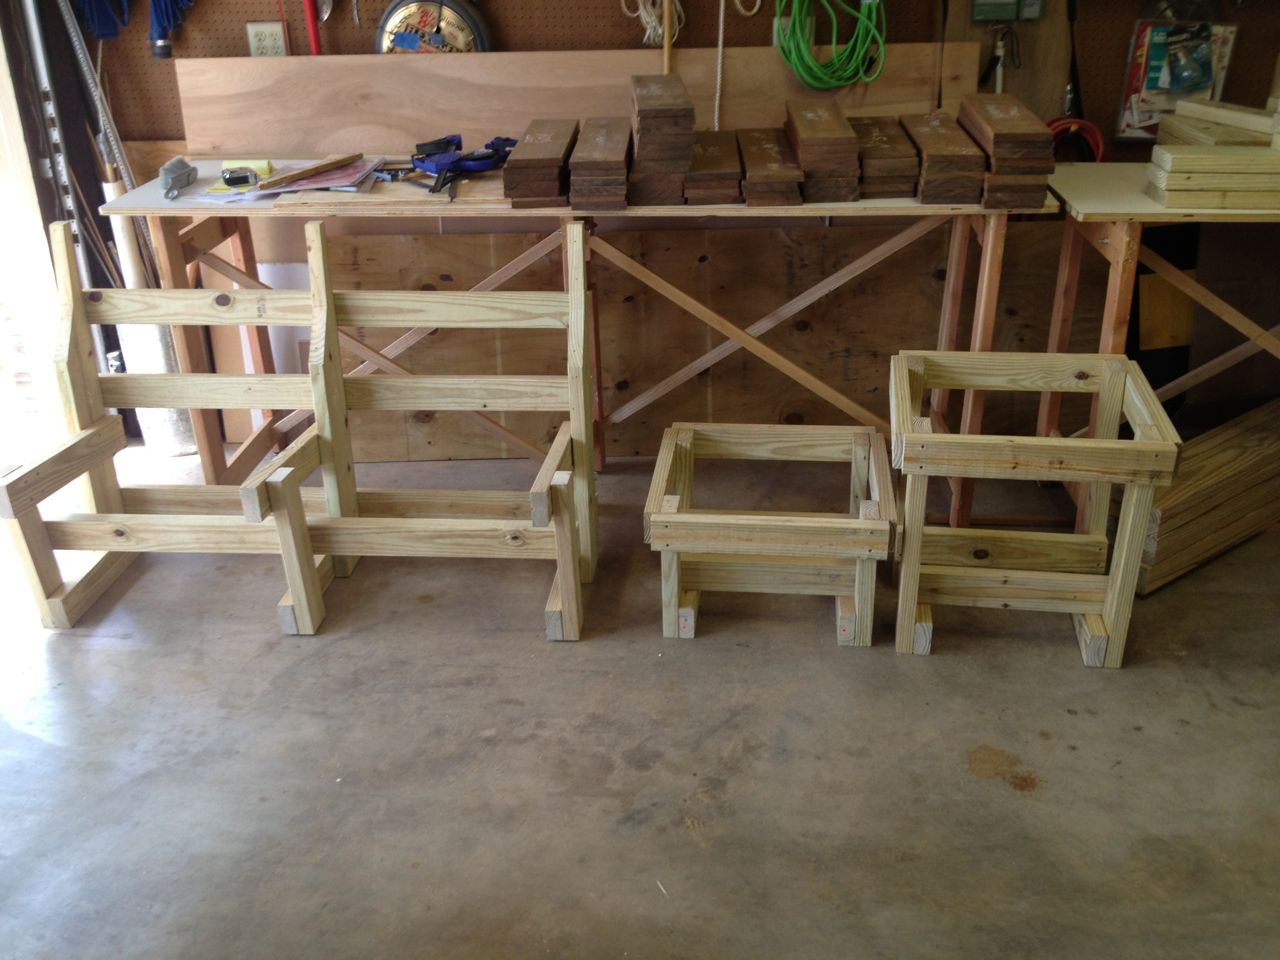
Bulk Frame Assembly
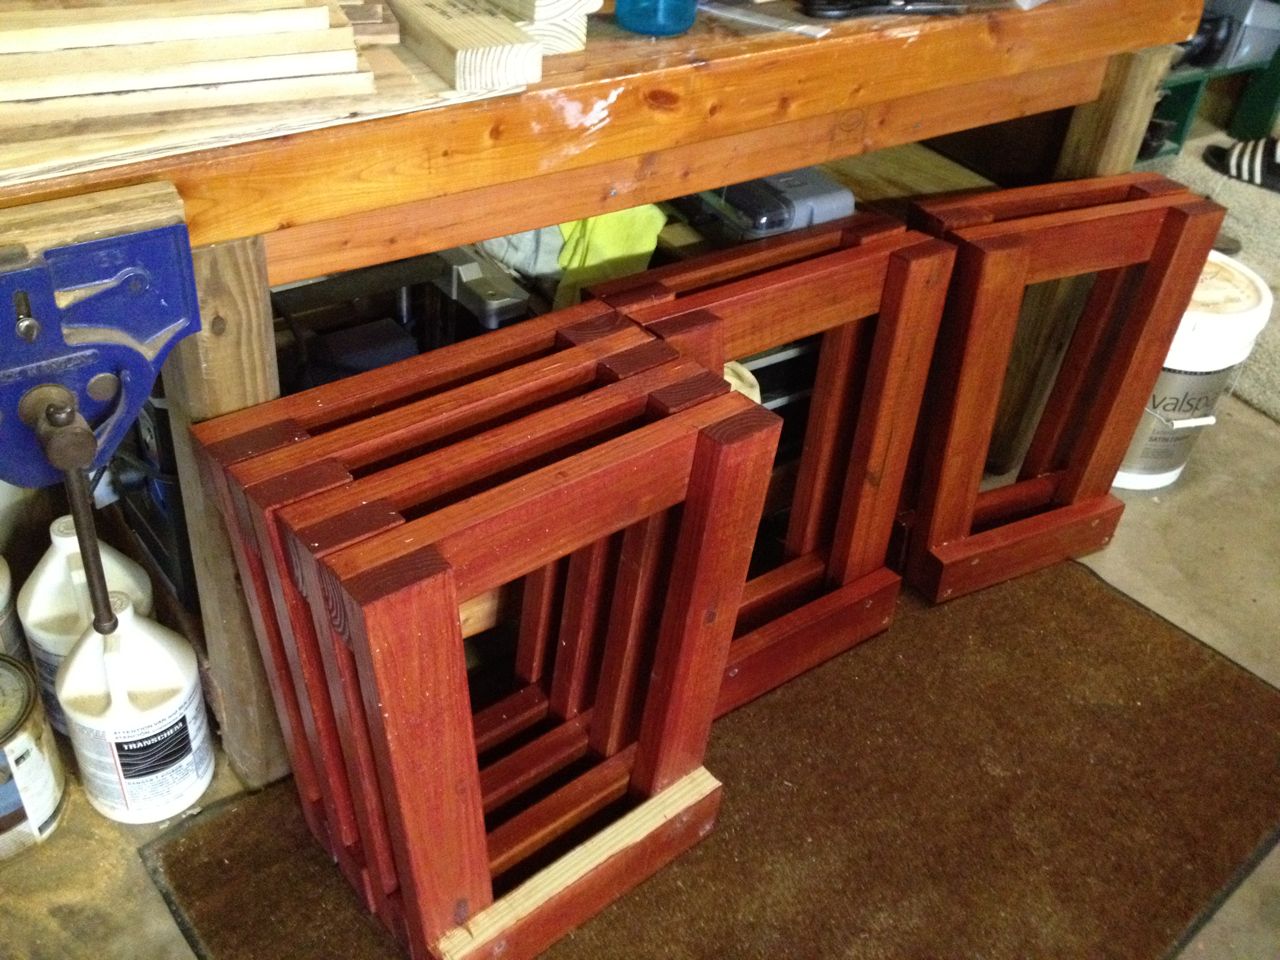
All table side frames
All ottoman side frames
With the painting, oiling and staining done, I decided to do the
assembly more like an assembly line. Main reason for this was the
minimize context switching, changing tools and to do it while it was
fresh in my mind.
Left hand bench side assembly
Bench side during assembly
Each bench requires 3 side assmeblies, which are joined by 4 cross
pieces. The way they were designed, 2 of these 3 are identical, while
the other is a "left hand" version. This allows the right type of
surface to fasten the cedar skirting to. I had a great fear of not
making the right amount of each type of bench sides.
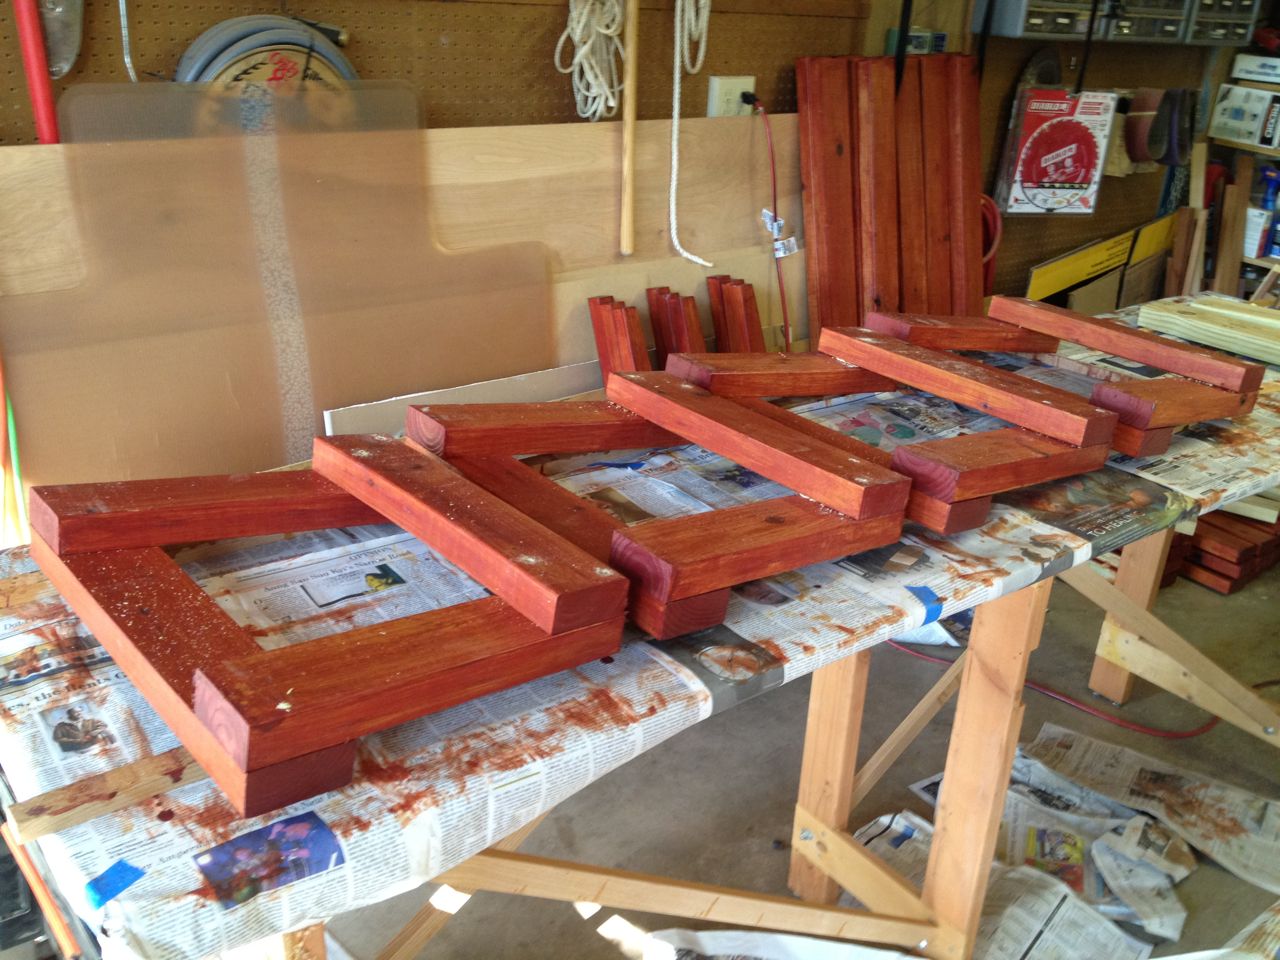
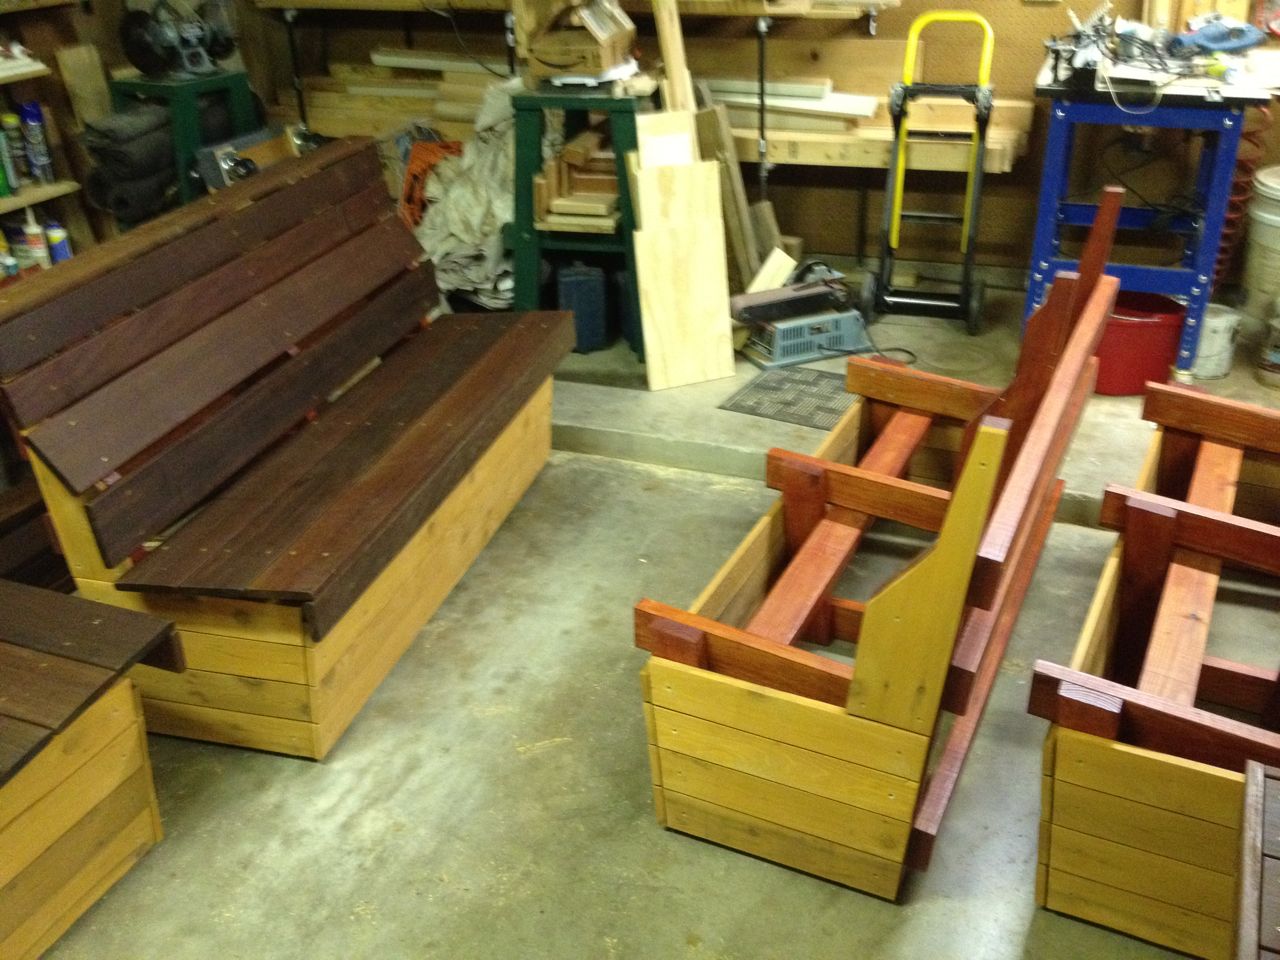
Bulk Final Assembly
Cedar skirt assembly
Final ottoman frame assembly
With all the frames assmebled, it was time to put on the cedar and Ipe
planks for the final assembly. I also did this one furniture piece at
a time.
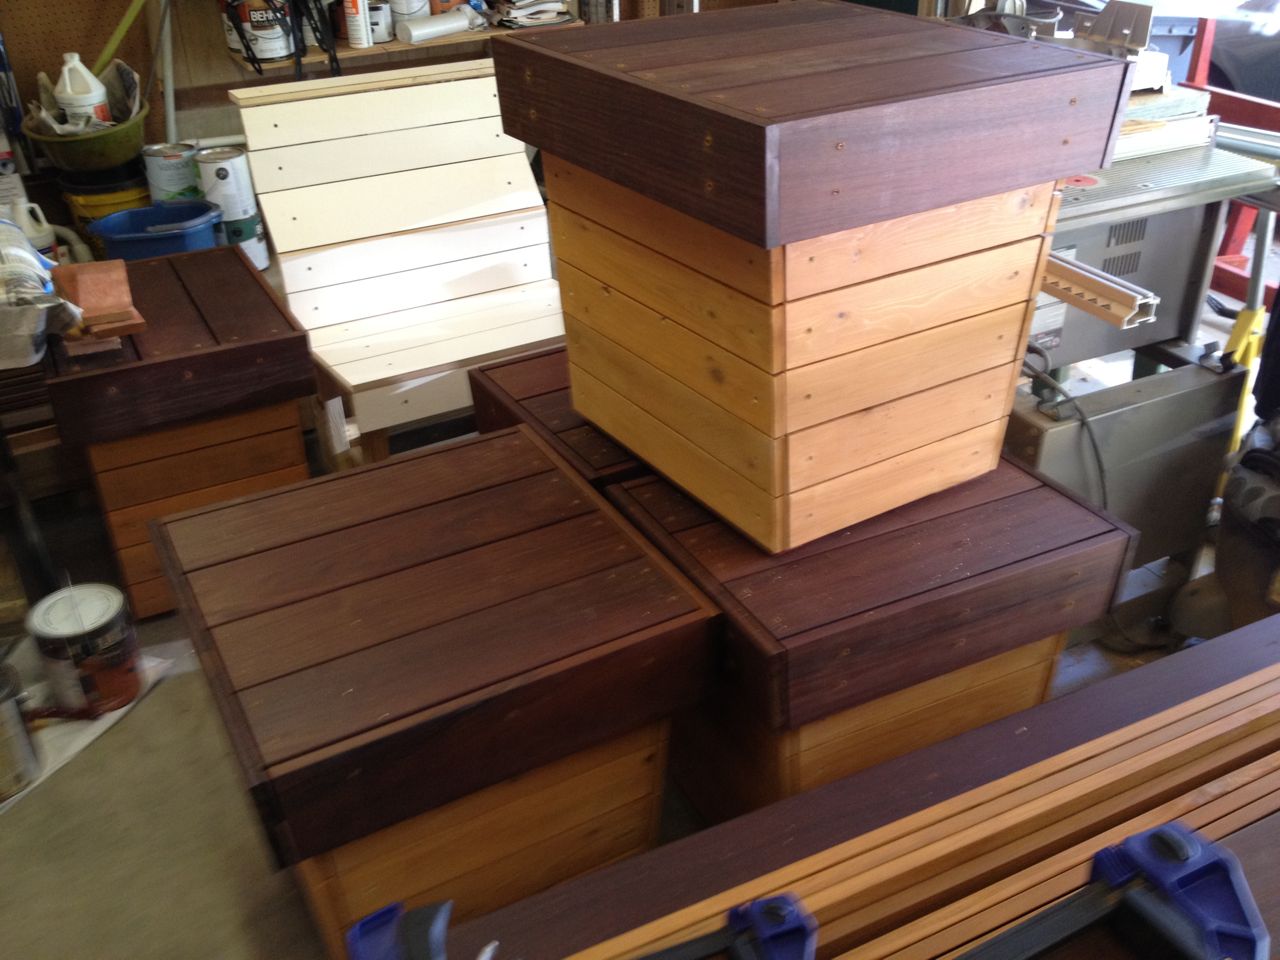
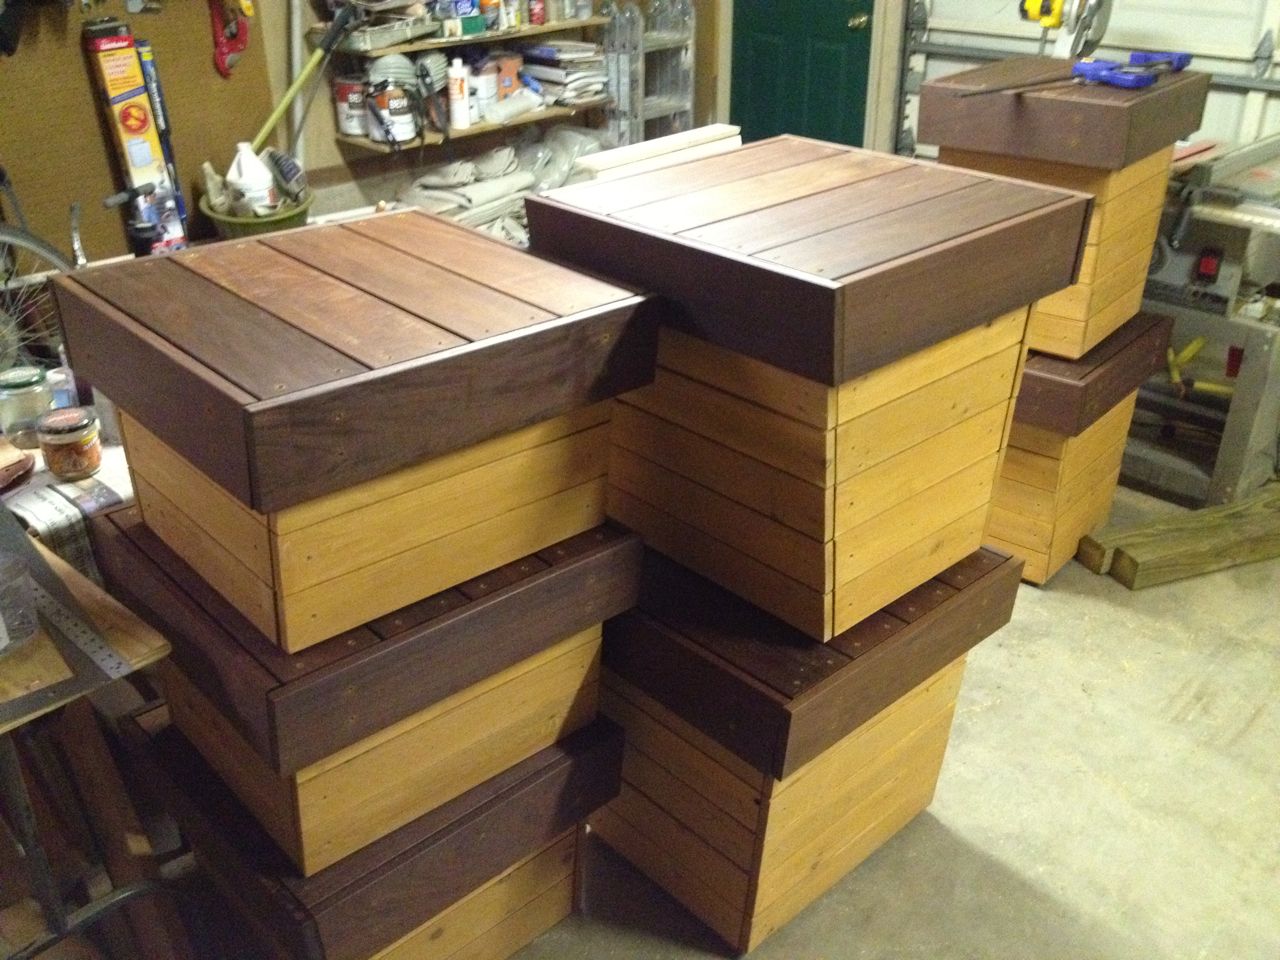
Stack of mostly completed ottomans
Stack of completed tables
I put all the ottomans together first, then moved onto the tables,
saving th8e benches for last.
Assembly about halfway finished
Bench frames
I did the benches last because they were easier to do with two people
and my wife was out of town during this point in time. The benches
also take up the most space, so I delayed putting their frames together
until after I cleared space by assembling the other pieces.
Installing Ipe on bench
Bench assembly in progress
Ipe is a very heavy wood. Between that and the ample frame structure of
pressure treated lumber, a finished bench weighs quite a lot. I would
estimate it weighs near 200 lbs. Thus, having a helper as it gets
assembled makes it much easier.
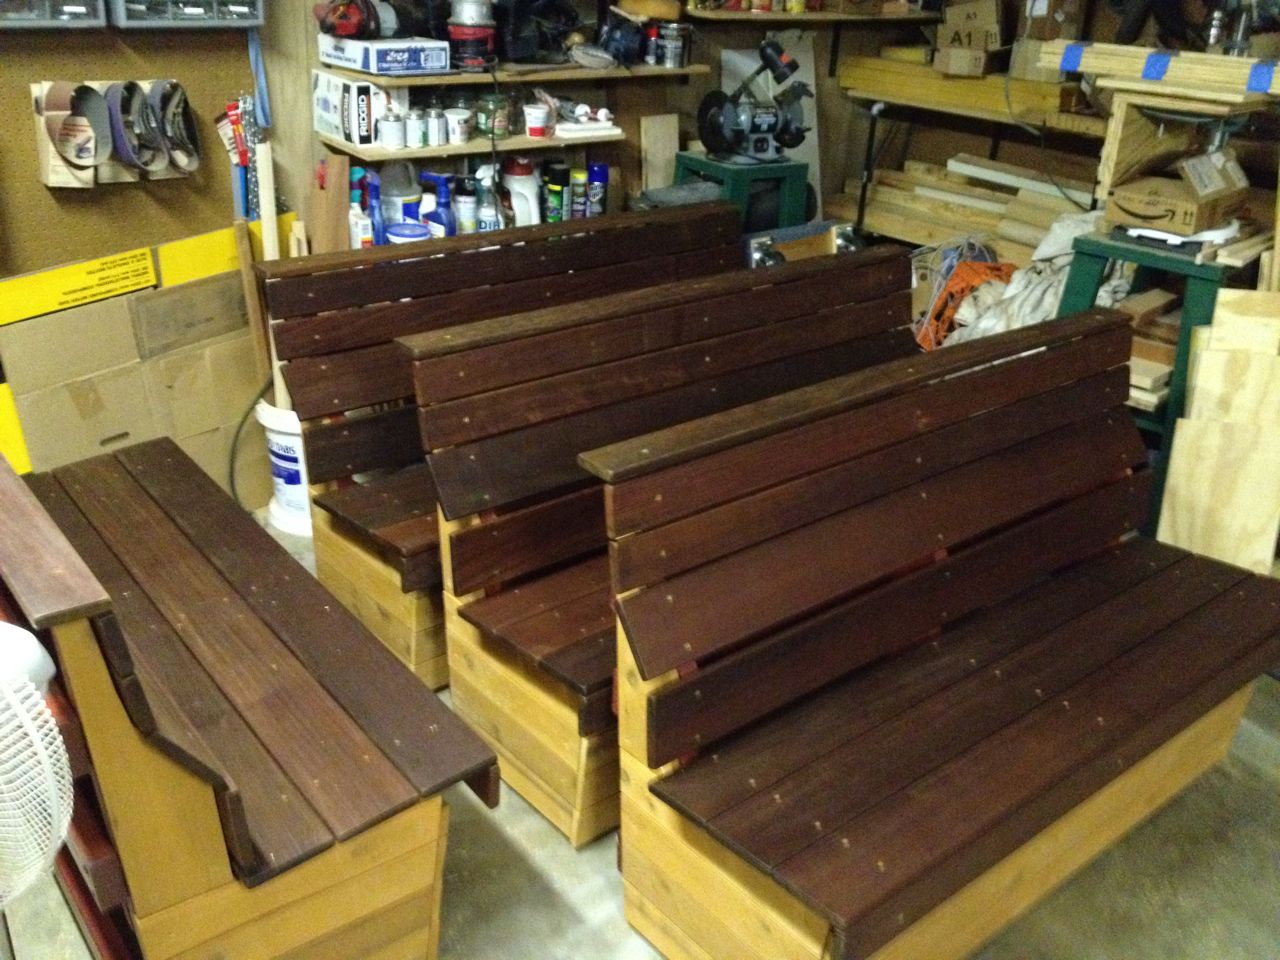
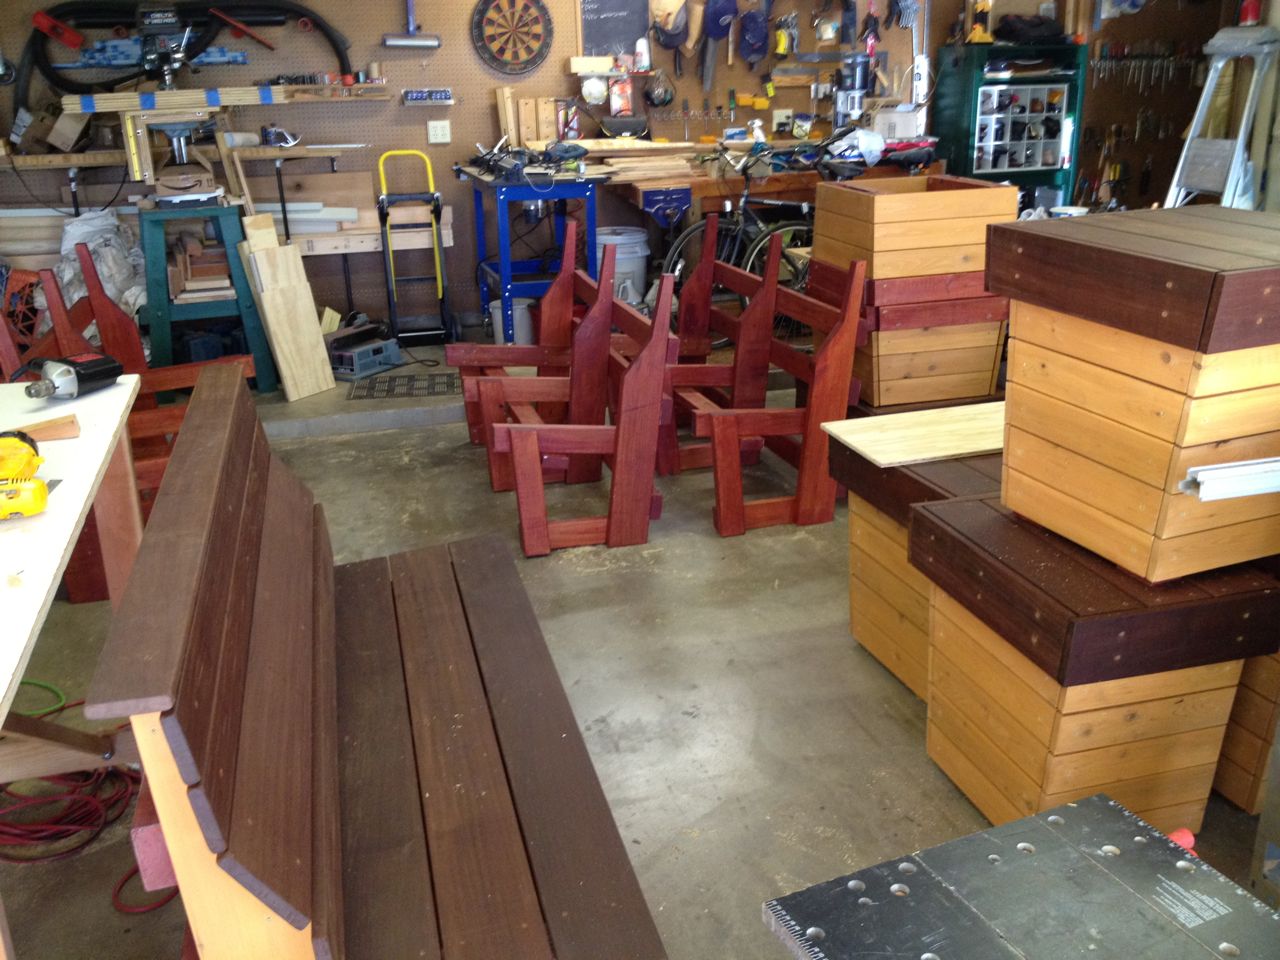
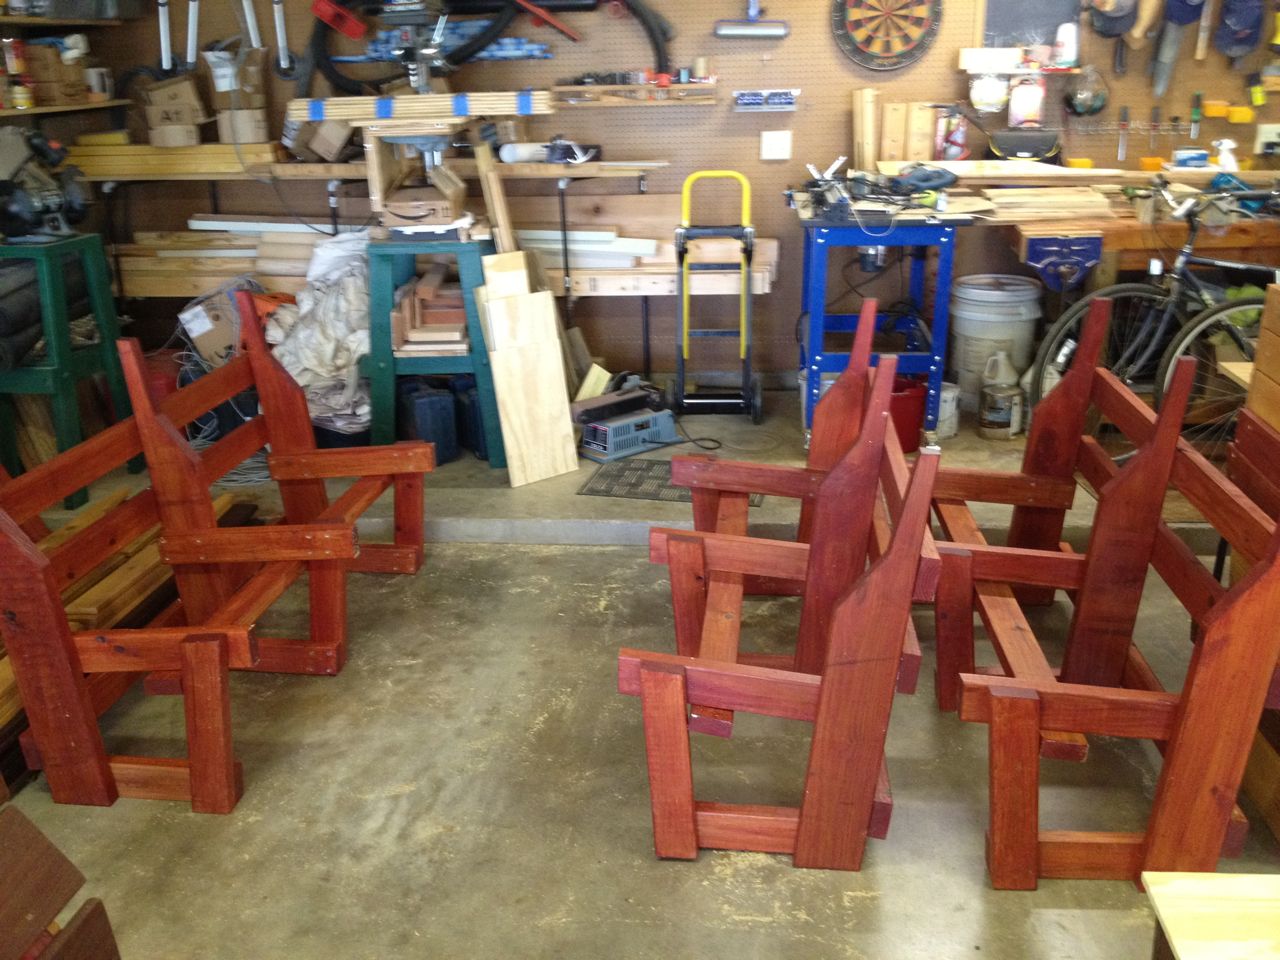
Assembly Completed
All tables assembled
All benches assembled
It was nearly two months from when I ordered the lumber until all the
furniture was finished. One month of that I was traveling, and I was
also doing some other projects during this time, but the shop/garage
was dominanted with this project for a solid 2 months. Thus, it was a
good feeling to finally see it all realized.
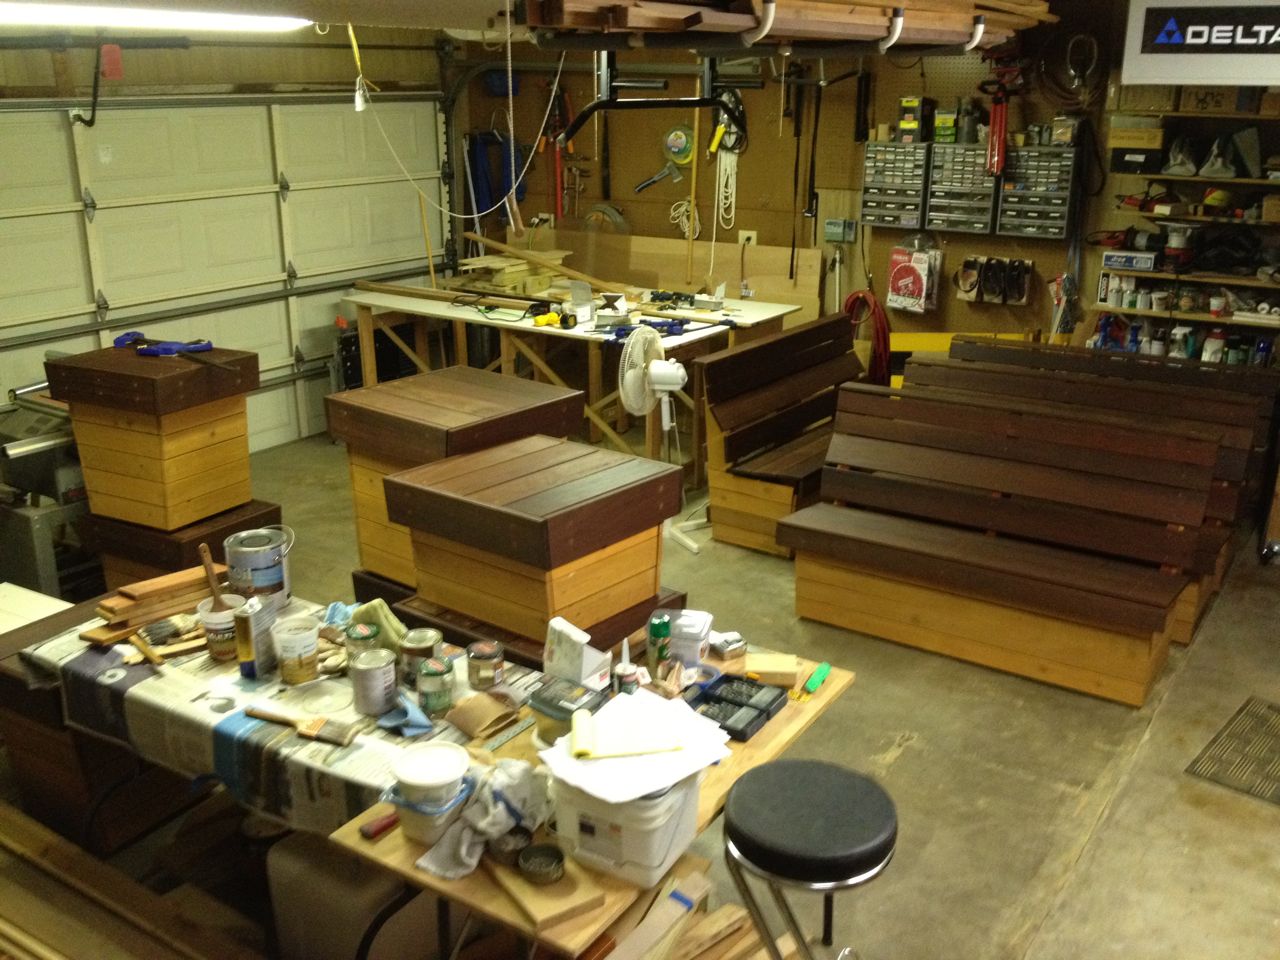
View of shop at completion
I needed to hold off on putting the furniture on the deck because there
was still some fence painting to be done and some light wiring to be
done. Thus, for a few days the furniture was just stacked up in the
shop/garage.
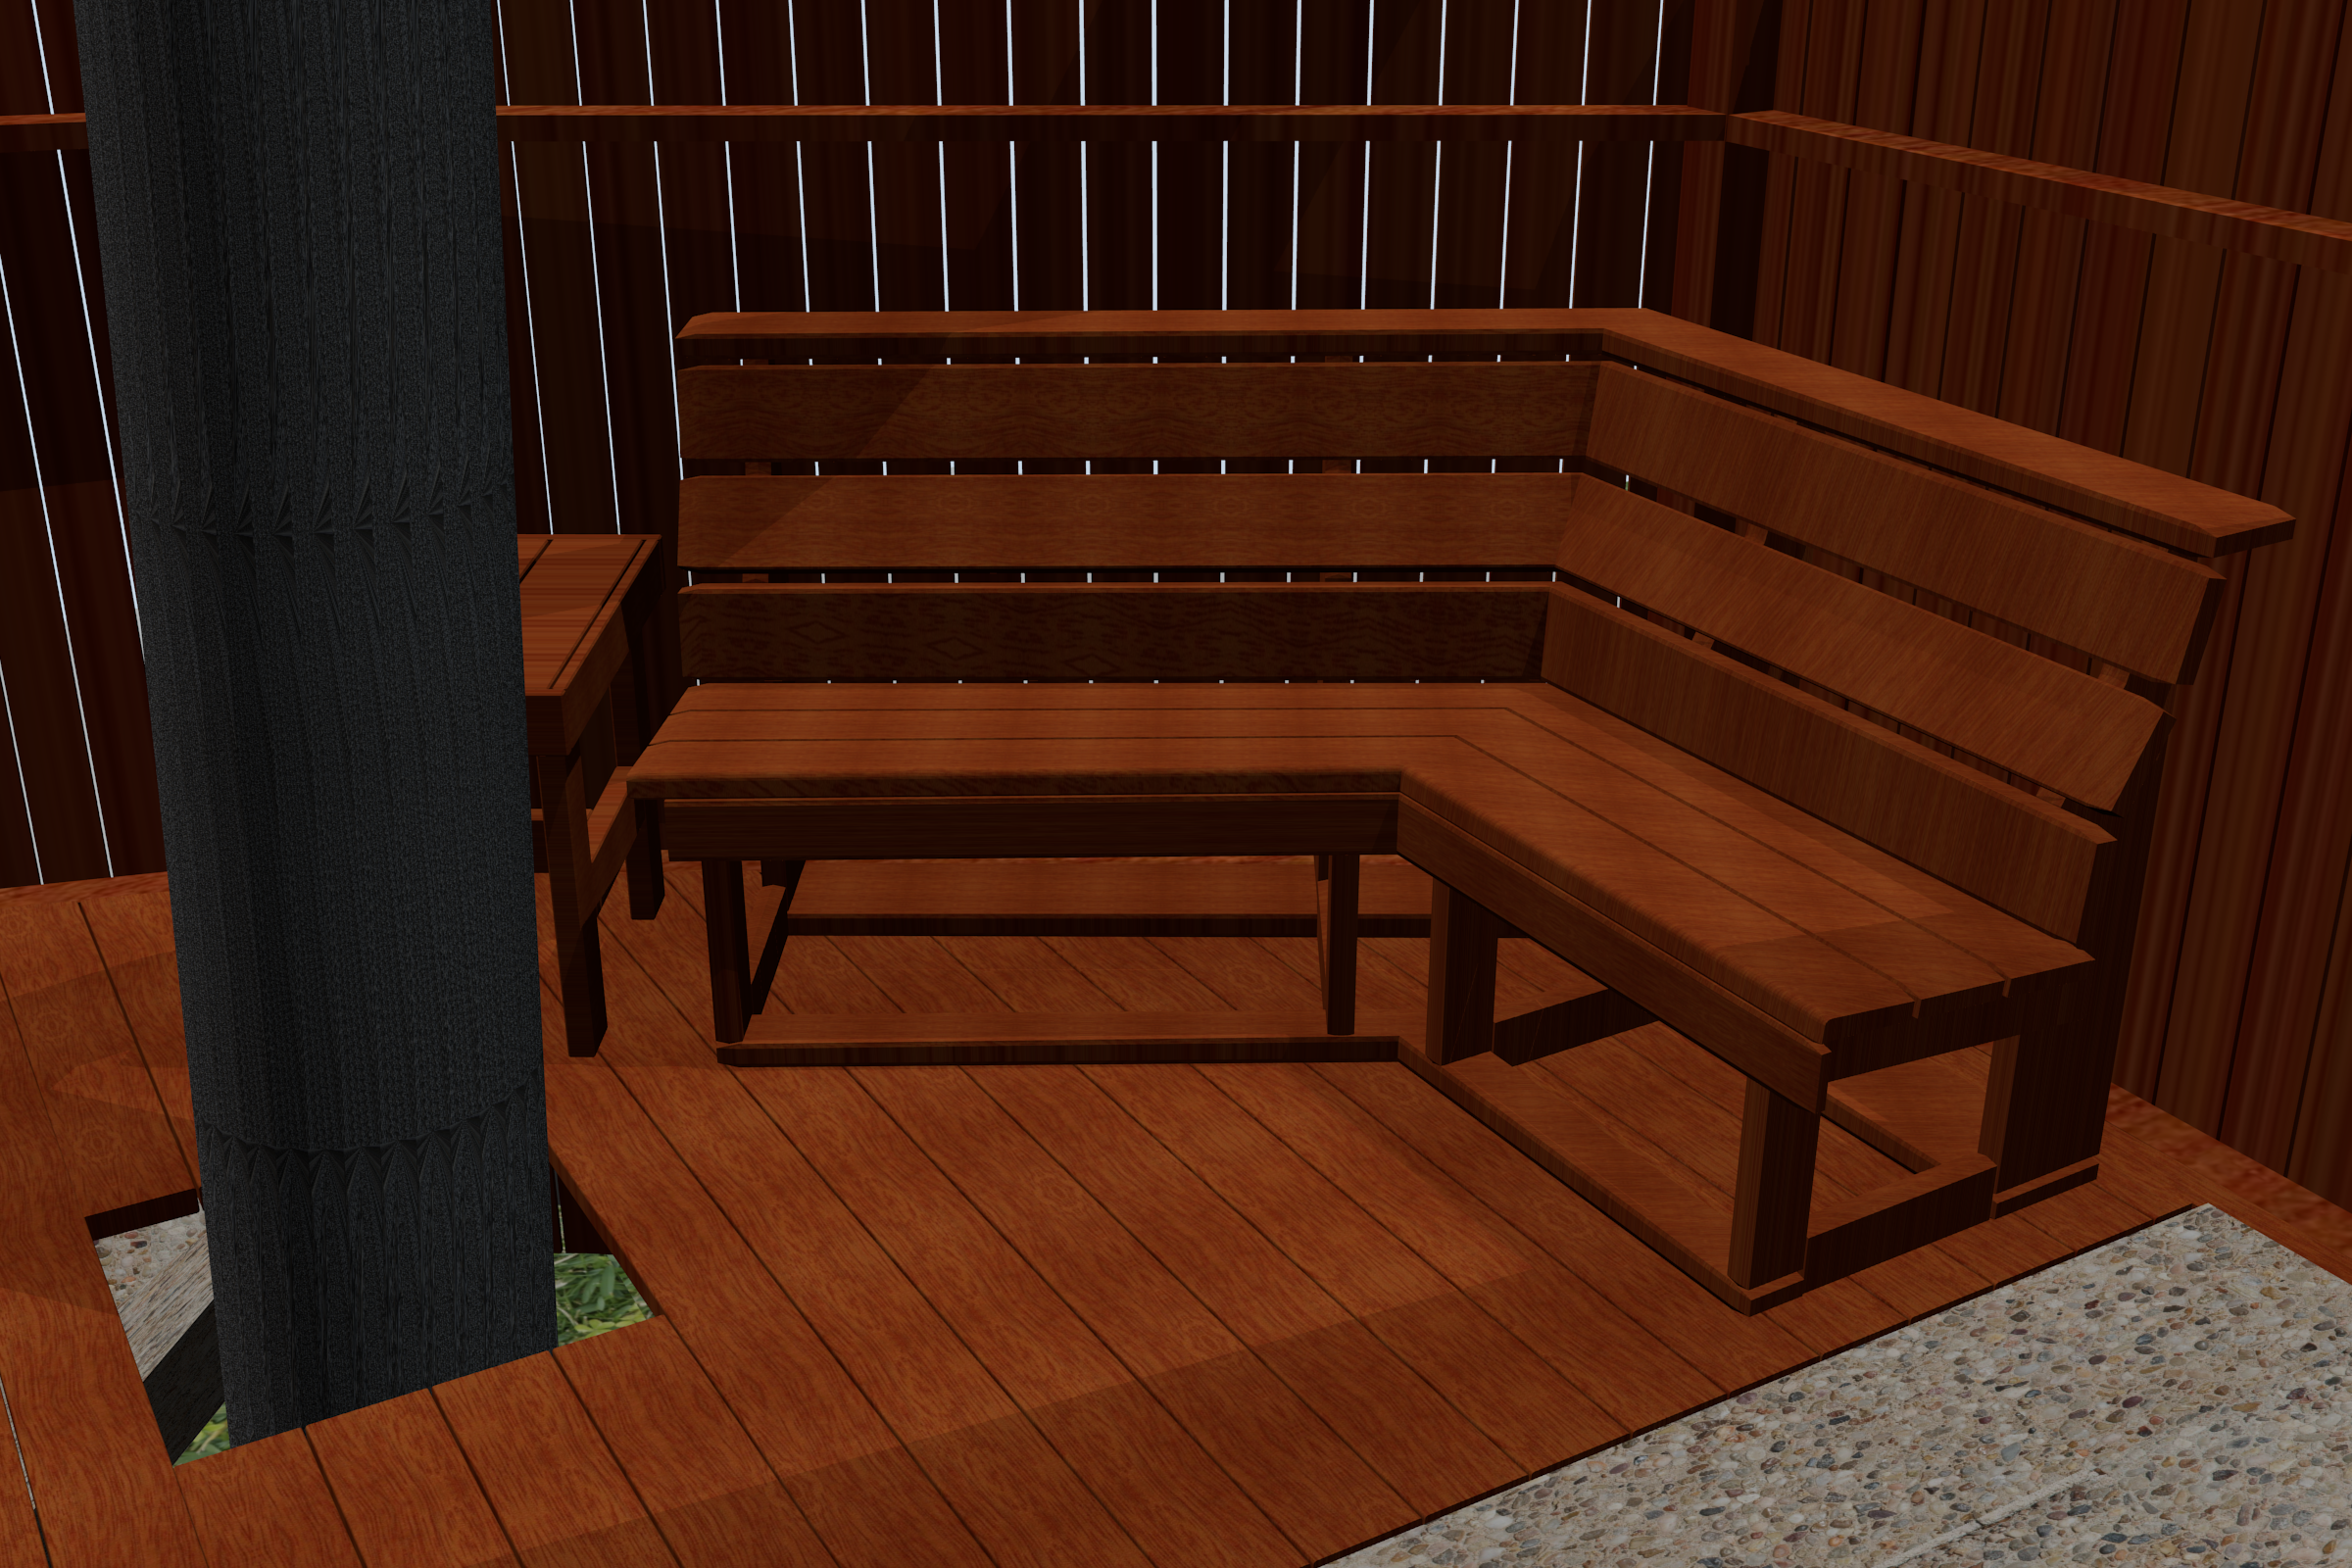
Final Result
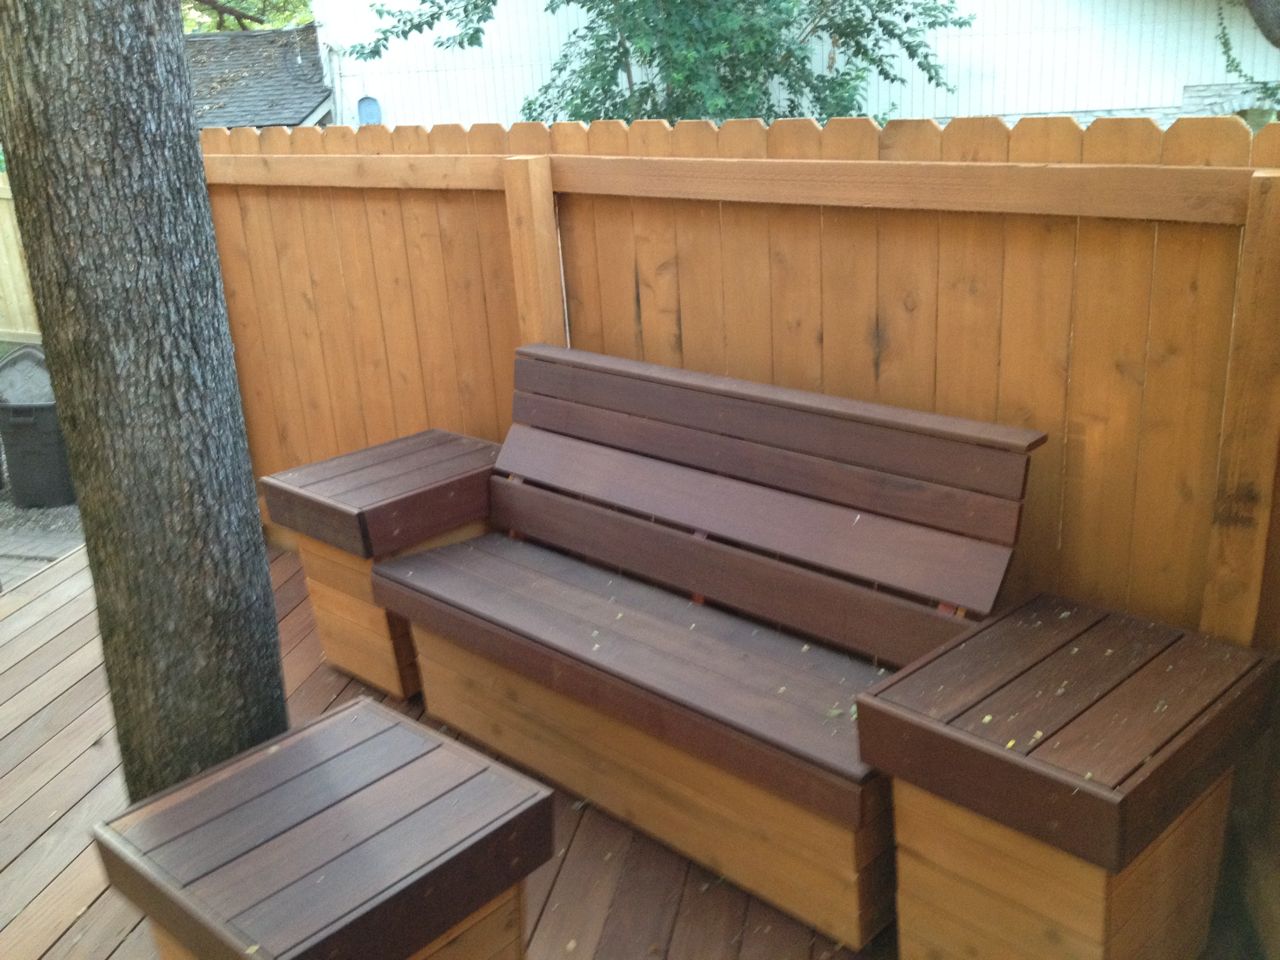
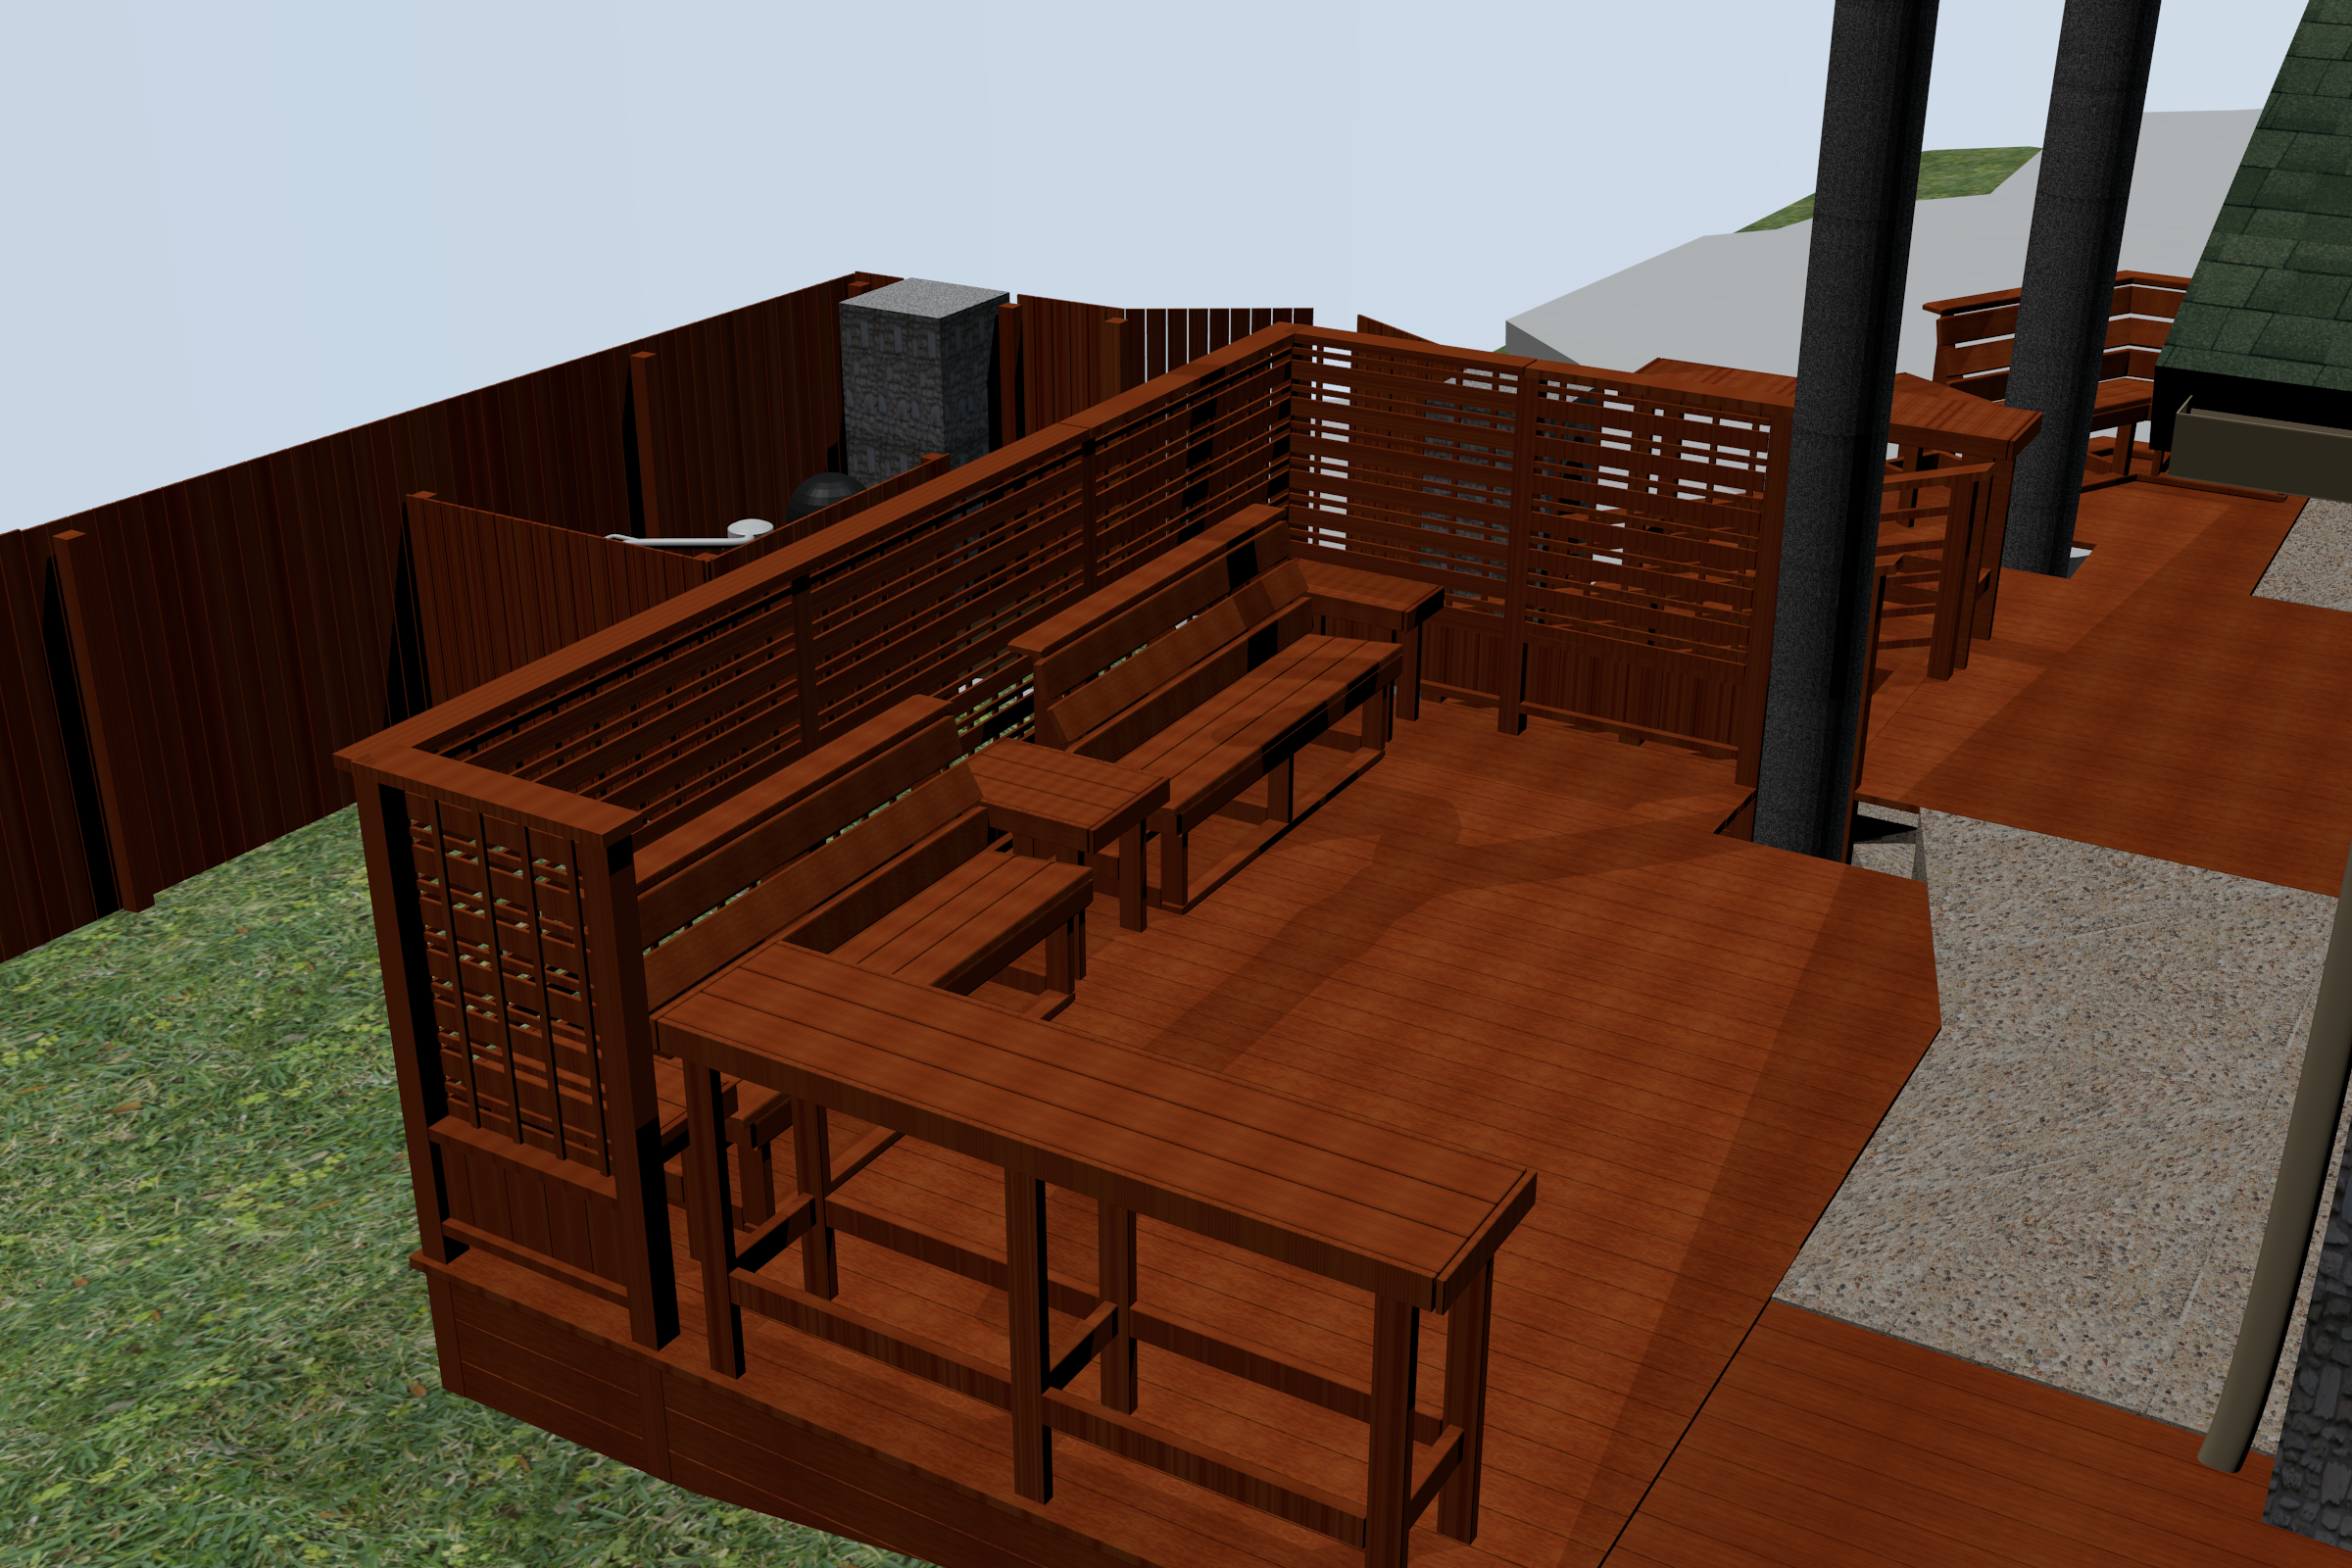
Furniture on southeast deck
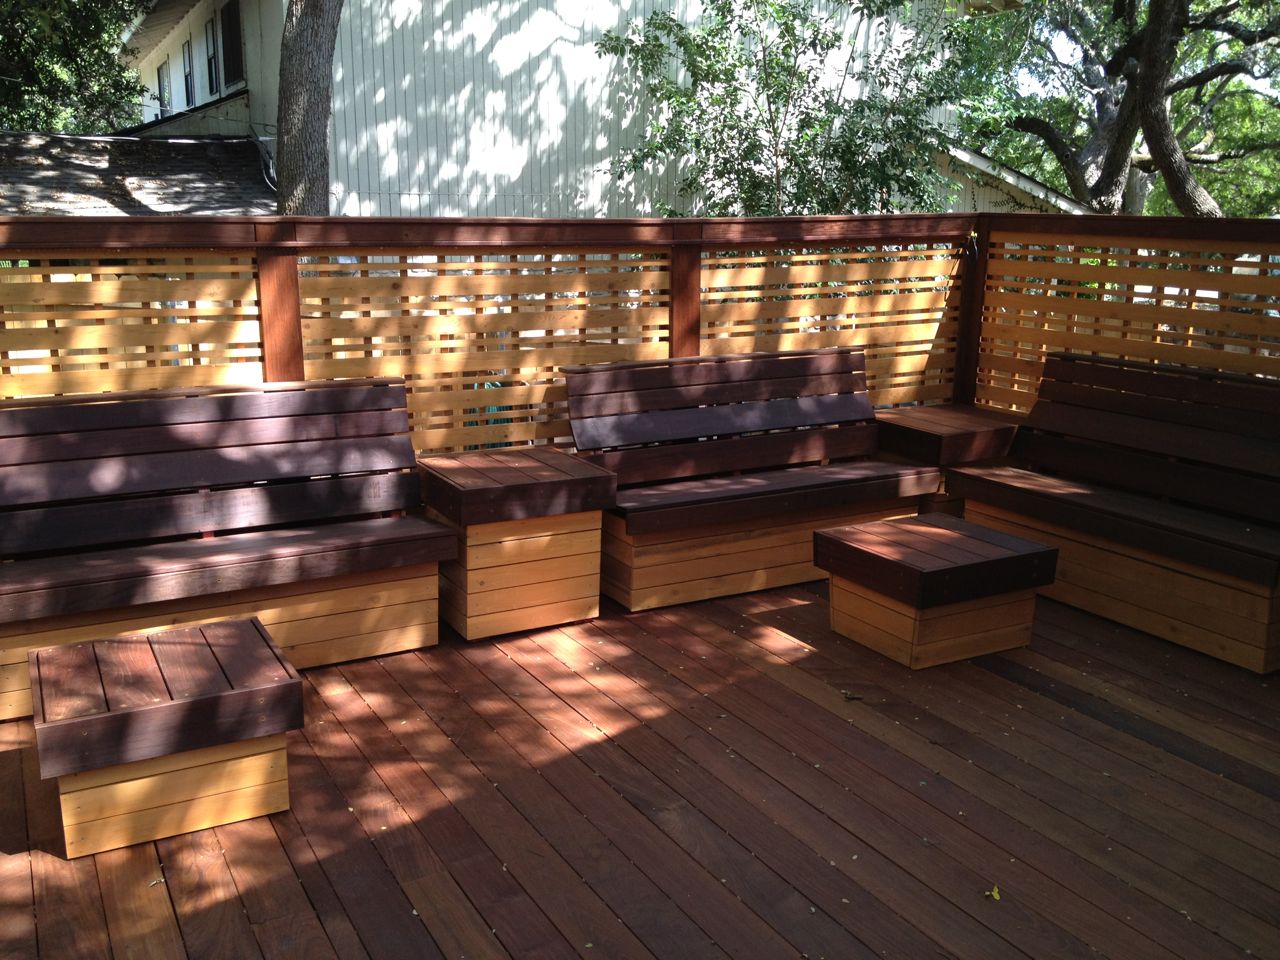
Furniture on northeast deck
Once the miscellaneous tasks on the New Decks Project were completed,
we could put the furniture where it was intended. This stuff was very
heavy so needed some furniture dollies and help to get it all in place.