 Cassandra.org
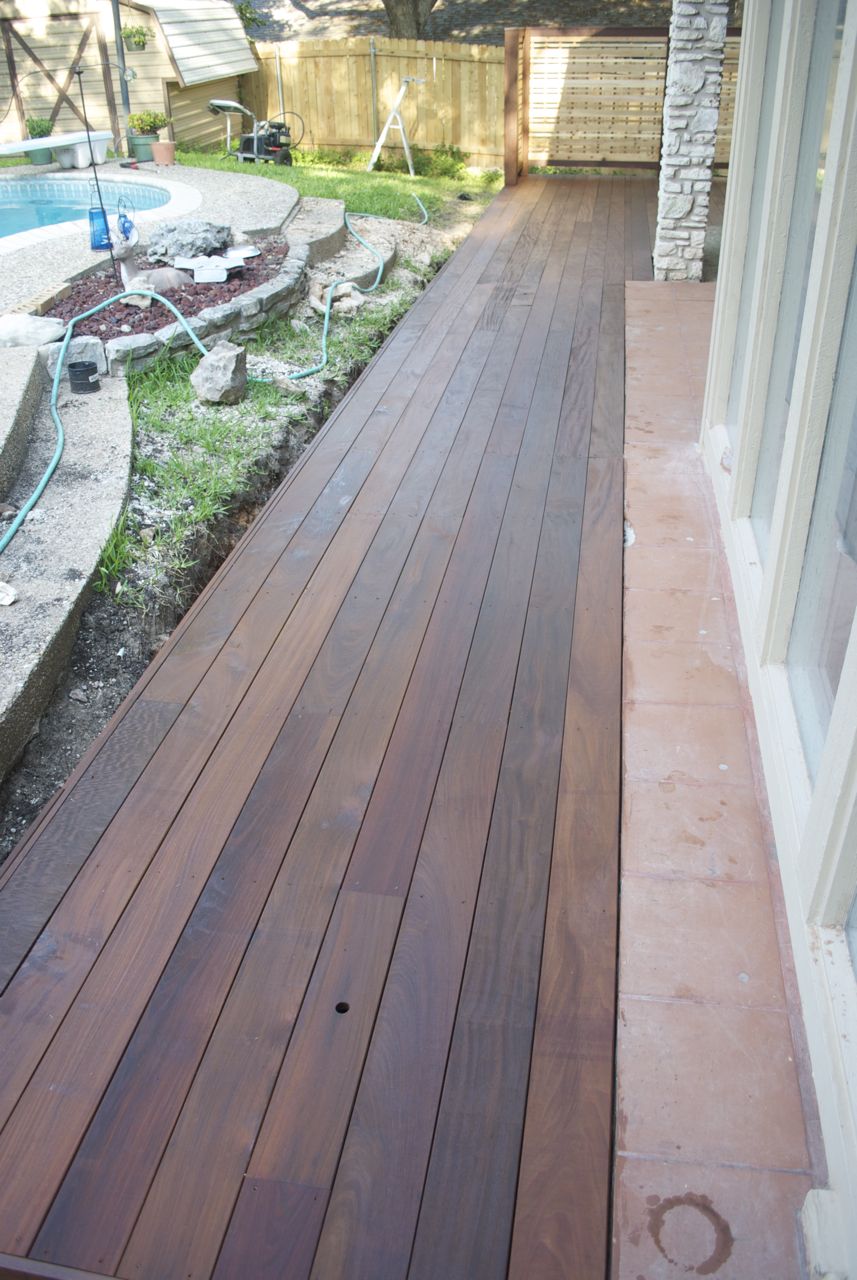
Before
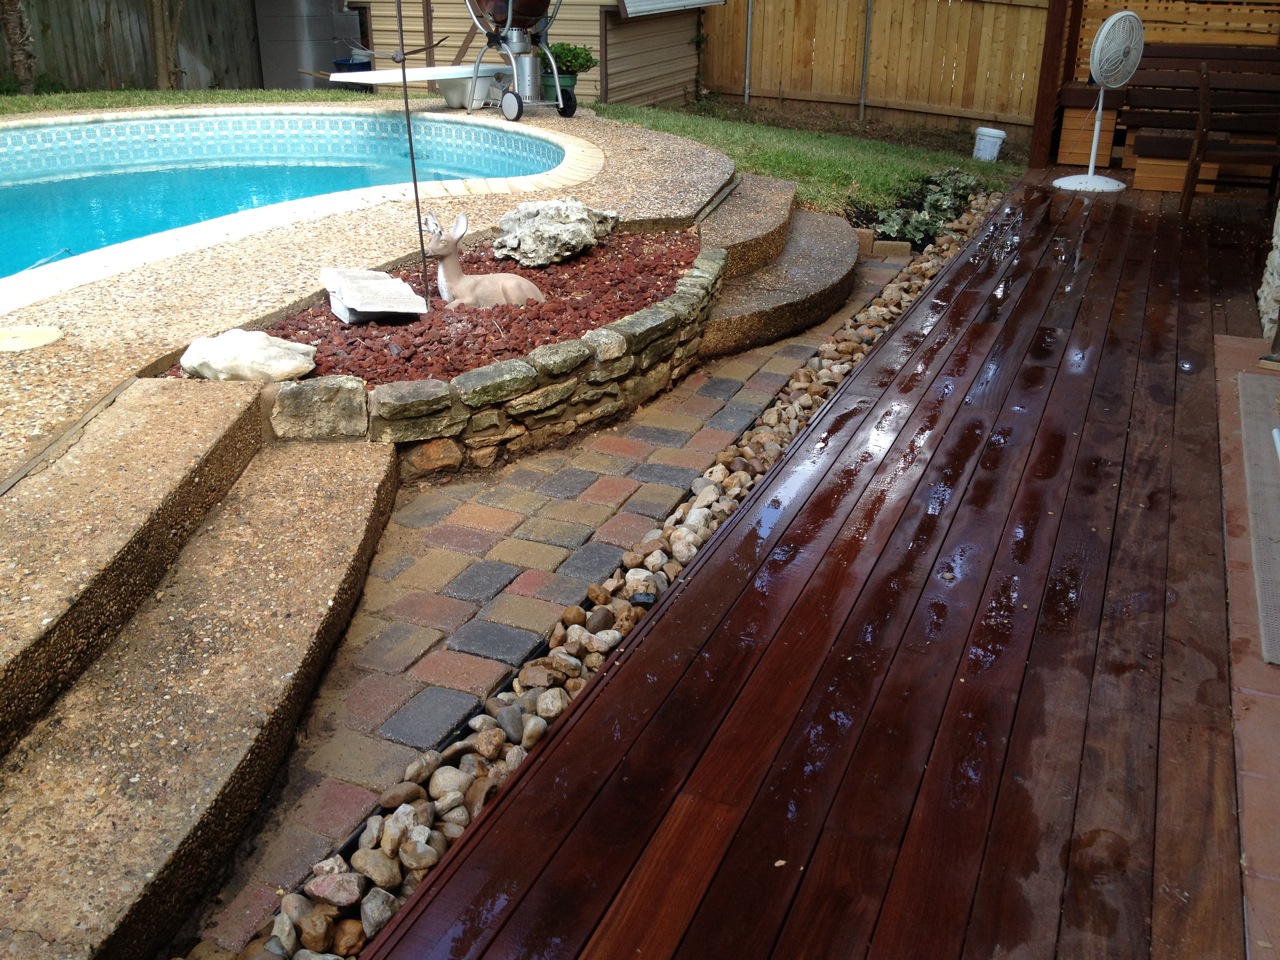
After - view east
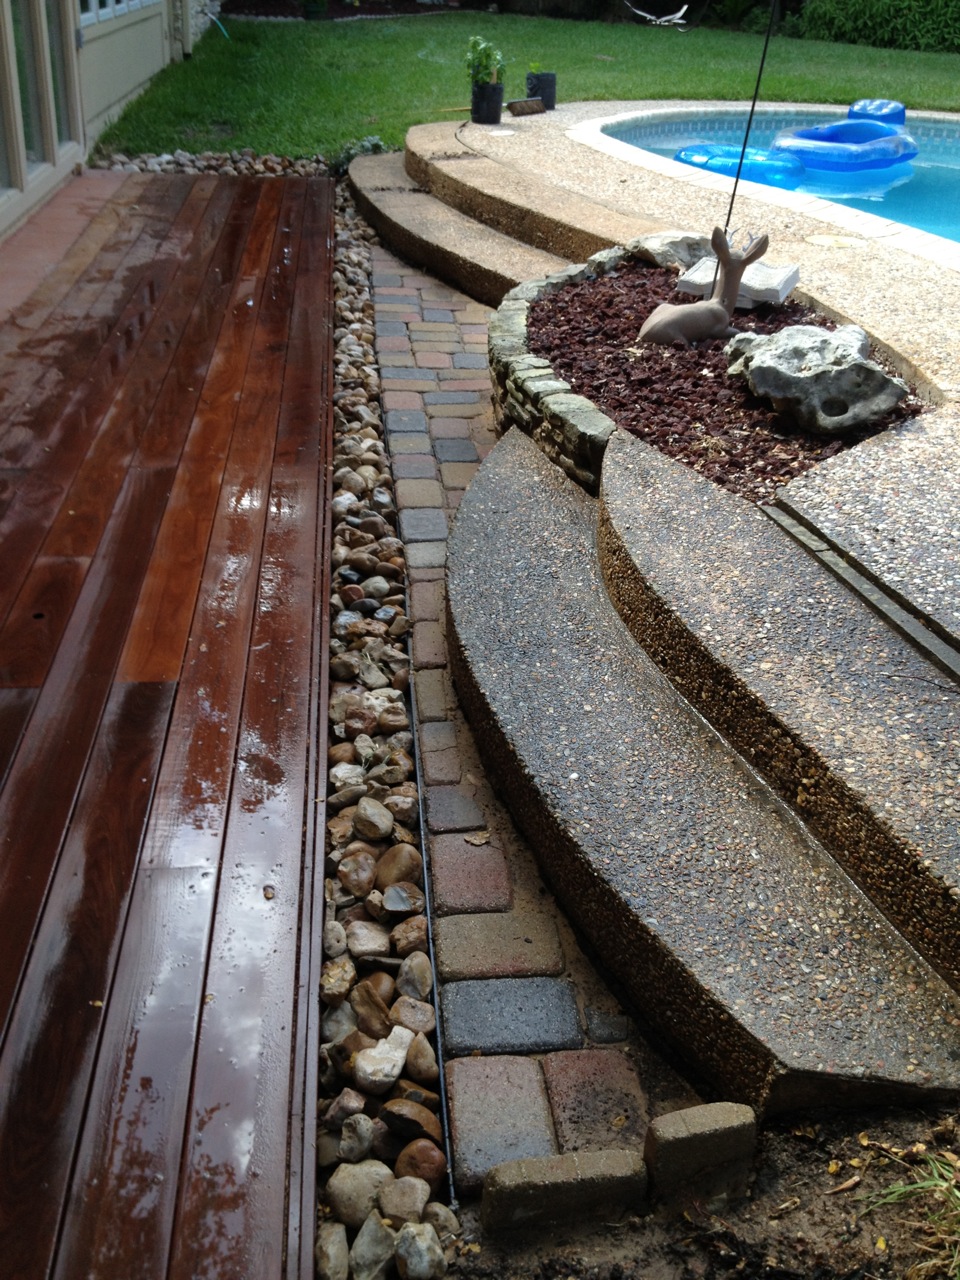
After - view west
Story
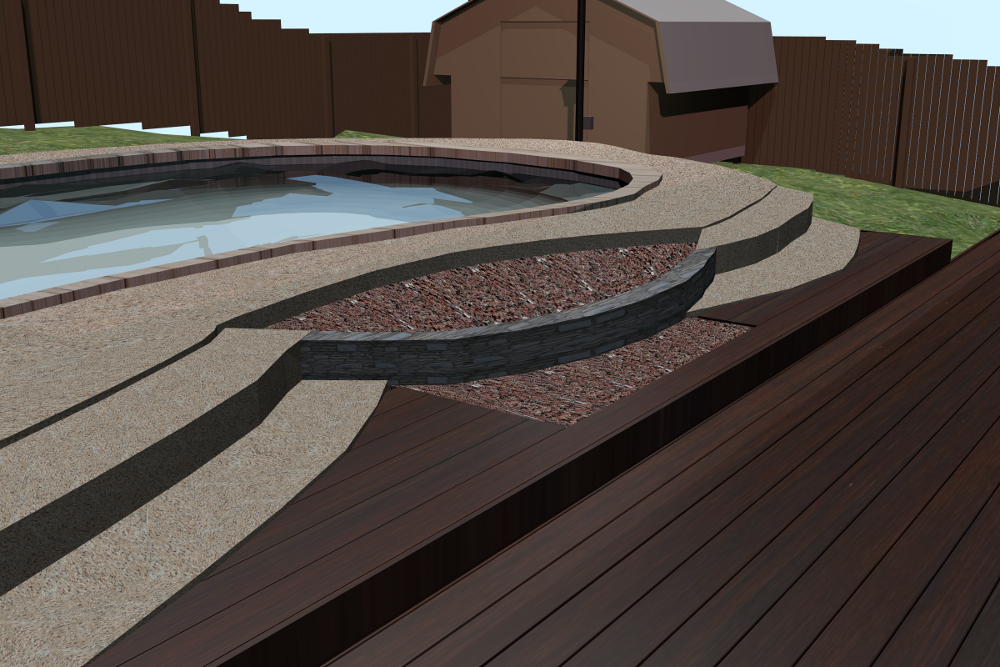
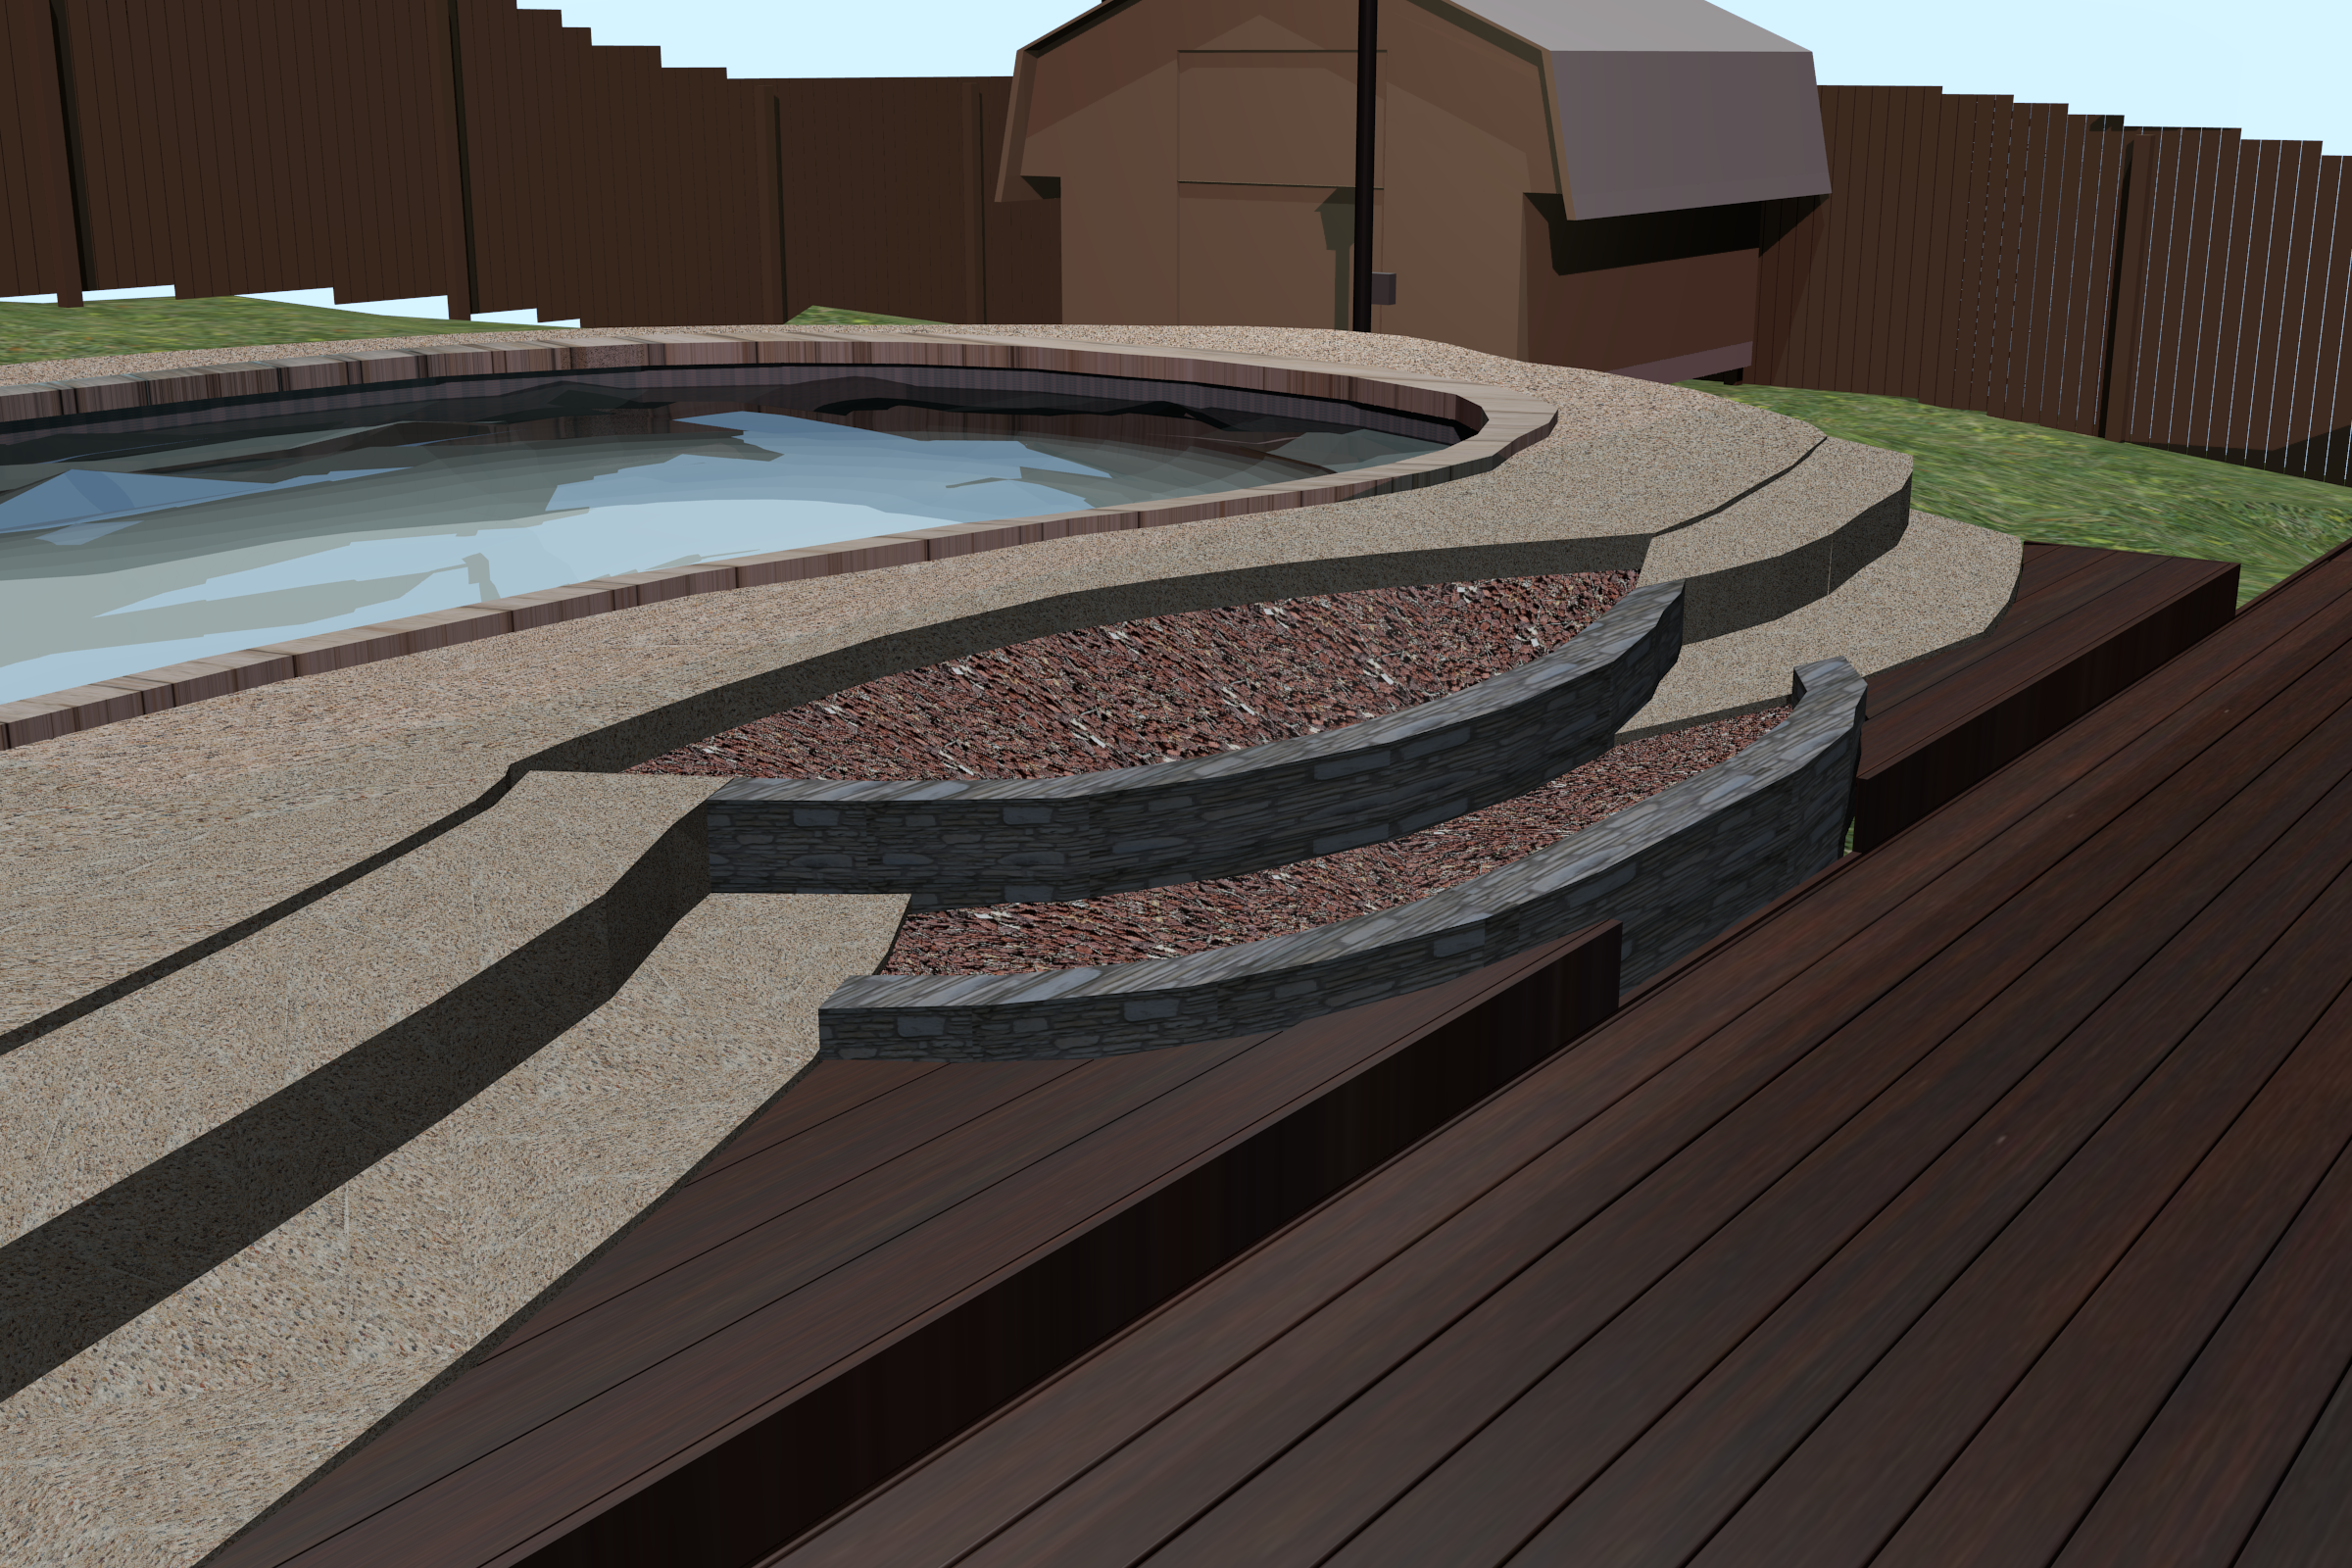
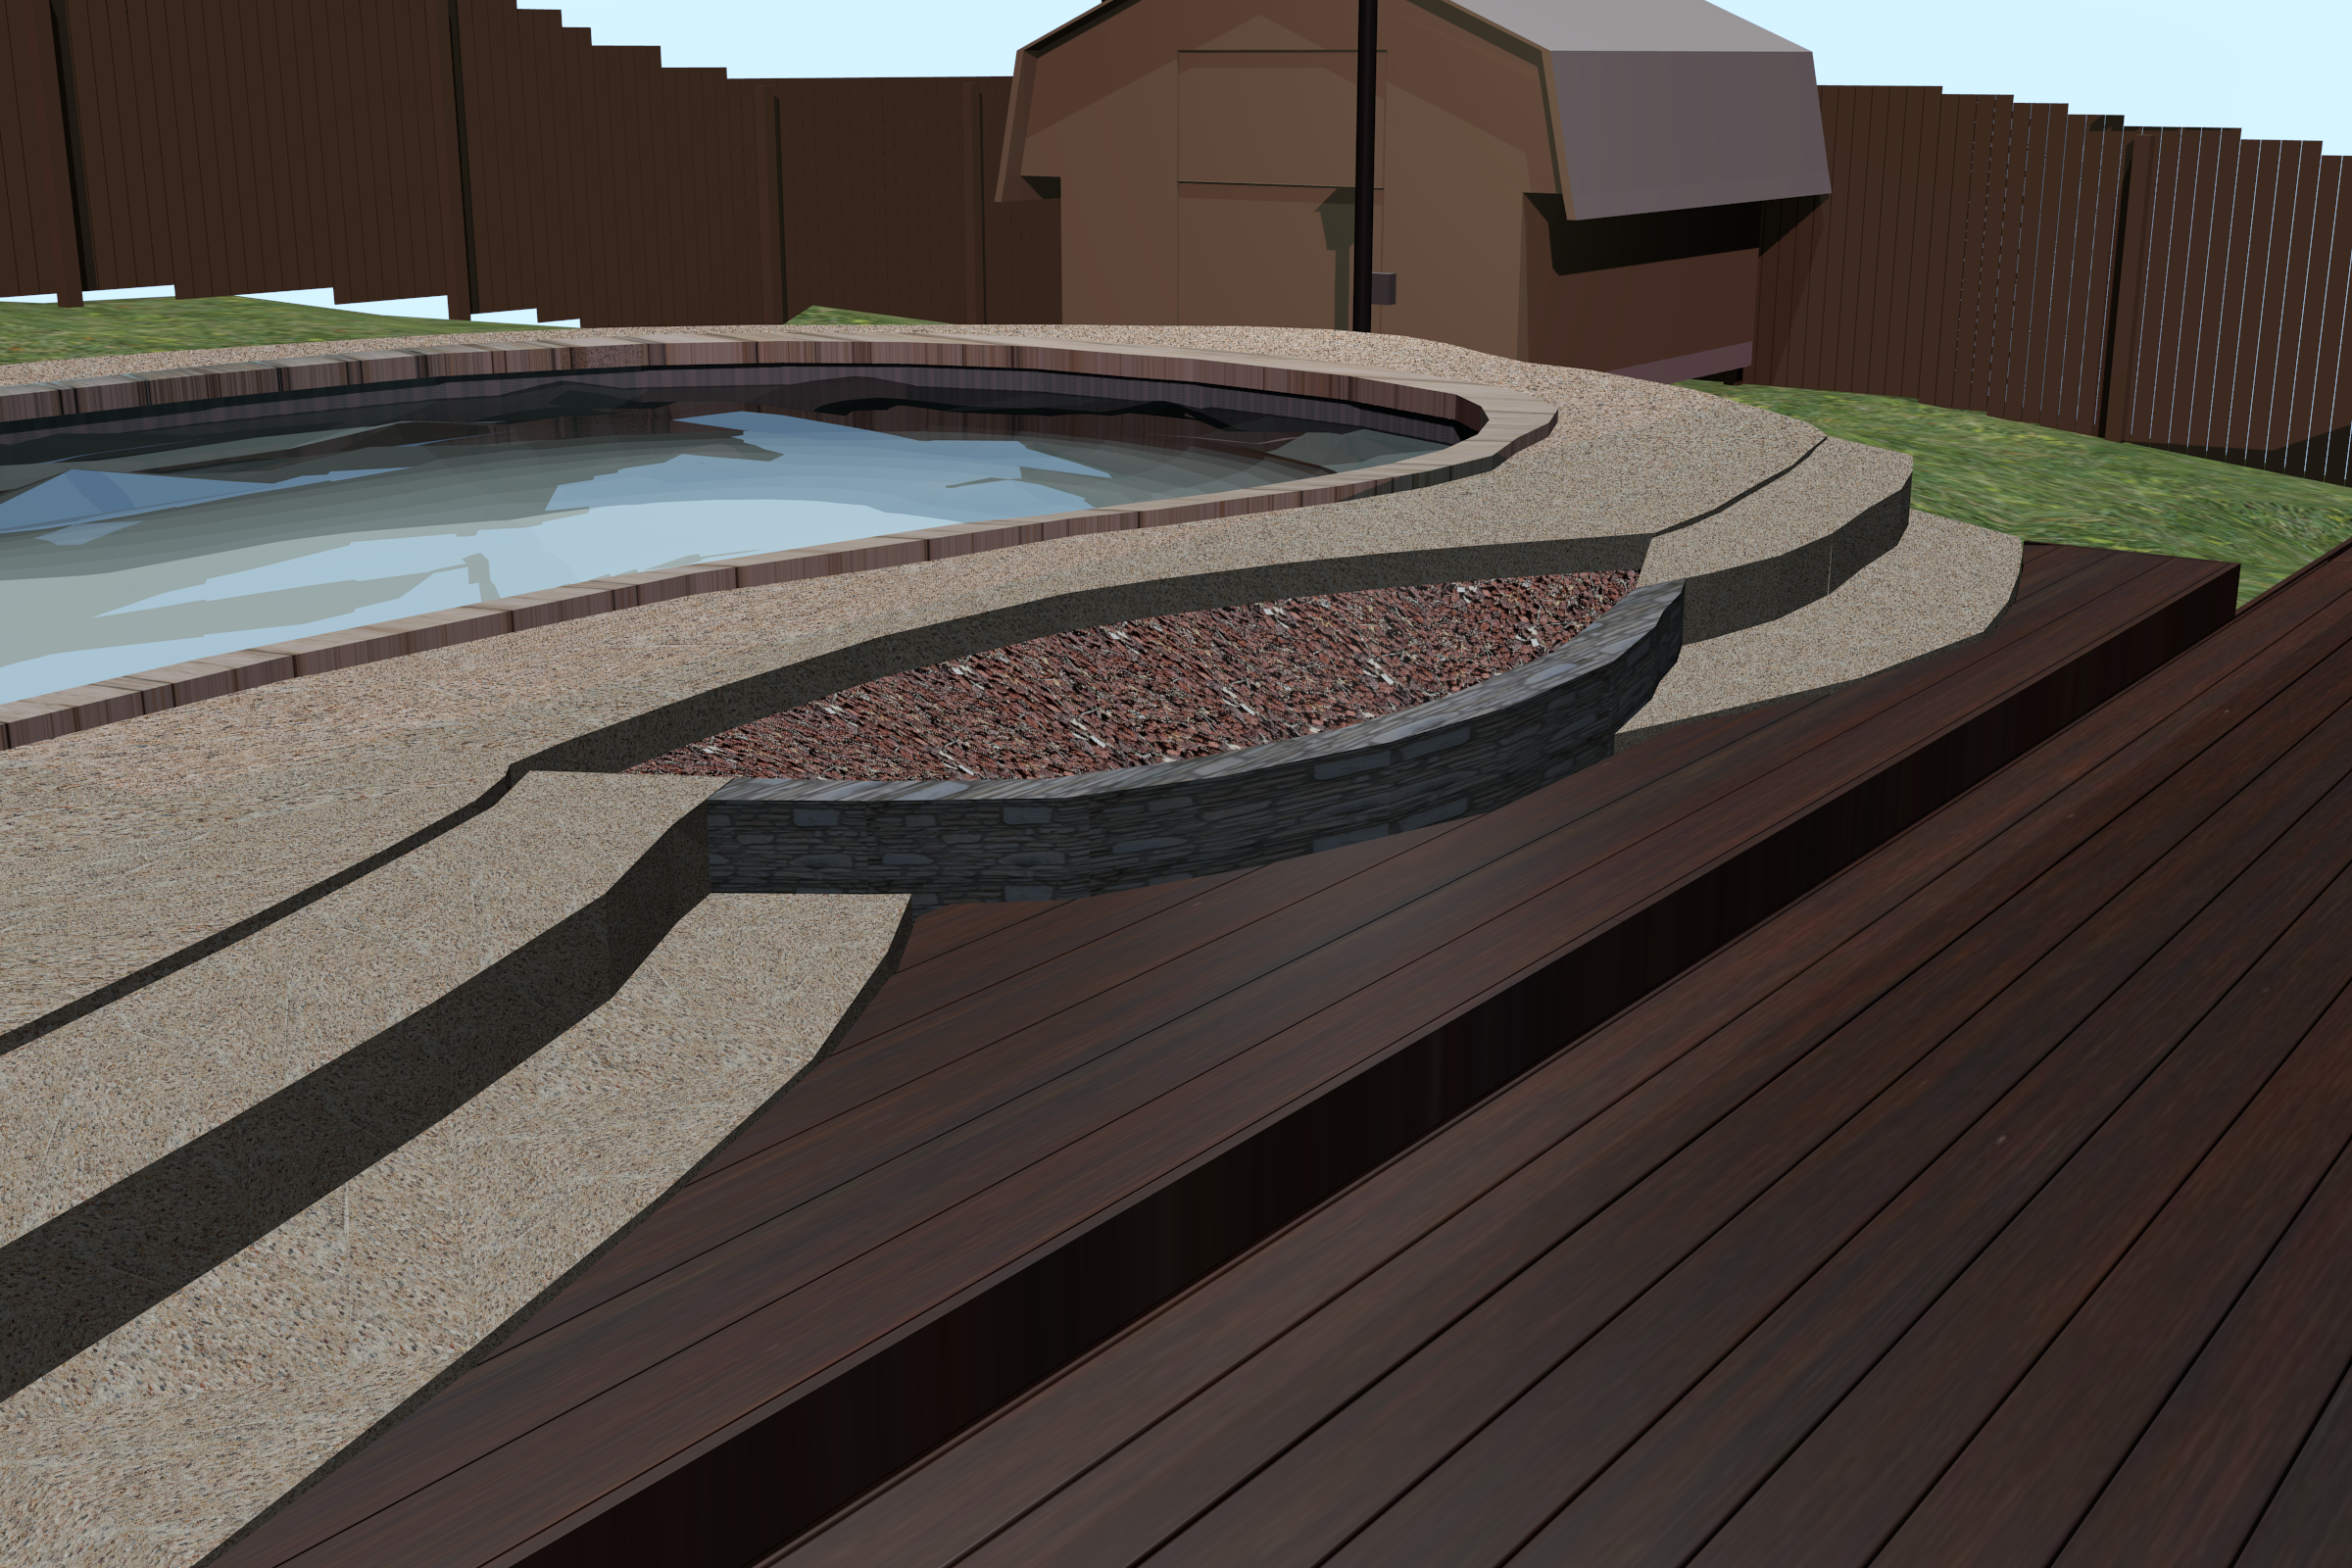
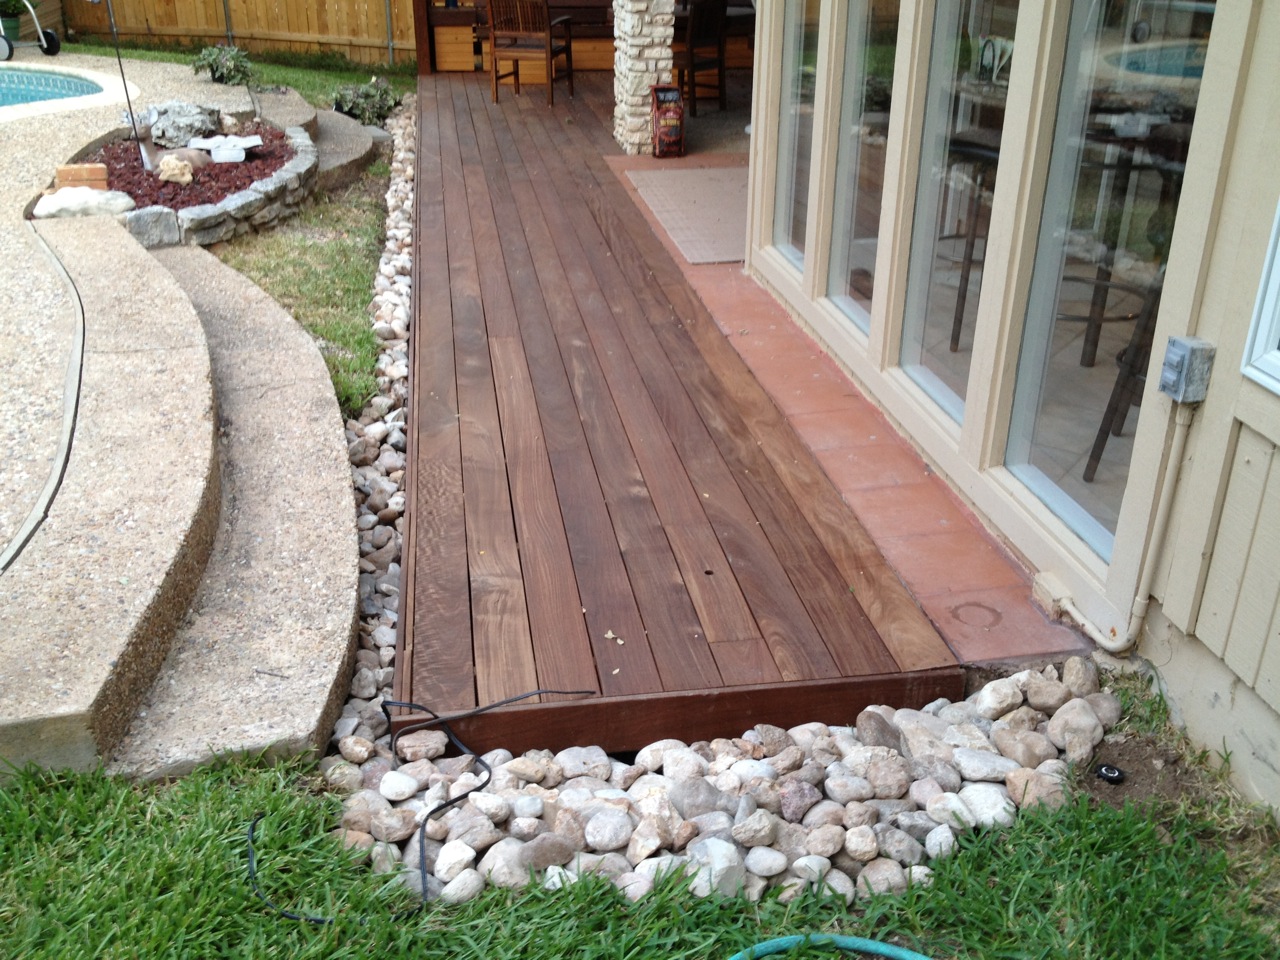
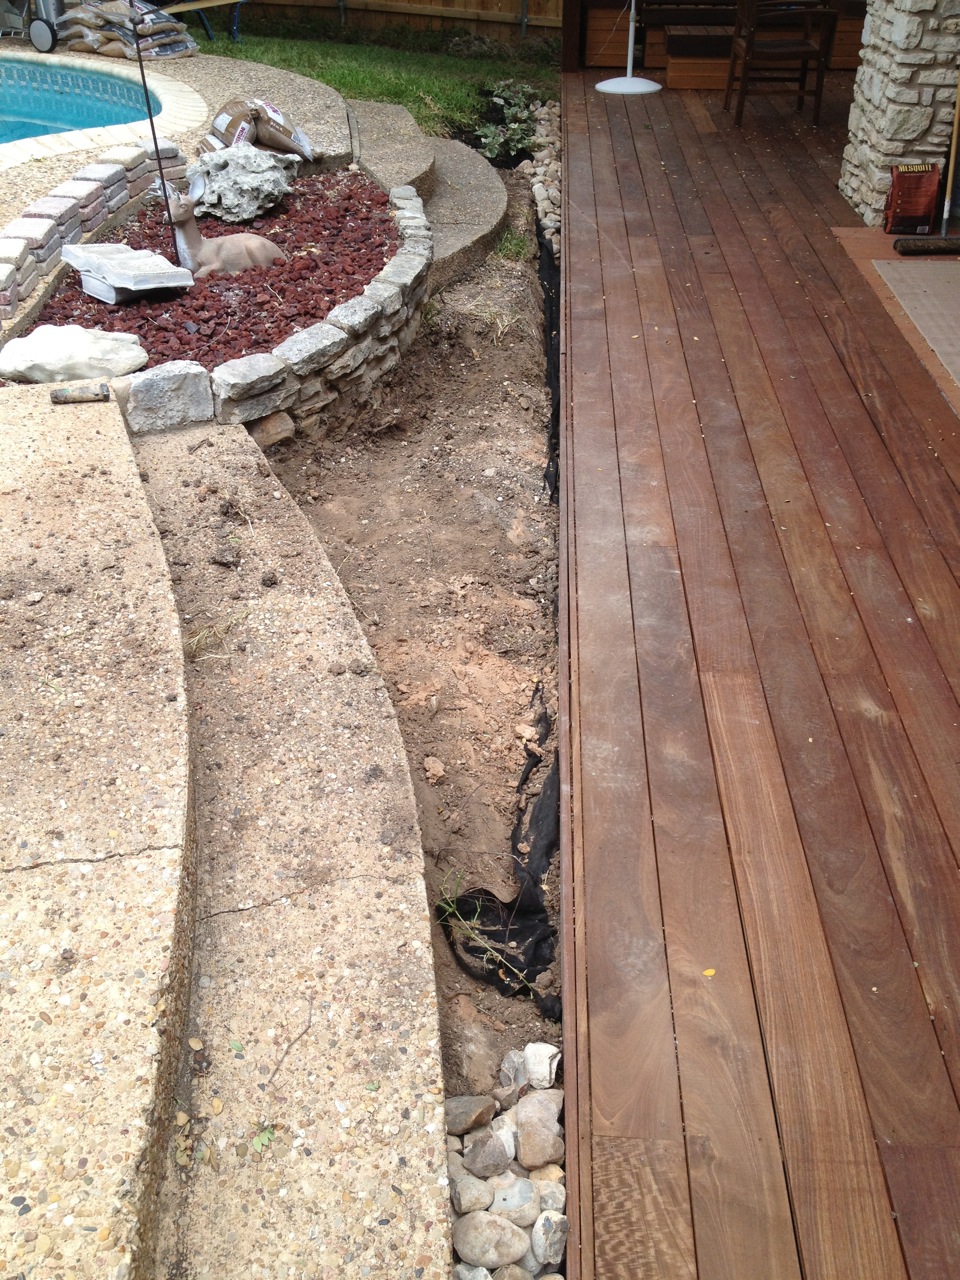
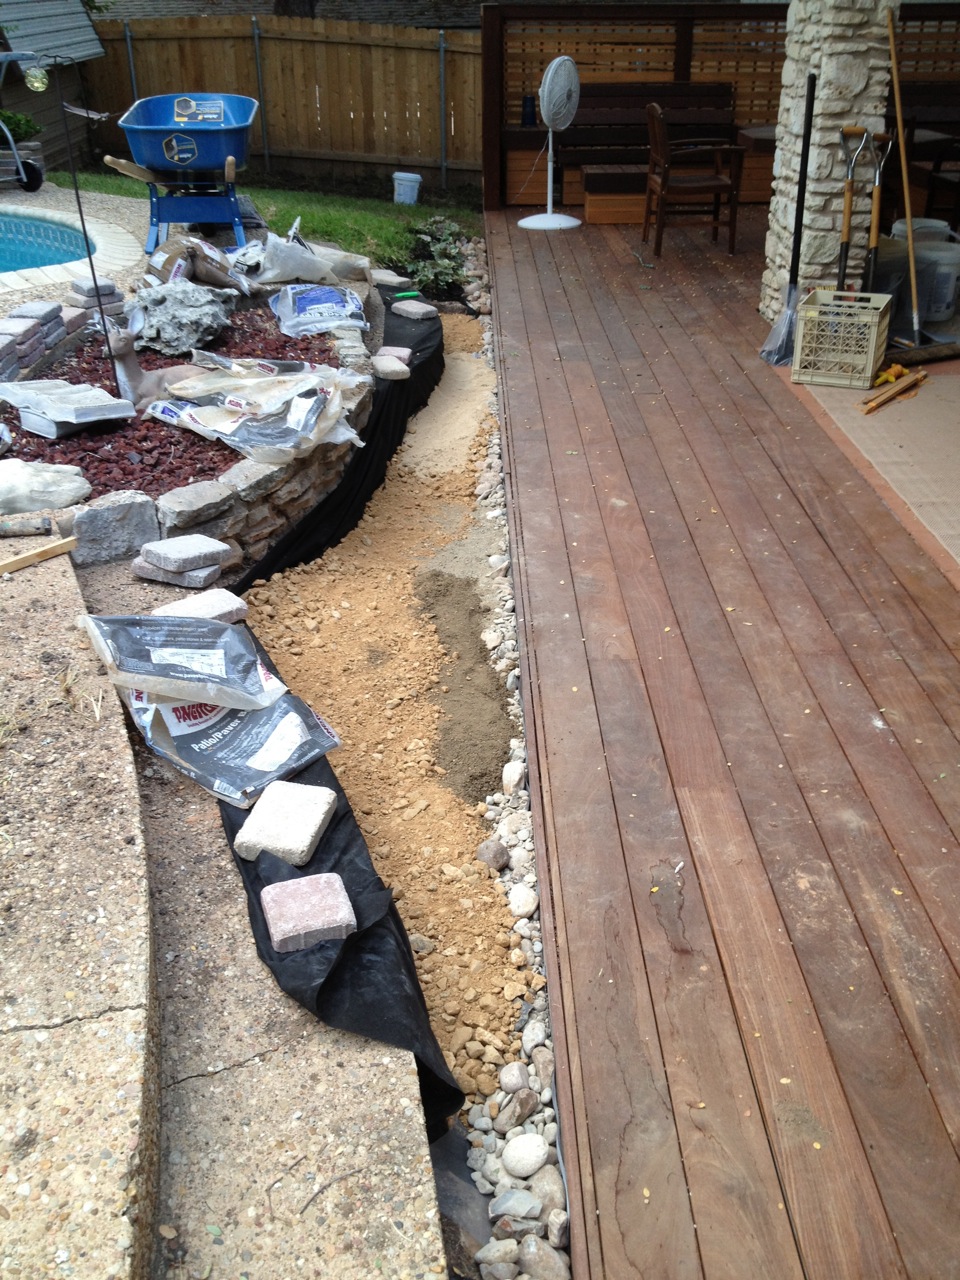
New deck and oddly shaped area
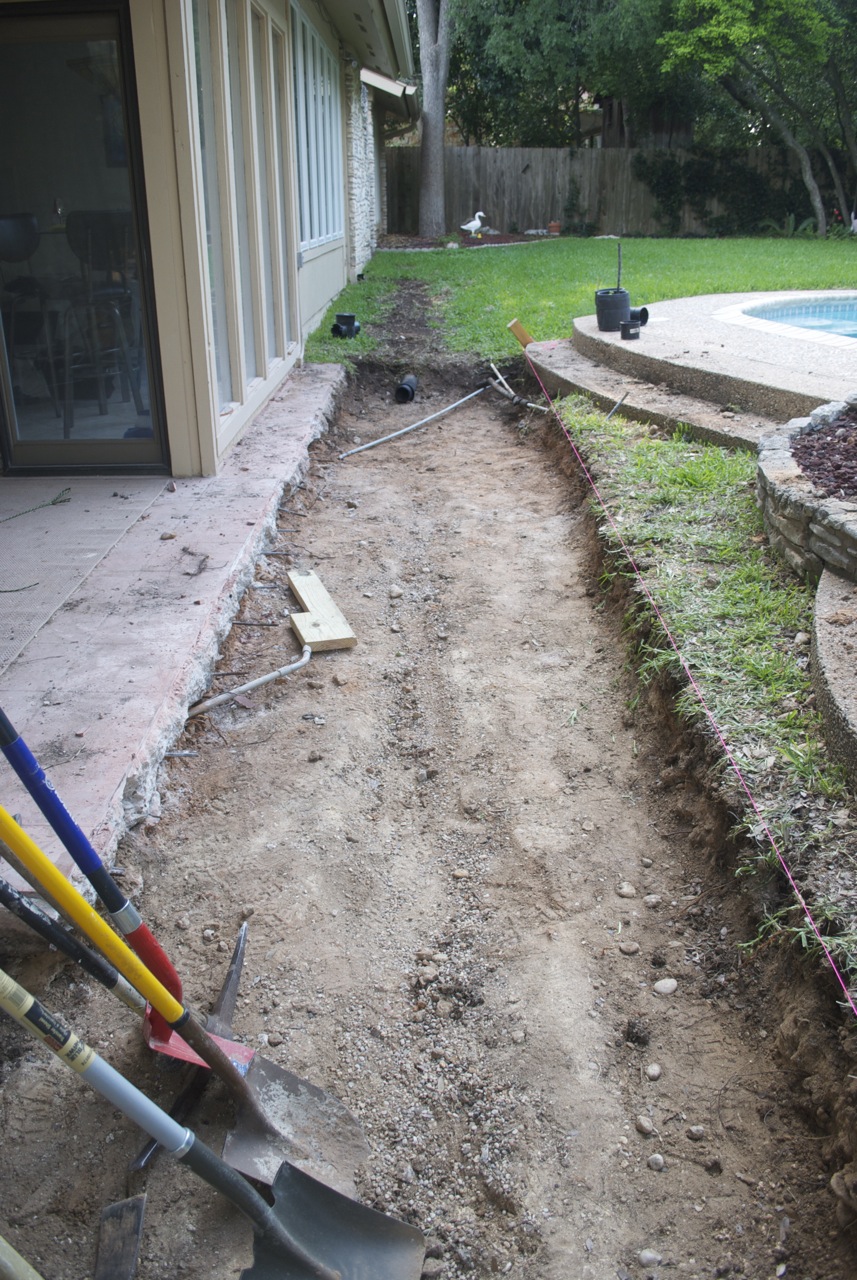
"No man's land" during construction
While designing and planning the New
Decks for our house, I eventually decided to simplify the project
by not worrying about the complicated geometry around the curved stairs
that go up to our pool. You can see this area in the images at
right. The new (northwest) deck added by the steps is just a plain
rectangle, which left a weird "no man's land" between it and the pool
steps. The desire for a new deck section at ground level also left a
weird gap between the ground and deck on the entire perimeter that
needed to be figured out. Complicating this was the need for a very
efficicent drainage in the area. When it rains hard, the area going
into this new deck and under it becomes a fast flowing river. It is
essential that water continue to travel unimpeded through here, or else
the backed-up water will enter the house.
Stairs and Planter Abandoned
During the construction of the New
Decks and for many weeks afterwards, the working idea for the area
was to add some planter section to this area, but it also require some
stairs or platform to transition to the stairs. I very much dislike
having to comes from the pool to the deck and having toi step over
something or step into dirt/grass/mud.
The odd geometry, the rock-hard ground, the existing structures and the
desire not to make this too complicated made designing this
confounding. I came up with some solutions that just did not seem
worth the effort. I decided I would probably never do something this
complex, so adandoned this and went searching for some very simple
shorter-term solution. Here's some 3D model renderings of the
progression of the abandon idea of adding stairs and a planter to this
area.
Version 1 Design
Version 2 Design
Version 3 Design
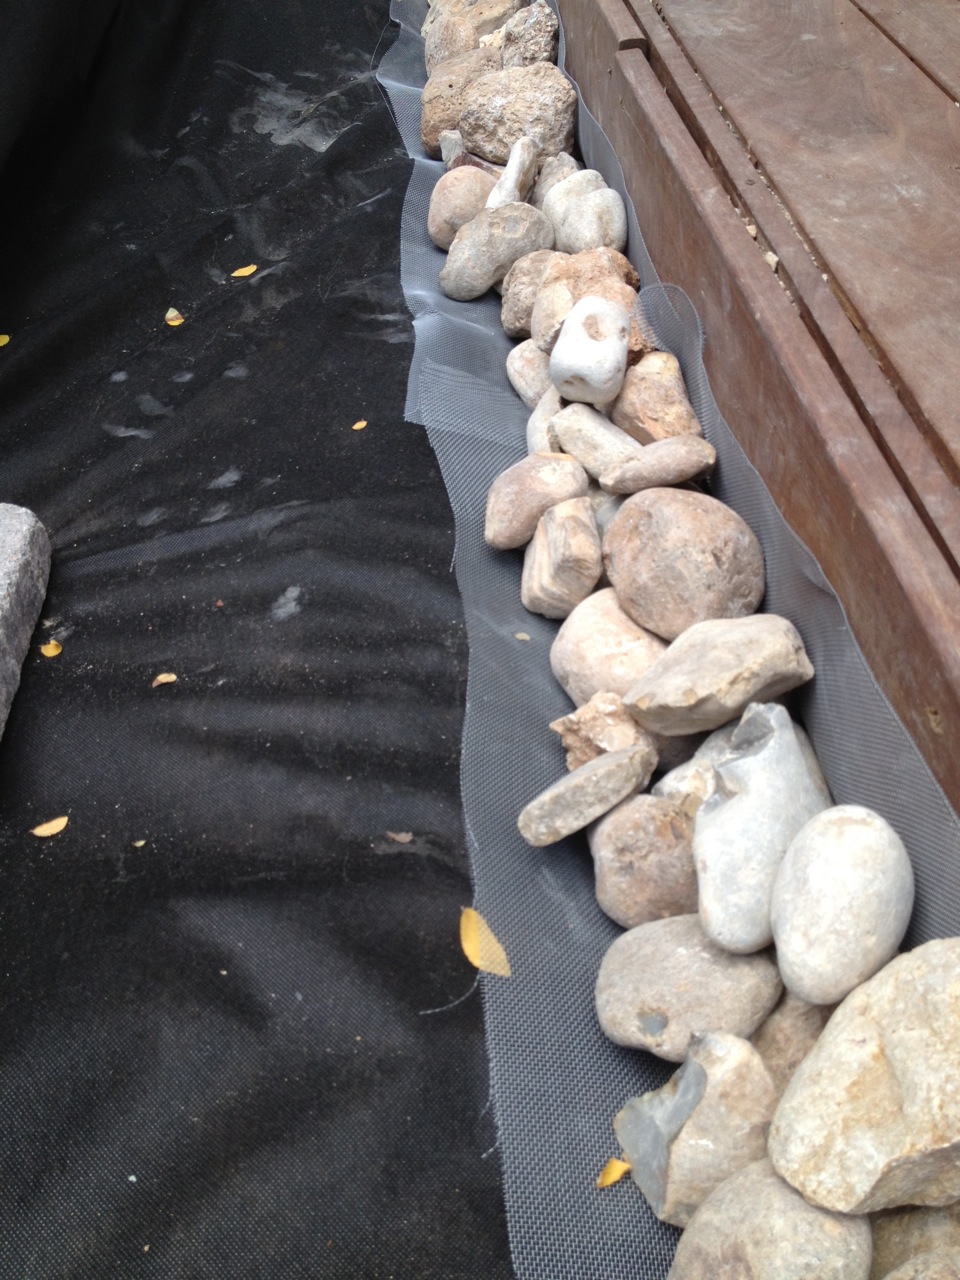
Large Rocks Installation
West end rock close-up
After large rocks installed
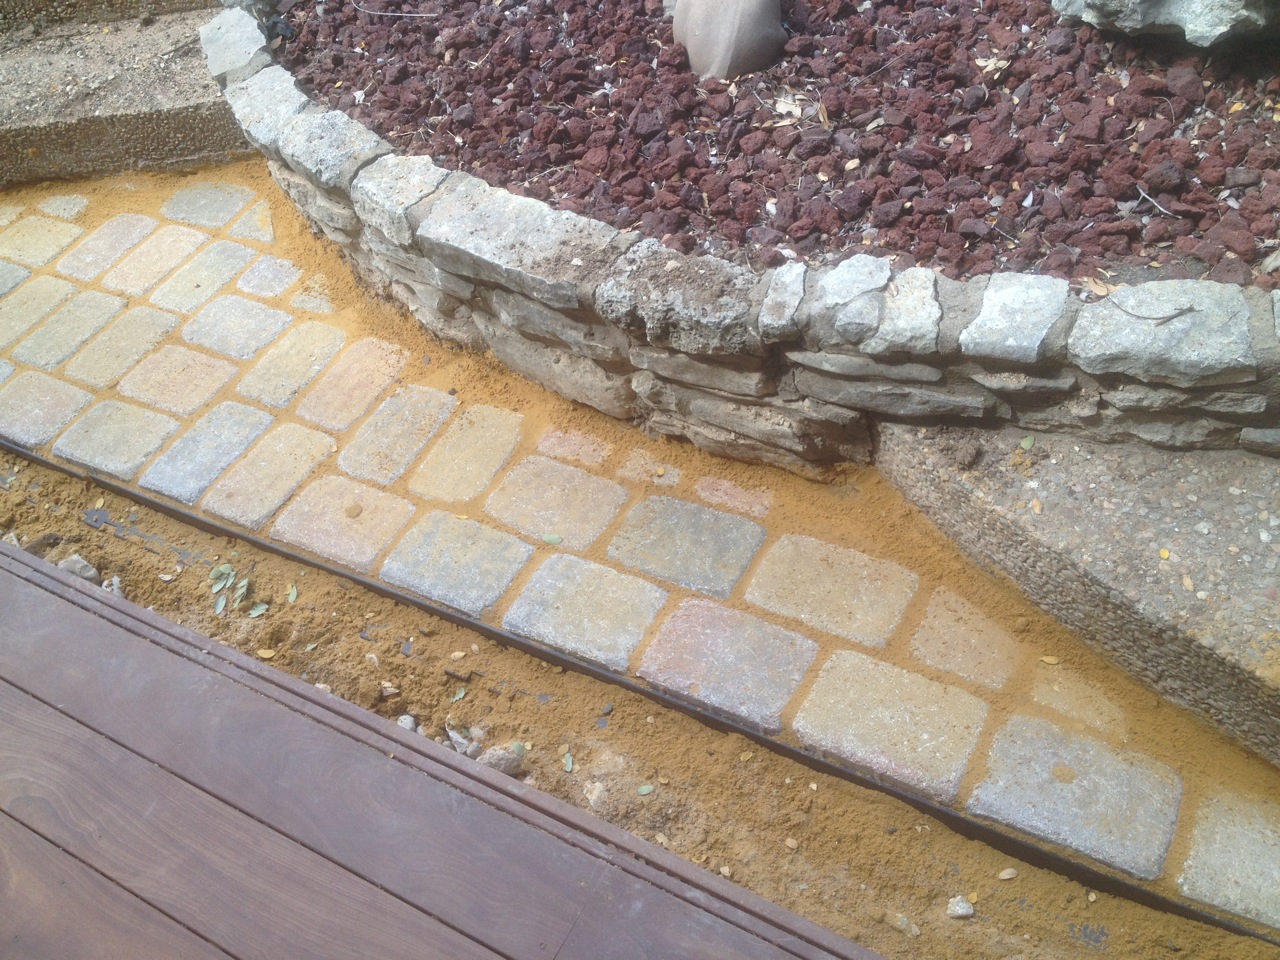
Before settling on a solution for the oddly shaped area, we had a more
pressing need to come up with a way to fill in a 6 inch wide and 8 inch
deep gap between the ground and the new deck. I did not want to fill
it in with dirt because that is bad for the wood, and it would not
solve the drainage issue. I decided I would use large stones in a kind
of river-bed look. The west end of this deck is where a large volume
of water enters at ahigh rate when it rains hard, so this would need a
larger area for water passage.
We went out to stone supplies to look at various large rocks, and
settled on something that was not too expensive, but looked decent.
Estimating how much we needed, I thought it was about 1/3 of a cubic
yard, but to be safe, we ordered 1/2 a cubic yard. This cost us $30 for
what they called "5 to 7 rock", which referred to their size, but there
was a lot of variation outside that range.
The delivery charge for the $30 worth of rocks would have been $45 and
the guy made it seem like a simple process of just making a few trips
using buckets, so I decided to do that. Worried about how much weight
my little car could take, I asked the person that moves the rocks
around about how much a 1/2 cubic yard weighs. He said it weights
about 1,000 pounds and that people ususally do it in two trips. I
gathered up buckets and milk crates and put what I thought was plenty
of weight in my car for the first trip. I definitely would not have
wanted to put in more. It wound up taking me 4 trips and was a royal
pain. I also had this thought on hauling the first heavy load that for
the sake of saying $45 on the delivery charge, I was risking a
multi-hundred dollar car repair. I should have paid for the delivery.
Hauling all these rocks around was a lot of physical work, so having
the wife to help was very useful. The end result was not as appealing
as I hoped, but way better than what was there or any other idea I
could think of. Note that we put some landscape fabric underneath the
rocks, both the prevent erosion and weed growth.
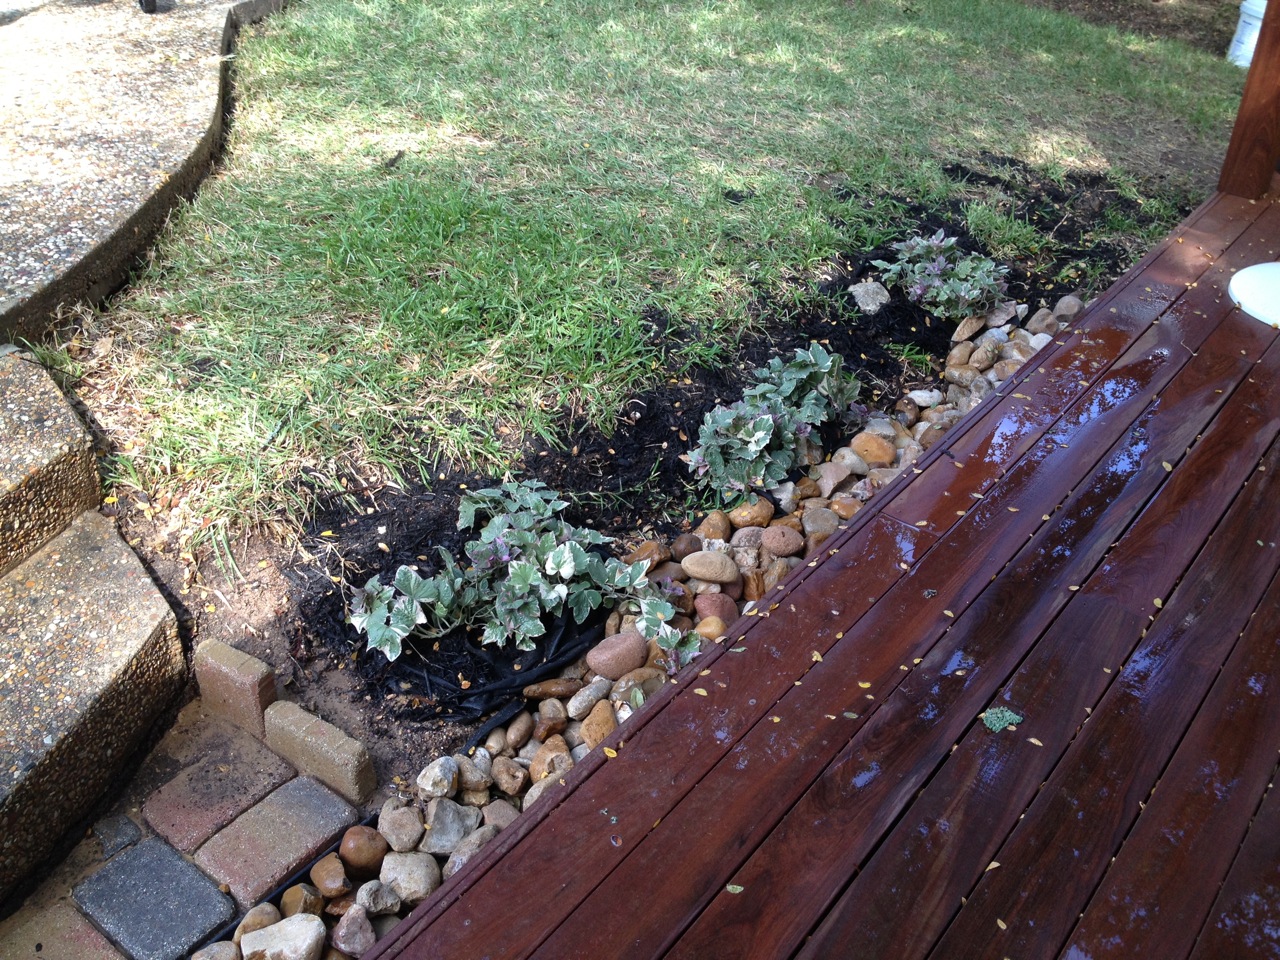
Ground Cover Addition
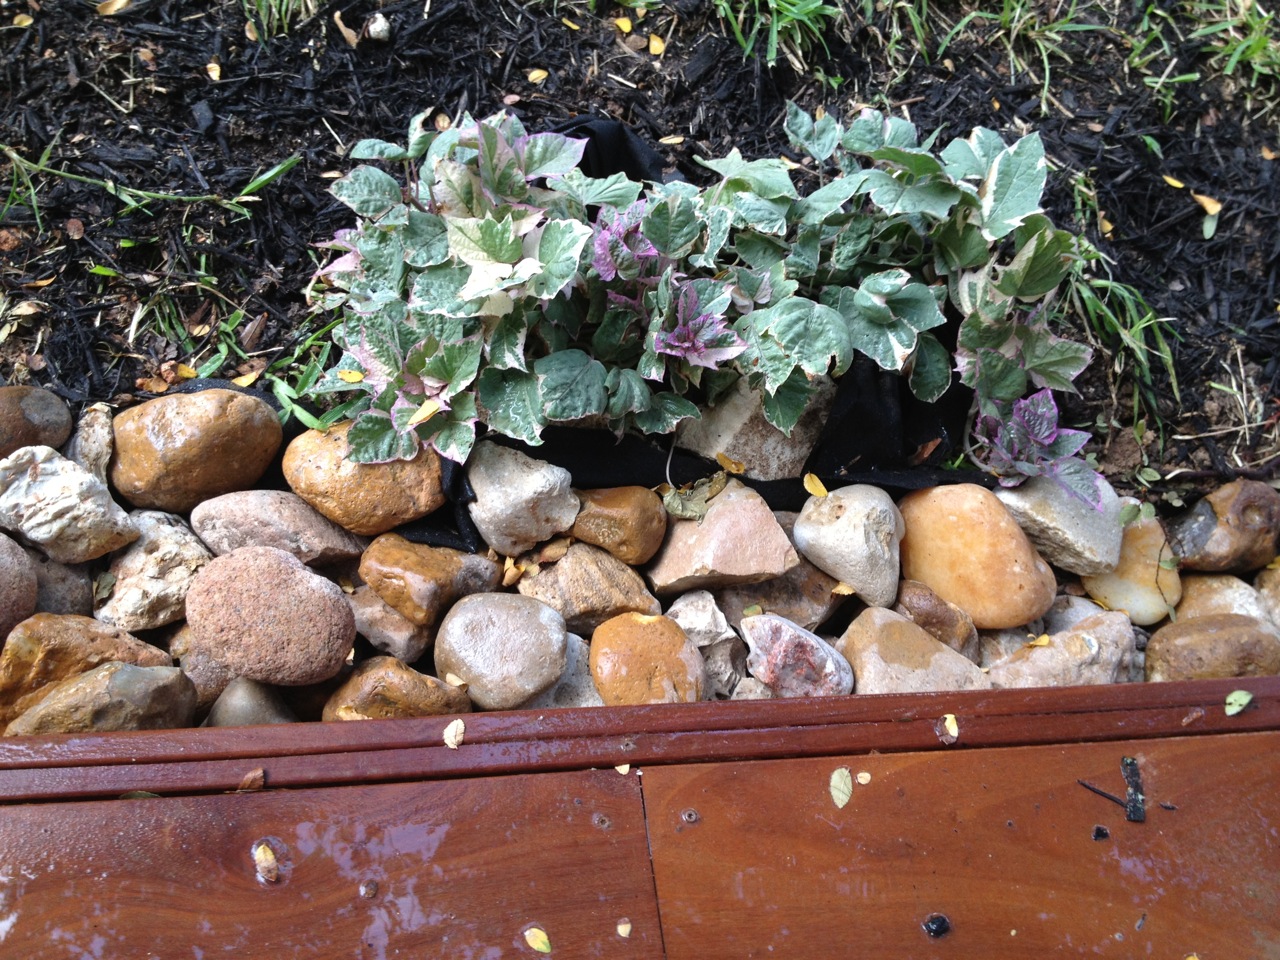
Ground cover added
There were some bare, graded areas that we decided to shore up with
some ground cover. This was meant to prevent erosion and to liven up
the area a bit. The wife had some good ideas on this for plants that
did well in out climate and they looked very good adjacent to these
rocks.
Stepping Stones Idea Escalates

Initial layout of paving stones
For the grassy/dirt area between the new deck and the pool steps, my
simple idea was to lay down a few paving stones to act more like
stepping stones so one could move from the pool to the deck without
stepping on dirt/grass. We bought a bunch of paving stones for this
purpose, and I figured I would just lightly level the area and lay them
down.
I layed them out top see how many total I would need and get an feel
for how it would look (see right). As I sat staring at this, the whole
idea became very unsatisfactory both from a visual look and from a "not
done right" point of view. I finally decided if I was going to put
that many paving stones down, I should do it the right way. What
preventing me from wanting to do it the right way to begin with was the
prospect of having to excavate the entire area 7 inches deep. The
ground is severely hard and very rocky. Still, I decided I would
attempt it, see how it went and hoped for the best.
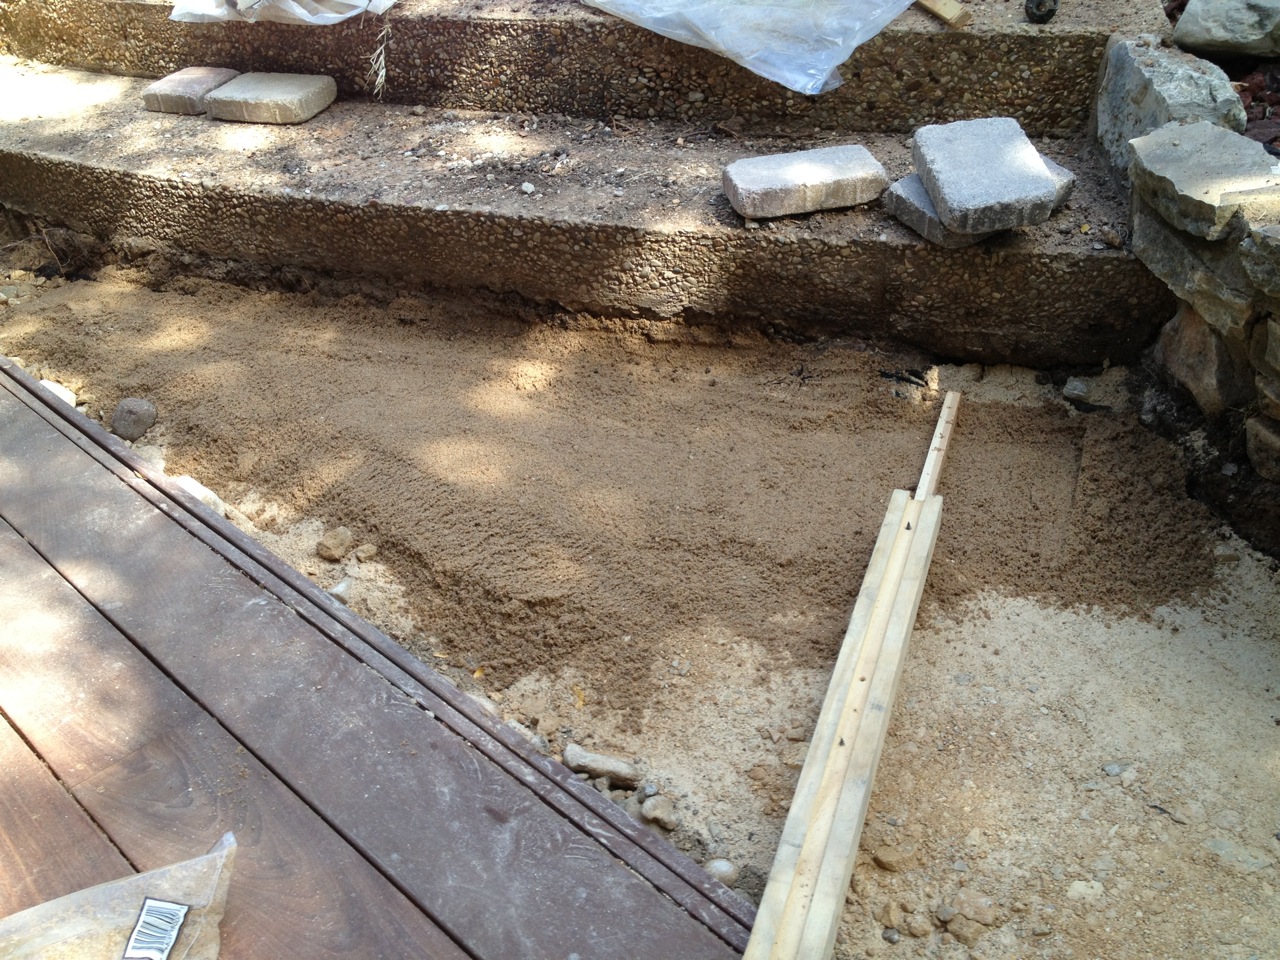
Excavation
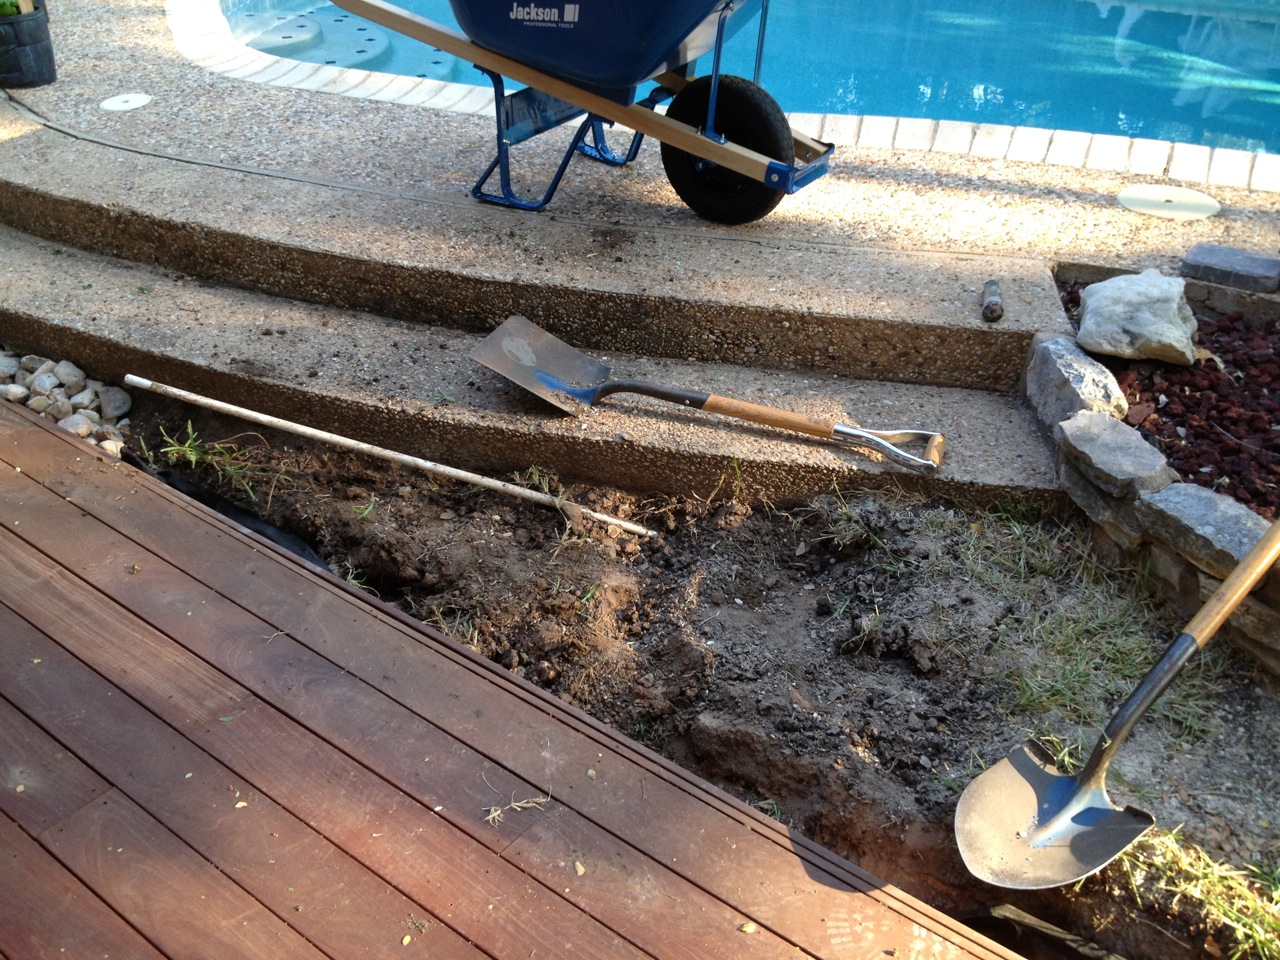
Initial excavation
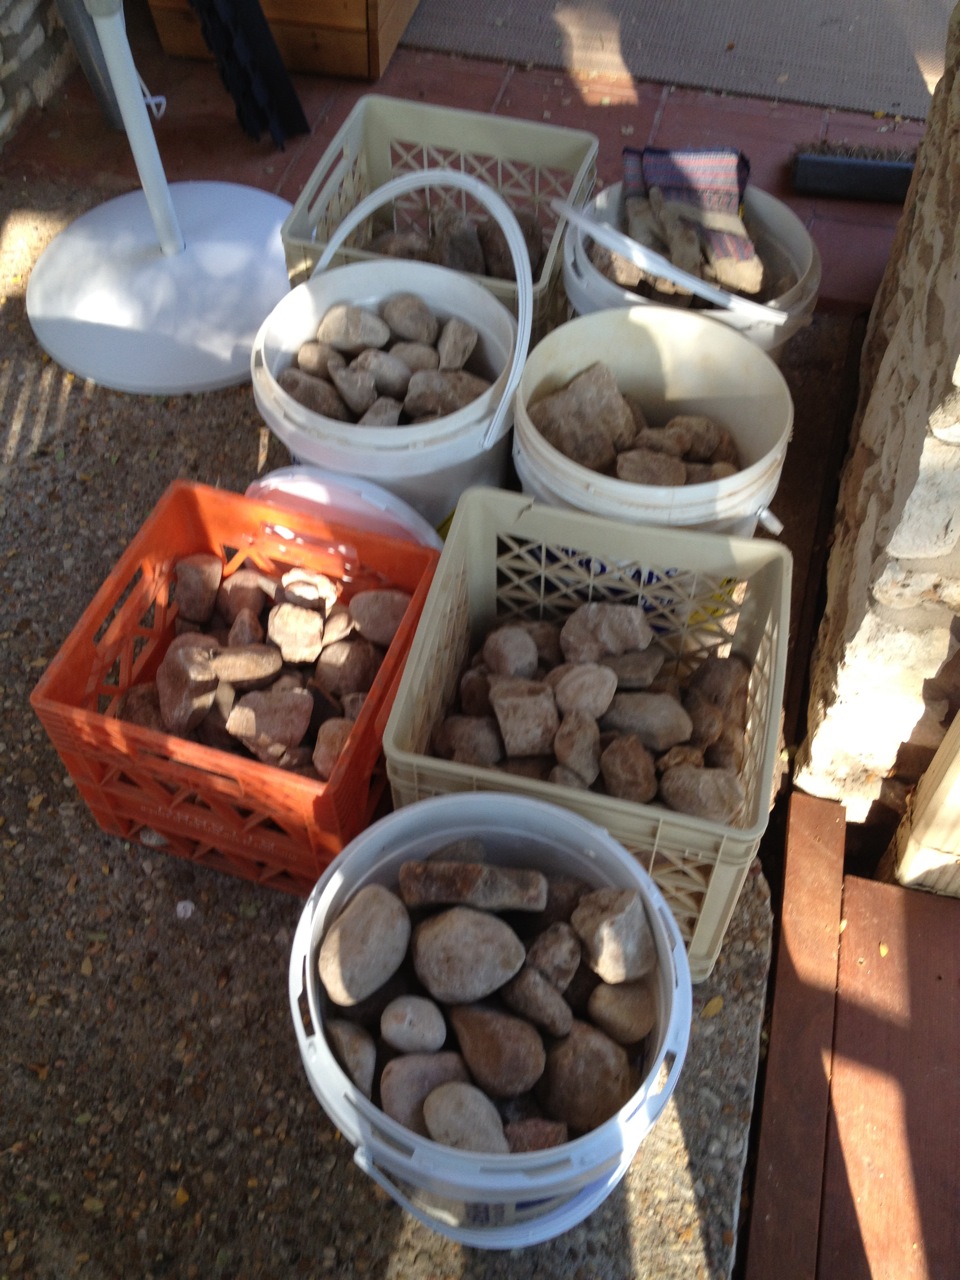
Removed rocks in containers
The first unpleasant fact of choosing to excavate the area for paving
stones was having to undo the placement of all the large rocks along
the entire area. I co-uld not just place them on the side as they
would just be in the way, so I had to load them into buckets/baskets
and put them out of the way.
I then began digging out the area. It was slow going at first because
I quickly realized that I did not have a lot of ground digging
experience and was very inefficiently going about it. I quickly
learned some tricks that made it much more bearable. The main
(probably obvious) trick was separation of breaking up the ground with
the removal of the dirt.
Excavation after day 1
Even as I was beginnning to dig the area out, there was an important
problem that I had no good solution for. It would be for all the
dirt and sand needed for the pavers to run right up against the deck,
both due to drainage and rot concerns. How would I be able to
provide a stable base for the pavers, while needing the sides to be
not dirt and permeable? I did plan on replacing the large rocks next
to the deck, so that was part of a solution, but that alone would not
be enough to prevent the paver base material from eroding away.
My plan was to work on this project the first half of each day before
it got too hot (it being August in Austin). I took the afternoon to
head to Home Depot to both get some supplies and browse for ideas on
how tro solve the problem of holding back the paver ground.
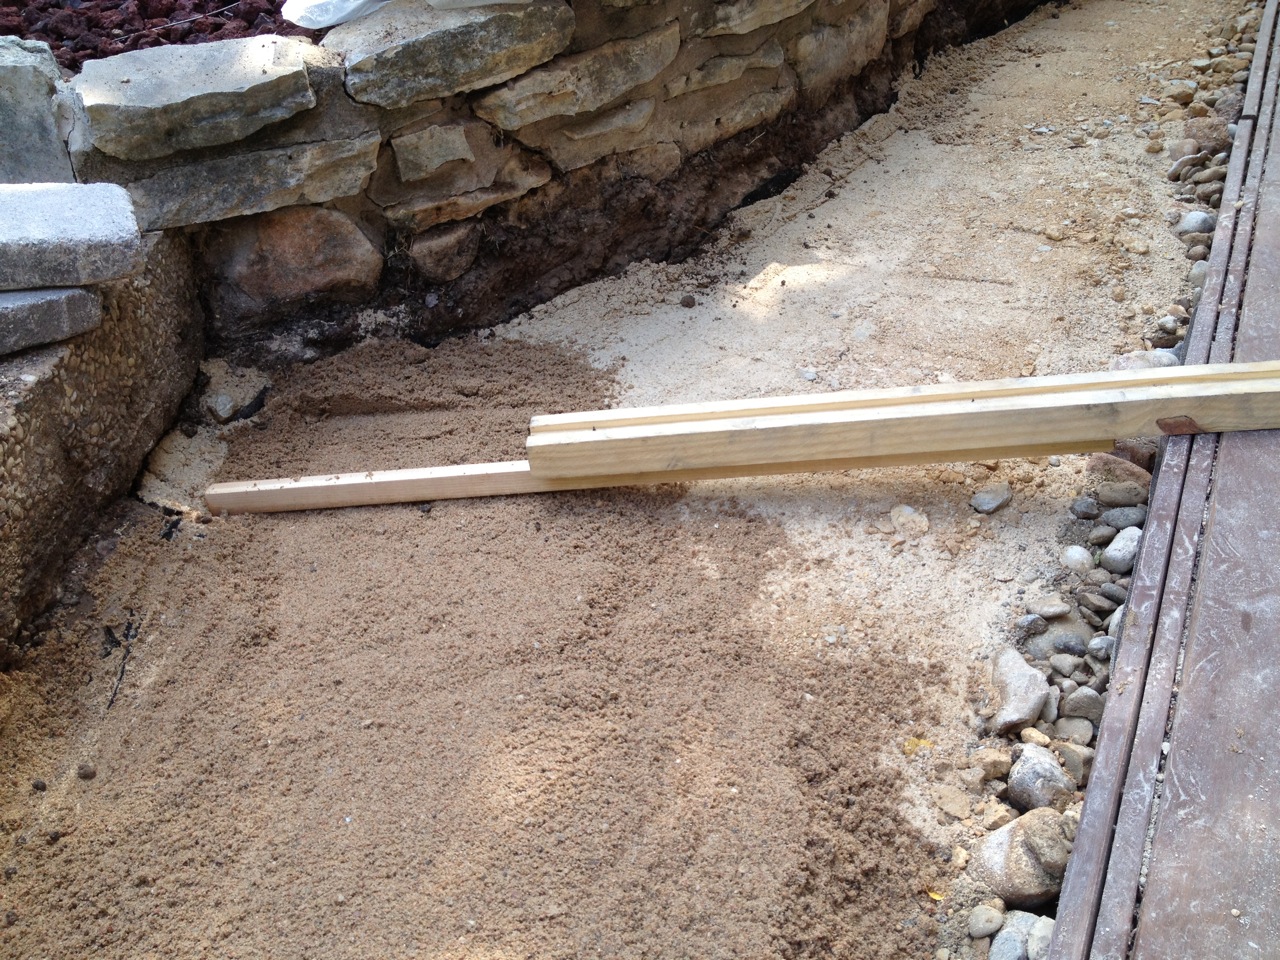
Ground Preparation
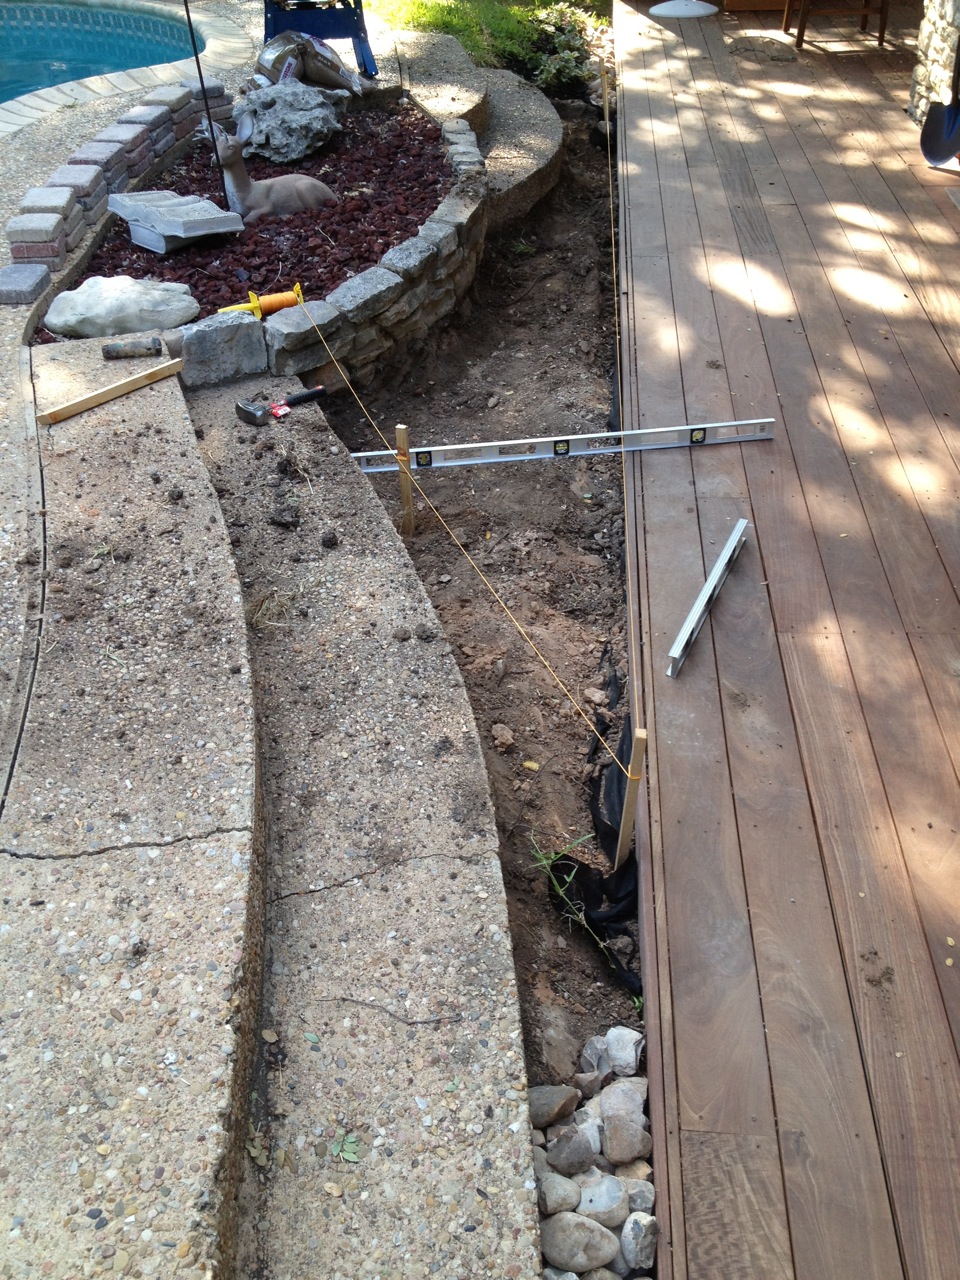
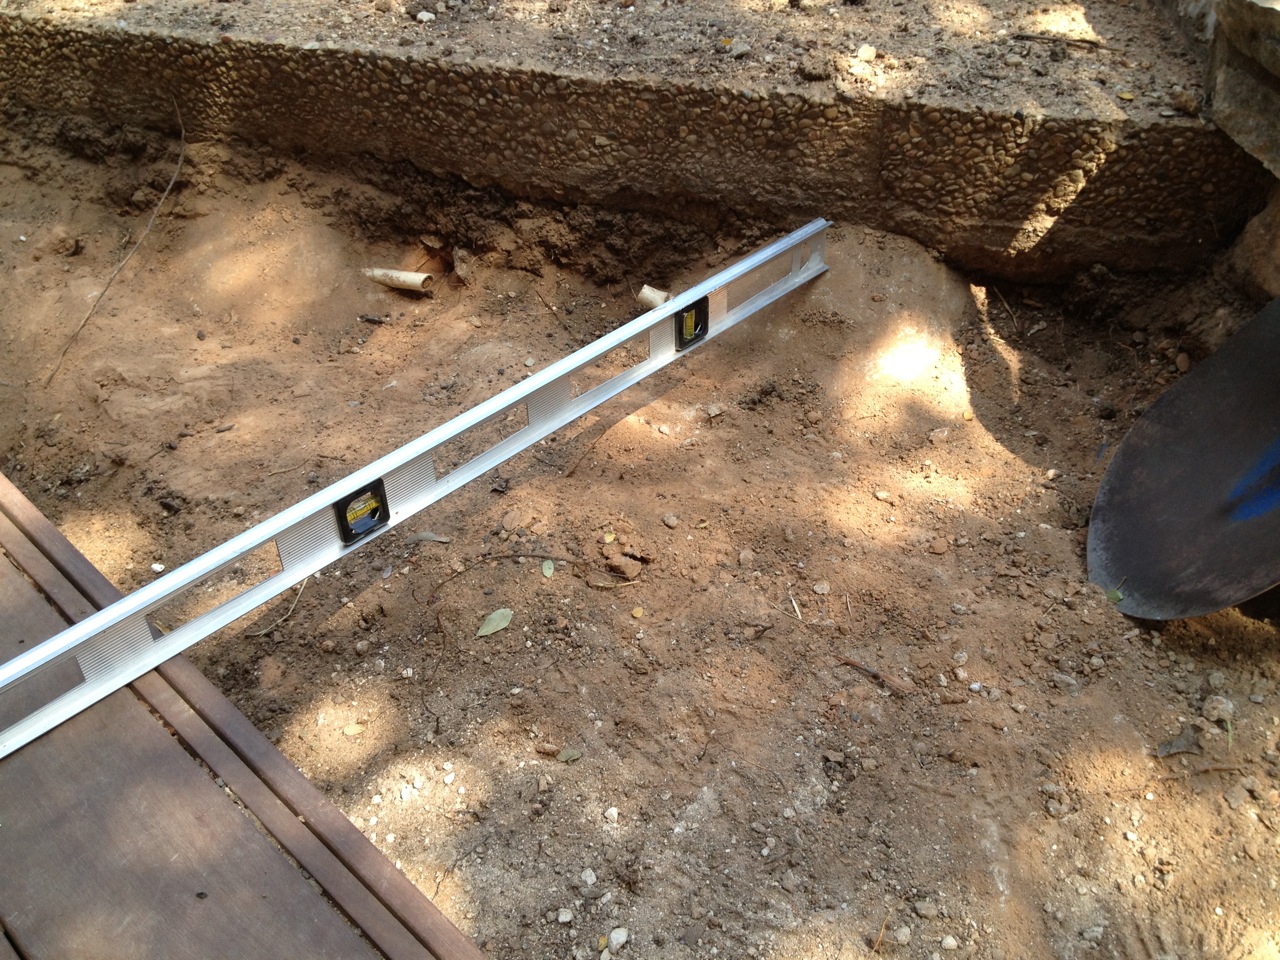
Finding the ground depth
The second day I continued the excavation until I got the whole area to
a depth that I thoughtn would be a good start. The I needed to get out
the levels, , mason string and stakes to get more accurate measurements
of the depth of the areas. The picture on the right makes it look very
professional, but in fact this was very amateurish. Because the ground
was so hard, rocky and dry, I could not get the stakes in very well, so
the line was not very taught, level or stable. I felt like there must
probably a whole technique to using stakes, mason line and level that I
had no clue about. Still, this gave me enough of arough idea of the
level across the whole area, and I found it very uneven. Some places
were deep enough already, but some needed a couple more inches taken
off it. At this level, the ground was very hard and very rocky, so a
lot of effort was expended in removing those extra 2 inches.
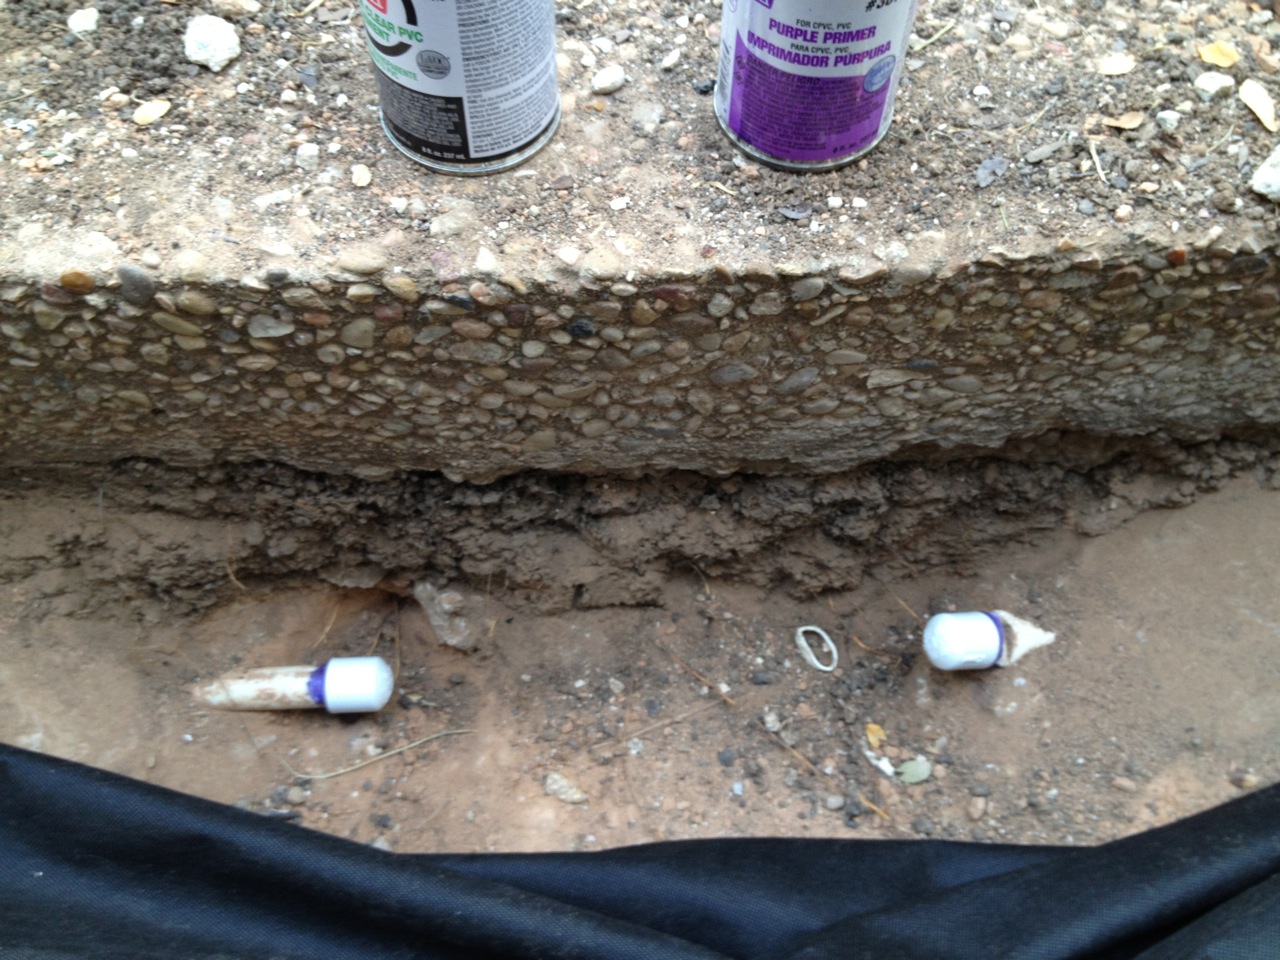
Sprinkler lines capped
Sprinkler lines unearthed
Some additonal complications arose. The first was relatively simple to
address: buried sprinkler lines. These I had always thought to be
defunct, disconnected lines, because a sprinkler head attached to them
never worked. With the ground opened up around it, I decided I would
verify this theory by turning on the sprinklers. Though water did not
come gushing out, there did develop some dampness, indicating that the
lines were only mostly dead. A thoery is that the concrete stairs
shifted over the years and might have pinched the line somewhere. Not
wanting to risk the line suddenly freeing up and pouring lots of water
under the paving stones, I needed to cap these lines as a precaution.
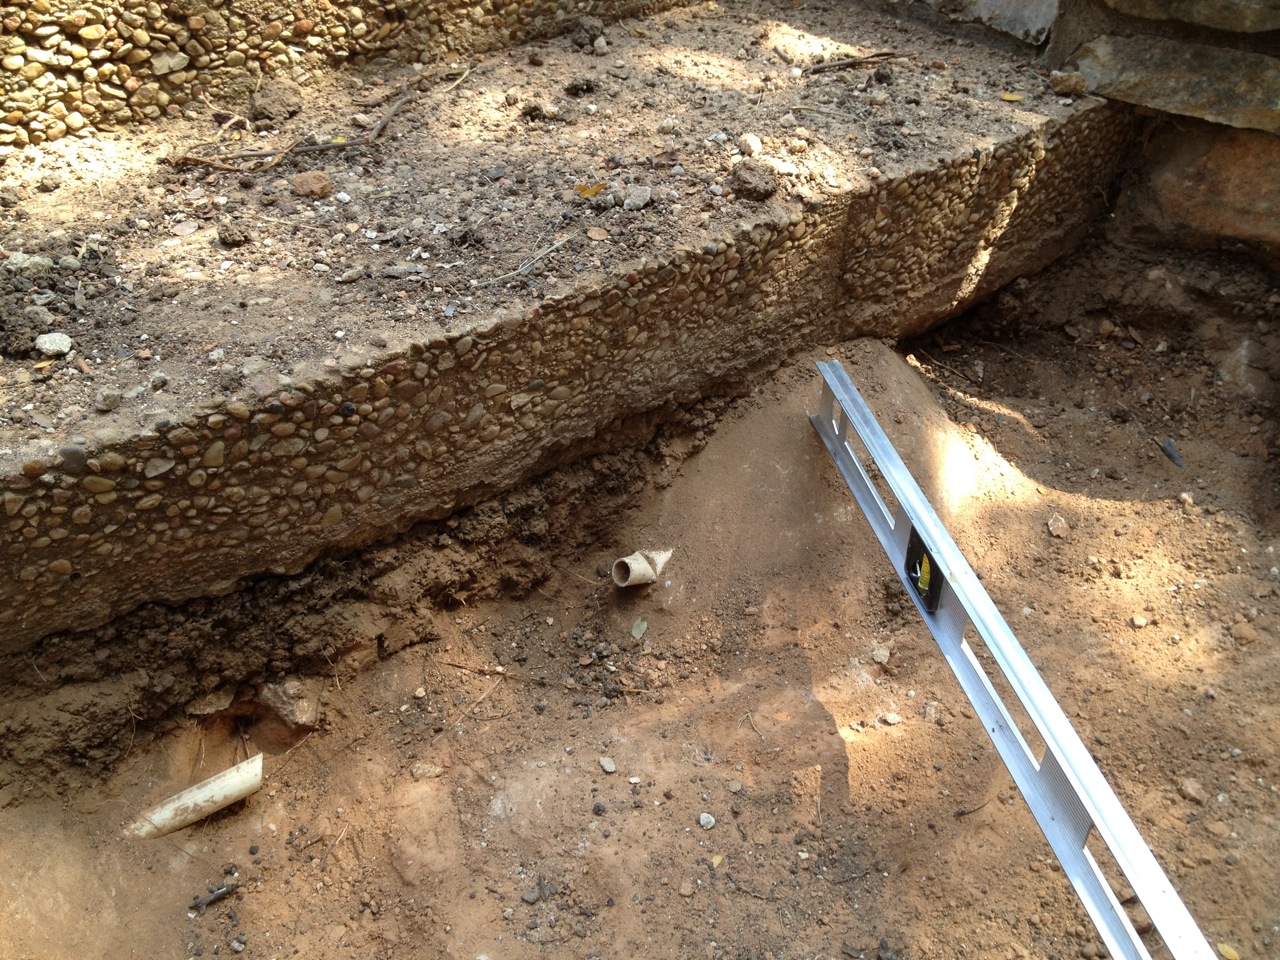
Leveling against the step footer
The more impactful complication was due to the concrete structure of
the pool stairs. It seems like it has a few footers that spread out
from the base to provide a wider footprint. This put a limit on how low
I could install the paving stones since they would be in the way. I
did not mind if the base material here was thin, since it was a small
area, but it also meant that the paving stones top surface would have
to be higher than the deck if I wanted to completely hide the footer.
I would eventually compromise on the height of the paving stones. My
desire to have them at the same level as the deck, and my lack of
desire to haul any more 40 pound bags of base material would rule the
day. Adding another inch of base material would mean another trip tom
the store, and lugging around another 4 to 5 bags around. Thus, the end
result is that you can see a bit of the step footer and I was not able
to put any paving stones in that area.
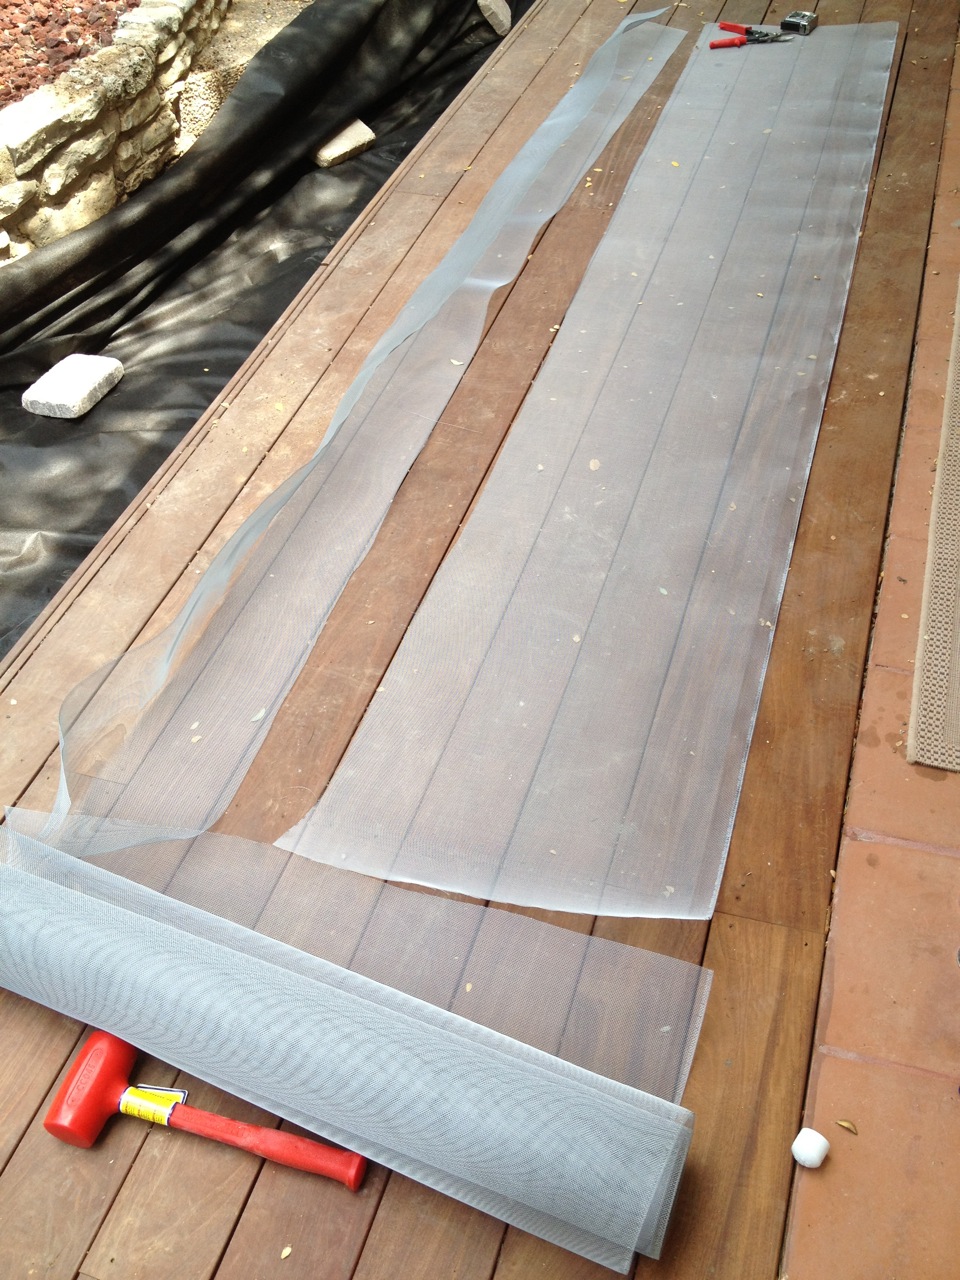
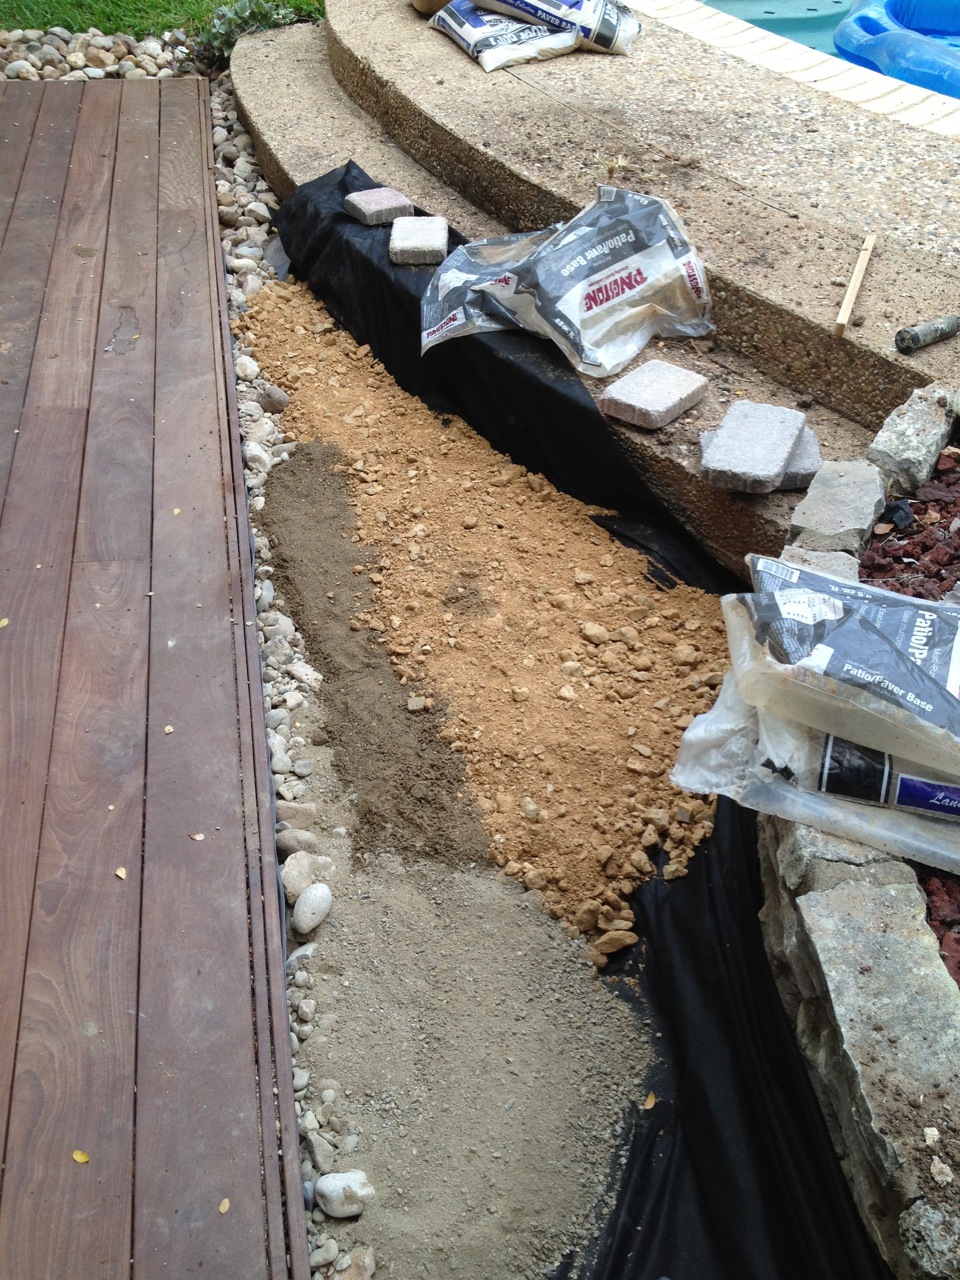
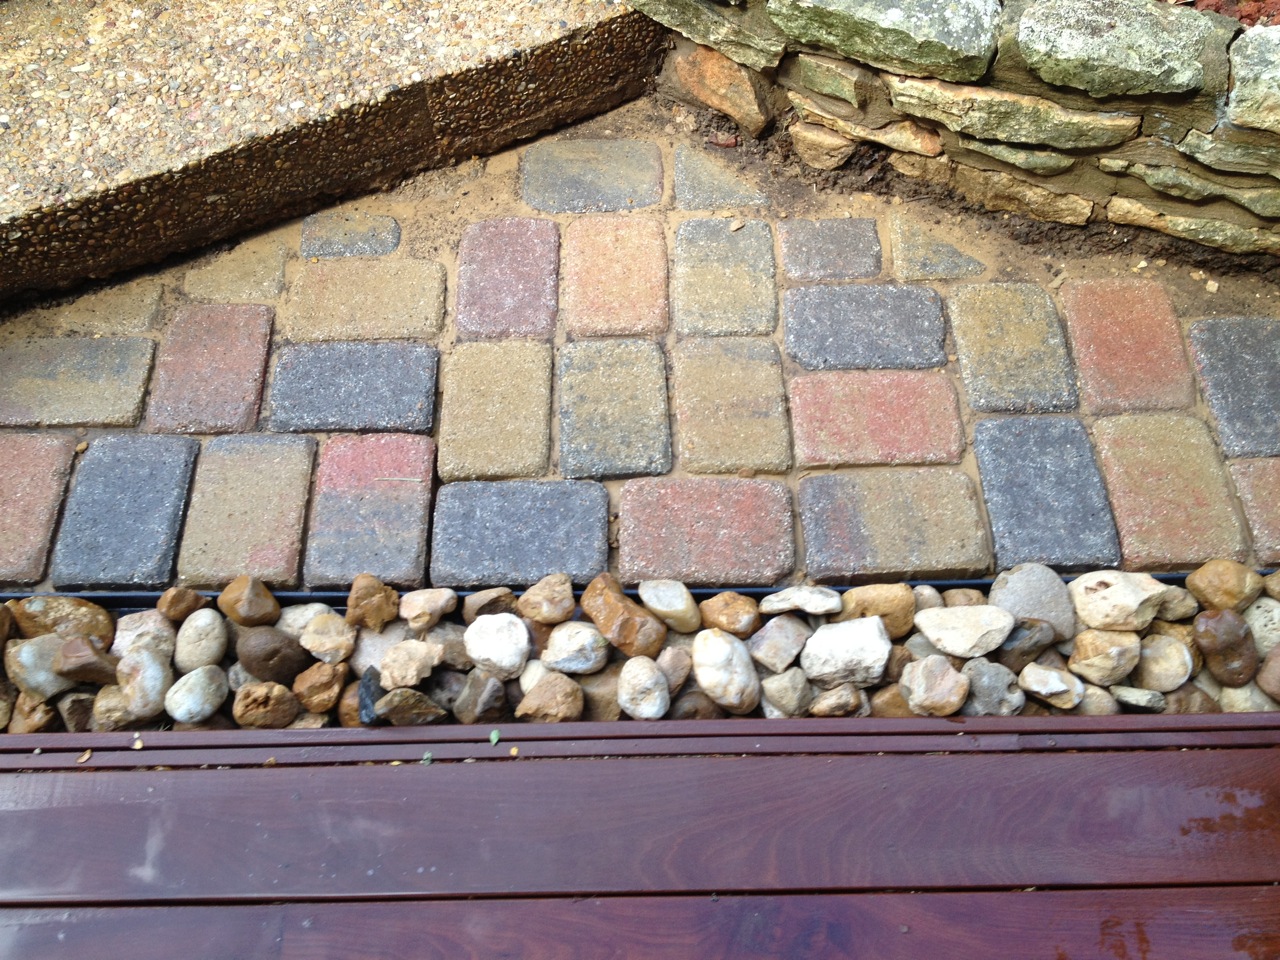
Cutting the aluminum screening
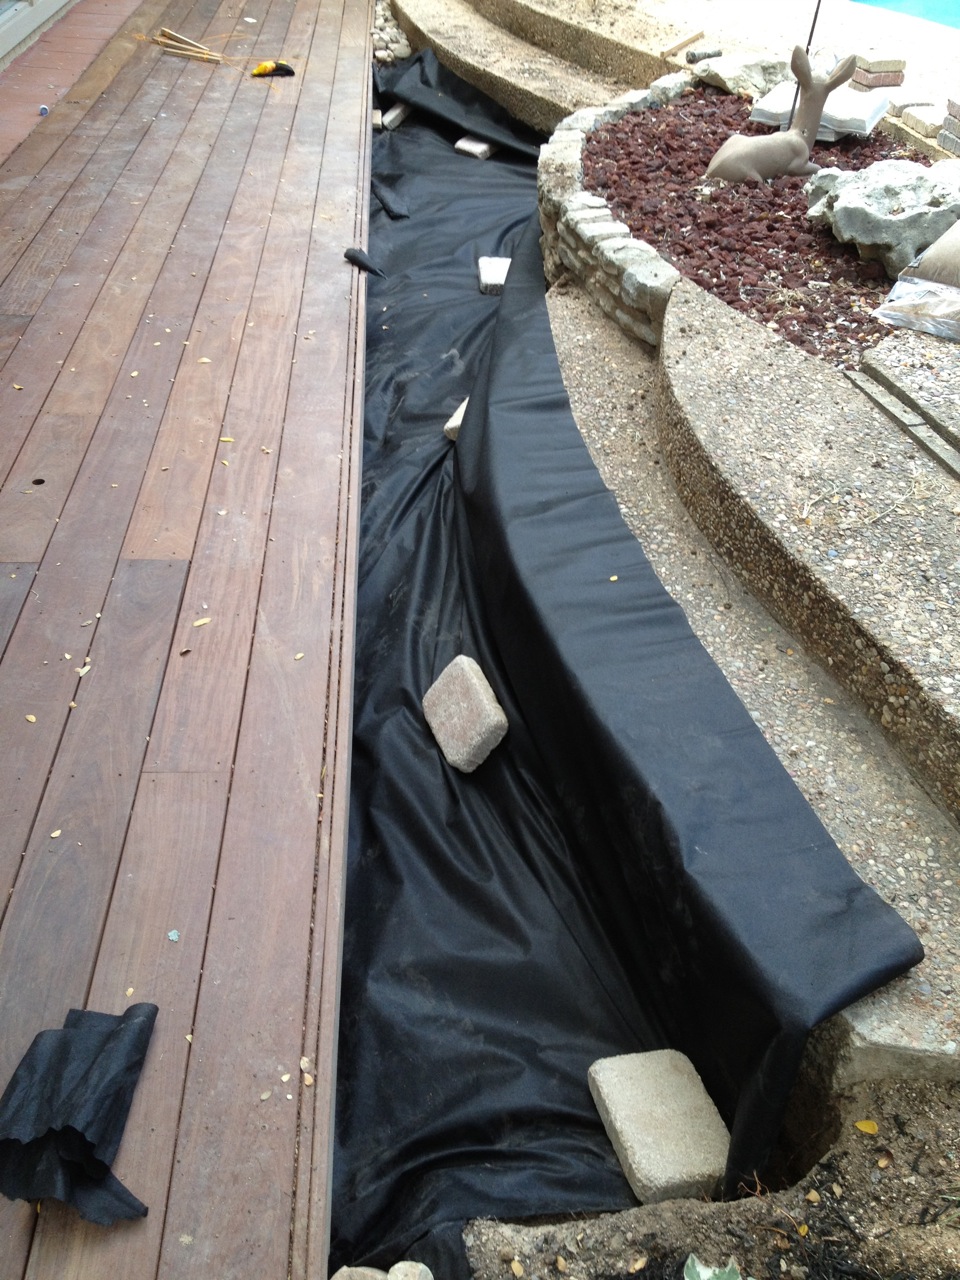
Laying out the landscape fabric
With everything excavated, the next step was to put landscape fabric
over the entire area (and running a few inches under the deck) to
prevent weed growth, but allow drainage. This is standard fair as the
bottom layer for paving stones. What was not common was what came next.
The solution I settled on to prevent the paver base layers from
creeping under the deck, and to hold the material in place was a three
pronged strategy. This was 50% my idea and 50% credited to an
unusually helpful person I talked to at Home Depot. I bought some
aluminum window screening as the first layer, which would be backed up
with rocks too large to fit under the deck. I then would add a layer
of smaller rocks (river pebbles) next to the larger rocks so that the
paver base material would (hopefully) be held at bay by this.
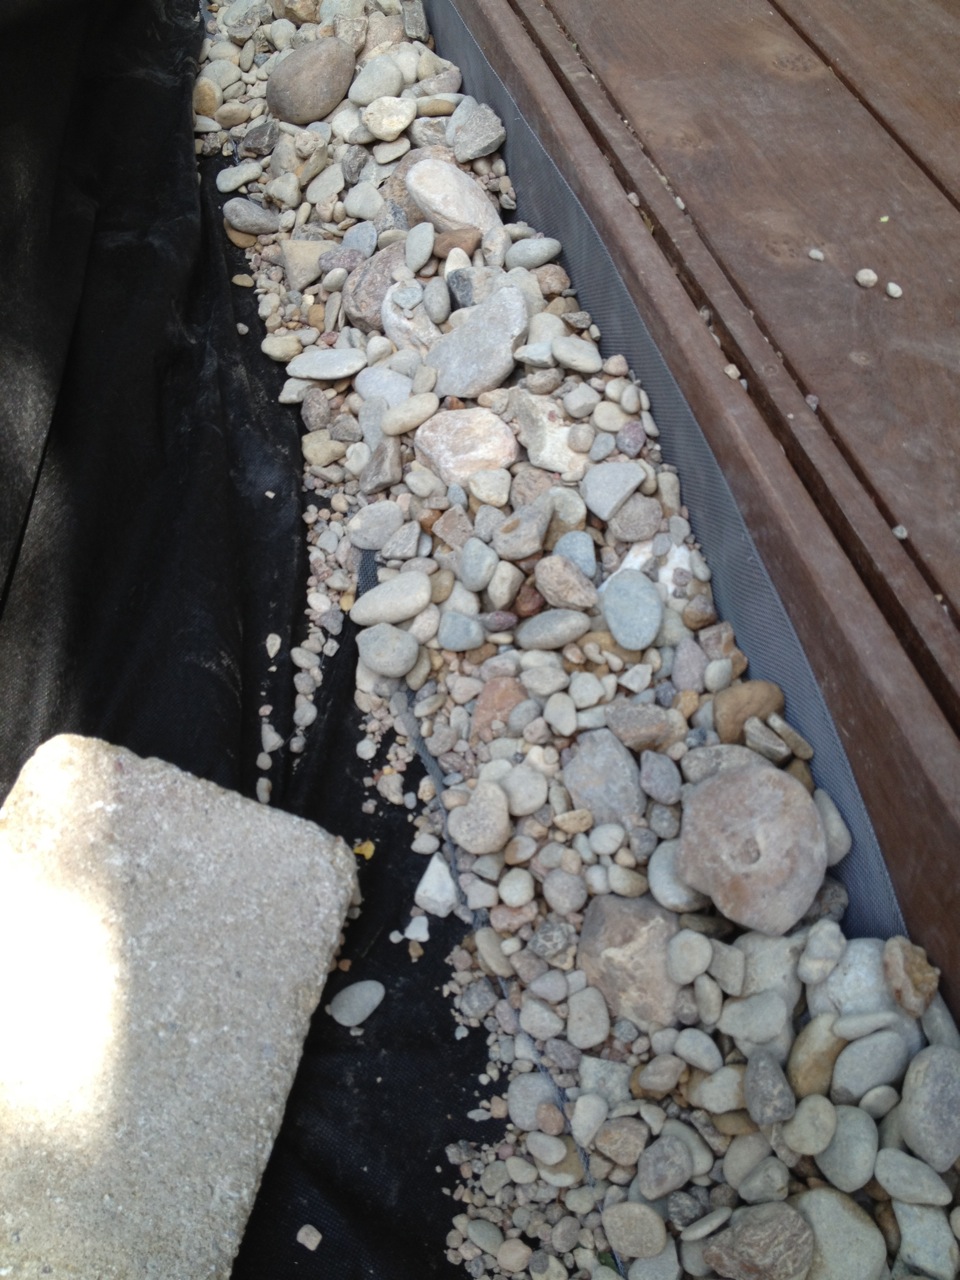
Small rocks backfilling larger ones
Large rock layer on screens
It was somewhat interesting that I could not find any definitive answer
to how to best solve the problem of this paver stone to deck
transition. I spent many hours hunting around the web, reading paver
stone how-to guides and watching numerous videos. They all assume you
have a flat area and want to just carve out a setion for the paver
stones. I have no idea whether my solution will work or not, so only
time will tell. I give it a 50/50 chance of lasting 5 years.
Note that the smaller rocks will not be visible in the end. These only
go as high as the base layer dirt/rocks and afterwards, the large rocks
(only) will be replaced where they began. This ensures a uniform look
of the large rocks around the perimeter.
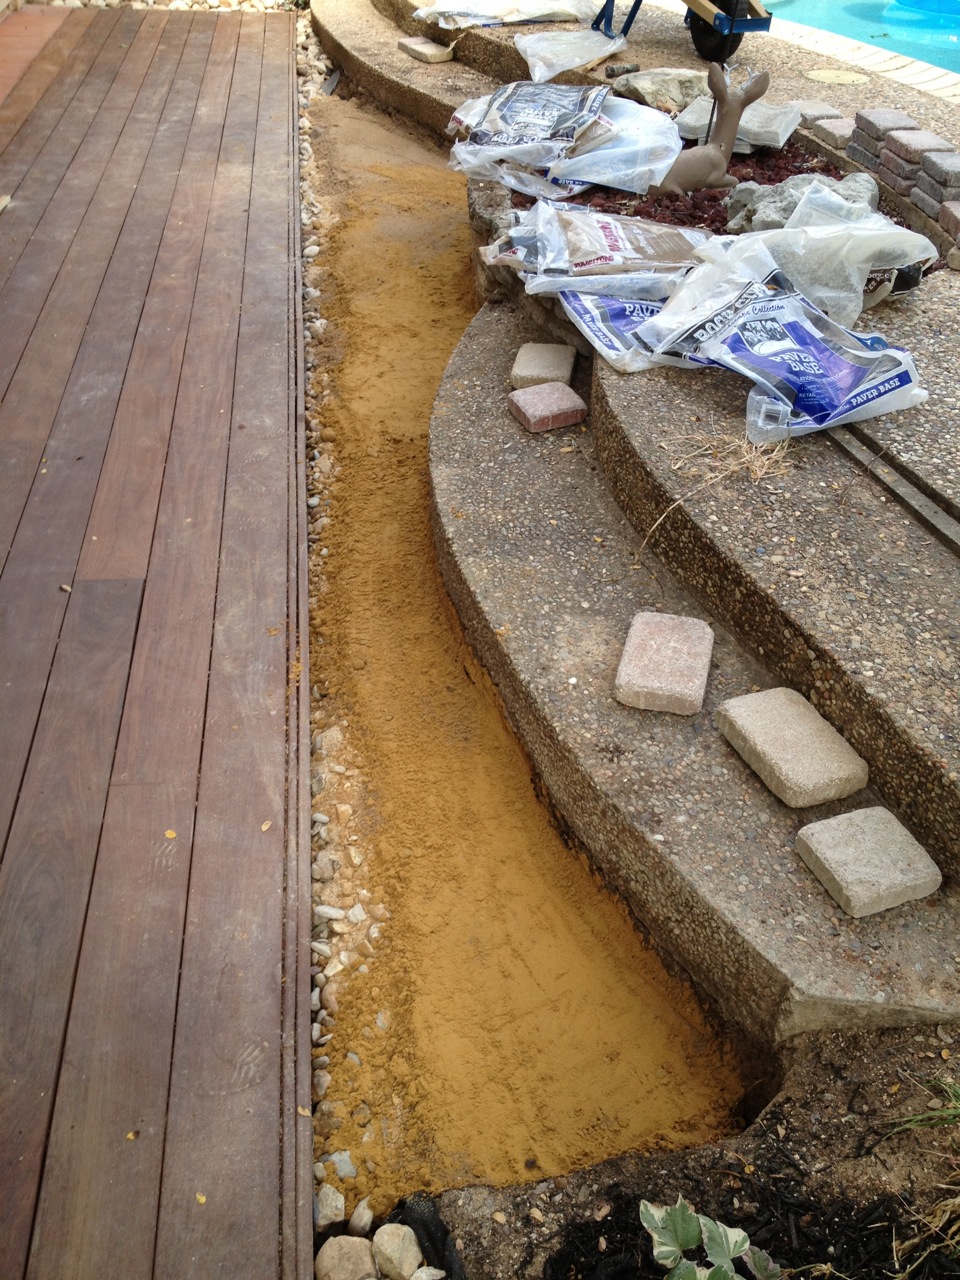
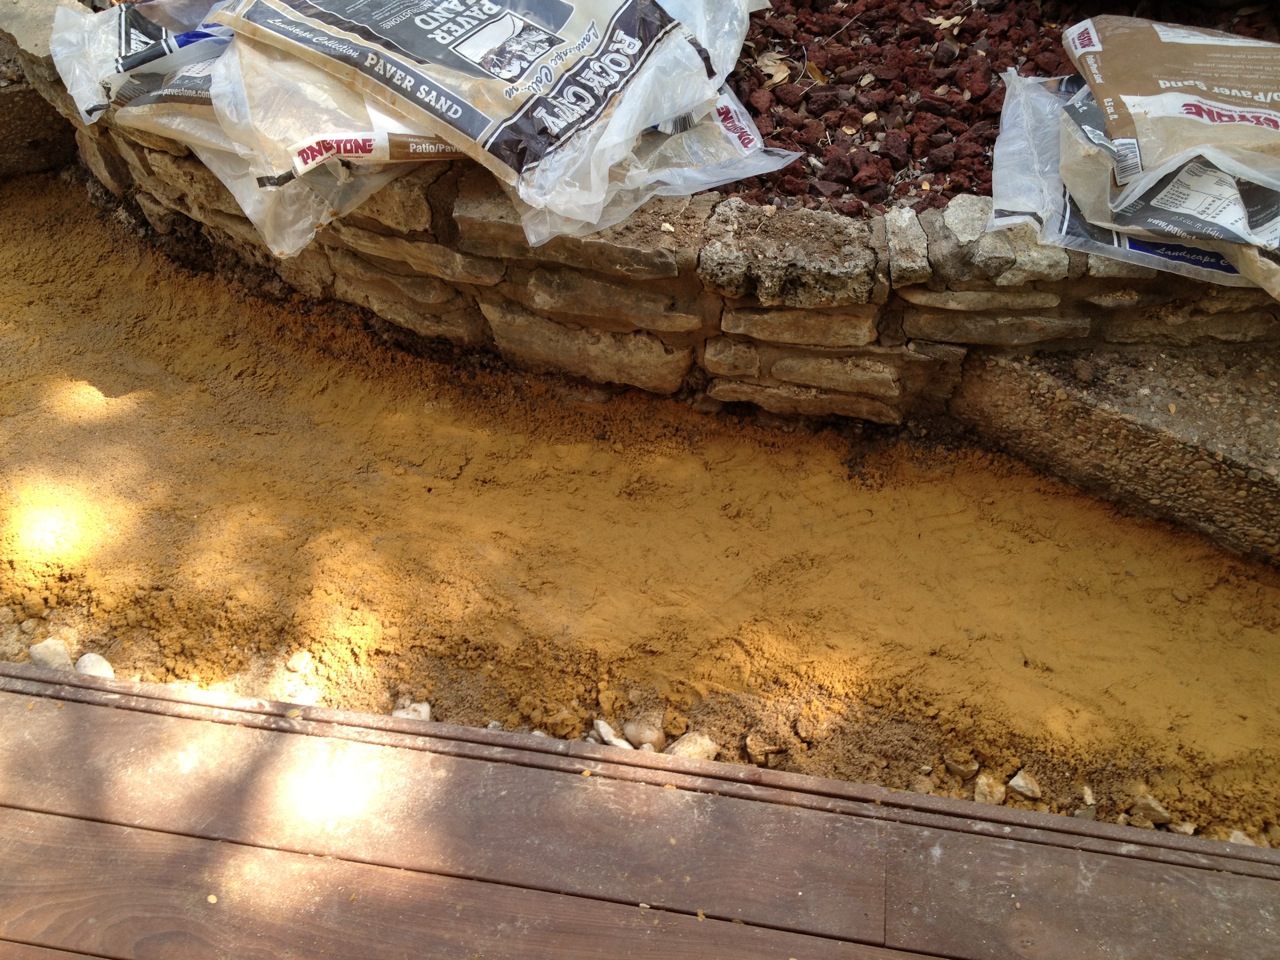
Paver Base Layer
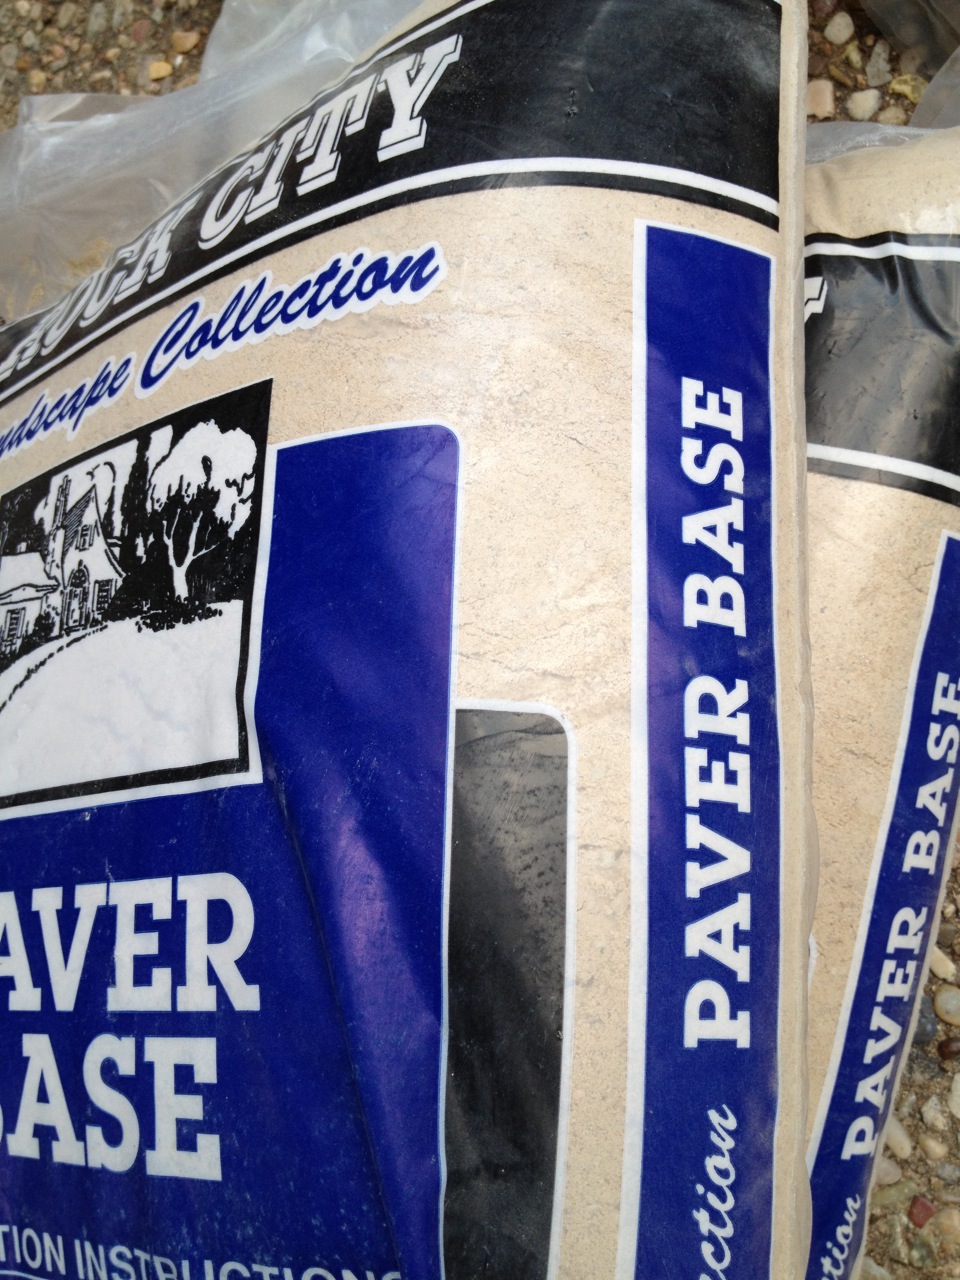
Fine paver base
Coarse paver base
With the ground fully prepared, it was time to start building up the
layers for a stable paver installation. The first layer is the "base",
which everyone says should be 4-6 inches of crushed gravel. When I
went looking for this at Home Depot, I did not find it anywhere. But I
did find a product called "paver base", which looked very gravel-like,
so I assumed this was a good substitute and specifically made for
pavers. However, in the end, I think this was a mistake. Some of the
bags looked like gravel, but some of them looked more like sand (see
pictures at right). I wondered if a mix of gravel and sand was ideal,
since once you put the sand on top of the gravel this is what you get
anyway, so this product just premixed it.
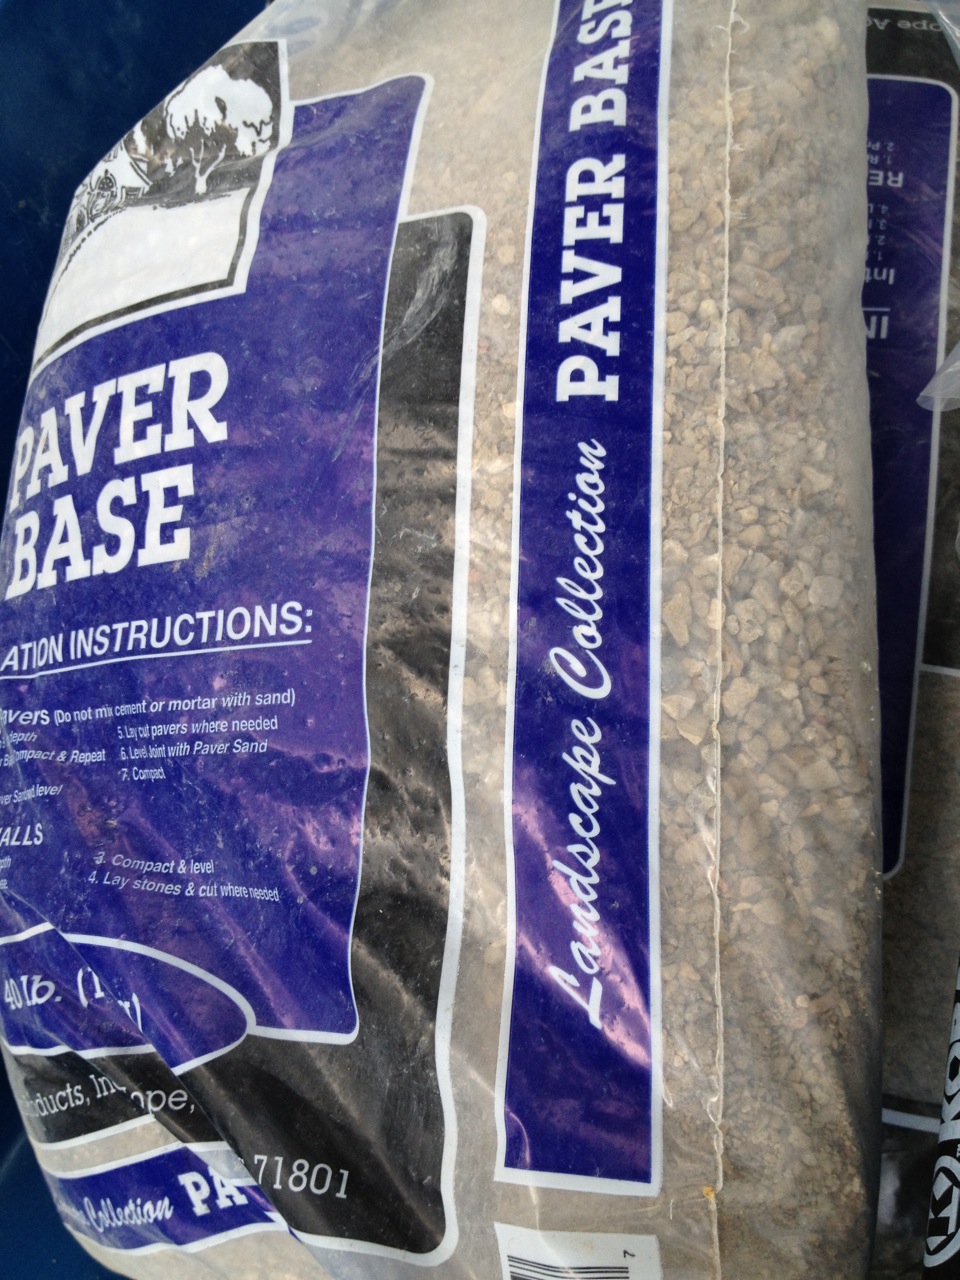
Contrasting paver base - close-up
Contrasting paver base products
I had hoped the finer looking paver base stuff had gravel insided, but
for the most part, there were very few rocks in many of the bags. I
wound up needing more than I originally bought, so went to Lowe's to
see what they might have. They too lacked gravel, but also had a
"paver base" product, though theirs looked much more like gravel. But
even their bags had wildly different textures. I bought two types of
paver base and wound up with 4 different colors and textures.
Weird. What I decided to do was to put the more gravel-like bags in the
higher traffic areas and at the bottom. The more sand-like bags I
reserved for low traffic areas and the upper parts of the base layer.
As per proper paver base installation, after adding every 2 inches of
paver base, this had to be compacted down with a tamper. Not having
one, I thought about using a small sledgehammer and some blocks of wood
for this. This might have worked, but since a tamper was less than $30
and since there are other ground improvekment projects on my list, I
invested in the proper tool for this. I was very glad I did as it was
much more effective and less effort than my home-grown solution would
have been.
Completed paver base
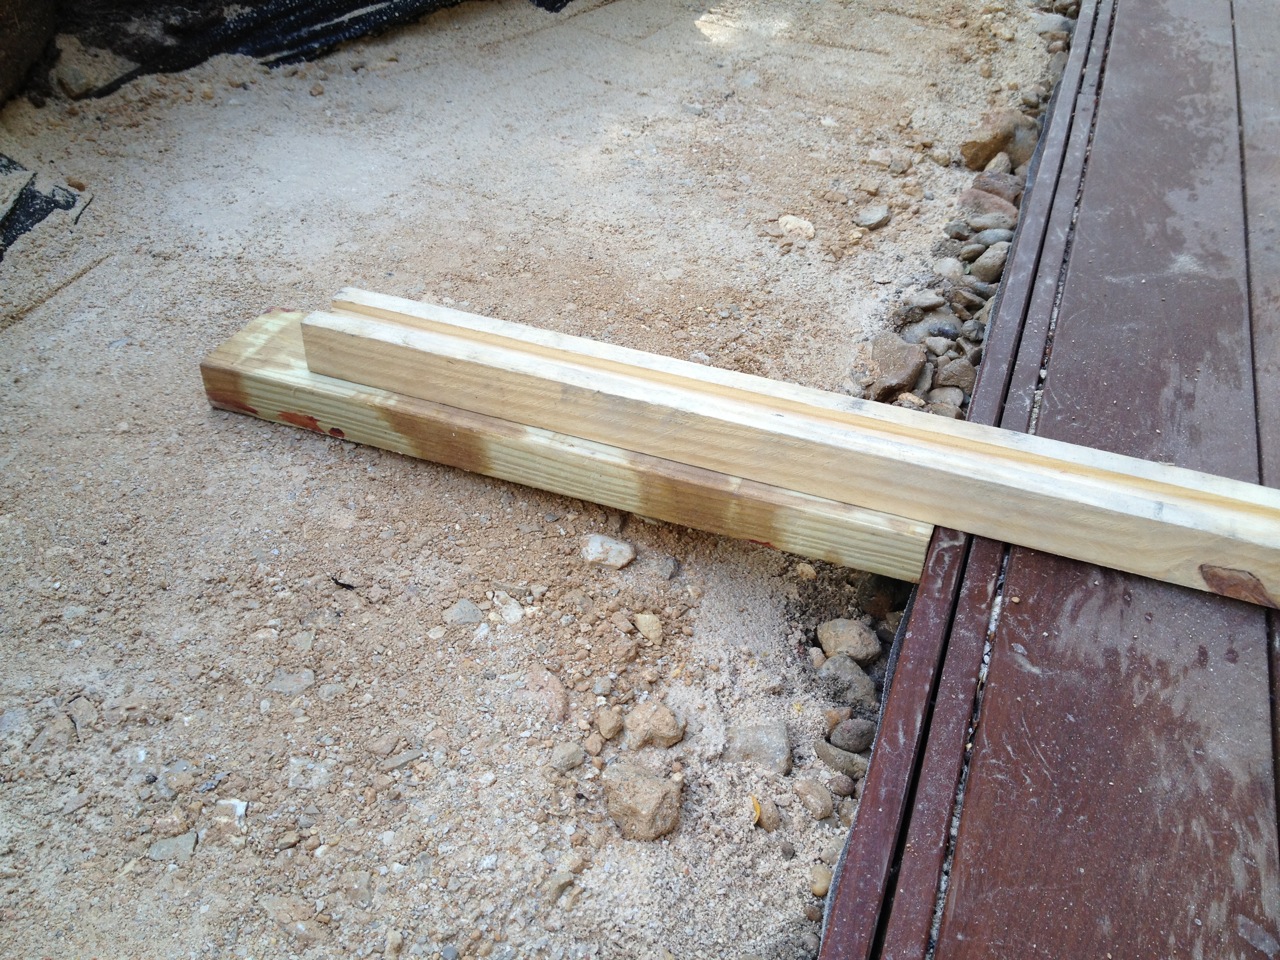
Paver base leveling tool
I had to remove the layout stakes and mason line to work on the ground
preparation, though they were of limited use due to my not being able
to anchor them well enough. But now I needed to level out the base
layer to be even and consistent across the whole area. Because the
deck itself runs across the entire area, and since I assume the
carpenters made this level, I decided to use the top of the deck as the
reference point, and I rigged up some wood pieces to help measure the
level relative to the deck surface. The idea was tro rest one end on
the deck and run it across the paver area to both evenm things aout and
measure against it. k It was at this point, seeing where the level was
after adding 12 bags of paver base that I decided to lower everything
by an inch.
Note that the deck itself is not completely level. It has some up and
down waves to it. Not terrible, but if you look closely yo-u can see
the rises and falls. As such, the final paving stones have the same
contour. Maybe this is better. Had the paver stones been true to
level, it might have highlighted the uneveness of the deck.
Note that when all was said and done, I added 18 bags of paver base,
which is equivalent to 7 cubic feet. The total area to be covered was
only 22 square feet.
Paver Sand Layer
Completed paver sand level
Sand layer leveling tool
On top of the 3-4 inches of base, one should at about an inch of paver
sand and level this off well. The traditional ways of leveling it
would not work due to the geometery and obstacles, so I just used an
adaptation of the base level tool for the sand leveling.
Home Depot paver sand
Lowes paver sand
I wound up making three trips for bags of paver sand. Some of these
were to Home Depot and some to Lowes and the different between the two
were quite stark as the pictures show. The Home Depot was very
sand-like, while Lowes was finer, more clay-like. I have no idea which
would be better, but I decided to put the finer Lowes product on top.
Covering the 22 square feet of area to 1 inch deep in paver sand took 4
bags, which is 2 cubic feet. Note that while Home Depot's bag specify
the bags as being 0.5 cubic feet, at Lowes. the bags only give their
weight: 40 pounds. This is horrible of Lowes. Yes, the weight is of
interest, but everything you need to do to plan your project is done in
cubic feet or yards, not weight. Luckily, I knew from Home Depot that a
bag was 0.5 cubic yards, and the Lowes bags were about the same size.
Paver Edging
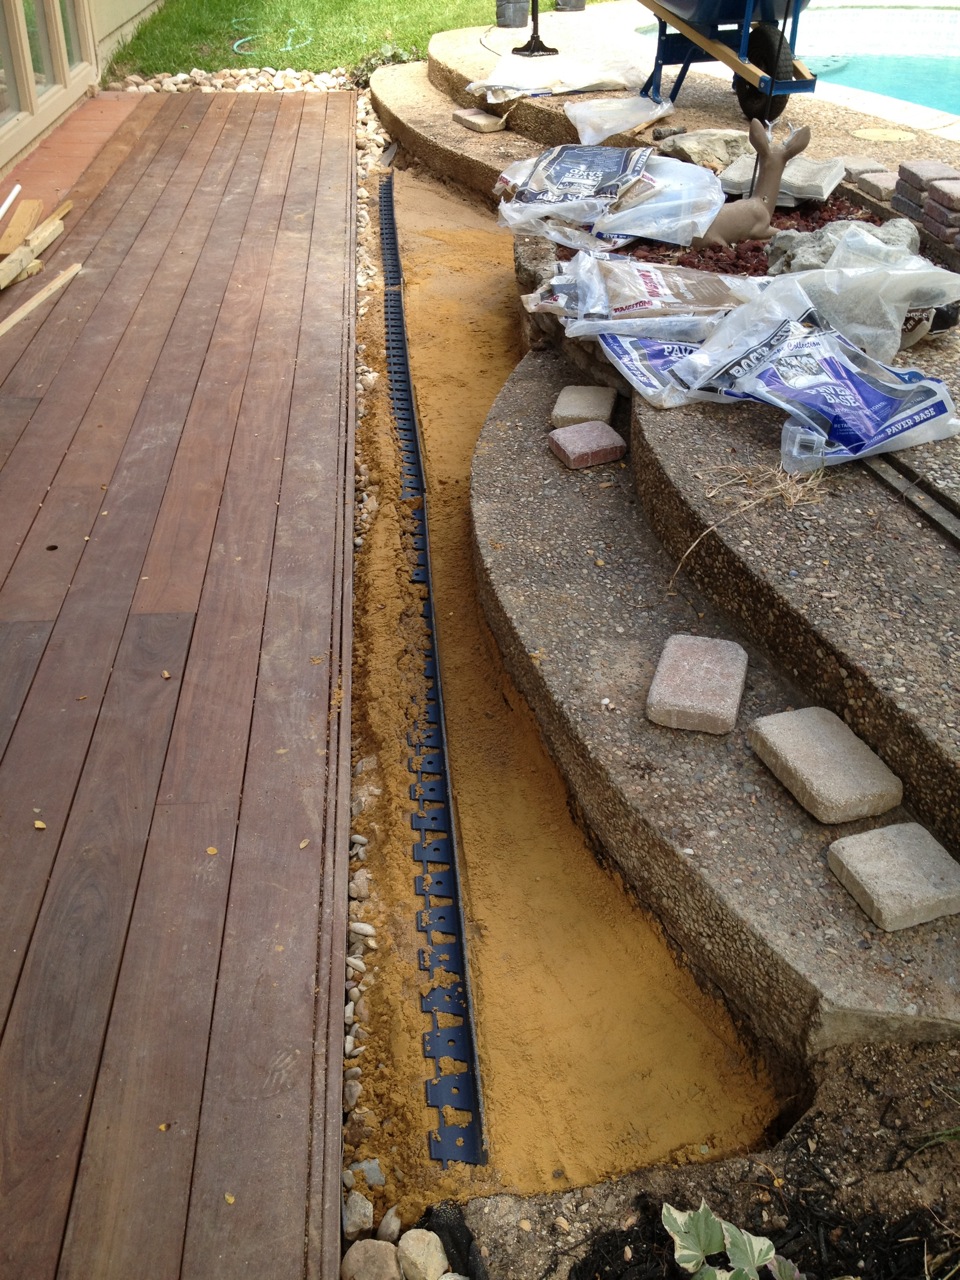
Paver edge rails installed
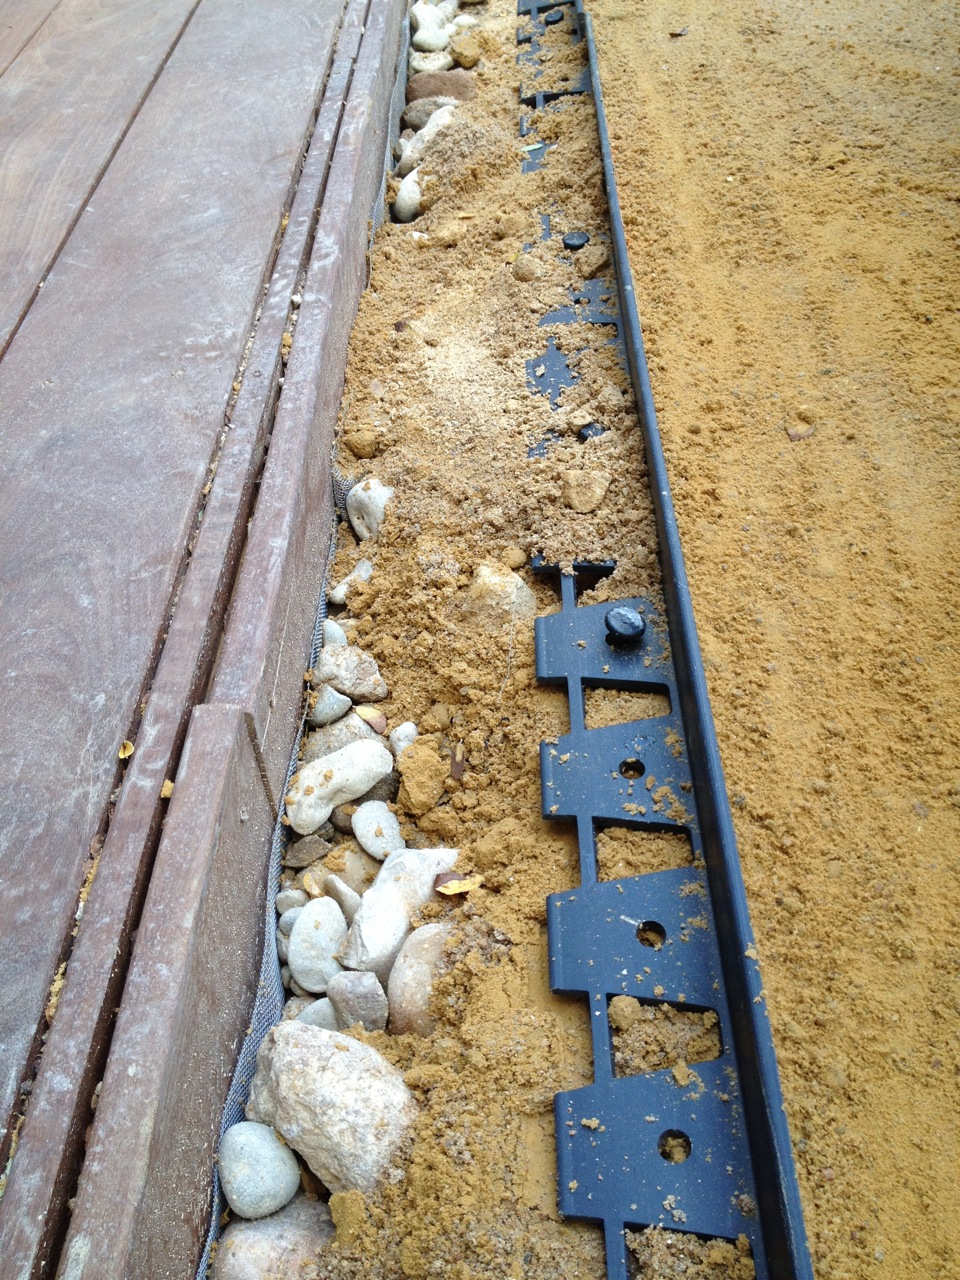
Paver edging with not-quite-flush spike
Adding some form of edging to pavers to hold them from migrating
horizonatlly is always recommended. There are lots of ways to achive
this, depending on the application. The edging also give the final
result a cleaner looking finish. I decided to use the more traditional
plastic edging, where you use stakes to hold it down. I was a bit
skeptical how well these stakes would hold, but I was at a loss for any
better edging method in this situation, so I hoped for the best.
The large rocks would be filling in between the deck and the start of
the paving stones, so I measured the width of the rocks in the area
where I did not have to remove them, which was about 7 inches. It was
very frustrating to install what should have been a very simple job. I
had plenty of stakes, and the plastic rails had plenty of holes to put
them in. Either the ground was too loose to secure them, or I would
hit a rock and not be able to drive the spike in. More than half the
locations I tried to put a spike in I hit a rock and had to pull it
out. The few locations I was able to get a good grip into required me
to hit the spike hard enough that the entire rail had shifted by the
time it was in. I wound up with a completely non-straight edge. I had
to pull up spikes and do the best I could to get this back to
straight. I eventually had to settle for "mostly straight".
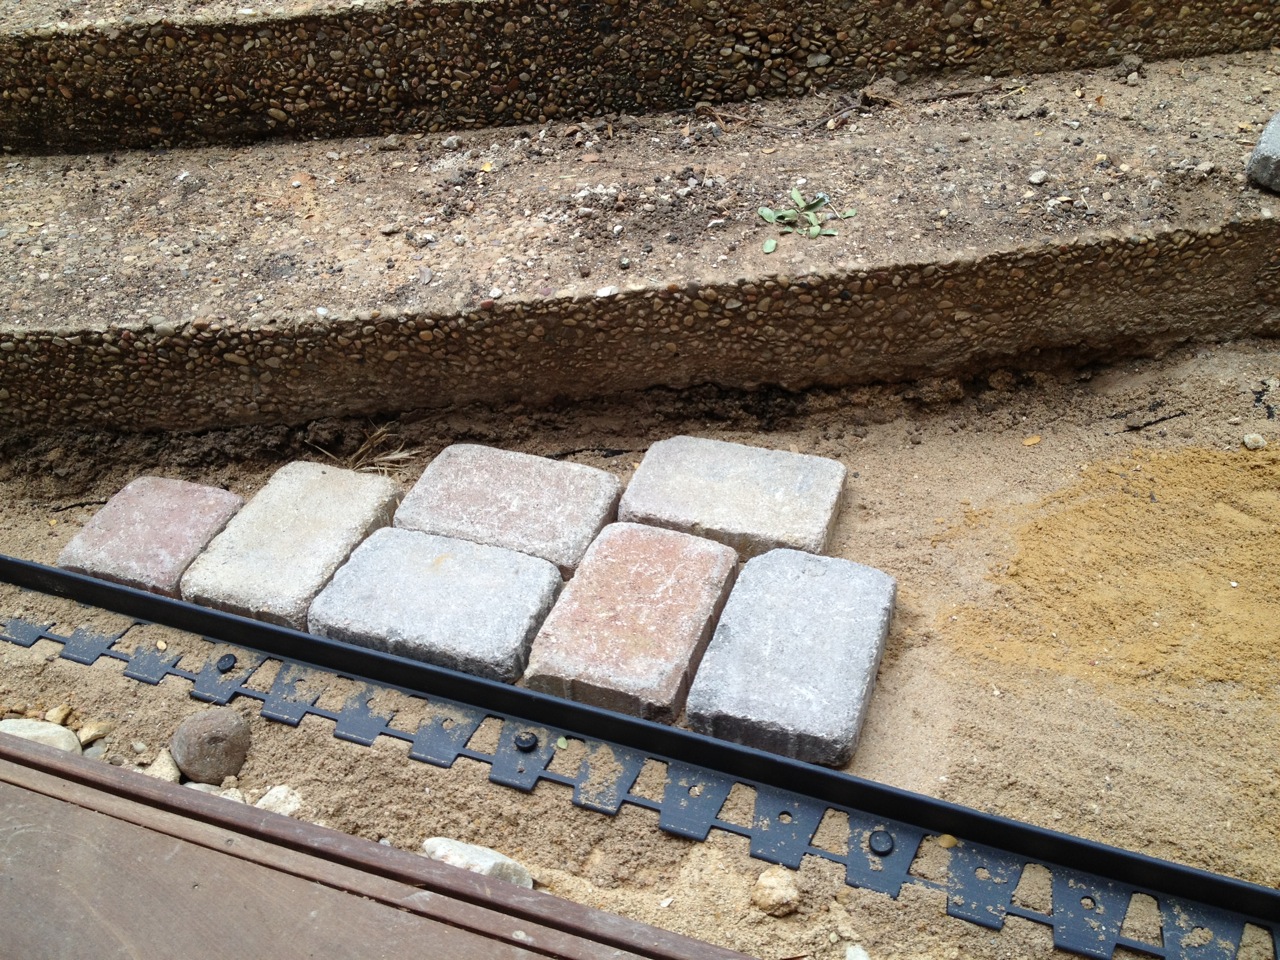
Paver Installation
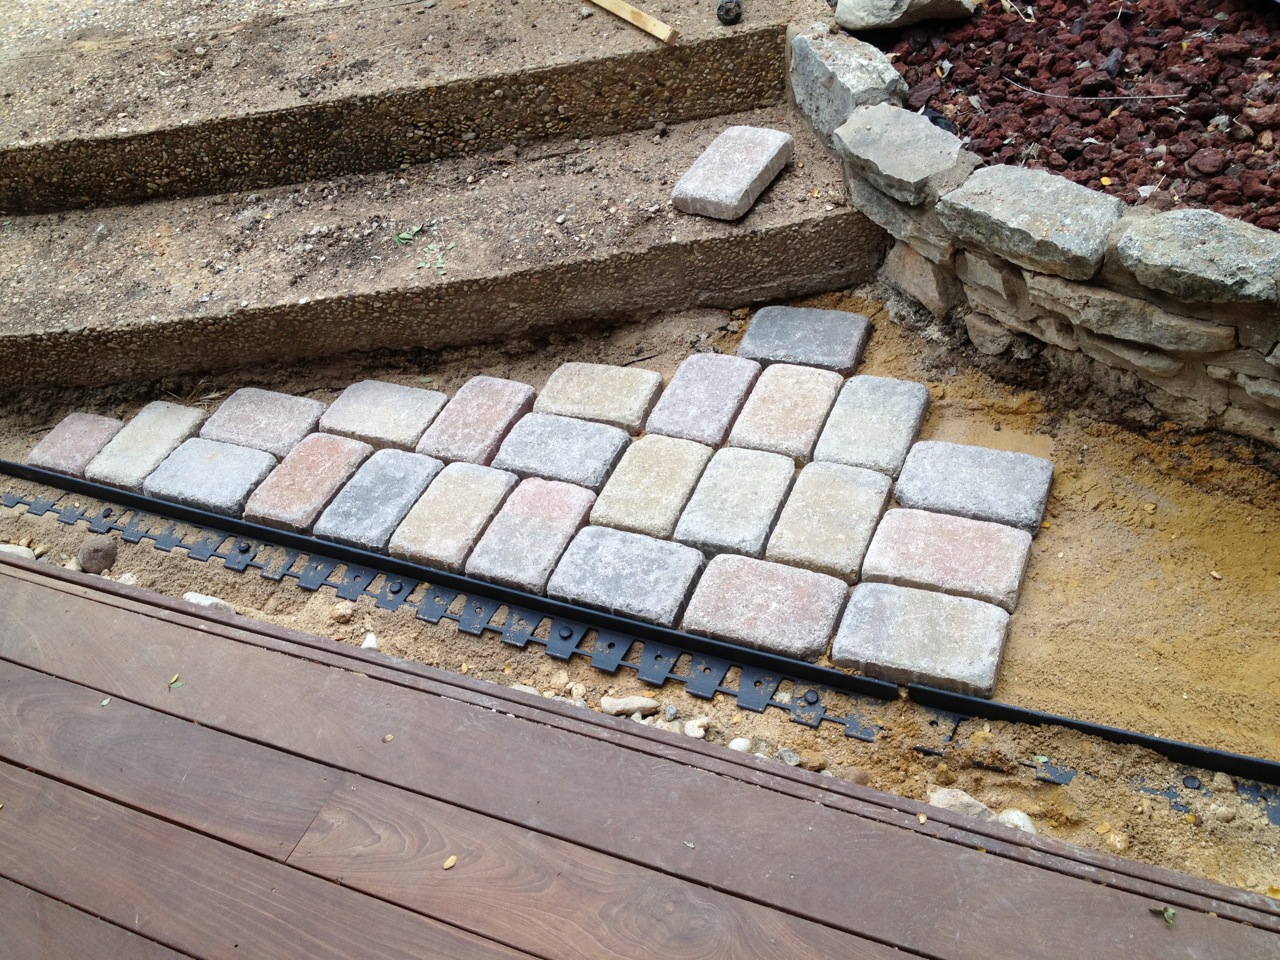
Half of pavers installed
First pavers installed
I got to the point of being ready to install the paving stones around
2pm on the third day of the project. It was pretty hot out (let's say
99 degrees as it usually is by this time) and I was a bit tired, but
the end seemed in sight, so I pressed onwards in hopes of wrapping this
project up that day.
Due to the weird shape of the area, I would need to cut the paver
stones to fill in the gaps. The proper way to do this is with a
masonry saw, but since I do not have one, I would have to buy or rent
one. This was a line I would not cross for this project. It was
already a bigger project than I originally planned, so I opted for the
poor man's method using a chisel. I first wanted to lay out all the
full-sized stones first before trying to split any of them. I did the
layout trying to minimum the number of gaps I would need to fill in.
Once all the full stones were in place, I then got a chisel and
drilling hammer and attempted to split the bricks into shapes. This
was only semi-successful. At first, the stones would randomly split
and I would hope to be able to fit them somewhere (since there were so
many opportunities). As this went on, I got a little more skilled at
this and had a few that split where I wanted them to. However, in the
end, I opted to just leave all the small areas since I was not able to
get precise enough control over the pieces by the time I ran out of
pavers. I fear regretting this decision someday.
After washing sand off
Before washing sand off
After laying the paving stones down, the nextstep is to tamp them down,
and then fill in the gaps withn paving sand. You do this by just
dumping sand on top and using a broom to work it in between the gaps.
After this, you wash off the excess.
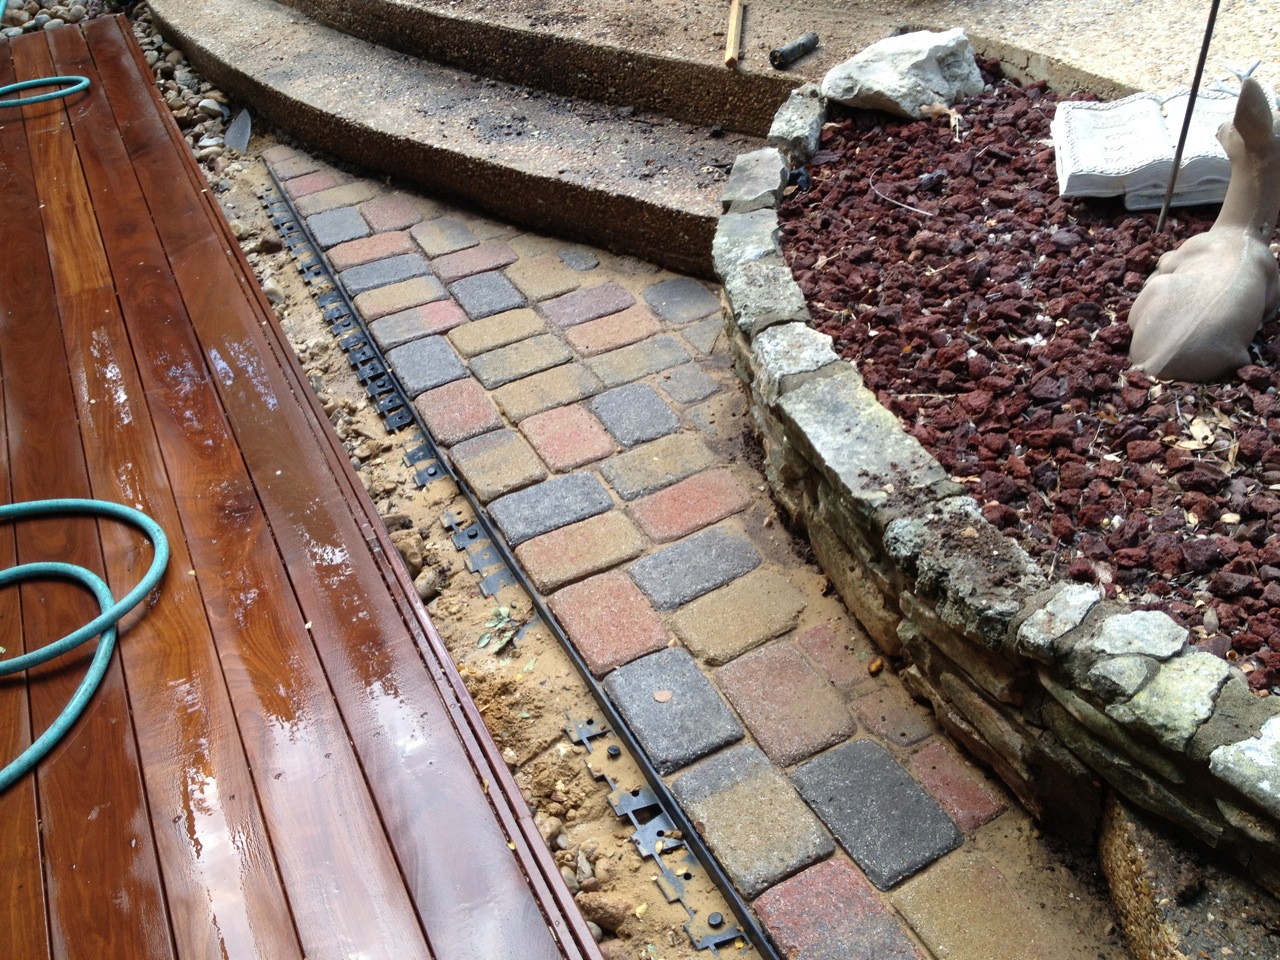
Final Result
The last steps were to re-install all the large rocks between the deck
and pavers, clean everything up, put the tools away and have a beer.
Final result
Final result - close-up
Final result - west end