 Cassandra.org
The Problems
Being a novice, recreational guitar player, I like to play songs on my stereo and attempt to play along. This used to require burning CD's with the appropriate songs, manipulating the stereo controls, and shuffling the many pieces of paper that contained the chords/tablature for the given song.
I wanted to find songs that did not seriously challenge my playing ability but which did not bore me. I would burn experimental CDs with candidate songs, find those that seemed appropriate and after 3 or 4 experimental CDs, burn a "master" CD that had all the good stuff. This system worked well enough, but was cumbersome to manage. Further, I would often want to rearrange the songs on the master CDs, or even replace songs with ones I liked better. My CD player only stores 5 disks, so I had to prioritize, sequence and constantly rearrange the CDs.
Further, I needed all those scraps of paper sequenced to match the constantly changing master and experimental CDs. Lot's of paper shuffling and reorganization.
Another problem was in the reaching for the stereo controls. You do not want to get too close to the stereo with the guitar, lest you mistakenly turn the wrong way and drive the tuning screws into the stereo cabinet.
Other annoyances included:
- getting a slight delay between songs on the CDs to allow readjustment of amp and guitar settings; and
- Sometimes wanting songs to play in sequence and sometimes wanting to repeat a song.
The Solution
The vision was to simultaneously resolve all these problems.
- First, create a set of foot pedals, so that song playing could be controlled more easily with a guitar in your hands.
- Second, use the MP3 collection on my computer directly, eliminating the need for constant CD burning.
- Third, coordinate the song playing and display of the chord/tablature charts so that the electronic text files were displayed automatically.
- Ensure that there was only one master list of songs and that it was easy to change, and only required changing once.
What I describe in the rest of this page is the design and implementation of this solution. This was a fabulous project as it incorporated all of these skills/tools:
- Woodworking (The control pedals and base)
- Metal Working (Control pedal mechanisms and electrical components)
- Mechanical Engineering
- Trigonometry (Determining pivot points on pedals)
- Electronic Design (Interfacing pedals and software)
- Soldering
- Salvaging Old Computer Parts
- GNU/Linux (Freedom to invent)
- XMMS (MP3 player)
- Emacs (Displaying Chord/Tablature)
- Computer Programming (Python to coordinate XMMS and Emacs)
- System Administration (Wireless, NFS)
Though diversity may have been obsoleted by the specialization that is today's industrial/corporate meat grinder, completing a project such as this provides me with a great deal of joy.
The other aspect of this project that I really liked was that it cost me less than $8 in parts, though this does not include all the random other pieces I used that were laying around my house.
The Components
The design and construction of the pedals to control the playing of the songs was the major hardware component, while the software was a combination of existing applications and some custom "glue" script to coordinate them.
The Hardware
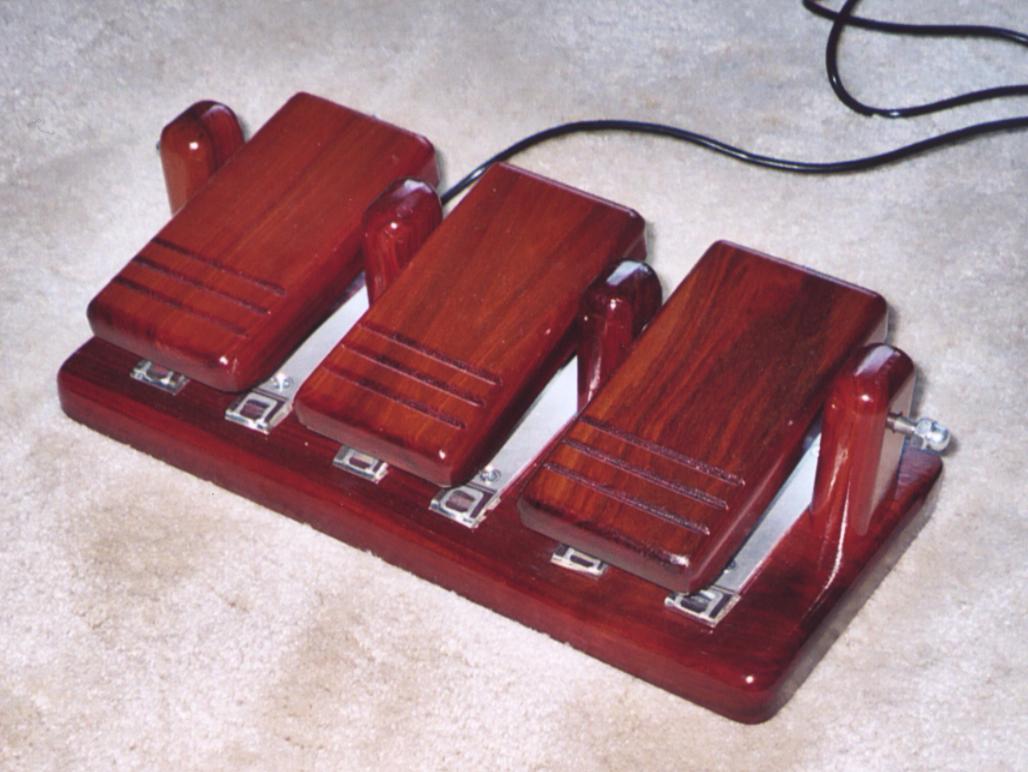
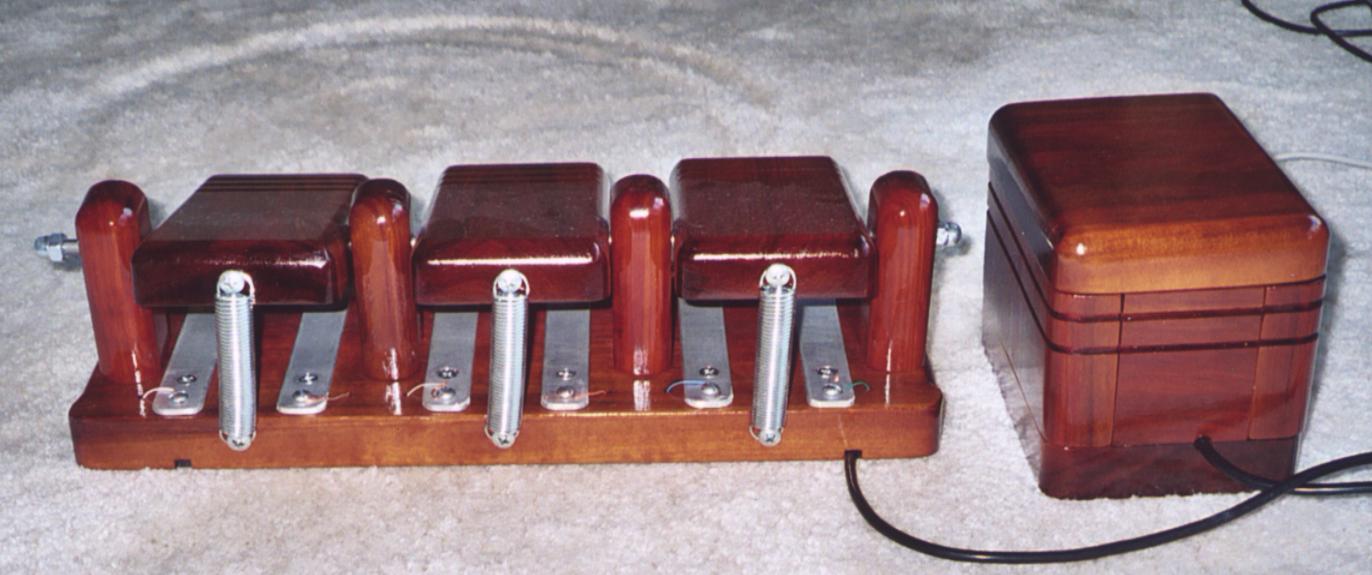
|
| Finished Pedals |
|---|
I'd heard of pedals that are used for transcribing songs, and surfed the web to see if I could locate them. I did, but they cost around $200 and it was not clear that it would be easy to interface them with something that was not the software that they were marketed with. Besides, building my own would be a lot more fun that buying off-the-shelf pedals.
Having done a fair amount of woodworking, and having lots of wood scraps I naturally thought this the right material to use and it would cost me nothing. One of the unmentioned constraints is that my guitar and stereo are located in the living room, so the appearance of the "contraption" I build had to be aesthetically pleasing and match the existing decor. Because of this, I used some scraps of Redheart wood I had, which has a beautiful reddish color.
I also had a lot of scrap pine, and this was what served for my prototype model. I was unsure of:
- exactly how big the pedals should be;
- where they should pivot;
- how high off the platform they would need to be;
- how to make them spring back after being pressed; and
- how to make some form of electrical contact with them.
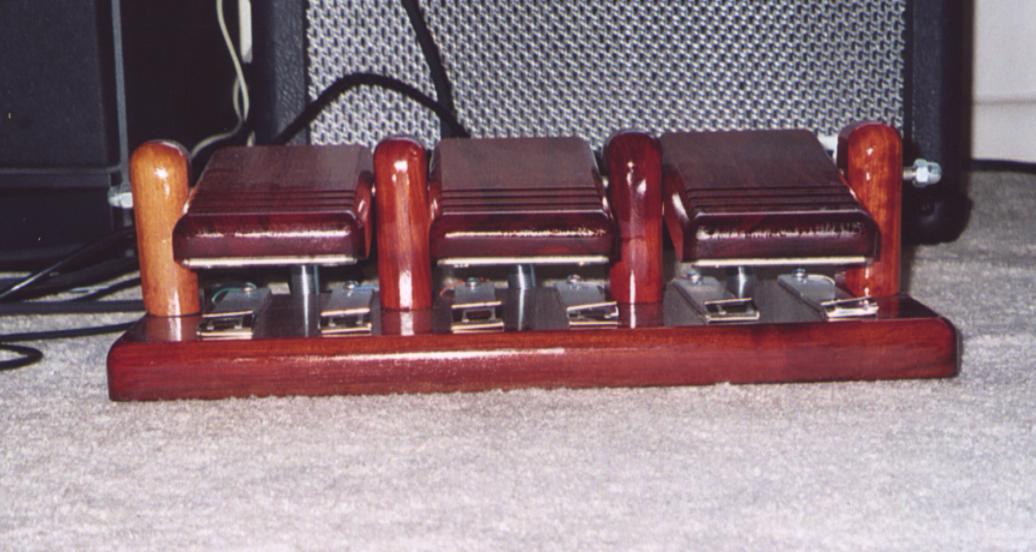
|
| Front View of Pedals |
|---|
Using my trigonometry skills, I determined that a wooden dowel running slight off the halfway point of the pedals, and a few inches off the platform would provide enough movement to have the front of the pedal make contact with the base. Building the prototype confirmed that my calculations were correct, though I did need to adjust some things slightly. Theory meets practice.
I now understood how the wood portions of the pedals would work, but needed a way to get spring action on the pedals. I had a few Springs, but nothing that looked usable in this context. I toyed with the idea of using those springy paper holders, but fastening them to a block of wood was tricky, which is why I went with pivoting on a dowel approach.
So off I went to the Home Depot to see what I could see as far as "springy things" they might stock. I hit the jackpot in finding springs of just the right length and just the right tension. Legs are generally relatively strong, so you can't put any old wimpy springs in a foot pedal mechanism and expect it to last. However, these springs did require a little bit of creative woodworking to allow them to sit in place without dislodging.
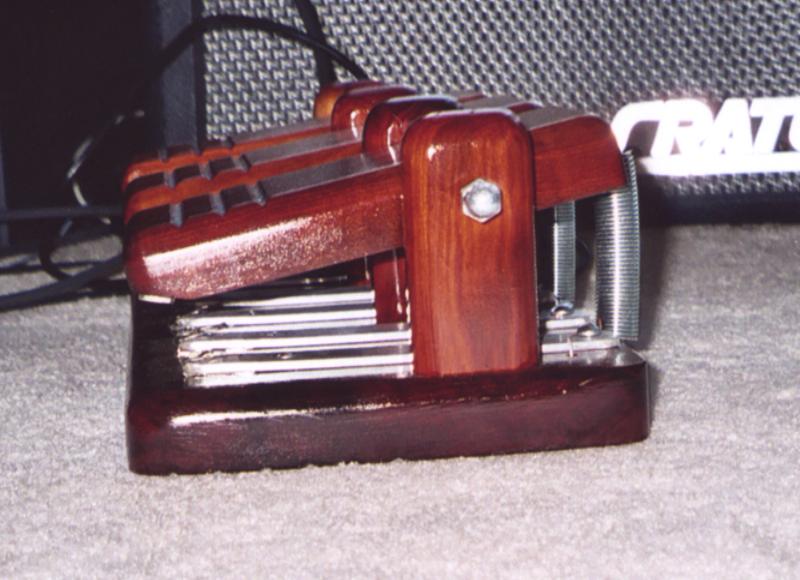
|
| Side View of Pedals |
|---|
Last up was coming up with a way to have the downward pedal action, making contact with the base, complete an electrical circuit. This was going to require metallic components, so I bought some pieces of thin metal stock (again at the Home Depot) and cur pieces so that a single metal piece on the underside of the pedal would contact two separate metal strips on the base of the pedal assembly. Now all I needed was to attach a wired to each of the bottom metal strips and the contact of the pedals would complete a circuit.
Another important challenge was in routing the wires within and outside the pedal assembly so as not to get hung up in normal use and to be resilient to tugging and jostling (i.e., the random vacuum cleaner roaring through.) This was accomplished by drilling holes in the interior to the metal contacts and routing a curved channel on the underside of the assembly.
I added some grooves to both the pedals and underside of the pedal assembly on the assumption that this would provide more "traction". It seems to provide more decorative traction than anything else though.
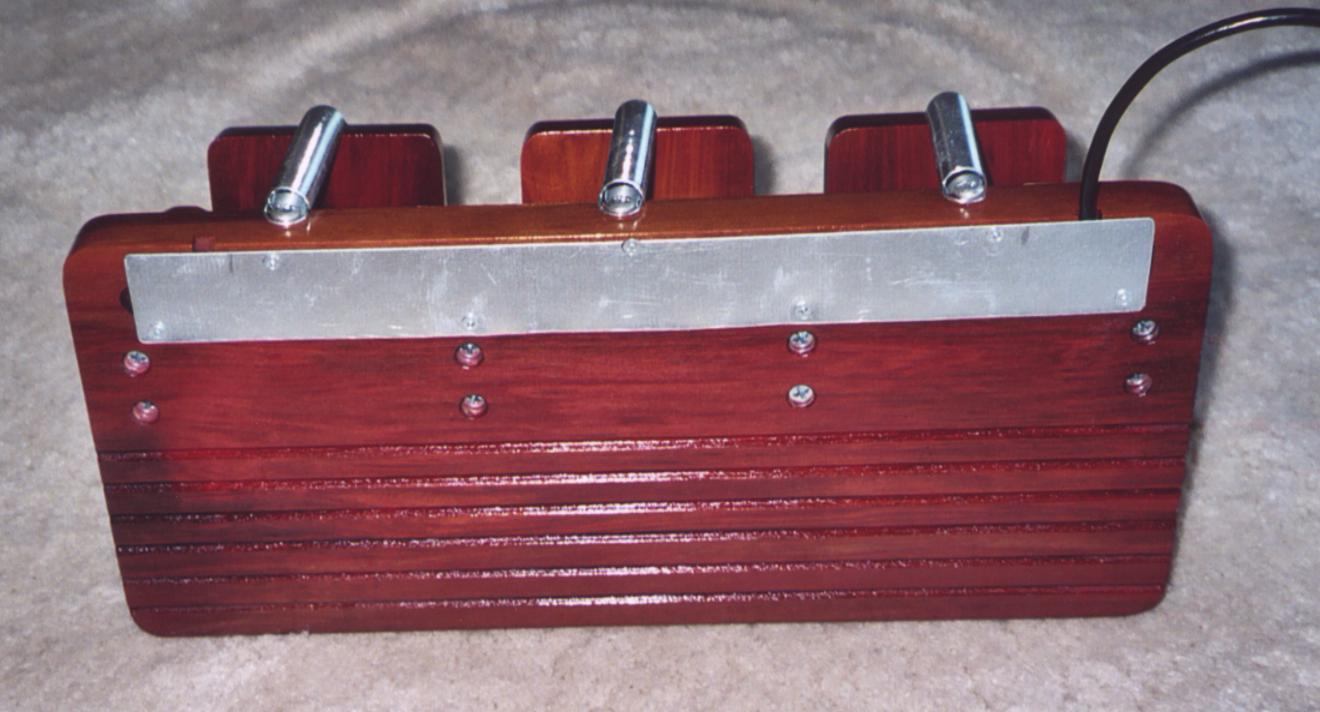
|
| Back View of Pedals and Housing |
|---|
The Interface
Recalling a vaguely similar foot pedal project I did for a Commodore 64 back in the Ice Ages (where I did in fact use a springy paper clip thing for the spring action), I started researching how to write some serial port access drivers in GNU/Linux. I knew that I could wire up two lines of the serial port and detect the pedal contact by the presence or absence of +5V on certain lines. Writing this code was not appealing though and I was not sure if I would be able to do it from a user program, or if it would require writing a device driver that would have to live as a Linux kernel module.
Then a brainstorm hit me and I realized that I was complicating my life, because there would already be most of what I needed with serial port (or even PS/2) mice. My first hope was that I could just find out which two pins the mouse buttons were hooked to, and just make myself a cable with the pedal contacts wired to the right pins. Alas, mice are slightly more complicated than some of the Commodore 64 joystick ports. Seems that mice have a little circuit board that does a little protocol handshaking to make it all work with the operating system.
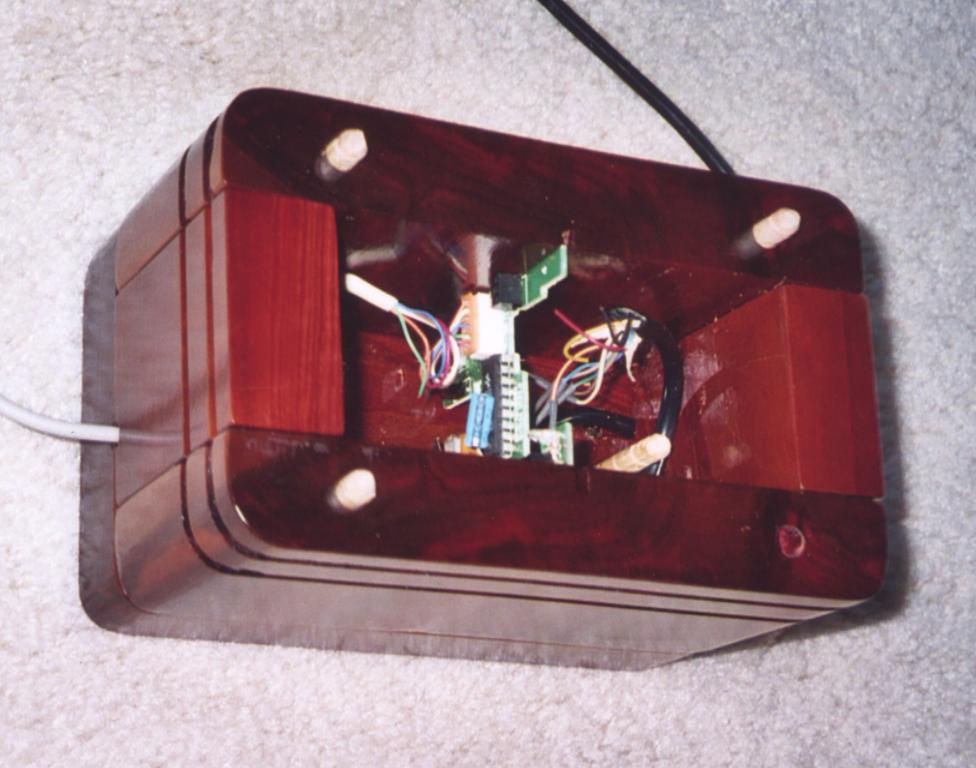
|
| Inside Housing |
|---|
Then the second brainstorm, though more like a light shower, occurred. Just gut a mouse and grab it's little control board. I was a little worried about trying to solder wires onto this board as my soldering equipment, like my soldering skills, are relatively amateurish. However, I had a slew of old mice, and the risk was minimal if I failed. After some poking around with my multi-meter, I found the appropriate contact points for the left, right and middle mouse buttons.
Here now were some problems to be solved. First, the little circuit board, and especially my tiny wires soldered to it, were relatively delicate. I needed to have a safe housing for them. There was really no safe place to mount this on the existing pedal base. The solution was to make a little box housing for this with wires on one side going to the pedals and wires on the other side going to the computer. This was a little bit of a hokey arrangement, so to disguise this, I ensured that the housing was a particularly decorative piece of woodworking. However, this may actually have been a great design, since I had separated the pedal assembly, which take the impact and abuse, from the delicate electrical components. Seemed like it would be less prone to failure or accident.
Another important issue was to ensure that the inevitable tugging on the wires would not cause problems. Inside the housing, I includes a couple wooden sowels that the wires would wrap around so that any pressure would be taken up there. In the pedal base, I did a similar thing by using a router to cut a serpentine slot for the wire to snake through. I covered the pedal slot with some sheet metal to keep the wire in place and protect it.
|
| Bottom View of Pedals |
|---|
The beautiful thing about this end solution was that I did not have a foot pedal assembly that was only useful for this project. I essentially have a three button mouse, but implemented with foot pedals. If you can control it with mouse buttons, you can control it with my foot pedals.
Note that the track-ball functionality of a mouse seemed very impractical for foot control. My feet are to spastic for that.
The Software
I've got the beautiful XMMS player for MP3 files, and the beautiful GNU Emacs for all things text-related, such as the chord/tablature files I've accumulated. Luckily, both can be externally controlled relatively easily. To control emacs, you need the gnuserv/gnudoit combination, and for controlling XMMS you need a special library, which is available for many languages. Having just learned python and being impressed with it, the "pyxmms" library was what I decide to use. I would also need the Tk python library so provide GUI buttons so that I could handle mouse events in the program.
Here's what the final product looks like (click on it to get a larger image.)
 |
| Screen-shot of All Software Components |
|---|
The idea here was that this custom python script would be the controller, issuing songs to the XMMS player, while simultaneously telling emacs to display the associated chord/tablature file. This would give me (the python programmer) complete control over sequencing and timing. I needed to first get comfortable with the pyxxms library, which required a software prototype. This prototype helped me realize that I did not want to have the python script telling xmms to load in files to its play-list. Telling it to play, stop, advance, etc. was going to be a more reasonable way to handle this program.
I wanted to have the play list contents and sequence in only one place, so that I could easily change it and have everything that depended upon it still work. My design decision was to define an XMMS play-list and let it be the master list. XMMS play-lists happen to be plain text files, so (with GNU Emacs naturally), it is trivial to add, move, shuffle and search for songs in the file. I had the ability to fetch the current song filename from XMMS via the pyxmms library, so could instruct emacs what song was playing.
To keep the whole process simply and robust, I opted to engineer the filenames rather than complicate the program. Thus, there would be two parallel directory hierarchies, identically names. In one hierarchy would be the MP3 files. In the other would be the chord/tablature files. I would ensure that (aside from the file suffix) the MP3 and its corresponding chord/tablature files were named identically and located in the same relative position in the hierarchy. This simple scheme imposed little burden on me for maintaining the files, but greatly simplified having to worry about the association between the MP3 files and the text files.
I also defined a series of suffixes for the text files: .tab, .crd, .txt, that the program would cycle through. This allowed me to have file suffix names that would also be meaningful outside this program.
Aside from the mechanics of the software control program (which needed to be multi-threaded), the important part now was to come up with a functional specification for the exact features I would need. After some iterations, and reflection of how I was going to use the system, I came up with this list:
|
| Controller GUI |
|---|
- Play - Begin playing the current song and continue playing songs sequentially from the play list with a 5 second delay between them. Note that there is a 5 second delay before playing any song, and a seconds count-down is shown during this time in case the song starts in a way you need to anticipate.
- Stop - Stop the XMMS player/
- Next - Advance to the next song in the play-list. If the song is playing, it play the next song, else it just advances without playing. It also updates the emacs displayed window to show the song's chord/tablature file. This also wraps around from the end of the list to the beginning.
- Next10 - Like Next only more convenient for quickly scrolling through a large list of songs.
- Step - Play the current song and then stop. This requires setting the XMMS preferences "No play-list advance" option, otherwise this will behave like "Play" but without the python program being in control (i.e., no delays, and no emacs updating).
- Prev - Like Next only going in the other direction.
- Page Down - Controls only the emacs display to page down the current file. Some chord/tablature files are larger than can be displayed and you need an easy way while playing to page through the song.
- Prev10 - Like Prev only going in the other direction.
- Page Up - Like Page Down only going in the other direction.
- Quit - the obvious functionality.
So how to get 10 different functions out of 3 mouse buttons? I decided to put the various selections in a two dimensional table and map the mouse buttons as:
- Middle - Move down a row
- Right - Move right a column
- Left - Select current cell
The only thing now was tweaking the layout of the various functions in the table, so that the most commonly used features required the least amount of foot pedal action. This was a trial and error process.
Here's the final python code:
Miscellany
I used an older 500MHz Sony VAIO laptop situated next to the stereo, with a wireless network card as the way to access my MP3 collection (via NFS) on my main, disk space endowed machines. The laptop happens to run the Gentoo distribution in case you care. Yes, it took two days to install Gentoo on this machine, thank you.
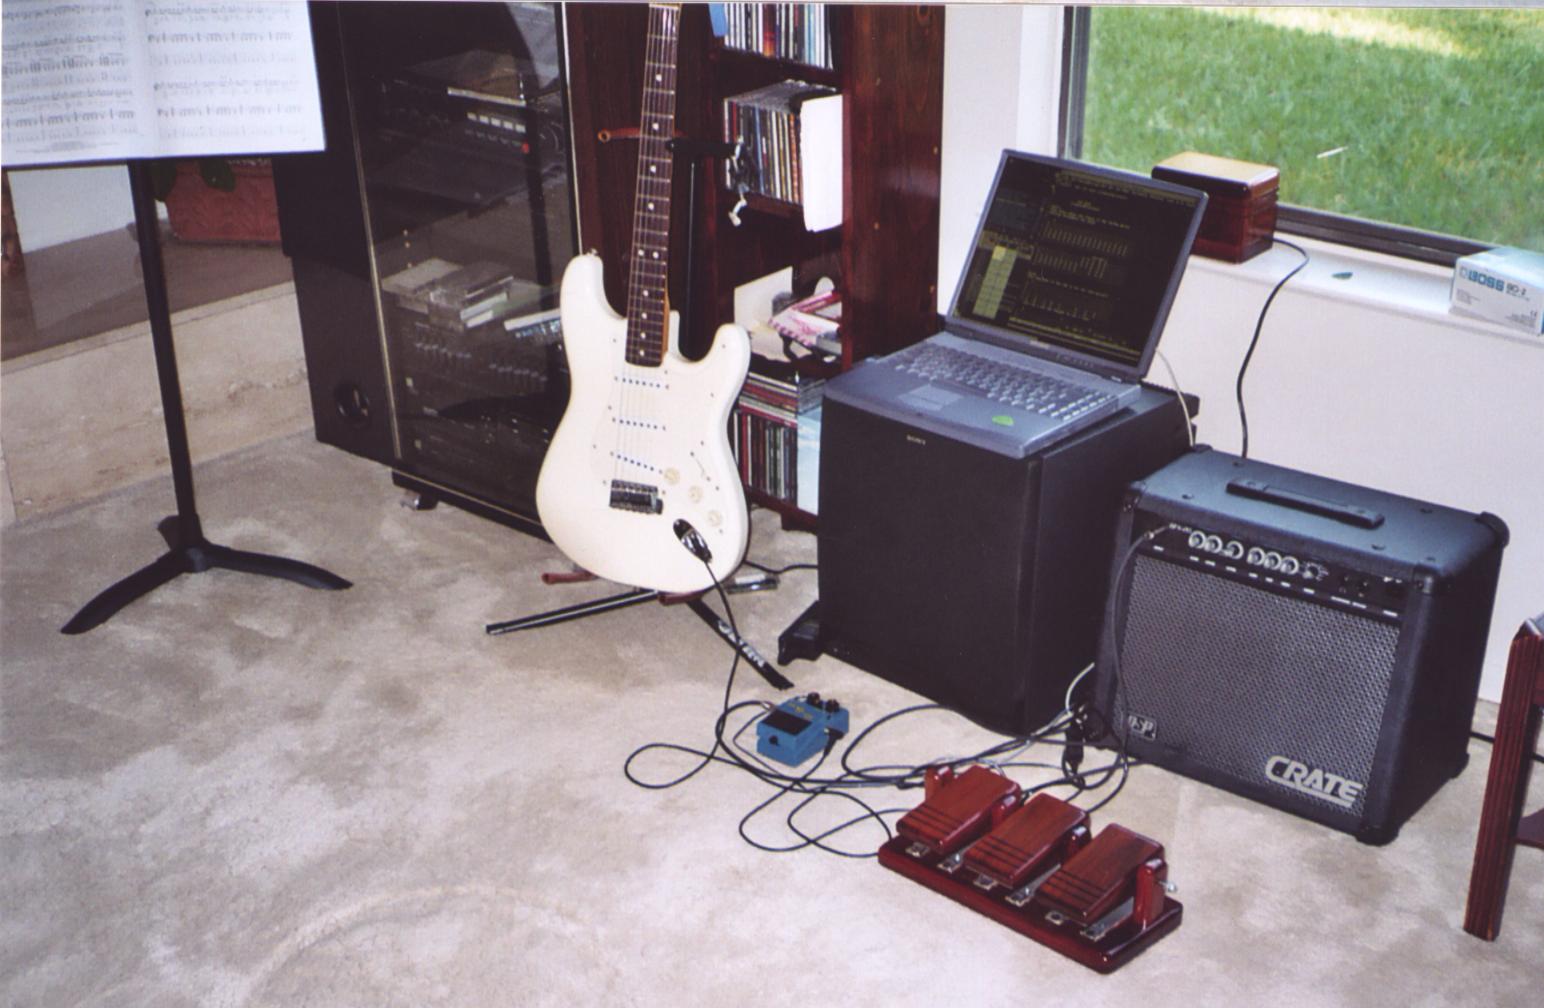
|
| Full Set-up of Guitar Player System |
|---|